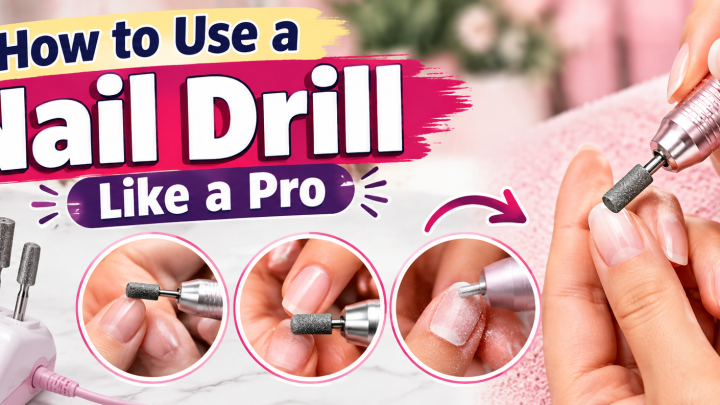
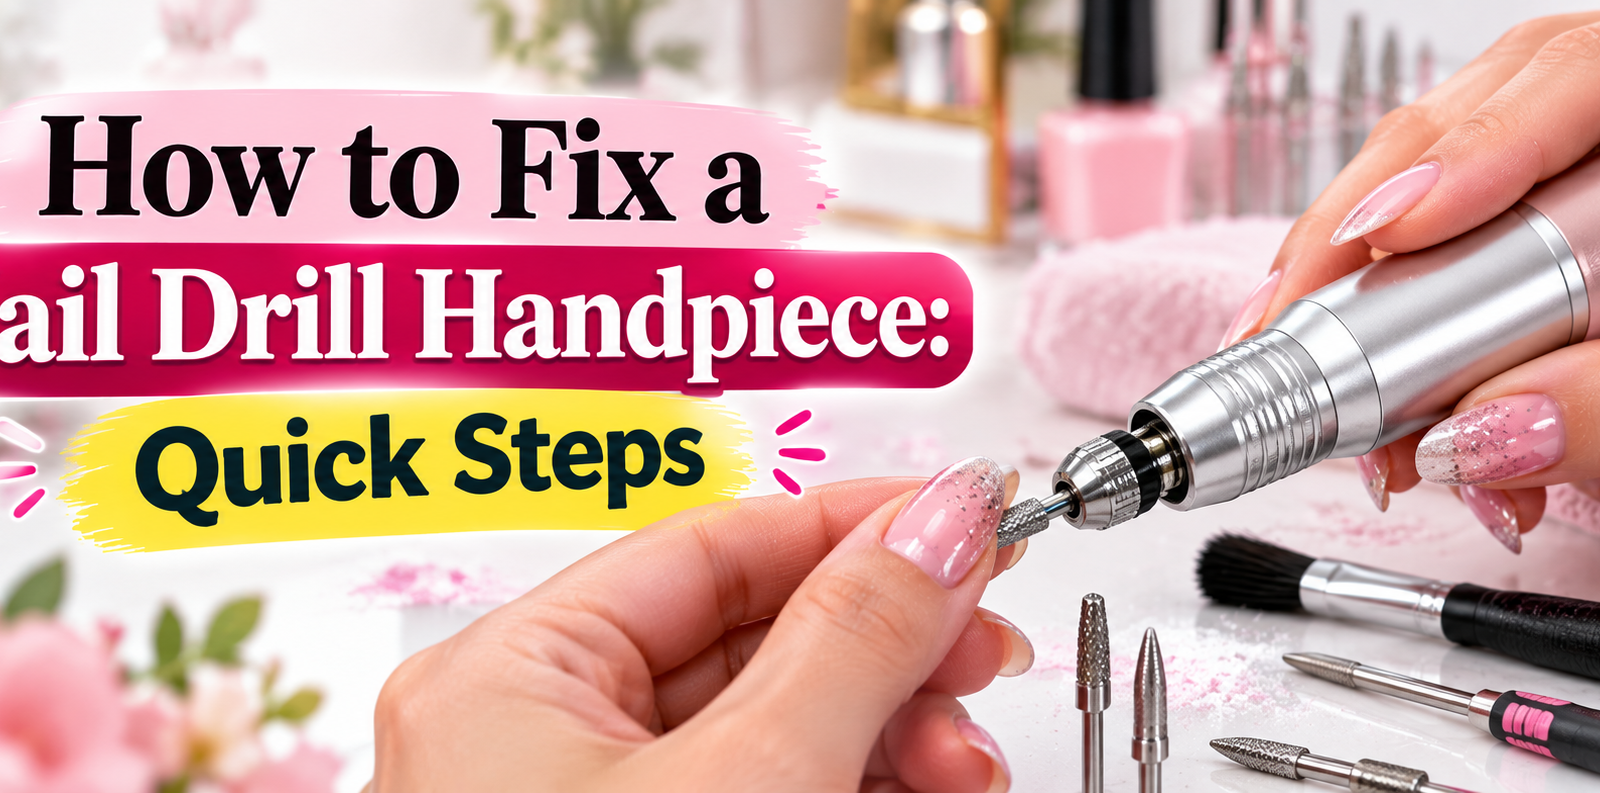
How to Fix a Nail Drill Handpiece: Quick Steps
You’ve got a booking in twenty minutes and your nail drill handpiece just stopped spinning mid-filing. Knowing how to fix a nail drill handpiece saves you from a flat, a lost client, and a $60-to-$150 replacement bill. Most failures come down to three things: a dead electrical connection, worn-out bearings, or a collet that’s slipped loose and can no longer grip the bit.
Manufacturer specs confirm that the standard shank diameter across US-market units is 2.35 mm, and as of 2026 the dominant motor architecture in professional e-files remains the DC brushed type. That makes carbon brush wear the single most common repair. If your handpiece still hums but won’t turn, jump straight to the diagnostic branches below and work through them in order.
What’s Going Wrong? Quick Symptom Check
Before you unscrew a single housing panel, you need to narrow down which system inside the handpiece actually failed. A grinding noise at low RPM points to something very different than total silence at the power switch. Run this check while the unit is still plugged in and the controller is set to your usual speed.
| Symptom You Notice | Most Likely Cause | Jump To |
|---|---|---|
| No hum, no spin, no warmth after 30 seconds | Dead connection, blown fuse, or carbon brushes seized | Branch One |
| Faint hum but shaft won’t rotate | Brushes gone, rotor locked, or controller fault | Branch One |
| Grinding or rattling under light load | Worn or gritty ball bearings | Branch Two |
| Shaft wobbles or “shudders” at 5,000+ RPM | Bearing play, bent shaft, or off-center collet | Branch Two |
| Housing gets very hot within 2–3 min | Blocked vents, dust packing, or bearing drag | Branch Three |
| Bit drops out or wiggles during filing | Stripped or worn collet nut | Branch Four |
| Intermittent spin (works, stops, works again) | Cracked trace at strain relief or cold solder joint | Branch One |
Hold the handpiece in your palm and give the shaft a gentle back-and-forth twist. If you feel grit or a click, that’s your bearing telling you it’s time. If the shaft spins freely with zero resistance but the motor won’t engage, the problem is electrical.
A faulty handpiece can do real damage to a natural nail plate while you’re not watching. If the tool started grabbing or jerking, and you’ve noticed a sore spot or split on a client’s finger, a proper nail-repair routine beats waiting for the damage to show up next appointment.
The Short Answer: Match Your Problem to the Fix
To fix a nail drill handpiece, identify the failing component first. Unplug the unit. Open the housing.
Test power at the motor leads. Replace worn brushes, gritty bearings, or a stripped collet as needed. Reassemble and bench-test at no load before returning it to client use.
Most repairs take 10 to 35 minutes and cost under $12 in parts.
The e-file handpiece is the heart of your acrylic application workflow, so a clean repair keeps your whole kit running.
Inside the Handpiece: What Every Part Does
Pull the housing apart once (most units use four to six tiny Phillips or Torx screws on the outer shell) and you’ll see the core assembly. Each part has a specific job, and knowing what it does helps you spot the failure fast.
Motor. The DC motor is either brushed or brushless. Brushed units (still the majority in the US salon market) use two small carbon blocks that press against a rotating commutator ring. Those blocks wear down like pencil leads.
Brushless units swap the mechanical contact for an electronic PCB sensor. They last longer but are far harder to open without destroying the board.
Ball bearings (or ceramic hybrids). Two or three small bearings hold the spindle. They keep the shaft spinning true. Once metal-on-metal wear starts, you’ll hear a rhythmic grind or feel radial play when you wiggle the bit by hand.
Collet and collet nut. This tapered sleeve clamps around the 2.35 mm bit shank. Over-tightening or repeated impact strips the internal threads, and the nut spins freely. A stuck collet means the nut was torqued past spec and the taper has fused.
Carbon brushes (brushed motors only). Two spring-loaded graphite blocks sit at opposite ends of the motor housing. When they drop below about 3 mm of active face, the motor loses torque or dies entirely.
Strain relief and wiring harness. The short cable between the cord plug and the motor winding runs through a rubber boot at the base. Hair-thin copper traces crack here from repeated bending. That’s the #1 cause of “works when I tilt it this way” behavior.
Cooling fan / airflow path. Many inverted handpieces pull air up through the shaft and exhaust it through slots in the motor bell. Dust and skin-product residue pack those slots over a few months of daily use.
If you’re running a client that needs sculpted or reinforced tips, proper acrylic technique without relying on a second drill pass reduces the sustained high-RPM load that cooks bearings.
Branch One: When the Handpiece Won’t Turn On At All
Total silence is the most stressful symptom because you’re staring at a blank screen and wondering if the whole system is dead. Usually it isn’t. Work top-down.
Step 1: Confirm the Controller Is Alive
Set the speed dial to mid-range. Watch the display. If the numbers change and you hear a soft relay click, the controller and its internal fuse are fine.
The problem sits in the handpiece itself. If the display is dead, you’ve got a controller-side issue, which is a separate (and simpler) fix.
Step 2: Inspect the Cord and Strain Relief
Gently flex the cord near the handpiece base. If the motor sputters or dies only when you bend it a certain way, you’ve found a cracked trace or cold solder joint. Unplug the unit.
Cut back 6 mm of the outer jacket. You’ll see either a broken wire or a hairline crack in the solder bead on the green ground lead. Resolder with 60/40 tin-lead or lead-free paste and a fine-tip iron.
Let the joint cool undisturbed for 90 seconds.
Step 3: Check the Carbon Brushes
Open the motor end-cap. Locate the two brush holders. Pull each brush out by hand (they’re spring-loaded).
Measure the exposed graphite face. Below 3 mm? They’re done.
Replacement brush sets for common models retail between $4 and $12 as of 2026. Seat the new brushes, compress the springs, and close the cap.
Step 4: Spin the Rotor by Hand
With power disconnected, grab the front of the shaft and give it a quarter-turn. If it seizes or grinds to a halt, the bearings have failed or the commutator rings are scored flat. A scored commutator means the motor is no longer serviceable at home.
Step 5: Look for a Blown Inline Fuse
Some controllers house a 500 mA or 1 A fuse on the handpiece output. Unscrew the controller casing, find the glass tube, and test it against a multimeter’s continuity setting. Swap it if it’s open.
OSHA general-industry guidance on portable electrical tool maintenance recommends inspecting fuses monthly in high-use settings.
If none of the above reveals the fault, stop. A shorted stator or PCB failure needs a small-motor bench tech. Forgetting to unplug before touching internal wiring is how people get a nasty shock.
Follow the basic electrical safety steps before you open any casing.
Branch Two: Grinding Noise, Wobble, or Excess Vibration
This branch covers the “something feels off but the motor still turns” category. The two main culprits are bearing wear and collet misalignment.
Is It a Bearing or a Collet Problem?
Remove the bit. Spin the empty shaft by hand. Now wiggle it side to side and front to back.
- Smooth, silent spin with zero play: Bearings are fine. The noise came from the bit or the collet grip. Go to the collet section below.
- Grainy, ratchety rotation or a side-to-side “loose” feel: Bearings are at the end of their life. Time to replace them.
- Smooth spin but a visible “cone” wobble at the tip: Bent shaft or off-center collet. Loosen the collet nut completely, remove the bit, reinsert it straight, and tighten just finger-snug. Never use pliers on the collet nut; the threads are plastic or soft alloy and strip in seconds.
Replacing Worn Bearings (Step-by-Step)
- Unplug the handpiece. Remove all housing screws. Set them in a labeled bowl.
- Separate the two halves of the shell. Note the orientation of the O-ring or gasket.
- The motor sits in a press-fit cradle. Tap the rear of the motor gently with a soft mallet to free it from the front bearing race.
- The front bearing is usually snap-fitted into the housing nose. Heat the plastic rim with a heat gun on low (under 200 °F) for 20 seconds. Press the old bearing out with your thumb or a small brass punch.
- Drop in the new bearing. A light dab of lithium grease on the inner race seats it cleanly. Snap-fit the rear bearing into the motor flange the same way.
- Blow internal dust out with short bursts of compressed air held 6 to 8 inches away. Don’t blast from close range; you’ll drive particles deeper into the windings.
- Reassemble, seat the O-ring, and torque housing screws to finger-tight plus a quarter turn.
Bearing kits sized for 2.35 mm e-file shafts run $3 to $9 per set in bulk. You’ll want two: one for the front, one for the rear.
Vibration That Isn’t a Bearing Issue
Sometimes the “wobble” is operator technique rather than hardware. If the handpiece runs true on the bench but shakes in your hand during filing, check your inversion angle. The shaft should sit roughly 10 degrees off vertical.
Leaning further causes the grinding plane to vibrate axially. Adjusting your filing angle and pressure eliminates the shake without touching the motor.
Also give the housing slots a once-over. A buildup of skin oil and resin turns the cooling fins into a sealed box. Heat rises, motor resistance climbs, and the RPM governor kicks in, creating a pulsing vibration that mimics bearing play.
A soft brush and isopropyl wipe clear it in two minutes.
When a Repair Turns Into a Replacement Call
If the commutator rings are pitted, the stator smells burnt, or the housing has a structural crack running through the motor mount, the math usually favors buying a new handpiece. Keeping your files clean and your workflow tight means the unit stays healthy longer between failures, but no amount of preventive care can save a physically shattered winding.
Branch Three: Overheating or a Burnt Smell
If your handpiece gets too hot to hold after two or three minutes of filing, or you catch a faint acrid scent, stop running it immediately. Most heat events trace back to one of three sources: packed cooling fins, dragging bearings, or a motor winding that’s partially shorting.
Is It Dust, Drag, or a Dead Motor?
Unplug the unit. Run your finger along the exterior vent slots. If they’re clogged with a grey-brown paste of skin oil and acrylic residue, you’ve found a major contributor.
That paste acts like insulation and traps the heat inside the housing.
Next, spin the empty shaft by hand. If you feel resistance beyond a light breeze of friction, the bearings have begun to drag. Drag multiplies motor current, which cooks the windings from the inside out.
Finally, look at the stator and rotor through the open shell. Healthy copper windings show a uniform golden-brown color. If you see blackened patches, melted insulation, or a faint blue tinge on the wire, that coil is compromised.
Do not power the unit again. A shorted turn can arc internally and damage the controller’s voltage regulator. Per OSHA portable-electrical-equipment guidance, a tool showing thermal discoloration on windings should be pulled from service until a qualified technician clears it.
Clearing the Heat Without Losing Traction
Here’s what to do when the cause is purely airflow:
- Disconnect the handpiece from the controller.
- Remove the housing screws and separate the two shell halves.
- Brush the cooling fins with a soft anti-static brush or a wooden toothpick. Work from the front vent toward the rear so debris falls outward.
- Hold a can of compressed air 6 to 8 inches away and fire short 2-second bursts through each slot. Never invert the can; propellant spray adds more grime than it removes.
- Wipe the motor bell with a lint-free cloth dampened (not soaked) in 91% isopropyl alcohol. This dissolves the resin film that a dry brush can’t lift.
- Reassemble, seat the gasket, and run a no-load test at 15,000 RPM for 90 seconds. The housing should feel warm, not hot. If it still exceeds about 120 °F at the touch, your bearings are on the way out. Go to Branch Two for the swap.
A quick rule of thumb: if you run the e-file continuously for longer than 45 minutes without a break, the thermal load compounds. Giving your natural nail plate time to recover between set appointments also means you’re not stacking back-to-back high-RPM sessions that cook the motor.
The Burnt-Smell Red Line
Here’s the hard line. If you smell burnt plastic or scorched varnish while the unit is running, kill the power and unplug it. Open the shell.
Inspect the motor winding and the PCB traces near the commutator. Visible discoloration means the insulation has degraded. You have two options: send the handpiece to a small-motor bench tech, or replace the unit.
Running a compromised motor risks an internal arc that can damage the speed controller’s output stage, turning a $40 repair into a $120 board swap.
Branch Four: Collet Slips, Won’t Grip, or Stuck Shut
The collet is the small tapered sleeve that clamps around your bit’s 2.35 mm shank. It sounds like a minor part, but a failing collet is the #1 reason bits wobble mid-filing and clients feel an uneven, papery grind on their nail.
Bit Keeps Popping Out During Filing
This almost always means the collet nut has lost its clamping tension. Check three things in order:
- Bit shank condition. A chipped, scored, or tapered-shaved shank won’t seat flush in the taper. Swap the bit. If the problem follows that one bit, you’ve found your answer.
- Collet wear. Remove the collet and inspect the internal cone. Fresh collets have a smooth, slightly tapered bore. Worn ones show flat spots and metal glazing where the bit was grinding against the sleeve. Replace the collet assembly; they cost $2 to $5 in bulk packs.
- Over-tightening habit. Some techs crank the collet nut with a coin or small wrench. The threads are nylon-insert or soft alloy and strip at roughly 4 to 5 in-lb of torque. Finger-snug is the spec. You’re looking for the point where the nut stops advancing freely and then just one more quarter-turn. Past that, you’re compressing the taper unevenly and the bit sits crooked.
Collet Won’t Come Off After Tightening
This is the maddening failure. You turned the nut just a fraction past full engagement, and now it’s frozen on the shaft. Don’t grab it with pliers.
You’ll crack the collet body and ruin the fit.
Instead, try this sequence:
- Apply a few drops of penetrating oil (PB Blaster or equivalent) at the collet-to-shaft seam. Let it sit 10 minutes.
- Tap the base of the collet gently with a small brass hammer while holding the shaft steady with one hand. Two or three taps break the friction seal.
- Wrap a rubber band around the nut for grip. Turn counter-clockwise with steady pressure.
- If it still won’t move, heat the collet body with a hair dryer on high for 30 seconds. The aluminum expands just enough to free the thread.
If the collet is genuinely fused and won’t budge even after heating, you’ll likely need to cut it with a Dremel at a shallow angle. That’s a one-time fix, and you’ll need a fresh collet for next time.
Stuck-Shaft Scenario
Sometimes the bit itself is welded into the collet. Acetone residue left on the shank from a removal step, combined with heat from the motor, creates a localized bond. Submerge the head assembly (with the housing open) in acetone for five minutes.
The solvent dissolves the residual monomer and the bit releases with a twist. Dry everything before reassembling. Keeping your filing tools properly sanitized and residue-free prevents this bonding issue from recurring.
How to Replace Carbon Brushes (Brushed-Motor Units)
Carbon brushes are the most common wear item on any brushed DC motor, and they’re the cheapest part to swap. A brush set runs $4 to $12 as of 2026. The job takes 15 minutes once you know where the end-cap screws go.
When to Pull and Replace
Pull the brushes when you notice any of the following:
- The motor hums but the shaft barely moves
- Visible sparking at the brush tip while the unit runs
- One side of the commutator ring shows deeper grooves than the other
- The exposed graphite face measures under 3 mm (about the width of a pencil eraser)
You don’t need a multimeter to diagnose brush failure. The symptom is mechanical. The motor loses consistent torque because the carbon blocks can no longer make full contact with the commutator surface.
Step-by-Step Brush Swap
- Unplug the handpiece and remove the motor-end housing cap. Most units use four tiny Phillips screws. Layout them in order on a soft mat so you don’t mix up positions.
- Locate the two brush holders. They sit on opposite sides of the motor, held in by a small spring and a retaining clip. Depress the spring tab and slide each brush straight out. Note which side had more wear; it goes back in the same orientation.
- Pick up the replacement brushes. Confirm they match the old ones in length, width, and spring type. A mismatched spring will seat unevenly and cause asymmetric wear in a month.
- Seat the new brushes so the graphite face touches the commutator ring. The spring should push them inward with gentle, even pressure. You’ll feel a light click as the retaining clip snaps behind the brush tail.
- Close the end-cap. Before powering on, spin the shaft by hand. Both brushes should ride smoothly with no grinding or catching.
- Power the unit at low speed (around 3,000 RPM) for 30 seconds. This “breaks in” the new brush surface and seats it against the commutator. Then run a normal filing pass on a practice nail block.
One detail that saves you a re-do: when you pull the old brushes, note which spring came off which side. Some motors use a slightly different spring tension top versus bottom to balance the commutator load. Swapping them creates uneven pressure and shortens the new brushes’ life by half.
What If You Can’t Find an Exact Brush Match?
Budget import handpieces sometimes use non-standard brush dimensions. If you can’t source an OEM pair, look for a generic DC motor brush that matches the old one’s millimeter specs. Measure length, width, and thickness with calipers.
Anything within 0.5 mm tolerance works. The critical match is the spring diameter; it has to slide over the commutator shaft to seat correctly.
How to Swap Out Worn or Gritty Bearings
Branch Two gave you the diagnosis. This section walks you through the actual replacement, because the press-fit nature of e-file bearings trips up first-time repairers more often than you’d think.
What You’ll Need
| Item | Why |
|---|---|
| Tiny Phillips or Torx screwdriver (matching your housing) | Opens the shell |
| Soft-faced mallet or wooden block | Frees the motor from its cradle without marring the casing |
| Small brass punch or dowel pin | Presses old bearings out of the nose |
| Heat gun (low setting, under 200 °F) | Softens the snap-fit ring on plastic housings |
| New bearing pair (front + rear), matched to shaft ID | The actual repair |
| Lithium grease or bearing-grade synthetic oil (one drop) | Seats and lubricates the new race |
| Isopropyl alcohol and lint-free wipes | Cleans old grit before reassembly |
| Compressed air can | Final blow-out |
Bearings for a 2.35 mm e-file spindle are typically 6001-2RS or equivalent sealed ball bearings. If your old unit used ceramic hybrids, stick with the same material. Swapping steel for ceramic changes the preload character and you’ll feel it as a tighter, noisier spin.
The Swap, Start to Finish
- Fully disassemble the housing. Label every screw by position with a piece of masking tape. Trust me on this step. You will not remember which screw goes where after twenty minutes of fiddling.
- Free the motor from its cradle. The motor usually sits in two plastic posts with a snap-fit or a small adhesive anchor. Tap the rear of the motor with the soft mallet until it drops free.
- Identify which bearing is bad. Most failures show up at the front (outboard) bearing because it carries the full radial load of the spinning shaft. But check both. If the rear bearing clicks when you wiggle it, replace it too.
- Remove the old bearing. On plastic housings, heat the snap-ring area with the heat gun for 15 to 20 seconds. The plastic expands and releases the bearing. Tap it out with the brass punch from the inside.
- Seat the new bearing. Drop a single drop of lithium grease into the bore. Press the bearing home with your thumb, front face down. It should click into the snap ring with firm, even pressure. No side-loading.
- Repeat for the rear bearing in the motor flange.
- Wipe the interior of the housing with isopropyl. Blow out all loose grit. The last thing you want is a single skin fragment migrating into the new race and grinding a pitting crater within a week.
- Reassemble. Torque housing screws to finger-tight plus a quarter-turn. More than that cracks thin ABS shells.
- Bench test. Plug in, no bit installed, run 10,000 RPM for 60 seconds. The shaft should spin silently with zero audible rumble. Insert a standard coarse bit, file a practice block, and confirm the vibration profile matches your old (working) unit.
Testing Your Work
After the swap, do this before handing the drill back to a client. Run the handpiece at maximum RPM for two full minutes. Listen.
A healthy bearing pair is silent. You might hear a very faint, high-pitched whine at 35,000+ RPM, which is normal aerodynamic noise. Any rhythmic thud, grind, or “rattle-rattle-rattle” means you missed a bearing or have a cracked race.
Pull it apart and reseat.
DIY Fix or Send It Out: Making the Right Call
You’ve diagnosed the fault. Now comes the fork in the road: do you open the unit yourself, or do you mail it to a small-motor repair bench? Both paths are legitimate.
The right one depends on the failure mode, your tools, and how much downtime you can absorb.
The Honest Decision Matrix
| Failure Mode | DIY Difficulty | Parts Cost | Shop Cost (typical) | Your Call |
|---|---|---|---|---|
| Cracked trace at strain relief | Easy (solder iron + 10 min) | Free (you already have the wire) | $25 to $40 labor | DIY unless you hate soldering |
| Worn carbon brushes | Easy ($5 parts, 15 min) | $4 to $12 | $20 to $35 | DIY |
| Front or rear bearing swap | Moderate (press-fit, 25 min) | $3 to $9 per set | $30 to $50 | DIY if you have a heat gun and punch |
| Scored commutator / burnt winding | Hard (motor-level work) | Not practical at home | $40 to $80 or replace motor | Send out or replace handpiece |
| PCB failure (brushless unit) | Very hard | Board not always available | $60 to $120 | Usually cheaper to buy a new handpiece |
| Stripped collet threads | Easy | $2 to $5 collet kit | $15 to $25 | DIY |
| Structural crack in housing | Easy (epoxy + retap) | $3 epoxy | $10 to $20 | DIY if crack is minor |
The general rule: if the repair involves solder, a bearing press, or a collet swap, you can handle it at your workstation. If it requires desoldering a SMD component, replacing a commutator ring, or rebuilding a stator, that’s bench-tech territory.
Finding a Repair Shop That Actually Handles E-Files
Not every electronics repair shop will take a 3-inch nail handpiece. What you’re looking for is a small-motor or instrument specialist. Search for terms like “DC motor repair,” “small electric motor service,” or “medical device repair” in your city.
Podiatry and dental offices keep backup e-files, so some shops build a niche around them. Call ahead and confirm they stock 2.35 mm collet hardware and brushed-motor brush sets. Aggregate pricing across US metro areas for a standard bearing-plus-brush service sits in the $35 to $60 range as of 2026, with a 5-to-10 business-day turnaround.
If you’re between clients and the failure is a dead trace, a 20-minute solder fix beats waiting a week for a package. Grab a 40-watt pencil iron, a spool of 30-gauge magnet wire, and 60/40 solder. You’ll have the handpiece humming before your next appointment.
Keeping your daily acrylic and gel workflow moving without long equipment outages often comes down to owning that one soldering setup and a drawer of spare collets.
The “Is It Even Worth Repairing?” Test
Run the math in your head. A replacement handpiece in the US market runs $35 to $150 depending on brand and motor type. Add $5 to $15 for spare bits and a new collet.
If the repair shop quotes $50 and your unit is four years old with two prior fixes logged, the next failure is probably months away. At that point, a fresh handpiece gives you a warranty window and eliminates the “I fixed it last month, now what” anxiety.
On the flip side, if your current unit is a premium brushless model with a 60,000 RPM top speed and a specific inversion balance you’ve built muscle memory around, a $40 bearing swap keeps that exact feel intact. No replacement unit will match the weight distribution of the one you’ve been working with for two years. That’s a valid reason to repair rather than upgrade.
Whichever path you choose, log the repair. A sticky note on the controller box with the date, what was fixed, and the parts used turns vague “it’s been acting up” into a concrete maintenance record. That record also tells your future self (or your assistant) whether to prep a bearing kit before the next spike season when heavy sculpting sessions and complex nail designs tax the motor harder than a standard manicure filing pass.
Common Repair Mistakes That Worsen the Problem
You’ve already identified the fault. But certain common fixes make things worse faster than leaving the unit alone. These mistakes show up again and again in repair-thread forums, and most of them are entirely preventable.
The Strip-the-Collet-Nut Trap
Over-tightening the collet nut with pliers is by far the most common first-time error. The internal threads are nylon or soft aluminum. A pair of channel locks strips them in one turn.
The fix is a new collet body and often a replacement outer sleeve because the housing threads get damaged too.
Tighten the nut finger-snug, then give it one quarter-turn with a rubber pad for grip. If you can hear a satisfying thread catch before that point, stop. You don’t need wrench torque to hold a 2.35 mm bit.
The “More Grease Fixes It” Mistake
Bearing lubrication isn’t a free-for-all. A single drop of lithium grease per bearing is the spec. More grease chokes the ball passages, creates drag, and raises motor temperature within minutes.
The motor compensates by pulling extra current. That current cooks the commutator and shortens brush life.
If you packed the bearings during your last repair, drain the excess with a small absorbent wipe before running the unit. Then apply one micro-drop fresh and spin the shaft by hand to distribute it evenly. The race should feel smooth, not thick.
The Unsuitable Solvent Move
Some techs pour acetone directly into the open motor housing to clean internal resin buildup. That floods the commutator segments and washes the old grease out of the bearings. When everything dries, you’ve got a dried-out race and a sticky commutator.
Use isopropyl alcohol on a lint-free wipe instead. Apply it to the external surfaces and vent slots. Let it evaporate completely before reassembly.
Isopropyl doesn’t attack most plastics the way acetone does, and it leaves no residue behind.
Ignoring the O-Ring or Sealing Gasket
Reassembly without the O-ring seated properly lets dust, skin cells, and liquid spray bypass the seal and enter the motor cavity. Most units use a small silicone or nitrile O-ring around the front cap. If yours went missing or cracked, soak a replacement in a little silicone dielectric grease before seating it.
The grease keeps the ring pliable and improves the dust barrier.
Forgetting this seal turns a clean repair into a 6-month warranty on your failure. Proper sanitization between clients keeps the exterior cleaner, which reduces how much liquid and particulate pressure the O-ring has to resist in the first place.
Mixing Screw Lengths During Reassembly
Housing screws vary in length even when they look identical. A longer screw driven into the motor cradle can pierce a wire harness or press against a commutator lead. Before you reinstall any screws, lay them on a labeled diagram or take a photo of the screw layout.
One crossed-threaded screw at the wrong location delays a 10-minute repair by an hour.
Running the Motor Without a Bit for Extended Tests
A no-load bench test is fine for 30 seconds. Prolonged no-load operation spins the shaft at maximum RPM without any cutting resistance. On brushed motors this can overspeed the commutator segments and cause arcing that pits the rings over time.
Keep no-load tests under 60 seconds. If you want a longer run-in, attach a standard coarse bit and file a practice block at medium speed.
Cost Reality: Repair vs. Replace Decision
Money matters. Sometimes you save $80 by fixing the handpiece yourself. Sometimes you spend $80 and still end up buying a new unit because a second failure shows up a week later.
Here’s the realistic cost picture as of 2026.
Typical Repair Costs Breakdown
| Repair Type | Parts Cost | Labor (Shop) | Your Time (DIY) |
|---|---|---|---|
| Strain-relief trace fix | $0 (reseat existing wire) | $25 to $40 | 10 min |
| Carbon brush replacement | $4 to $12 | $20 to $35 | 15 min |
| Front bearing swap | $3 to $9 | $30 to $50 | 25 min |
| Collet and nut kit | $2 to $8 | $15 to $25 | 5 min |
| Full bearing + brush rebuild | $7 to $21 | $40 to $60 | 40 min |
| Commutator resurfacing | Not DIY | $50 to $80 | N/A |
| PCB board replacement (brushless) | $25 to $70 | N/A | N/A |
Replacement handpieces retail anywhere from $35 on the low end to $150+ for brushless premium models. Add a $20 controller if yours is also acting up, and you’re looking at a $55 to $170+ total system cost.
When Repair Wins on Price Alone
If your handpiece costs $80 or more new and the fault is a simple brush or bearing swap, DIY repair pays for itself after the first failure. Parts stay under $15 total. You save $40 to $60 versus a shop visit, and you keep your preferred weight distribution and grip.
The same logic applies if you work four or five days a week. A $120 unit that fails once every 18 months is cheaper over three years than replacing it outright each time. Maintenance compounds in your favor.
When Replacement Makes Financial Sense
If the motor windings are burnt, the PCB is fried, or the housing has a structural crack through the bearing mount, repair costs approach or exceed half the price of a new unit. At that threshold the gamble shifts toward replacement. You’ll have a fresh warranty window, a known-good component set, and no risk of the same failure recurring next month.
Budget import units ($35 to $60 new) often land in that gray zone. Repairing one of those might save $20, but the quality of the replacement bearings and brushes can vary wildly. A factory-new unit with guaranteed tolerances sometimes beats a patched-up aftermarket job.
Hidden Cost You Miss
Time spent troubleshooting counts. If your hourly rate or opportunity cost is $30 or more, an hour-long DIY repair that goes poorly could actually lose you money compared to shipping it out. Track your actual clock time for three repairs.
The data tells you whether you’re saving or spending.
Maintenance Habits That Extend Handpiece Life
Repair skills matter, but prevention matters more. A few minutes of routine care cuts bearing wear and brush degradation dramatically. The habits below come from salon maintenance logs and manufacturer recommendations.
Daily End-of-Day Routine
Wipe the housing with a disinfectant-safe cloth. Don’t spray directly onto the unit; mist the cloth first. Check the bit shank for resin buildup and clean it with isopropyl before storage.
Spin the shaft by hand to feel for grit. Log any rough spots while they’re still minor.
Weekly Deep Clean
Remove the bit. Compressed-air blow-out through the front and rear vents. Check the O-ring for cracks or flattening.
Inspect the collet nut threads for cross-threading. Run a fresh bit, tighten finger-snug, and do a 30-second no-load test at medium RPM. The sound should be consistent without rhythm changes.
Monthly Brush Inspection (Brushed Units)
Pull one brush and measure the graphite face. If it’s under 4 mm, start budgeting for a full set replacement. Watching the brush wear pattern helps you spot uneven commutator contact before the motor loses torque.
Storage Best Practices
Keep the handpiece in a hard case or a dedicated drawer slot when not in use. Leaving it loose on a busy counter exposes the shaft to knocks that bend the spindle or misalign the collet. Coil the cord loosely around the controller body.
Don’t wrap it tight around the handle; that stress migrates to the strain relief over time.
Rotation Protocol for Shared Salons
If multiple techs share one e-file, assign each person a preferred bit type and torque setting. Cross-compatibility leads to overtightened collets and mismatched RPM ranges. Tag each tech’s go-to bits with color-coded caps.
The habit prevents the #1 cause of stripped-collet failures we covered earlier.
Annual Professional Checkup
Once a year, send your daily-use handpiece to a qualified small-motor bench technician. They’ll inspect the commutator condition, measure bearing preload, and clean internal dust deposits you’d miss at home. Think of it like an annual dental cleaning.
The expense adds up slowly, but it catches problems before they become emergency failures mid-session.
These habits won’t eliminate every future repair, but they shift the timeline from “three months to next failure” into “twelve to eighteen months.” That’s the difference between an unexpected shutdown and a planned service window.
Real Scenarios: Three Typical Repair Cases
Abstract advice is useful, but specific cases show how the decision tree plays out in real salon days. Here are three representative repair scenarios based on common failure patterns reported in technical support channels.
Case A: The Intermittent Cord Fault
A tech reports that her Apex-style handpiece works perfectly until she angles it past 45 degrees, then the motor dies. She assumed a bad controller.
Diagnosis: Flexing the cord near the strain relief revealed a hairline crack in the ground wire trace. The break made intermittent contact when the housing bent slightly.
Fix: Solder a 22-gauge solid-core jumper across the cracked trace inside the strain relief boot. Heat-shrink tubing sealed the joint. Zero parts cost.
Ten minutes of labor. The unit has run flawlessly for nine months since the repair.
Lesson: Always flex-test the cord before blaming the controller. Intermittent faults live at the bend point, not the speed dial.
Case B: The Aggressive Bearing Overhaul
A weekend warrior ordered replacement bearings for her imported handpiece. She also bought bearing grease, cleaned the housing thoroughly, and reassembled quickly. Within three weeks, the same grinding noise returned at higher RPM.
Diagnosis: She’d used too much grease. The excess pumped outward under heat and trapped airborne dust into an abrasive paste. The paste accelerated wear on both the new bearings and the commutator surface.
Fix: Disassembled again. Flushed the residual paste with isopropyl. Reapplied one micro-drop per bearing per manufacturer spec.
Ran a bench test with a clean bit. The noise stayed gone for over six months after this correction.
Lesson: Less lubrication beats more when you’re working with sealed miniature bearings. The grease inside the race at purchase is usually sufficient; a light topping just needs to coat the outer edge of the rolling elements, not flood the housing.
Case C: The Heat-Induced Commutator Failure
A podiatry office ran their handpiece continuously for two hours filing thickened toenail plates. The unit developed a burning smell and stopped spinning altogether.
Diagnosis: The cooling vents were clogged with skin-product residue. The motor ran hot enough to degrade the varnish insulation on one stator coil. A short developed between adjacent turns, killing torque output entirely.
Fix: The motor was unrepairable at home. They replaced the entire handpiece assembly rather than attempt a rewinding job.
Lesson: Never ignore heat. When a handpiece gets too hot to hold comfortably, shut it down immediately and clean the vents. Pushing through thermal distress turns a $5 bearing service into a $100 motor replacement.
Staying aware of the physical limits of your equipment helps you avoid treating a warning sign as an inconvenience.
Pattern Across All Three Cases
Every scenario shared one trait: the initial symptom was minor and fixable. Intermittent power, a faint growl, a warm housing. Each owner either ignored the warning or treated it as a temporary glitch.
Once the underlying issue matured, repair complexity escalated sharply.
The early-diagnosis habit saves money faster than any specific tool upgrade. When you notice something unusual, log it, bench-test it, and address it within 48 hours. Small actions compound.
Delayed actions multiply into expensive replacements.
Frequently Asked Questions
What is the easiest nail drill handpiece repair to do yourself?
Replacing worn carbon brushes is the simplest fix for most users. It requires only a tiny Phillips screwdriver, a set of replacement brushes, and about 15 minutes of work. The process involves removing the motor end-cap, sliding out the old brushes, and seating the new ones with the same spring orientation.
No soldering or special tools needed.
How much does it cost to replace bearings in a nail drill handpiece?
A bearing replacement kit runs between $3 and $9 for a standard 6001-2RS pair as of 2026. If you buy through a salon supply distributor, expect $5 to $12 depending on brand and sealed-versus-open configuration. Shop labor for the same job typically adds $30 to $50 in service fees.
Can you fix a nail drill handpiece that smells burnt?
Not safely at home unless you have experience with DC motor rewinding. A burnt smell means the winding insulation has degraded and likely shorted. Continuing to run the unit risks damaging the controller board.
Pull the handpiece from service, have it inspected by a qualified small-motor technician, or replace it entirely.
How long should new carbon brushes last in a daily-use handpiece?
Typical brush life ranges from six to eighteen months under daily salon use. Factors that shorten life include high continuous RPM operation, aggressive filing pressure, and dusty environments. If you measure the exposed graphite face and it reads under 3 mm, replace both brushes as a set rather than waiting for one to fail.
Is it worth repairing a cheap imported nail drill handpiece?
Only if the fault is simple: a cracked strain-relief trace, worn brushes, or a single bad bearing. Repair costs plus parts usually exceed $40 to $50 when labor is included. If the unit costs $40 to $60 new, replacement often makes more financial sense than investing in repair labor for a marginal-quality motor.
Amazon and the Amazon logo are trademarks of Amazon.com, Inc, or its affiliates.
Author


Similar Posts