Acrylic Nails for July: Trendy Colors and Designs
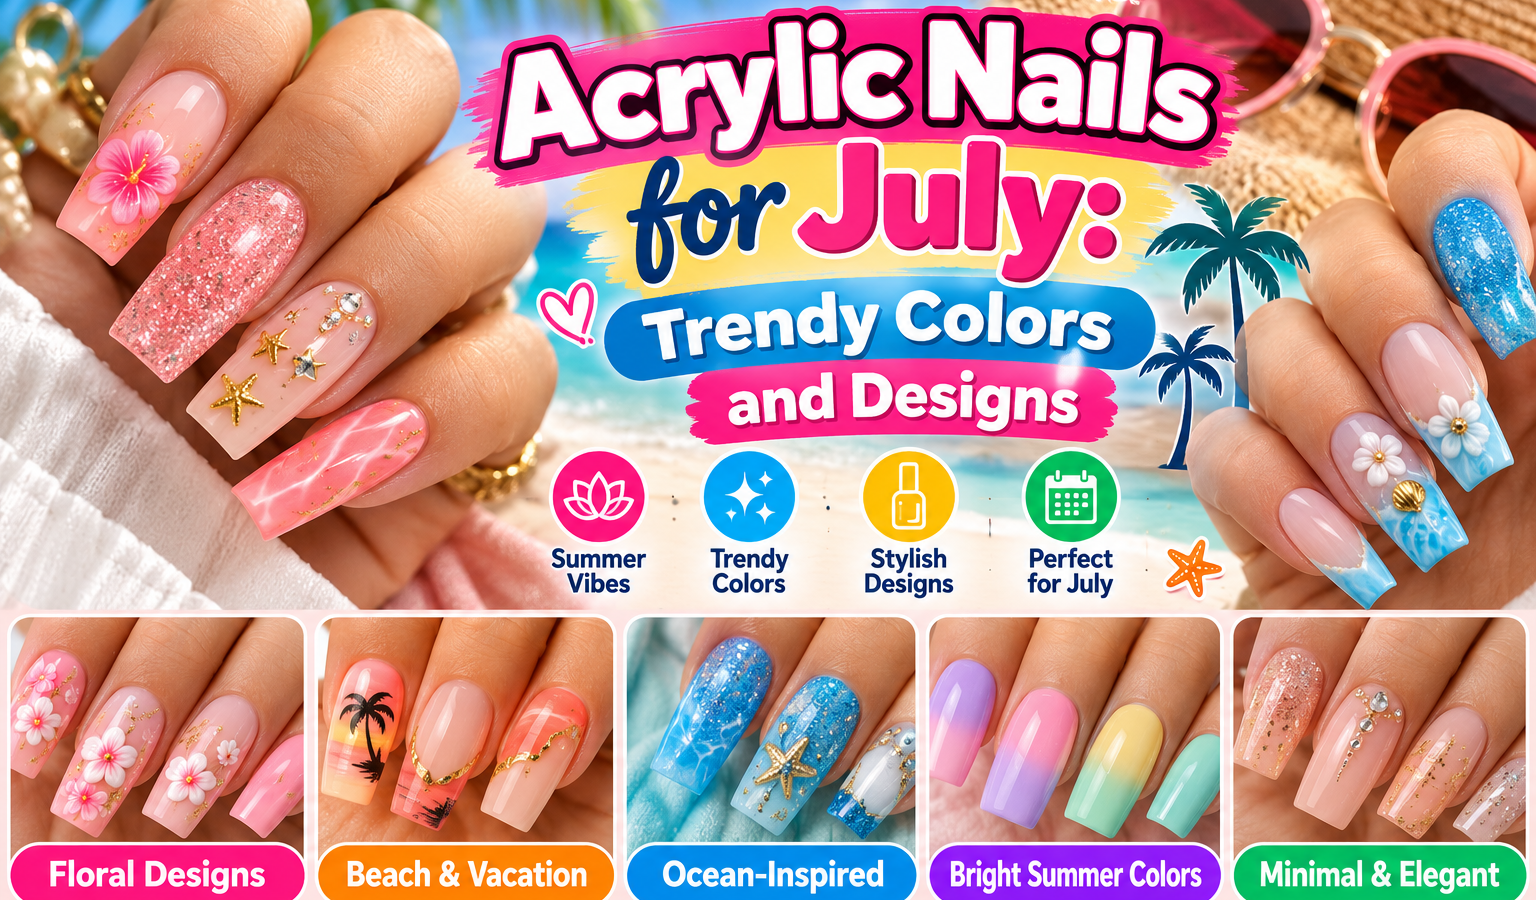
July manicures have an easy visual brief: make the color feel bright, keep the shape wearable in heat and humidity, and choose details that suit the occasions on your calendar. The best acrylic nails for July aren’t limited to one trend. They can be polished and minimal, boldly tropical, patriotic, nautical, playful, or somewhere in between.
My rule is simple: start with the part of your month that demands the most. A beach trip calls for practical lengths and sheer color. A wedding calls for softer neutrals or a modern French.
July 4 calls for red, white, and blue without forcing every nail into a flag design. Your everyday work, nail strength, and personal style still matter more than a seasonal trend.
The Best July Acrylic Nail Look at a Glance
The most wearable July direction combines a medium-length shape with fresh color, a clean finish, and just one decorative detail. Think milky ocean blue, coral, lemon, tomato red, butter yellow, sheer white, soft chrome, or a vivid French tip.
For a relaxed vacation look, choose:
- Short or medium almond, oval, or squoval nails
- Sheer pink, milky white, pale blue, coral, or tropical green
- Fine glitter, a small floral accent, or a simple ombré
- Matte or satin finishes that don’t show every fingerprint
For a bolder summer manicure, try:
- Red, white, and blue French tips
- Daisies, checks, sliced citrus, watermelon, or color blocks
- High-contrast chrome or metallic accents
- Mixed designs that use one shared color family
- Glitter concentrated at the cuticle or tip rather than over the entire nail
The strongest choice is usually the one you can wear for three weeks without resenting it. A trend photo may look exciting for an event, but your nails also type, wash dishes, hold towels, open containers, and travel.
Best Acrylic Nail Colors for July
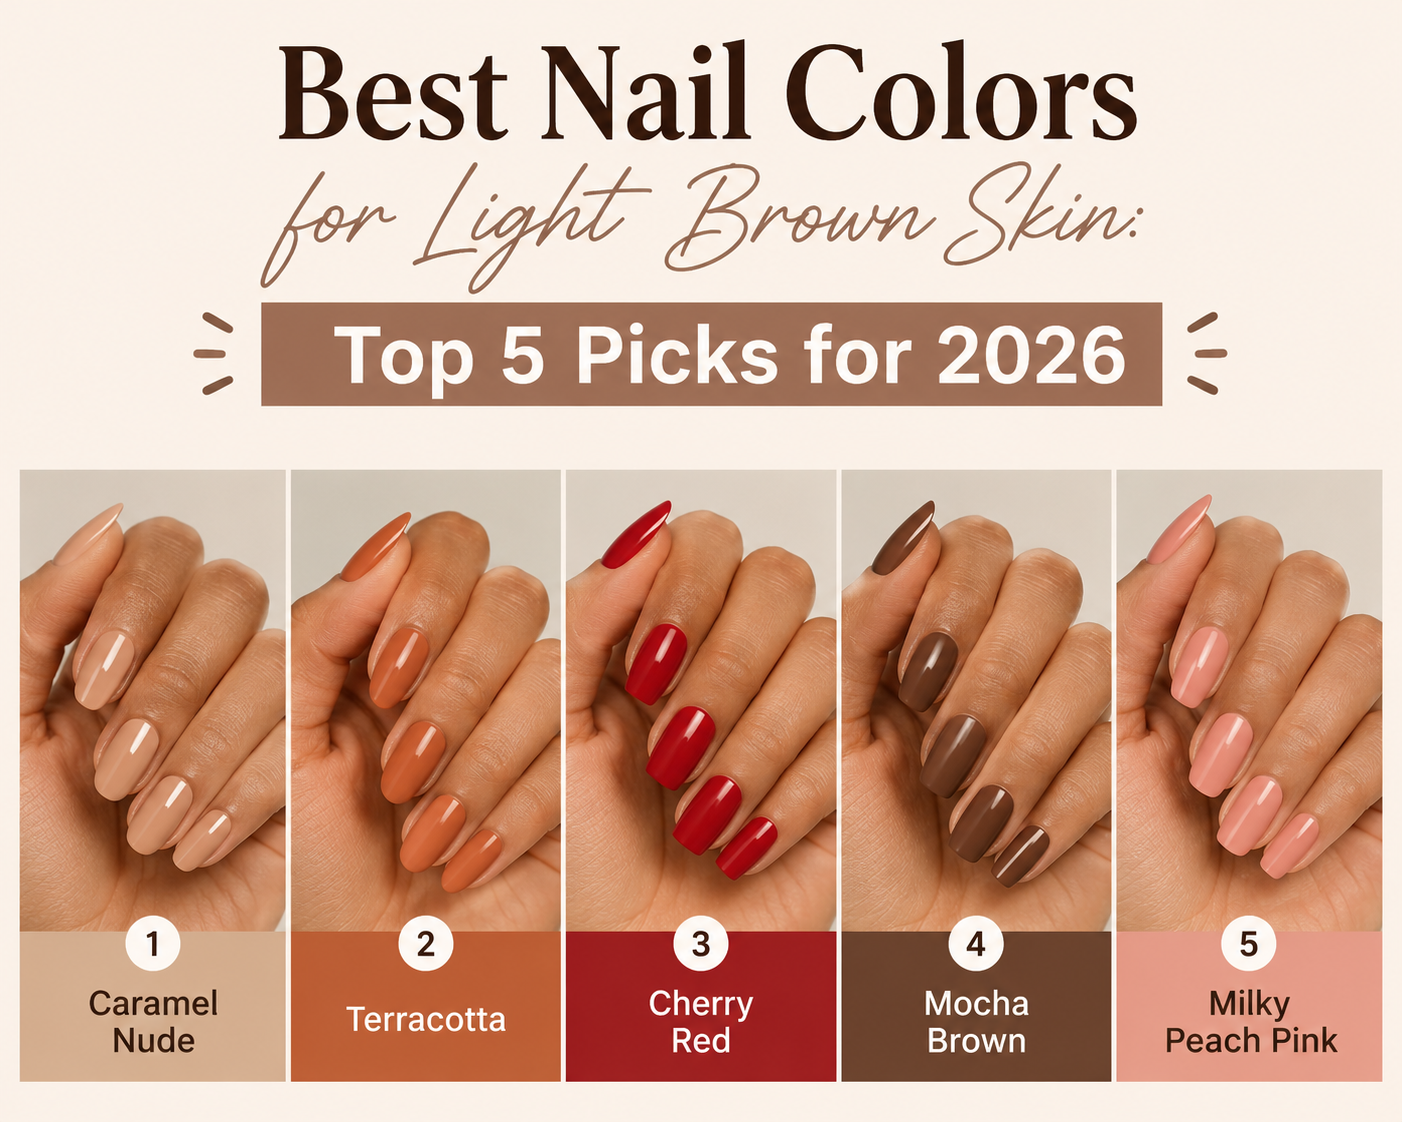
July gives you permission to use color, but the best shade still depends on your undertone, contrast, and how much attention you want the manicure to attract. Warm skin tones often look rich in coral, tomato, turquoise, and gold, while cool and neutral undertones can carry lavender, fuchsia, sapphire, and icy blue with equal impact. Those are guides, not rules.
| July Color Idea | Best Shades | Finish Options | Overall Vibe |
|---|---|---|---|
| Coastal blue | Sky blue, cobalt, teal, pale aqua | Glossy, chrome, glitter | Fresh and vacation-ready |
| Sunset coral | Soft coral, orange-red, peach-coral | Cream, sheer, matte | Warm without looking heavy |
| Lemon | Pastel yellow, lemon, chartreuse | Glossy, jelly, matte | Cheerful and fresh |
| Butter yellow | Muted cream-yellow, vanilla | Glossy, satin, sheer | Soft, flattering, modern |
| Tomato red | True red, brick red, orange-red | Cream, glossy, matte | Bold and confident |
| Milky white | Soft white, off-white, translucent white | Glossy, satin, micro-glitter | Clean and vacation-friendly |
| Ocean green | Sea green, pistachio, deep emerald | Glass, chrome, metallic | Cooling and distinctive |
| Lavender | Soft lilac, periwinkle, violet | Sheer, glossy, chrome | Trendy without being harsh |
| Mocha neutral | Coffee, taupe, mushroom, cocoa | Matte, glossy, satin | Practical for work |
| July 4 palette | Red, white, cobalt, pale blue, silver | French, glitter, matte | Patriotic and celebratory |
| Summer metallics | Gold, silver, rose gold, holographic | Chrome, foil, fine shimmer | Eye-catching and festive |
| Black accent | Black, charcoal, black glitter | Gloss, matte, chrome | Dramatic contrast |
Coastal Blue
Blue is the easiest July color to carry from the beach to an evening out. Pale sky blue looks soft and clean, while cobalt makes a stronger statement. Teal sits between blue and green and works well with warm gold or silver jewelry.
For a subtle look, use blue on every nail with no decoration. The color itself provides enough interest. If you want more dimension, add a thin silver French line, a small white wave, or chrome powder near the tips.
Avoid covering each nail with a different ocean color unless you enjoy a playful mix-and-match manicure.
Coral and Orange Shades
Coral is made for summer because it brightens the look without requiring black or white underneath. Soft peach-coral feels polished and fresh. Brighter orange-coral creates a more energetic effect and pairs well with denim blue, gold, or white.
I like coral on short and medium nails because it gives the manicure personality while keeping the shape practical. It also works beautifully if you plan to apply color in thin coats. A rich, warm red underneath can make a single coral polish look more saturated, but skip the extra coat if the polish becomes too thick.
Lemon and Butter Yellow
Yellow nails can look cheerful without being childish when the shade and finish are controlled. Lemon yellow is crisp and bright. Pastel yellow is softer.
Butter yellow sits between yellow and cream and works particularly well for understated summer manicures.
Choose glossy or satin yellow for an elegant result. Matte yellow requires more care because small surface marks become more visible, and bright pigment can be difficult to remove if it gets on the skin. If you’re applying polish yourself, a thin barrier around the cuticle makes cleanup much easier.
Red for Every Setting
Red remains one of the most versatile July colors because it works with a fitted dress, a white sundress, denim, or monochrome swimwear. Tomato red feels summery. True red feels polished.
Brick and orange-red add warmth and pair beautifully with teal or forest green.
A modern red manicure does not need decorative art. One coat of a high-quality red polish, finished with a glossy topcoat, can carry the entire look. If you want a July twist, reverse the traditional French by painting the cuticle red and leaving most of the nail soft white.
Milky White and Sheer Neutrals
White nails often look cleaner and more expensive when the shade is soft rather than stark. A milky off-white, pale pink, or translucent nude brightens the natural nail without hiding it completely.
These shades also work as a background for line art, negative-space florals, or colorful tips. Let the base color dry fully before drawing details. If the line looks fuzzy, the base was likely too soft or the cleanup around the cuticle was uneven.
Sheer pink is the easiest option to reapply during a vacation. It gives definition without looking heavy, and minor chips are less noticeable than on a dark or high-contrast design.
Greens for a Fresh Alternative
Green is less expected than blue, which makes it useful when you want a summer manicure that doesn’t look basic. Seafoam and pistachio feel light. Emerald looks rich and dramatic.
Olive and moss provide an earthy contrast to bright summer clothes.
Chrome green, especially a cooler or blue-based green, also gives a modern finish. If you use a highlighter to map the design before applying color, keep the highlighting lines thin and remove every trace of residue before the base color goes on.
Lavenders, Periwinkels, and Purples
Lavender works well in July because it sits between a neutral and a statement color. A pale shade can look soft and romantic, while a saturated violet can look more graphic. Periwinkle has the same cool, summery feel as blue but adds a little softness.
Pair lavender with silver for a cool-toned manicure or gold for a warmer finish. A small white daisy on two or three nails keeps the design seasonal without becoming novelty-heavy.
Mocha, Mushroom, and Coffee Neutrals
Neutral shades are practical when you want the strength of an acrylic enhancement without drawing attention to it. Mushroom, taupe, and soft mocha look especially good in matte or satin finishes. They pair naturally with denim, cream, camel, and white.
For July, choose a lighter taupe or gray-mushroom if you want the neutrality to feel springlike. A rich mocha can look elegant in the evening but may feel heavier in strong summer sun.
Red, White, and Blue Without the Flag Look
A July 4 manicure doesn’t need stars and stripes on every nail. A red, white, and blue French is clean, recognizable, and appropriate beyond a single holiday. Alternate the colors across the tips, keep the index and ring-finger tips white, or use silver glitter in place of one color.
For a playful version, paint small dots in red, white, and cobalt on a sheer base. For a polished version, alternate a glossy red, crisp white, and deep blue with a clear topcoat. If your event code is formal, keep the design to the tips or add only one narrow accent stripe.
Metallic and Holographic Finishes
Gold, silver, rose gold, and holographic pigment catch sunlight and evening light, making them useful across the whole month. Full chrome can be striking, but it also draws attention to every small surface irregularity. A chrome accent on the tip, thumb, or a curved line is easier to wear.
Apply metallic powder thinly over a compatible base color. If it looks patchy, the nail may be too dry, oily, or unevenly painted. More powder won’t fix poor adhesion.
Best July Acrylic Nail Designs
A July design works best when the colors relate to one another. Repeating two or three shades across the manicure makes mixed elements look intentional rather than crowded.
Modern French Tips
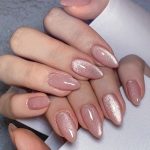
The classic French tip remains a strong choice because the pale base keeps the nail light and the tip can change the entire manicure. For July, consider a bright red, cobalt, coral, lemon, or chrome tip.
A narrow colored tip looks especially modern on short and medium nails. Leave a slightly deeper border near the smile line so the tip looks clean and even. A wider tip creates more drama, but the visual weight suits medium or long almond and square shapes.
For a twist, paint the base in a summer color and outline the cuticle edge with white. Keep that border fine and consistent.
Ombre Nails
Ombré works well in July because the gradient can mirror sea water, sunset colors, fruit, or sherbet. A pale, sheer base also hides minor growth more smoothly than a dark solid color.
Choose a two-color blend rather than a complicated multicolor effect. Pale pink into coral, white into lavender, pale blue into teal, and yellow into orange are all easy summer combinations. If you need a detailed process, this guide to a soft blended color effect breaks the transitions down step by step.
Daisies and Small Summer Flowers
Daisies create a clean, youthful design that suits both casual and dressy July plans. You don’t need a large flower on every nail. Place one daisy on the thumb or ring finger and keep the remaining nails cream, white, yellow, or pale blue.
For a realistic flower, use five rounded petals rather than thick lines. Add a small yellow center, then let the detail color dry before applying the topcoat. Tiny flowers are especially effective on short nails, where oversized artwork can crowd the surface.
Citrus and Watermelon Art
Citrus slices work well on lemon, orange, or coral bases. Draw the rind with a fine line, add wedge lines inside the fruit, and use white for the pith. Watermelon designs can use a pale green base, a red tip, and small black seed details.
For a cleaner result, use one fruit design per hand rather than placing it on every nail. Limit each fruit slice to two or three colors. Let each color dry before the next is added so the edges stay crisp.
Checks and Color Blocks
Checks are graphic, clean, and surprisingly easy to wear if you keep the pattern consistent. A smaller check usually looks better on a short nail than a large checkerboard. Use white and red, pale blue and white, green and cream, or black and white.
Color blocks can work without any line work. Divide the nail into horizontal or vertical sections, then repeat the same color arrangement across the set. A slim metallic divider can make the blocks look more refined.
Negative-Space Floral Art
Negative space means leaving parts of the natural or base nail visible while placing artwork around them. A thin green vine can curve around the edge of a sheer nail, or petals can sit near the cuticle while the center remains open.
This design is ideal when you want visible movement but not heavy coverage. Keep the lines fine, allow them to dry completely, and avoid placing the art in the exact area where the nail will flex.
Chrome Moons and Accent Curves
A chrome crescent near the cuticle creates a bright, clean accent. You can pair it with a sheer nude base or a soft summer color. A curved chrome line at the tip creates a simpler alternative to a full French.
Chrome powder should go over compatible polish, not bare acrylic or an oily nail. If the powder fades or patches, the color underneath may not be dry or may not have adhered evenly.
Glitter Placement
Full-glitter nails can be fun, but selective glitter often lasts better through daily wear. Place glitter near the cuticle in a curved band, along one side, or over the tip. This creates a summer look without covering the nail so heavily that small scratches and polish chips become distracting.
Keep glitter away from the skin. Adhesive on the cuticle can create a lifting edge later, and loose glitter may irritate the skin if it stays there.
Sliced Summer Designs
“Sliced” designs use blocks, stripes, or angled sections of color. They can reference watermelon, citrus, geometric summer art, or the reflective surfaces associated with pool water. Apply a thin base first and keep the sections large enough to remain clear at your chosen nail length.
A transparent diagonal line between two colors adds detail without requiring tiny brushwork. Finish with a topcoat that suits the desired effect.
Patriotic and Firework Details
If July includes a holiday party or outdoor gathering, consider tiny bursts of red, white, blue, and silver. A small firework can be placed on two accent nails, while the rest stay solid.
Avoid loose glitter that resembles sparks around the cuticle. Controlled brushwork is cleaner and less likely to snag clothing. For a formal event, use fine lines and muted metallic colors rather than oversized stars.
Choosing the Best July Length and Shape
Summer weather does not require short nails, but heat, water, sweat, and travel make practical lengths more appealing. Your lifestyle matters more than the month. A teacher, nurse, parent, gardener, or frequent traveler may prefer short or medium enhancements.
A professional who spends the day at a desk may comfortably wear long almond nails.
| July Shape | Best Length | Advantages | Watch-outs |
|---|---|---|---|
| Oval | Short to long | Rounded, elegant, forgiving of growth | Sidewall pressure can still cause breakage |
| Almond | Short to long | Slimming and polished; works with French tips | Very pointed versions are less practical |
| Squoval | Short to medium | Neat, balanced, roomy nail bed | Broad tips need careful corner shaping |
| Soft square | Short to medium | Clean and modern | Corners can catch on clothing |
| Short coffin | Short to medium | Bold, balanced taper | Needs firm sidewalls and careful filing |
| Long coffin | Medium to long | Dramatic silhouette | Requires more care and can lift if weakened |
| Short stiletto | Short to medium | Distinctive and elegant | A sharp tip can damage the nail or snag fabrics |
Short Nails
Short acrylic nails are often the most practical choice in July because they have less leverage against the natural nail. They also allow more detail without the artwork looking crowded. A sheer nude, bright coral, white chrome, or micro-glitter design will look refined at this length.
Choose short almond, oval, or squoval shapes. They look polished and leave enough room to perform everyday tasks.
Medium Nails
Medium nails are the easiest all-around length for a summer manicure. They look elegant with a French tip, bold enough for color, and still manageable around a steering wheel, suitcase handle, and hotel key card.
My favorite July length is medium almond or medium squoval. These shapes complement both short faces and longer nail beds without requiring dramatic length.
Long Nails
Long nails can work beautifully, but they need a stronger apex and more disciplined maintenance. A thin long extension bends with every movement and may crack where the sidewall or stress area is weak. If you choose long nails, select almond, tapered coffin, or a softened stiletto rather than an extremely thin point.
If you already have length but want a change, use a controlled length-reduction method that removes the old material before shaping the new edge.
Salon or DIY: Which July Acrylic Manicure Is Better?
A salon appointment gives you access to a trained technician, a full product system, and detailed shaping. DIY gives you control over the color, timing, and budget. Neither option is automatically better.
| Option | Best For | Main Benefits | Main Risks |
|---|---|---|---|
| Professional acrylic set | Detailed shaping, nail art, first-time wearers, corrective work | Better technique and faster balanced application | Cost, appointment scheduling, exposure to uncured products |
| Home acrylic manicure | Color changes, simple shapes, experienced DIYers | Flexible timing and control | Application, curing, filing, and cleanup depend on your skill |
| Press-on nails | Minimal chemical exposure and short-term wear | Quick and removable | Application and nail-bed preparation still matter |
| Gel or hybrid manicure | High shine and glossy color | Smooth, thin-looking finish | Removal can be harder if overworked |
Choosing a Salon
A good salon technician should be able to explain what they are applying, how the liquid and powder work together, and what maintenance your set needs. Ask about ventilation, especially if you have sensitivity to strong odors. A properly working acrylic system doesn’t need a cloud of fragrance to cure.
The appointment should include enough time for the full set, shaping, color, and cleanup. If your nail art is detailed, bring a clear reference photo and confirm the design, length, and price before the service begins.
If your nails are already lifting, very thin, or painful, a technician can assess whether they can safely take over maintenance. This prevents a damaged nail from being hidden beneath a thicker set.
Doing the Manicure at Home
At-home acrylic application rewards patience. The products cure chemically, so rushing the bead, filling the cuticle, or removing sticky residue creates problems that may not show up until later.
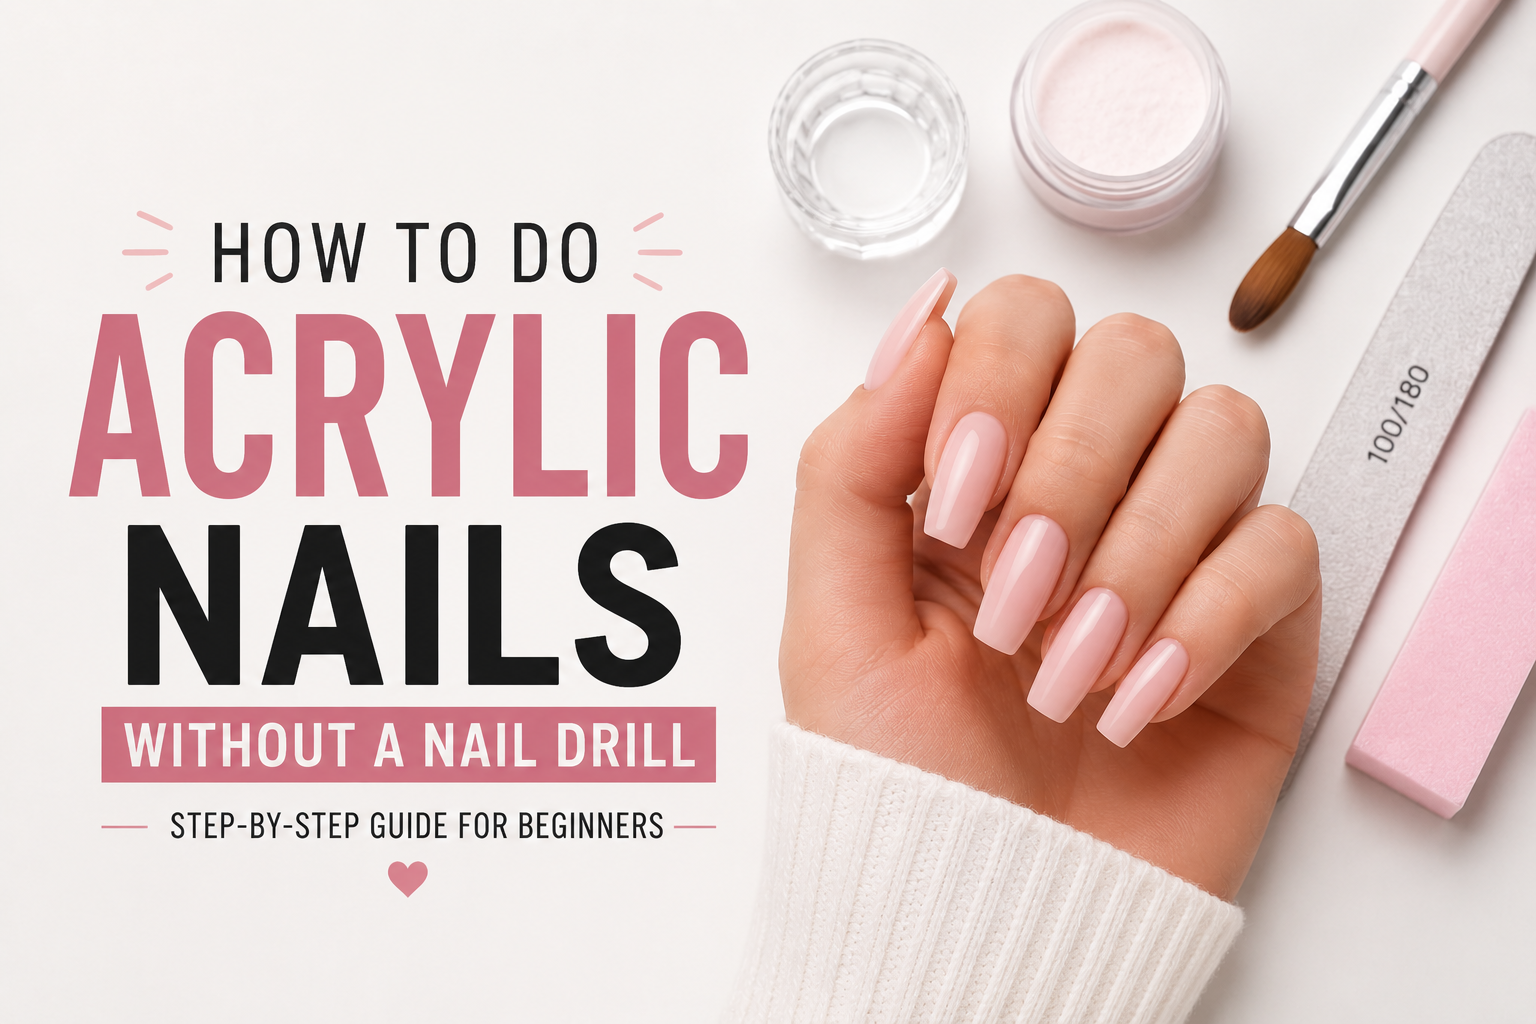
Home application is a good fit if you can work in a ventilated area, follow one compatible product system, and stop to correct mistakes. For a detailed walkthrough of preparation, bead placement, shaping, and color, use this carefully mapped acrylic process as your working guide.
How to Create Your July Acrylic Nails
1. Plan the Length Before Opening the Acrylic
Choose the length around how you use your hands, not only how the shape looks in a photo. Medium almond is a versatile option for July. If you prefer a short set, leave enough room to shape a soft square or oval.
Avoid planning a very long shape if the natural nail is weak or you will be doing frequent manual work.
Sketch the desired outline. A design that follows a clear shape is easier to apply than one with deep sidewalls, pointed corners, or narrow tips.
2. Set Up a Clean, Ventilated Workspace
Open a window or use ventilation before opening the monomer. Work on a nonporous surface that can be cleaned, and keep food, drinks, and pets away from the application area.
Have everything within reach:
- File and buffer
- Cuticle pusher
- Brushes
- Compatible liquid and powder
- Base or primer if the system requires it
- Polish and topcoat
- Cleanser and cuticle oil
- Disposable wipes or lint-free pads
If you wear protective gloves, choose gloves that fit well and can be changed if uncured product reaches the outside.
3. Prepare the Natural Nail
Remove old product according to its instructions. Trim the free edge, gently buff the shine from the nail plate, and wipe away dust and oil with a compatible cleanser.
Pay attention to the sidewalls and cuticle. Product trapped under these areas can prevent adhesion. Don’t aggressively scrape the natural nail or use a coarse file on soft, thin nail plates.
If the nail is peeling, split, infected, or painfully separated, pause. Acrylic can cover the visible damage, but it cannot repair the nail underneath.
4. Protect the Skin
Place a thin layer of a product-compatible barrier around the nail if your system’s instructions allow it. Keep the skin around the cuticle clean and dry.
A barrier can make cleanup easier, but it cannot replace careful bead placement. Flooding the cuticle with acrylic is one of the fastest routes to irritation and lifting.
5. Apply the Primer or Base
Use primer or adhesion product only as directed by the manufacturer. These products are system-specific. Applying more doesn’t necessarily improve the bond and may create an oily or incompatible surface.
Let the product air-dry if that is the labeled method. Do not assume every acrylic component is a no-wait product.
6. Form the Bead
Dip the brush into the monomer, then into the powder. The correct bead is neither watery nor dry. A well-mixed bead is glossy, creamy, and holds a soft shape while spreading.
Products made by the same system are formulated to work together. Don’t mix brands or substitute liquids to change the consistency. If the bead keeps sliding, the ratio is usually too wet.
If it breaks apart, it may be too dry.
7. Place the Acrylic
Set the bead near the center of the nail and guide it toward the tip with the brush. Press and lightly pat the product into place rather than dragging it back and forth.
Keep the smile line visible. Carry the sidewalls firmly into the wings without forcing product into the cuticle. Too much pressure can create a thick, unnatural edge and trap excess product under the nail.
Aim for a smooth, slightly domed apex. The nail should feel strong without looking bulky.
8. Refine the Shape
Once the acrylic has fully set, smooth the surface and refine the sidewalls. A 180-grit file is often a useful finishing grit for smoothing.
Avoid leaning heavily into the natural nail. A drill-free approach is gentler when you only need refinement; this safe filing routine shows how to remove high spots without thinning the extension excessively.
9. Apply July Color
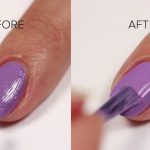
Choose a base shade, then apply color in thin, even layers. A good starting point is one or two thin coats of polish with a compatible base and topcoat. If you need a richer finish, allow each coat to dry instead of flooding the nail with a single thick layer.
For stronger color selection and formulas suited to a manicure that needs to last, compare these durable polish options.
Clean the cuticle after the color has set enough not to smear. Finish with the correct topcoat. If you want extra shine and don’t want to handle the nails while wet, a quicker setting routine can help reduce handling.
10. Finish the Cuticle
After cleanup, apply a small amount of cuticle oil and massage it into the surrounding skin. This won’t make the acrylic grow or repair the natural nail, but it helps keep the skin and cuticle area comfortable and neat.
Your completed set should be firm, smooth, thin near the cuticle, and even in shape. If the product is sticky, wrinkly, soft, or smells strongly after the expected set time, don’t cover it with color.
Making July Acrylic Nails Last Through Summer
A well-placed acrylic set can stay attractive for several weeks, but its appearance depends on application, nail condition, and daily habits. Heat and water aren’t automatic reasons for removal, yet they can expose weak prep work or encourage you to use your nails as tools.
Daily Care
- Apply cuticle oil once or twice a day.
- Dry the nail area thoroughly after bathing or handwashing.
- Avoid using the nail edge to scrape boxes or lift jar lids.
- Keep cleaners, gardening chemicals, and dye away from the acrylic.
- Do not press a manicure button using the nail tip.
- Wipe the skin around the acrylic if polish or sunscreen accumulates there.
- Refill visible gaps before the lift becomes more noticeable.
- Ask for a full removal instead of letting several poorly fitted sets stack.
These details are more useful than applying heavy oil to the acrylic itself. Oil belongs on the surrounding skin and cuticle, not on the nail plate.
Protecting the Color
Full-glitter color and glossy polish can show wear sooner than sheer color. Two thin color coats usually look smoother than one overloaded coat, and a compatible topcoat adds a protective layer.
Do not use the nails as a scraping surface to remove price stickers or open cans. One small tear can travel through the tip and stress the sidewall.
Handling Heat
A cured set can soften, distort, or lose polish when exposed to intense heat. Don’t leave a manicure inside a hot car for hours, even if the weather seems mild outside. A windshield can create heat high enough to affect polish and the pressure from the steering wheel adds mechanical stress.
Likewise, don’t use direct heat to speed drying. Normal air drying and a compatible topcoat are the safe methods for regular polish. If a UV-curing topcoat has a complete, even look, it should stay fully stationary.
Acrylic Nails, Pools, Beaches, Sunscreen, and Humidity
Swimming in Pools
Swimming doesn’t automatically ruin a sound acrylic set. Chlorinated water can stain or dry nail polish, make the skin and cuticles feel rough, and cause a previously weakened polish layer to lift. The bigger risk often comes from pushing wet nails against rough surfaces, using the nail edge to grip pool equipment, or leaving moisture beneath the enhancement.
Before entering a pool:
- Check for lifting or cracks.
- Apply a fresh compatible topcoat if the polish is worn.
- Dry the nail plate and cuticle completely.
- If the nails will be used to grip anything, choose gloves.
Afterward, rinse and dry the hands well. Avoid repeatedly soaking the nails just because chlorine is present.
Beach Days
Sand can lodge under the nail edge, especially when acrylic or polish is still wet. Wear gloves for messy work and avoid using a manicured nail as a scraper.
Sunscreen is better applied after the nail product has had time to set. Keep visible sunscreen off the cuticle when you can, and wash the hands after applying it. The sun does not cure acrylic, and leaving regular polish in intense heat can cause bubbling or discoloration.
You can still create a beach-friendly color: sheer pink, milky white, pale blue, or clear polish shows less damage and suits a swimsuit or cover-up.
Humidity and Sweat
Cured acrylic is not ruined simply because the air is humid. The bigger issue is moisture trapped against an unclean nail plate. After a workout, rinse the hands and dry between the cuticle and nail edge.
If you notice lifting, keep the area dry and have it evaluated. Do not press the acrylic back down and seal the moisture underneath.
Hotels, Road Trips, and Airport Days
Long travel days add friction, tight schedules, and suitcase-handle pressure. Medium or short nails with a glossy or sheer finish are especially practical. Keep a small file and one extra topcoat in your bag if you travel often.
A small nick can sometimes be fixed with a thin topcoat, but a crack that reaches the sidewall or separates the tip should be evaluated before a full nail is added over it.
Safety, Allergies, and Healthy Nail Preparation
Acrylic systems rely on acrylates, which can cause irritation and allergic contact dermatitis after repeated or intense skin exposure. The FDA’s guidance on nail products explains the safety concerns associated with liquid, powder, and gel nail products.
Good technique reduces exposure, but no product should be described as risk-free. Sensitization can happen after using a product for months or years.
Reduce Skin Contact
- Apply liquid and powder over a protected surface.
- Keep windows open or use ventilation.
- Wash uncured product from tools before they dry.
- Change gloves if liquid reaches the outside.
- Wipe or remove stray product from the cuticle before it cures.
- Don’t work on wet or oily nails.
- Follow the product’s full application and cleanup instructions.
Uncured product on the skin is different from a fully set enhancement. Skin exposure should be avoided at every stage.
Watch for Irritation
Mild dryness near the cuticle is different from a spreading allergic reaction. Seek professional advice if you develop persistent burning, itching, swelling, hives, a rash that spreads beyond the nail, or increasing pain after the set is removed.
If the area is hot, markedly swollen, draining, or accompanied by fever, contact a healthcare professional. Acrylic should never be placed over an active infection.
“Can you make acrylic stronger?” remains one of the most common questions. The honest answer is no. A structurally strong set can protect a healthy nail plate from some impact, but it cannot repair a fungal infection, a split, severe peeling, or a nail bed that has separated.
Patch Tests and Hypoallergenic Claims
A product labeled for sensitive skin may still contain acrylates. A patch test can reveal a reaction, but it cannot guarantee that you will not develop a delayed allergy later. Don’t intentionally place a full set on one nail to “test” a formula; exposure can sensitize the skin and still fail to predict your response.
If you have a known acrylate allergy, tell the salon before your appointment and bring information about the specific ingredients you must avoid. You may need a completely different nail enhancement.
Diabetes, Circulation, and Nail Injuries
People with diabetes, poor circulation, reduced sensation, or a hand injury should ask their healthcare professional before making major nail changes. Reduced sensation can make it harder to notice burning, pressure damage, or an infection.
Choose removal over heavy filing when the natural nail is fragile. A qualified technician can reduce one small section at a time without creating hidden thinning.
Fix Common July Acrylic Nail Problems
| Problem | Likely Causes | What to Do |
|---|---|---|
| Lifting at the sidewall | Incomplete prep, oily cuticle, stress, heavy filling | Keep it dry, stop picking it, and have the sidewall cleaned and refilled |
| Lifting at the tip | Long wear, impact, lifting before filling, using nails as tools | Avoid adding more product over the gap; trim the loose section or visit a technician |
| Wrinkled acrylic | Bead too wet, inconsistent pressure, moving too early | Remove the affected section and rebuild with properly mixed beads |
| Chipping | Thin apex, weak sidewalls, filing too deep, impact | Repair early and avoid heavy work or using the nail as an opener |
| Tacky surface | Incomplete curing, wrong system, skin or moisture contamination | Stop, remove the product, and reapply in a clean, ventilated space |
| Bubbling in polish | Oily nail, thick coat, environmental moisture | Remove, cleanse the nail, and reapply thin layers over compatible products |
| Bubbling in the acrylic | Moisture trapped underneath | Do not press the acrylic down; have the nail lifted and rebuilt |
| Polish fading in pools | Chlorine, sunlight, friction, worn topcoat | Use gloves for repeated exposure and refresh color with a new base |
| Growing gap | Normal nail growth combined with delayed maintenance | Fill before the sidewall becomes long and thin |
| Soreness after the set | Excess pressure, deep filing, damaged nail, prolonged product contact | Remove pressure, stop using the set, and seek care if pain remains |
| Cloudiness in chrome or glitter | Too much product, oily base, wrong topcoat | Remove and rebuild with thin, compatible layers |
What Not to Do
Do not:
- Press down a lifted enhancement
- File through the natural nail
- Use a nail as a scraper
- Apply product over green, yellow, or draining material
- Mix liquid and powder from different systems
- Flood the cuticle to “save time”
- Use a blow dryer to force ordinary polish to cure
- Scrub the skin with acetone after a set
- Cover an old set with several new layers indefinitely
When a Repair Is Not Enough
A small chip can often be rebuilt. Deep cracks, persistent sidewall separation, severe yellowing, or thin peeling may require complete removal. Another full set over a damaged enhancement can make the situation worse.
If the nail bed has separation, do not glue the nail plate back under the new product. A nail technician or healthcare professional can help determine the appropriate treatment.
Safe Acrylic Nail Removal and Post-Manicure Care
Full removal is safer and more predictable than trying to disguise a damaged set. A removal appointment also gives the technician a chance to assess the natural nail before deciding whether the next set should be full, infilled, or delayed.
What a Professional Removal Includes
A professional will generally:
- Remove polish and decorations.
- File the acrylic surface.
- Use controlled soaking or another product-specific removal method.
- Lift the softened material without forcing it.
- Clean the natural plate and cuticles.
- Assess thinning, dryness, or separation.
Tell the technician about allergies, pain, diabetes, circulation concerns, or an injured nail before the appointment begins.
At-Home Removal Safety
If the set is sound, a careful home removal may be manageable. If it is very thick, deeply attached, painful, or allergy-related, professional removal is the better choice.
Before starting:
- Use ventilation.
- Keep acetone away from the skin.
- Wear well-fitting protective gloves and open a window.
- Remove artificial decoration carefully.
- Protect the surrounding skin.
- Do not soak for an unlimited period.
The work should begin by filing the upper acrylic surface until the color and underlying layers become less visible. Stop before the natural nail is thinned. Don’t aim to remove every trace during the first pass.
Only some installers recommend wrapping the nail with an acetone-soaked cotton pad and a light protective covering rather than flooding the entire hand in acetone. Follow the exact instructions supplied with the product, keep liquid from pooling around the skin, and check the nail at recommended intervals instead of re-soaking continuously.
Remove softened material with a wooden stick or another nonmetal implement. Don’t pry with a screwdriver, knife, metal cuticle pusher, or electric drill. Those tools can gouge the natural plate and make the next set unstable.
If removal requires unusual force, stop. Look beneath the edge of the enhancement to see whether a corner can be released gently. If the acrylic is locked in, blended, or deliberately filed into the natural nail, a professional is better equipped to manage it.
After Removal
Wash the nails, remove any film with a gentle cleanser, and apply moisturizer. Do not soak the hands repeatedly or use harsh solvents on the skin.
Give the natural nail time to recover. A strong post-removal recovery plan can help you protect the nail plate, reduce peeling, and avoid choosing a new set before the natural surface is sound.
A nail appointment that looks good should also feel good. There should be no persistent pressure pain, constant picking at the cuticle, or increasing discomfort as the set thickens.
Frequently Asked Questions About Acrylic Nails for July
What are the best acrylic nail colors for July?
The strongest all-around choices are coastal blue, coral, lemon, milky white, soft chrome, lavender, ocean green, and tomato red. Choose coral or warm orange for a bright summer look, blue and white for a coastal feel, or a sheer nude if you want the nails to look neat without obvious color.
Are long acrylic nails practical in summer?
Long nails can work, but they require more care around pools, sand, luggage, gardening, and manual work. Medium almond or squoval nails give you more length with less leverage. If you do choose a long shape, use a firm apex and avoid pointed nails that can catch clothing.
Can I swim in acrylic nails in July?
Yes, if the set is sound and you take reasonable precautions. Apply a compatible topcoat before swimming, dry the nails and cuticles, avoid using the nails to grip rough surfaces, and rinse afterward. Chlorine mainly becomes a problem when it dries or stains color or when the set is already weak.
Does the sun dry or cure acrylic nails?
No. Acrylic cures through a chemical reaction between its components, not through sunlight. Strong heat and UV exposure can damage regular polish, make it bubble, or contribute to lifting.
Don’t leave a manicure in a hot car or rely on sun exposure to set the product.
Can I paint over existing white acrylic nails?
Yes, as long as the acrylic is clean, stable, and compatible with the polish. Smooth the surface and apply a compatible base to prevent the new color from becoming patchy. If the old coating is lifting or separating, remove it first instead of painting over the gap.
Should I choose French tips or ombré for July?
Both work well. French tips give you a clean, polished look, especially in bright red, cobalt, coral, or chrome. Ombré feels softer and more vacation-like, particularly in blue, pink, lavender, or citrus shades.
French is easier to maintain on short nails, while a gradual ombré can disguise a small growth gap more subtly.
How long should July acrylic nails be?
The best length depends on your everyday routine. Short nails are practical, medium nails are versatile, and long nails work best when you protect them from impact and friction. For most summer plans, short or medium almond, oval, or squoval nails balance style and practicality.
What do I do if an acrylic nail lifts in July?
Keep the nail dry, stop pulling or pressing the edge, and avoid applying glue or more acrylic over the gap. A small temporary lift can sometimes be cleaned and refilled, but a wide separation or crack in the natural nail needs professional attention.
Can I change the length without removing the whole set?
If the old nail is healthy and the new length is reasonable, an experienced nail technician may reshape or remove part of the acrylic. Thick, yellowed, or weakened enhancements are safer to replace completely because removing one new set on top of another can create excess thickness.
How should I protect July manicures from sunscreen and heat?
Wait until the polish and topcoat are properly dry before applying sunscreen. Don’t leave the nails in a hot car or expose them to a blow dryer. Protect them from sand, gardening chemicals, cleaning products, and opening packages with the nail edge.
Are matte acrylic nails better for July?
Matte finishes look beautiful in muted summer shades, but they tend to show fingerprints, tiny scratches, and rough patches more clearly than glossy finishes. Choose satin if you want a soft look with easier maintenance, or select matte for a defined, color-focused manicure and bring polish with you for quick touchups.
What if I have a reaction after an acrylic appointment?
Stop using the set and remove it if this can be done without forcing or damaging the nail. Persistent burning, swelling, hives, a spreading rash, or worsening pain should be assessed by a healthcare professional. Seek urgent care for breathing difficulty or rapidly worsening swelling.
Your best July manicure begins with the kind of week you’ll actually live. Pick a color that makes you want bare hands, choose a length you can manage, and keep the art simple enough that the whole set still feels like you. A sheer coral, modern white French, or ocean-blue gloss will look fresh long after the first weekend.
Amazon and the Amazon logo are trademarks of Amazon.com, Inc, or its affiliates.
Author


Similar Posts