How To Do Acrylic Nails Without A Nail Drill (complete Guide)
Shahinur Akter

how to do acrylic nails without a nail drill

As an Amazon Associate I earn from qualifying purchases.

Table of Contents

Doing acrylic nails at home can feel intimidating, especially if you do not own an electric nail drill. The good news is that you can still create beautiful acrylic nails using simple hand tools and the right technique. In fact, many beginners prefer this method because it offers more control and reduces the risk of over-filing.

During my research, I reviewed advice from professional nail technicians, beauty experts, and trusted nail care resources. I also compared common beginner experiences and current best practices. This guide explains how to do acrylic nails without a nail drill step by step while helping you avoid mistakes that could damage your natural nails.

Can You Do Acrylic Nails Without A Nail Drill?

Yes, absolutely.

A nail drill is a convenience tool, not a requirement. Professional nail technicians often use electric files because they save time when shaping, refining, and removing acrylic. However, beginners can achieve excellent results with quality hand files and a little patience.

According to experienced nail technicians, hand filing is often easier for beginners because it offers better control and lowers the chance of removing too much product too quickly. Many DIY nail enthusiasts also recommend learning manual filing before using an electric file.

Pros

  • More control during filing
  • Lower risk of damaging natural nails
  • Less expensive
  • No electricity required
  • Beginner friendly
  • Quieter working environment

Cons

  • Takes more time
  • Requires more physical effort
  • Shaping thick acrylic needs patience

When A Drill Is Not Necessary

A hand file works well if you are:

  • Learning acrylic nails for the first time
  • Doing your own nails occasionally
  • Applying thin acrylic overlays
  • Maintaining short or medium-length nails
  • Refining small imperfections

When Professionals Usually Use A Drill

Professional salons commonly use electric files for:

  • Removing old acrylic quickly
  • Large acrylic fills
  • Heavy reshaping
  • High-volume appointments
  • Saving time

Even then, many technicians still finish the manicure using hand files and buffer blocks for better precision.
Tools You Need

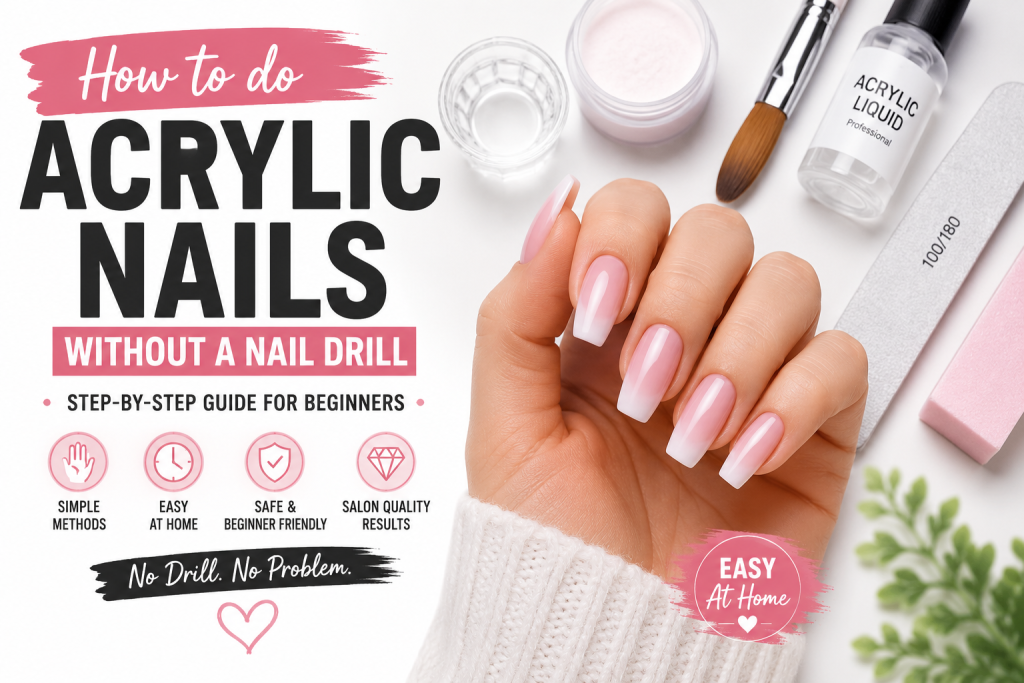
You do not need expensive equipment to create attractive acrylic nails. Choosing the right basic tools matters far more than buying professional machines.

Hand Nail File

A quality hand nail file is your most important tool. It shapes the acrylic, smooths uneven areas, and refines the final nail.

Why It Matters

Without a drill, the nail file does nearly all the shaping work. Choose a washable file with multiple grit options if possible.

Beginner Tip

Use long, gentle strokes. Avoid aggressive back-and-forth sawing motions because they create uneven edges.

Buffer Block

A buffer block smooths small scratches left behind by the nail file.

It also prepares the surface before applying polish or top coat.

Why It Matters

Even well-shaped acrylic can appear rough without proper buffing.

Beginner Tip

Buff lightly.

Too much pressure can thin the acrylic unnecessarily.

Nail Brush

Dust builds up while filing.

A soft nail brush removes that dust without scratching the acrylic.

Why It Matters

Clean nails help polish and top coat adhere more evenly.

Beginner Tip

Brush away dust after every major filing step instead of waiting until the end.

Cuticle Pusher

Healthy cuticle preparation creates cleaner-looking acrylic nails.

A cuticle pusher gently moves excess cuticle away from the nail plate.

Why It Matters

Acrylic should never sit on top of the cuticle.

Proper preparation helps reduce lifting.

Beginner Tip

Push gently after softening your cuticles.

Never force them backward.

Acrylic Powder

Acrylic powder combines with liquid monomer to form the hard protective layer.

Available colors include:

  • Clear
  • Pink
  • White
  • Nude

Why It Matters

Good-quality powder cures more consistently and is easier to shape.

Beginner Tip

Clear or nude powders are often the easiest for beginners to practice with.

Acrylic Liquid (Monomer)

Monomer activates the acrylic powder.

Together they create the bead used to build each nail.

Why It Matters

The liquid controls working time and overall consistency.

Beginner Tip

Follow the manufacturer’s recommended powder-to-liquid ratio.

A bead that is too wet may flood the cuticle, while one that is too dry becomes difficult to smooth.

Nail Tips (Optional)

You do not need artificial tips if you simply want an overlay on natural nails. However, tips are useful when adding extra length.

Why It Matters

Properly fitted tips create a stronger foundation.

Beginner Tip

Choose tips that fit sidewall to sidewall without forcing them.

Nail Glue

If you use tips, nail glue secures them before acrylic application.

Why It Matters

Strong adhesion reduces lifting later.

Beginner Tip

Use only a small amount. Too much glue creates uneven surfaces.

Lint-Free Wipes

Ordinary cotton can leave fibers behind. Lint-free wipes keep the nail surface clean.

Why It Matters

Tiny fibers trapped inside acrylic may weaken the finish.

Beginner Tip

Use fresh wipes throughout the application process.

Cuticle Oil

Cuticle oil is one of the most overlooked products in nail care.

Why It Matters

Acrylic and filing can dry the surrounding skin. Regular moisturizing keeps nails healthier and improves appearance.

Beginner Tip

Apply cuticle oil after your manicure is completely finished—not before acrylic application—because excess oil can reduce adhesion.

Before You Start

Preparation is just as important as application.

Take a few minutes to set up your workspace.

Choose:

  • A clean table
  • Bright lighting
  • Good ventilation
  • Paper towels nearby
  • All supplies within reach

According to professional nail care advice, working in a well-ventilated area is especially important because acrylic liquid has strong fumes. Organizing your tools beforehand also helps you work more confidently and reduces mistakes while the acrylic is curing.

Step-By-Step Guide

Now that your tools are ready, it’s time to apply your acrylic nails. If you’re a beginner, don’t worry about making them perfect on your first attempt. According to experienced nail technicians, smooth technique comes with practice. Focus on applying thin, even layers rather than trying to finish quickly.

Prepare Your Natural Nails

Preparation is the foundation of a long-lasting acrylic manicure. Start by washing your hands thoroughly with soap and water. Dry them completely before beginning. Remove any old nail polish using an acetone-based remover if needed. Trim your natural nails so they are all about the same length. lightly file the free edge to create a neat shape.

Why This Step Matters

Clean nails allow the acrylic to bond properly. Oil, lotion, or leftover polish can cause lifting later.

Beginner Tip

Avoid soaking your nails in water right before applying acrylic. Water temporarily expands the nail plate, which may affect adhesion after it dries.

Push Back Your Cuticles

Use your cuticle pusher to gently push back the cuticles. Only remove loose, dead skin. Never cut living skin unless you have proper training.

Why This Step Matters

Acrylic should sit only on the nail plate. If acrylic touches the cuticle, lifting often starts within a few days.

Beginner Tip

If your cuticles feel dry, soften them with warm water first. Dry them completely before moving to the next step.

Buff The Nail Surface

Take your buffer block and gently remove the natural shine from each nail. You are not trying to thin the nail. You only want to remove the glossy surface.

Why This Step Matters

A slightly rough surface gives the acrylic something to grip.

Beginner Tip

One or two gentle passes are enough. Over-buffing can weaken your natural nails.

Apply Nail Tips (Optional)

If you want longer nails, apply artificial nail tips now. Choose tips that fit naturally from sidewall to sidewall. Apply a small amount of nail glue. Press the tip firmly for about 10 seconds. Once secure, trim them to your preferred length. Blend the seam carefully using a hand file.

Why This Step Matters

Well-fitted tips create a stronger extension and reduce stress on the natural nail.

Beginner Tip

Never force a tip that feels too small. A slightly larger tip can usually be filed down for a better fit.

Mix The Acrylic Correctly

Pour a small amount of acrylic liquid into your dappen dish. Dip your brush into the liquid. Wipe away excess monomer. Dip the brush into the acrylic powder. A small acrylic bead should form naturally.

Why This Step Matters

The correct bead consistency makes application much easier.

Signs Of A Good Acrylic Bead

  • Smooth surface
  • Holds its shape
  • Not runny
  • Not crumbly

Beginner Tip

If the bead spreads immediately, it contains too much liquid. If it looks dry and grainy, use a little more monomer next time.

Apply The Acrylic

Place the first bead near the center of the nail. Use gentle brush strokes to spread the product evenly. Work toward the cuticle without touching it. Then smooth the acrylic toward the tip. Continue adding small beads until the nail is fully covered.

Why This Step Matters

Several small beads usually produce smoother results than one large bead.

Beginner Tip

Keep the acrylic slightly thicker near the stress area for added strength.

Avoid making the free edge unnecessarily thick.

Allow The Acrylic To Cure

Once applied, allow the acrylic to harden naturally. Most traditional acrylic systems cure within a few minutes. Avoid touching the surface while it is setting.

How To Check

Lightly tap the nail using the end of your brush. A hard clicking sound usually indicates that the acrylic has cured.

Beginner Tip

Do not rush this step. Filing soft acrylic can ruin the overall shape.

Shape Using A Hand File

This is where hand filing replaces the electric nail drill. Begin shaping the sidewalls first. Then file the free edge. Finally, smooth the surface using gentle, even strokes. Check the nail from different angles as you work.

Why This Step Matters

Good shaping creates a professional-looking manicure.

Beginner Tip

Use long strokes instead of short, aggressive movements. Stop often to inspect your progress.

Smooth With A Buffer Block

After shaping, use your buffer block to remove small scratches left by the nail file. Work across the surface gently. Pay attention to uneven areas.

Why This Step Matters

Buffing creates a smooth finish that looks much better under polish.

Beginner Tip

Do not over-buff.

Too much buffing removes unnecessary acrylic.

Clean The Nails

Brush away all filing dust. Then wipe each nail using a lint-free wipe and nail cleanser or isopropyl alcohol.

Why This Step Matters

Dust trapped under polish reduces shine and can affect adhesion.

Beginner Tip

Take your time.

A perfectly clean surface creates a much smoother final result.

Apply Polish Or Top Coat

At this stage, your acrylic nails are complete.

Now you can choose:

  • Regular nail polish
  • Gel polish (with proper curing equipment)
  • Clear glossy top coat
  • Matte top coat

Apply thin, even coats. Allow each layer to dry before adding another.

Why This Step Matters

Thin coats last longer and look more professional.

Beginner Tip

Seal the free edge with your top coat to improve durability.

Finish With Cuticle Oil

Once everything has dried completely, apply cuticle oil around each nail.

Massage it gently into the surrounding skin.

Why This Step Matters

Cuticle oil restores moisture lost during filing and improves the overall appearance of your manicure. Many professional nail technicians recommend using cuticle oil daily to keep both acrylic nails and natural nails healthy.

Beginner Tip

Make cuticle oil part of your regular nail care routine instead of using it only after a fresh manicure.

Hand Filing Tips For Better Results

  • File in one direction whenever possible.
  • Keep checking the nail from the front and side.
  • Use light pressure instead of forcing the file.
  • Compare all nails frequently to maintain a consistent shape.
  • Clean your file regularly to prevent product buildup.
  • Replace worn-out files because they become less effective over time.

100 Grit Nail File

A 100-grit file is coarse and removes product quickly.

Best Uses

  • Shortening acrylic nails
  • Removing bulk
  • Refining thick acrylic
  • Initial shaping

Beginner Tip

Use light pressure. A 100-grit file can remove acrylic faster than you expect. Avoid using it directly on your natural nail.

180 Grit Nail File

A 180-grit file is finer and more beginner-friendly. Many nail technicians consider it the best all-around hand file for home users.

Best Uses

  • Refining shape
  • Smoothing edges
  • Preparing natural nails
  • Final shaping

Beginner Tip

If you’re new to acrylic nails, spend most of your filing time with a 180-grit file. It offers better control and reduces the risk of over-filing.

Buffer Block

A buffer block is not designed to shape acrylic. Instead, it smooths the surface after filing.

Best Uses

  • Removing scratches
  • Smoothing uneven spots
  • Preparing for polish
  • Creating a glossy finish

Beginner Tip

Use gentle pressure. A few passes are usually enough. Too much buffing can thin the acrylic.

Common Mistakes

Even experienced nail enthusiasts make mistakes from time to time. The good news is that most problems are easy to avoid once you know what to watch for.

Filing Too Aggressively

One of the biggest beginner mistakes is trying to finish shaping as quickly as possible.

Heavy pressure can:

  • Remove too much acrylic
  • Create uneven nails
  • Damage the natural nail underneath

How To Avoid It

Let the file do the work.Use slow, controlled strokes instead of pressing harder.

Using The Wrong Nail File Grit

Many beginners buy only one nail file. Unfortunately, one grit cannot do every job well.

How To Avoid It

Use:

  • 100 grit for heavy shaping
  • 180 grit for refining
  • Buffer block for smoothing

Each tool has a specific purpose.

Applying Acrylic Too Thick

Thick acrylic takes longer to shape.It also looks bulky.

How To Avoid It

Apply several small beads instead of one large bead.Thin layers are much easier to control.

Skipping Cuticle Preparation

Poor cuticle preparation often causes lifting. Even expensive acrylic products cannot compensate for poor prep work.

How To Avoid It

Always:

  • Push back cuticles
  • Remove dead skin
  • Clean the nail plate
  • Keep acrylic away from the cuticle

Not Waiting For Acrylic To Cure

Some beginners start filing too early. Soft acrylic becomes difficult to shape properly.

How To Avoid It

Wait until the acrylic is completely hard before filing. Patience usually produces a smoother finish.

Over-Buffing

Buffing improves appearance.Too much buffing removes unnecessary product.

How To Avoid It

Use only enough pressure to remove small scratches. Stop once the surface feels smooth.

Safety Tips

Healthy natural nails should always be your priority. According to professional nail care advice, proper technique is more important than expensive tools.

Protect Your Natural Nails

Never file aggressively into your natural nail. Only remove the shine before applying acrylic.

Avoid Over-Filing

If your nails become hot or painful while filing, stop immediately. Too much filing can weaken the nail plate.

Work In A Well-Ventilated Area

Acrylic liquid produces noticeable fumes. Open a window or use a small fan whenever possible. Good airflow creates a more comfortable workspace.

Keep Your Tools Clean

Dirty tools can transfer bacteria and reduce product performance.

After each manicure:

  • Clean your files if reusable
  • Wipe your tools
  • Store everything in a dry place

Replace worn-out files regularly.

Moisturize Your Cuticles

Healthy skin makes every manicure look better. Apply cuticle oil daily. Moisturized cuticles also reduce dryness around the nails.

Frequently Asked Questions

Can Beginners Do Acrylic Nails Without A Drill?

Yes.

Many beginners actually find hand filing easier because it provides more control and reduces the risk of over-filing.

Which Nail File Grit Is Best?

There is no single best grit.

Use:

  • 100 grit for removing bulk
  • 180 grit for shaping
  • Buffer block for smoothing

Using multiple grits produces better results.

Does Hand Filing Take Longer?

Yes.

Manual filing requires more time than using an electric nail drill.

However, beginners often produce cleaner results because they work more carefully.

Can I Remove Acrylic Without An E-File?

Yes.

The safest method is usually soaking the acrylic in acetone after reducing its thickness with a hand file.

Avoid pulling or peeling acrylic from your natural nails.

Is Hand Filing Safer Than A Nail Drill?

For many beginners, yes.

Hand files remove product more slowly, making accidental over-filing less likely.

Professional nail technicians can safely use electric files because they have experience and proper technique.

How Long Does It Take To Do Acrylic Nails By Hand?

For beginners, expect the process to take between 90 minutes and 2 hours.

With practice, most people become much faster while still maintaining good quality.

Can Hand-Filed Acrylic Nails Last As Long?

Yes.

When applied correctly and maintained properly, hand-filed acrylic nails can last 2 to 3 weeks before needing a fill, just like acrylic nails shaped with an electric file.

Conclusion

Learning how to do acrylic nails without a nail drill may take a little more time, but it is completely possible. During my research, one message remained consistent across professional advice and experienced DIY nail enthusiasts: good preparation, patience, and proper hand-filing techniques matter far more than owning expensive equipment.

For beginners, manual filing is often the better place to start. It allows you to develop control, understand nail shaping, and reduce the risk of damaging your natural nails. By using the right tools, choosing the correct nail file grit, and following each step carefully, you can create durable, attractive acrylic nails without relying on an electric drill.

Remember that every manicure is a learning experience. Your first set may not look salon-perfect, but your technique will improve with practice. Focus on thin acrylic application, gentle filing, and consistent nail care. Over time, you’ll build confidence and achieve professional-looking results—all without needing an electric nail drill.

Amazon and the Amazon logo are trademarks of Amazon.com, Inc, or its affiliates.

Author

  • Shahinur Akter

    Welcome to NailsTrending.com, your ultimate destination for all things nail art and care. My name is Shahinur Akter, and I am thrilled to share our journey with you. Our website is dedicated to providing inspiration, guidance, and the finest products for your nail art needs.

Share This Post:

Leave a Comment