How to Use an Acrylic Kit: A Simple Step-by-Step Guide
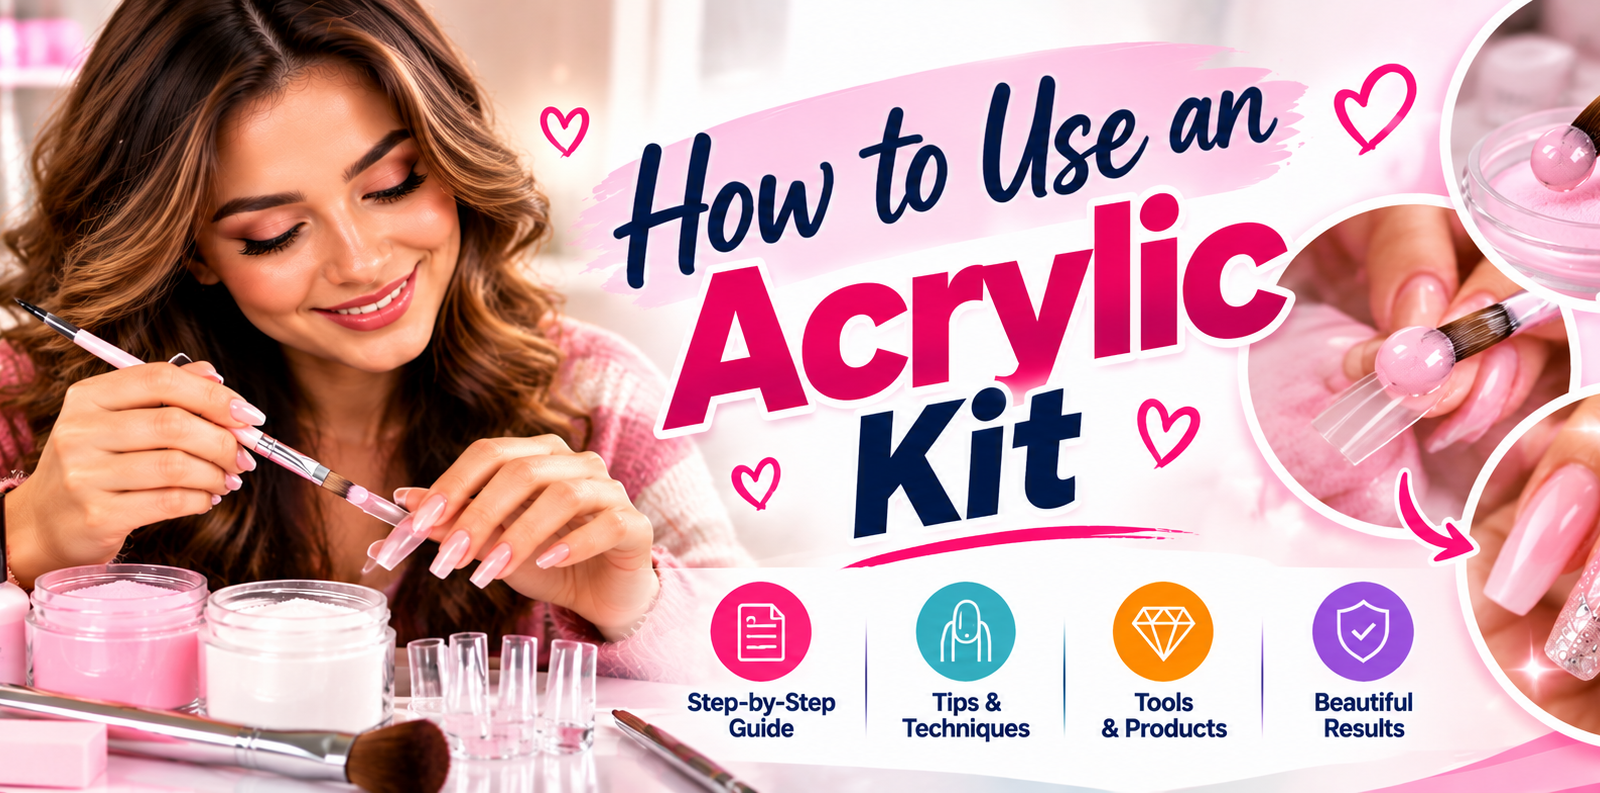
An acrylic nail kit is simple enough to learn at home, but small details decide whether the manicure lasts. A bead that’s too wet spreads and creates bulky edges. One that’s too dry looks rough, shapes poorly, and is more likely to crack.
Oil left on the nail plate can cause lifting, while acrylic touching the skin can trigger irritation or allergy.
The process that works is straightforward: prepare the nail, apply the correct bonding products, control the bead, build the apex and free edge, refine the shape, and finish the surface. Traditional liquid-and-powder acrylic sets through a chemical reaction. Gel-acrylic systems need an appropriate lamp.
Those two systems should never be treated the same.

The Quick Answer
Use an acrylic nail kit in this order:
- Read the manufacturer’s instructions and identify the type of system.
- Clean, shape, buff, and degrease the natural nails.
- Apply the specified dehydrator, primer, or bonding liquid.
- Fit the form or prepare for a formless application.
- Mix a small bead at the manufacturer’s powder-to-liquid ratio.
- Build the cuticle zone, apex, sidewalls, and free edge.
- Refine the shape after the acrylic has fully set.
- Remove the sticky layer and apply compatible color, base coat, or top coat.
- Cure any light-cured product for the exact time stated by its manufacturer.
- Apply cuticle oil after the acrylic and finish have fully hardened or cured.
I wouldn’t use a universal “two parts powder to one part liquid” rule. Acrylic systems have different formulations, and their instructions, not nail tutorials from another brand, determine the correct ratio.
Identify Your Type of Acrylic System
“Acrylic kit” can describe several different systems. The most important first step is identifying what’s actually in the box.
| System type | How it hardens | What you must follow |
|---|---|---|
| Traditional liquid-and-powder acrylic | Polymerizes after liquid and powder are combined | The exact powder-to-liquid ratio and application method |
| Gel-acrylic or “gel-like” acrylic | Requires an LED or UV lamp to cure | The compatible lamp, coat thickness, and cure time |
| Powder-and-paste system | A premixed polymer paste is applied to the nail | The application, shaping, and curing directions supplied with that product |
| Acrylic extension system | Powder and liquid build an extension over a form or natural free edge | The shaping and thickness rules for the specific system |
| Full-coverage or overlay system | A thinner layer may be built over most of the natural nail | The intended free-edge and cuticle-clearance instructions |
Traditional nail acrylic is a shaped plastic layer. It isn’t a press-on nail and it doesn’t attach to the nail the way ordinary nail glue attaches to a tab. Instead, the acrylic powder and liquid are combined, shaped over the prepared nail, and allowed to harden.
Gel-like acrylic follows a different curing process. Even if the powder resembles traditional acrylic powder, the liquid may contain a light-sensitive resin. If the label says “cure,” “LED,” or “UV,” don’t assume it will harden like a conventional monomer bead.
Read the wording on every component. A kit can contain a traditional base and a separate gel top coat, or a brush and forms designed for a system that you don’t own. If the parts aren’t meant to work together, the result may cure unevenly or fail to adhere.
Before choosing a new set, a practical kit comparison can help you compare included products and system types. The box alone doesn’t tell you whether a kit is complete or suitable for your experience level.
Set Up a Safe, Controlled Workspace
Acrylic products can irritate skin, produce irritating fumes, and create fine filing dust. A manicure is easier when your workspace is ventilated, organized, and free from ignition sources.
Read the manufacturer’s safety data sheet for the monomer and any other chemical product. If you can’t locate the safety data sheet, contact the seller or manufacturer before using the product.
Ventilate the room
Open a window and use an exhaust fan that moves air outdoors when possible. Don’t point a fan toward your face, and never direct vapors toward a flame, candle, cigarette, vape, or space heater. OSHA’s ventilation guidance explains why source control and effective airflow matter when airborne contaminants are present.
Ordinary masks don’t remove monomer vapor. They also offer limited protection from the fine particles created by filing. Better ventilation and controlled filing are the main protections.
Keep acrylic away from heat and flame
Traditional monomer is flammable. Keep the bottle closed when it isn’t in use, and work away from pilot lights, candles, hot styling tools, smoking materials, and sparks. Don’t store the kit in a vehicle, garage, or cabinet next to a heater.
Protect your skin and eyes
Disposable gloves can reduce accidental contact, but gloves don’t make poor handling safe. Change them if product gets on the outside. Keep the working area free of loose skin, torn cuticles, and wet surfaces.
If monomer contacts your skin:
- Stop the application.
- Remove any contaminated jewelry or clothing if needed.
- Wash the exposed skin with soap and running water.
- Stop using the product if burning, redness, itching, swelling, or blistering develops.
- Seek medical advice for persistent or severe symptoms, and contact a poison control center if exposure is significant.
For eye exposure, rinse with clean running water and obtain prompt medical guidance. Don’t try to neutralize a chemical spill or reaction with another product.
Acrylates and methacrylates can cause allergic contact dermatitis, particularly after repeated exposure. Stop using the system if you develop an itchy, swollen, blistered, or persistently irritated reaction. Don’t attempt to “dry out” an active reaction by covering it with another gel or polish.
The FDA’s guidance on nail products explains the safety concerns associated with cosmetic nail products and the need to use them as directed.
Control filing dust
Dry-file in a ventilated area, and keep your face out of the dust cloud. Use a vacuum with suitable filtration or clean work surfaces with damp methods where the equipment permits. Never blow dust off the nail or your clothing.
An electric file can reduce the amount of hand filing, but it can generate heat and cause damage if you press too hard. Use the lowest effective setting, keep the bit moving, and stop if the nail plate becomes warm.
Plan for spills and disposal
If you spill the product, move away from ignition sources and follow the safety data sheet. Don’t pour liquid or powder into a sink, storm drain, or household trash without checking local disposal rules. Keep containers in their original packaging, and don’t combine unused liquid, powder, or reactive residue.
Keep acrylic products away from children, pets, food, and medicines. Don’t place brush handles or other tools in the monomer bottle for convenience.

Check the Parts of Your Kit
A useful acrylic kit contains more than powder and liquid. Some starter sets group optional extras together, so you should know which products are essential to your chosen system.
| Item | Purpose | Common problem when omitted or misused |
|---|---|---|
| Acrylic polymer powder | Supplies the solid polymer used to build the enhancement | A poorly mixed bead can be weak, gritty, or uneven |
| Acrylic liquid or monomer | Wets the powder and starts the forming or curing process | Excess liquid can create long cure times, bulk, or skin contact |
| Number 2 nail brush | Places and smooths the acrylic | A damaged brush can waste product and disturb the bead |
| Nail forms | Support a new free edge during extension | A loose or missized form can cause lifting and distortion |
| Dehydrator or nail prep | Removes moisture and surface oil from the nail plate | Oily nails encourage lifting |
| Primer or bonding liquid | Improves adhesion to the prepared nail surface | The wrong primer may be incompatible with the acrylic system |
| Cleanser or sticky-layer remover | Removes the tacky acrylic surface after it has set | Excess solvent can unnecessarily dry the surrounding skin |
| Base coat | Seals and protects the finished acrylic if the system calls for one | Incompatible products may peel |
| Top coat | Protects color and adds shine | A UV gel top coat must be cured properly |
| File and buffer | Shapes the extension and smooths the surface | Aggressive filing can damage the natural nail |
| Nippers and cuticle pusher | Trim hangnails and move loose cuticle tissue | Aggressive cuticle cutting can injure living skin |
| Tray and small dishes | Hold product without contaminating original containers | Reusing contaminated caps can ruin the product |
| Cuticle oil | Conditions the cuticle and surrounding skin after completion | Oil applied before color or top coat can interfere with adhesion |
A primer, dehydrator, and “activator” are not automatically interchangeable. Some products combine several functions. Some traditional systems don’t use a separate activator at all.
A gel-achiever product may require a system-specific curing or bonding step.
Never add talc, baby powder, lotion, pigment, oil, or a homemade activator to the monomer. These additions change the mix and can interfere with curing, adhesion, color, and strength.
Prepare Your Workspace and Natural Nails
Good preparation gives the acrylic a clean, dry surface and helps you control the cuticle area. It also makes the manicure faster because you won’t stop to deal with lifting or oily nails halfway through the set.
1. Arrange everything within reach
Set out the products before you begin. Place each liquid in a separate small dish, close every bottle immediately after dispensing it, and keep the powder container separate from the liquid dish.
A clean palette or acrylic dish is useful for shaping a bead. Don’t dip your brush directly into a nail polish bottle or return a contaminated brush to the monomer container.
2. Clean your hands and tools
Wash your hands and dry them completely. Clean your implements according to their material and the product directions. If you work on more than one person, use a proper disinfection process designed for manicure tools; ordinary wiping isn’t equivalent to professional sterilization.
Don’t share files, nippers, cuticle pushers, or brushes. Nail work can spread infections if contaminated tools or dirty hands are moved from one person to another.
3. Remove old product carefully
Remove old gel, polish, glue, or acrylic before beginning. If the previous enhancement is lifting, thick, or bonded to the skin, don’t just cover the problem with another layer.
A soak-and-lift method is gentler than pulling. Don’t use metal tools to force product away, and don’t file the natural plate down simply because residue remains.
4. Shape the free edge
Use a file to round or square the free edge according to the style you want. Keep the shape consistent across both hands.
If you want a short extension, a controlled formless application may be easier than forcing a long form over a very short nail. A gentler prep method is useful if you don’t own an electric file, but hand filing still requires light pressure.
5. Handle the cuticle area without cutting living skin
After washing, gently move loose cuticle tissue away from the nail plate. Don’t cut deep into the living cuticle or tear it at the base. Trim obvious hangnails with clean nippers.
If the cuticles are painful, infected, swollen, or heavily damaged, don’t cover them with acrylic. Seek appropriate professional care instead.
6. Remove shine and natural oils
Use a file or buffer to remove the shiny surface from the natural plate. Work lightly because over-thinning the plate makes the finished enhancement less stable.
Wipe away filing dust, then apply the manufacturer’s cleanser, dehydrator, or nail prep. Let each product dry as directed. Don’t use lotion, hand cream, cuticle oil, or household cleaner on the nail plate beforehand.
| Preparation mistake | What can happen later |
|---|---|
| Skipping the dehydrator | Oil remains and the acrylic may lift |
| Applying lotion before prep | Poor adhesion and a greasy nail plate |
| Leaving the cuticle area thick | Skin contact, irritation, and cuticle-line lifting |
| Filing too deeply | Weakness, pain, and nail-plate damage |
| Using a dirty brush | Grainy acrylic, inconsistent curing, and contamination |
| Applying form glue to the nail plate | Immediate lifting or skin irritation |
7. Fit the form correctly
Choose a form that matches the width and curve of the nail. Fit it beneath the free edge so the acrylic can meet the natural nail without a gap.
If the form requires adhesive, apply it to the form according to its instructions. Keep glue off the natural plate and cuticle. Press the form into place and check that it doesn’t rock when you move your finger.
Forms that are too narrow force the enhancement into a curved shape. Forms that are too wide create unsupported sidewalls. Changing the form size for each nail is more reliable than forcing one universal shape.
8. Test the product before completing the full set
Apply a small bead on one easy nail. Check its consistency, pick-up, and setting behavior. If the bead spreads, feels crumbly, or remains unstable after the manufacturer’s expected set period, stop and correct the ratio before building all ten nails.
The complete application sequence can help you organize the setup, but each system’s instructions remain controlling.
Mix a Consistent Acrylic Bead
The bead is the heart of a traditional manicure. Its size, shape, and moisture content affect everything that follows.
Traditional acrylic polymerizes after its liquid and polymer components are combined. The liquid binds the powder into a workable plastic, while the chemical reaction hardens it. The result should feel dense and firm, not powdery, foamy, or greasy.
Powder-to-liquid ratio
Some common traditional systems use approximately 2:1 or 3:1 powder to liquid by volume. Those numbers aren’t universal, and a scoop of powder isn’t automatically the same volume as a scoop of liquid.
Your options are:
- Use a manufacturer-supplied measuring tool.
- Mark exact volumes in a suitable small container.
- Follow a kit-specific dip-and-tap method.
- Use an activator system only as its instructions specify.
Change the ratio if the system changes. Don’t transfer a ratio from one acrylic brand to another simply because both containers look similar.
Dip-and-tap method
- Dispense a small pool of liquid into a clean dish.
- Dip the brush into the liquid.
- Tap the brush against the edge of the dish to remove excess.
- Lightly dip and tap into the polymer powder.
- Roll the material on the clean palette until it forms a smooth bead.
The bead should be compact enough to control and large enough to cover the intended area. It shouldn’t be foamy, crumble when lifted, or run across the palette.
Don’t stir violently or blow on the bead. Either action can introduce air and create bubbles.
Recognizing the correct consistency
| Bead appearance | What it usually means | What to change |
|---|---|---|
| Spreads into a thin puddle | Too much liquid for the powder | Use less liquid or add measured polymer |
| Stays tacky for an unusually long time | Excess liquid, moisture, or contamination | Stop, remix, and check the products |
| Looks foamy | Air or a wet brush | Tap off excess liquid and mix more gently |
| Contains dry pockets | The brush didn’t saturate all the powder | Use a fuller dip or adjust the measured amount |
| Crumbly and rough | Too little liquid | Add a measured amount of liquid |
| Sticks heavily to the brush | Usually too wet | Reduce liquid pickup before touching the nail |
| Smooth and dense but slightly tacky | It may still be setting | Shape or wait according to the product directions |
| Firm, dense, and shapeable | Usually correct | Continue the application |
If a bead contaminates with lotion, water, oil, pigment, or another chemical, discard it. Don’t spread it on the nail and hope the finished manicure will protect you from the problem.
Apply Acrylic Step by Step
Work on one nail at a time, or two if your system and hand control allow it. Make sure your brush, dish, palette, and form stay clean throughout the application.
1. Load the brush correctly
Touch the bristles to the monomer, then tap away the excess. A controlled brush load is more important than using a large amount of product.
Keep the brush’s ferrule and handle dry where possible. Liquid that runs toward the ferrule can make the brush slippery and damages it over time.
2. Place the cuticle-zone bead
Start with the smallest bead you can control. Place it near the cuticle line and pull it toward the free edge.
Leave a narrow margin between the acrylic and the living cuticle. That margin is your safety barrier. If the acrylic flows into the cuticle, don’t spread it across the skin.
Use the side or edge of the brush to establish a clean cuticle line, then lightly pat the surface. Don’t press hard enough to push the natural plate.
3. Build the apex
The apex is the strongest part of the enhancement. It adds support and distributes pressure so the extension doesn’t flex like a lever.
Place one or more larger beads through the center of the nail. The highest point should usually sit around the middle-to-front portion of the nail, not directly against the cuticle.
A useful rule is:
- Keep the cuticle area relatively thin.
- Add controlled thickness through the center.
- Keep the free edge less bulky than the apex.
- Preserve a rounded sidewall profile.
A strong enhancement isn’t a flat sheet of plastic sitting on the nail. It has a gentle curve from the sidewalls into the apex, followed by a controlled taper toward the tip. That shape handles pressure better than a flat or overly bulky extension.
4. Fill the sidewalls
Place small beads along each sidewall and blend them into the center bead. Hold the brush nearly vertical when shaping the side profile, then soften the transition with a light pat.
Check from above and from the side. You’re looking for:
- No visible voids beside the natural nail
- A smooth curve rather than a ledge
- A sidewall that follows the finger’s shape
- A thin, clean cuticle margin
- Support without pressing on the skin
If you see a gap, don’t “fix” it with a very wet brush stroke. That can flood the area. Use a smaller, denser bead and press it into place with light patting.
5. Extend over the form
Extend the acrylic toward the free edge. A form supports the product while it’s still workable, so the acrylic doesn’t sag before it hardens.
The underside of the extension should continue the line of the natural nail. Avoid creating a sharp downward curve or a deep scoop. Both make the tip more likely to break.
Check the form before continuing:
- Does the tip line up with the fingertip?
- Is the extension centered under the finger?
- Is the form stable?
- Can you see clear acrylic along both sides?
- Is the product covering the area where the natural nail and extension meet?
Add material only where the bead doesn’t reach. Don’t flood the entire nail because the first bead stopped short.
6. Pat rather than push
Patting spreads the bead with less disruption than dragging or pressing it. Pressing too hard can force product under the cuticle or distort the apex.
Let the brush touch the acrylic, then lift it cleanly. Keep the brush moving in a consistent direction. Don’t repeatedly brush one spot until the product becomes stringy or uneven.
Traditional acrylic will often become less workable as it sets. A bead that’s spreadable when first placed may be firm enough to refine by the time you reach the free edge. If the product has already hardened, don’t try to restart it with more liquid.
Add a new bead to the area that needs correction.
One-bead and two-bead methods
A one-bead application uses one small bead at the cuticle, one through the apex, and one at the free edge. It’s clean and efficient when your brush control and consistency are good.
A two- or three-bead system divides the nail into separate zones. More beads can help beginners control the thickness, but each bead adds another chance for a gap or overlap. Don’t add extra beads simply to use more product.
| Method | Best for | Watch for |
|---|---|---|
| One-bead-per-zone application | Consistent products and steady hand control | Rushing the cuticle zone |
| Two-bead side-and-center application | Beginners who need simpler placement | Uneven pressure between beads |
| Three-bead overlay | Short nails and full-coverage enhancements | A bulky result if too much product is used |
| Formless application | Experienced users and modest natural growth | Unsupported extension or over-thickened tips |
Formless acrylic
A formless application places acrylic mainly over the natural nail and a short free edge. It can work when the natural nail already has enough length and strength to support the finish.
Formless application isn’t the same as building a long extension without support. If the natural nail is very short, flexible, or damaged, forms or professional correction may be a better choice.
Keep the added thickness controlled. A formless enhancement should follow the shape of the natural nail, with modest reinforcement through the center. If you need a dramatic length change, use a form.
Apply Gel-Arylic or Light-Cured Systems
If your kit contains a gel-like acrylic, work with its own method instead of treating it like traditional monomer acrylic.
Gel-acrylic commonly follows this sequence:
- Prepare the natural nail.
- Apply the compatible dehydrator, primer, or bonding layer.
- Place a small bead or controlled layer of gel-acrylic.
- Shape it before curing.
- Cure it for the time stated by the manufacturer.
- Repeat for additional layers if directed.
- Refine the enhancement after the required lamp curing.
- apply the compatible base, color, and top coat.
- Cure each light-sensitive layer as specified.
- Finish with cuticle oil.
The bead is usually smaller and more controlled than a traditional monomer bead. Don’t spread a gel-acrylic product into a thin, watery film unless the manufacturer specifically calls for that application.
Some systems require an initial “base” bead followed by an apex bead. Others use a full-cover layer. Don’t assume that every gel-acrylic system uses the same number of coats or the same cure schedule.
Check the lamp before you begin
A lamp that looks compatible may not cure the product evenly. Confirm the following:
- The lamp wavelength and compatibility requirements match the gel product.
- The nail sits fully under the lamp’s light area.
- The lamp is clean and free from dust.
- The bulb isn’t expired or failing, if the lamp has a service life.
- The product isn’t placed on a dirty or sticky surface.
Apply a thin coat of the specified product to the first nail and cure it before completing the full hand. Check that the underside is fully hardened and the surface has the finish expected from that system.
After curing, the nail shouldn’t feel tacky in the areas that are supposed to be cured. Don’t use a product that remains soft or dentable in a cured area. Ask the manufacturer whether the lamp, layer thickness, or cure time is the problem before applying more product.
Let the Acrylic Set or Cure Correctly
Traditional acrylic usually sets through a chemical reaction. Gel-acrylic and other light-cured systems require exposure to the correct light. Don’t use a generic time that applies to another product.
Traditional liquid-and-powder acrylic
Let the bead spread and settle for the period specified by the manufacturer. The product should become firm and less tacky. The surface may still feel slightly tacky even after the structural set is complete, depending on the system.
If a large bead remains soft long after the expected set time, don’t add more liquid automatically. Look for:
- Excess liquid in the mix
- Moisture on the nail or brush
- A dirty palette or contaminated brush
- A mismatched liquid and powder system
- Product that was mixed too thinly
A thin bead can appear dry on the surface while remaining soft underneath. Test firmness with a tool in an area away from the cuticle and skin.
Light-cured acrylic
Cure each layer or bead for the manufacturer’s stated time. Longer isn’t automatically better. Over-curing can heat the nail, and some products can change color, cure unevenly, or develop surface problems when exposed unnecessarily.
Keep your hand still under the lamp and position the nail beneath the light area. If your lamp has several positions, follow its instructions for the correct placement.
How to tell the acrylic has set
A properly set traditional enhancement feels firm across the cuticle zone, apex, and free edge. A gel-cured enhancement should be fully hard and no longer tacky in the areas meant to be cured.
A ready-to-finish enhancement should not:
- Shift under gentle pressure
- Leave a deep dent in the surface
- Smear when touched with a clean implement
- Feel soft near the free edge
- Separate from the nail at the cuticle line
If the acrylic is still soft, you can usually continue refining only when the manufacturer says it’s safe to do so. Don’t file aggressively or press down on a soft free edge. You may lose the shape and trap stress inside the material.
Refine and Shape the Enhancement
Refinement should happen after the acrylic has reached the appropriate set or cure stage. Filing earlier can smear the surface, drag the free edge, or expose uncured product.
Remove the form
Hold the finger steady and peel the form away from the underside of the free edge. Don’t yank it sideways across the natural nail.
If the form sticks, don’t force it. Separate it gently with a clean tool designed for form removal, then wipe away any adhesive or loose acrylic.
Establish the free-edge profile
Use a file to shape the tip. Keep the underside relatively straight and support the finger with your other hand. File from the underside toward the top or from the top toward the underside using short, controlled strokes.
A few common shapes include:
- Square: Straight tip with softened corners
- Squoval: Rounded-square outline
- Round: Curved tip following the finger
- Almond: Tapered sides with a rounded point
- Stiletto: Strong taper to a narrow tip
The shape should match the strength of the enhancement. Very pointed tips require more controlled thickness and a stable apex. Don’t create a sharp point from a thin, weak extension.
Smooth the surface
Use a 180-grit file to even the surface, then a finer file or buffer to smooth it. A common finishing sequence is 180 grit followed by 180 grit for refining, but the grit choice depends on the material and the condition of the surface.
Keep the file moving. Don’t concentrate on one nail edge until it becomes thin. A properly shaped enhancement supports the finger without pinching or digging into the sidewalls.
Check the underside and sidewalls
View the enhancement from several angles:
- From above
- From the fingertip
- From each side
- From underneath
- With the finger in a relaxed position
Look for a straight extension line, clean sidewalls, a smooth apex, and no deep split at the natural nail. If the acrylic is shaped only from above, the tip may still be uneven underneath.
Remove the Surface Tackiness
Traditional liquid-and-powder acrylic can leave a soft, tacky surface layer. This layer is sometimes called the “sticky layer.” It isn’t the same as an area that hasn’t started to set.
After the acrylic is firm, clean the surface with a compatible cleanser or acrylic-cleaning liquid. Use a clean brush or lint-free wipe, and work gently. Don’t soak the finger in remover or use an aggressive solvent on the skin.
For gel-acrylic, a cured surface may also be tacky. Some systems rely on that surface for adhesion of a gel base or top coat. Don’t remove it unless the instructions for that exact system tell you to do so.
| System | What the tackiness usually means | What to do |
|---|---|---|
| Traditional acrylic after structural set | Normal surface layer that can be cleaned | Wipe lightly with the specified cleanser |
| Traditional acrylic before set | Product is still working or the mix is too wet | Wait, check the ratio, and don’t file it |
| Gel-acrylic before cure | The resin has not been polymerized | Cure it for the specified time |
| Gel-acrylic after cure | Some systems intentionally remain tacky | Follow that system’s top-coat instructions |
| Any system with a wet or dentable area | Incomplete set or cure | Stop and check compatibility, thickness, or curing |
Never try to disguise an incompletely cured product with extra gel. A thick uncured layer can lift, peel, or trap irritating liquid against the nail.
Finish the Manicure
Once the acrylic is firm, smooth, and clean, you can add color and protection. The correct order depends on whether you’re using traditional or light-cured products.
Traditional color and finish
A typical sequence is:
- Apply the compatible base coat, if the system calls for one.
- apply two thin color coats, allowing each to dry as directed.
- Apply a compatible top coat.
- Let the finish harden fully.
- Wipe away “skin lines” if needed.
- Apply cuticle oil around the nail.
A traditional base and top coat that dry by air usually don’t require a lamp. Light-cured gel products do. Don’t assume a product will cure just because the acrylic beneath it is dry.
Gel color and top coat
With gel color or a gel top coat:
- Apply a thin, even coat.
- Keep the product away from the cuticle unless the product explicitly permits otherwise.
- Cure for the exact stated time.
- Repeat as needed.
- Finish with a compatible top coat and cure it.
- Wipe the sticky layer if the system requires that step.
Don’t flood the cuticle. Gel that cures onto the skin can make the manicure look untidy and can increase the chance of irritation or lifting.
One-color and French manicure application
For a solid color, use thin coats. The first coat should cover the nail without hiding the natural shape. The second coat can make the color more even.
For a French tip, apply the base color first, then place a fine tip color while the base is still workable if using traditional polish. With gel, cure the base before applying and curing the tip color unless your system directs otherwise.
A small clean gap between the tip color and cuticle makes the line easier to control. If the design looks uneven, don’t keep flooding the edge. Remove and reshape the color only after the product has dried or cured.
Nail art and decals
Acrylic can be a stable base for polish, stickers, foil, and small decals. Prepare the surface according to the design product’s instructions. Adhesive nail art generally needs a clean, oil-free acrylic surface and a compatible top coat.
For a dimensional design, build the art on a fully hardened enhancement. If you’re using gel art, cure each layer according to its instructions. Don’t press heavy decorations into acrylic that hasn’t set.
Maintain the Acrylic Manicure
Good application gives the manicure a strong start; maintenance determines how long it stays intact. Most early failures come from impact, moisture, product incompatibility, or a weak preparation.
During the first 24 hours
Avoid treating a fresh manicure like a permanent coating. Give the finish the time stated by its manufacturer before exposing it to heavy work.
Be cautious with:
- Opening tight jars
- Gardening
- Cleaning products
- Swimming or soaking
- Repeated hand washing
- Typing with strong impact
- Working with vibrating tools
- Sleeping with the nails pressed against a hard surface
If the top coat feels soft, dentable, or tacky, it may not be fully hardened. Don’t apply another product to hide the problem.
Keep moisture away when preparing
Water and cleansing residue can interfere with adhesion. Wear waterproof gloves for dishes and cleaning, but remove them afterward so your hands don’t stay warm and damp.
If you apply nails after wet work, wash and dry them thoroughly, then follow the full preparation process again. Don’t simply wipe the surface and apply primer over moisture.
Use gloves for wet tasks
Gloves protect the manicure and your skin, but they can trap sweat. Choose well-fitting gloves and dry your hands before putting them on. For wet household work, cotton-lined gloves may be more comfortable, but they can absorb liquid if they aren’t changed often.
If you need to repair your cuticles, use a clean implement and don’t cut into the living skin. A simple nail-care routine can help keep the surrounding skin flexible without disturbing the acrylic.
Reapply cuticle oil carefully
After the top coat has fully hardened or cured, apply a small amount of cuticle oil around the cuticle. Massage it in gently.
Avoid flooding the nail edge. Oil can soften polish, collect beneath the cuticle, and make the manicure look less clean. Reapply a small amount when the cuticle feels dry, especially after hand washing.
If a fresh manicure is still curing, wait before applying oil. For conventional air-dry products, follow the drying time on the bottle. For gel, complete every required lamp cure and finish the remaining surface steps first.
Fill small gaps correctly
If a small area lifts but the acrylic remains firmly attached, clean the area and determine whether the problem is a nail edge, a stress crack, or a product gap. Don’t simply flood the gap with thick product.
If the lifted section is loose, trim it back to sound material and rebuild the structure. Keep the cuticle area clean and dry during repair. Deep separation, a loose free edge, or a crack through the apex may require a full repair.
Recognize the Signs of a Bad Enhancement
A well-applied manicure should feel smooth from the cuticle to the tip. These warning signs suggest a problem:
- The acrylic presses into or rests on the cuticle
- The cuticle line looks buried under product
- A dark gap appears between the acrylic and natural nail
- The extension rocks or shifts when you press the tip
- The surface is very thick at the cuticle and thin at the tip
- Sidewalls split while the apex stays in place
- The free edge bends sharply with normal pressure
- The enhancement separates within a few days
- The nail plate becomes increasingly thin or painful
- The skin around the nail becomes red, swollen, or blistered
A small amount of “grow-out” is normal. As the natural nail grows, the acrylic remains fixed while the attachment point moves. It isn’t automatically a lifting problem.
Don’t fill the gap just because the nail plate has grown.
If lifting begins at the cuticle, along the sidewall, or through the center, correct the cause. Continuous filling over trapped moisture can make the problem worse.
Troubleshooting Acrylic Application Problems
The acrylic is too runny
Possible causes:
- Too much liquid
- A wet brush
- Moisture on the nail plate
- An incorrect powder-to-liquid ratio
- A system used with a different liquid
What to do:
- Don’t spread a runny bead over the nail.
- Remove it while it’s still workable.
- Clean and dry the nail plate.
- Use a smaller, measured bead.
- Check the mixing ratio against the manufacturer’s directions.
The bead is crumbly
Possible causes:
- Too little liquid
- Polymer powder that has been contaminated
- Old or moisture-exposed powder
- A product used outside its intended system
What to do:
- Use the correct liquid and a clean, dry brush.
- Mix the material longer in a clean palette.
- Check the powder’s condition.
- Replace product that has absorbed moisture or been spilled into.
The acrylic never hardens
Possible causes:
- Excess liquid
- Moisture contamination
- A mismatch between acrylic products
- A layer that is too thick
- A light-cured product placed too far from the lamp
- A missed or incomplete lamp cycle
What to do:
- Don’t repeatedly add liquid.
- Check that the products belong to the same system.
- For traditional acrylic, stop using a mix that remains soft after the expected set period.
- For gel-acrylic, confirm compatibility, placement, layer thickness, and cure time with the manufacturer.
If the product remains soft and smells unusually strong or different from normal, move it away from your skin, ventilate the area, and contact the manufacturer for product-specific advice.
The surface is rough or grainy
Possible causes:
- An undissolved powder pocket
- A dry bead
- A dirty brush
- Too much product on the brush
- Excessive filing pressure
- Under-mixing
What to do:
- Mix a fresh bead.
- Wipe the brush between uses.
- Use a denser bead with controlled liquid.
- Smooth the bead before it fully hardens.
- Refine the finished surface gently.
The manicure lifts soon after finishing
Possible causes:
- Oil, lotion, or moisture on the natural plate
- Too little prep
- A cuticle zone that’s too thick
- Product touching skin
- Excessive filing
- A weak or damaged natural nail
- Thick, rigid refinishing layers
- Water exposure before adhesion
- Poor compatibility between the acrylic and top coat
What to do:
- Remove the lifting material rather than covering it.
- Clean the natural plate thoroughly.
- Reapply the appropriate dehydrator or primer.
- Rebuild the cuticle zone thin and clean.
- Use a compatible base and top coat.
- Reduce impact and repeated wet work.
The enhancement bends like a soft tip
Possible causes:
- Too little apex support
- Excess length relative to thickness
- A very thin free edge
- A weak natural nail
- A form that creates an unsupported curve
What to do:
- Choose a shorter length while rebuilding.
- Add a controlled apex through the center.
- Strengthen the structure without flooding the cuticle.
- Avoid an extremely thin, pointy tip.
The free edge breaks
Possible causes:
- Excessive length
- A sharp stiletto shape
- Weak sidewalls
- Dropping a heavy object onto the tip
- Continuous pressure from a tool or keyboard
- An uneven underside
What to do:
- Trim the damaged area.
- Rebuild support at the apex and sidewalls.
- Round or shorten the tip if necessary.
- Protect it with gloves during heavy work.
Acrylic gets on the skin
Possible causes:
- A too-wet bead
- Rushing the cuticle area
- A loose brush
- A form that sits too close to the skin
- Moving the finger while the acrylic is wet
What to do:
- Don’t press the product farther into the skin.
- Wipe or lift away accessible product while it’s still workable.
- Wash the skin with soap and running water.
- Stop the application and let the skin recover.
- Seek medical advice if irritation or blistering develops.
Don’t use acetone, paint thinner, or household solvents on irritated skin to “clean up” the spill.
The brush hardens in the bristles
Possible causes:
- Leaving the brush in the powder
- Using too much liquid
- Failing to wipe the brush
- Storing the brush in a wet container
- Using a brush made for a different, incompatible product
What to do:
- Don’t dig hardened material out of the bristles while the brush is still in use.
- Use a clean brush and treat the old one according to the manufacturer’s guidance.
- Wipe the brush after every nail.
- Keep the cap and neck of the liquid bottle clean.
Remove Acrylic Nails Safely
The removal method depends on the amount of product, the system used, and whether gel or traditional acrylic is present.
Soak-off removal
Soak-off may work for a relatively thin traditional acrylic enhancement, but the product and nail must tolerate the solvent. Follow the removal directions for the exact system.
- Remove polish or gel if present.
- File the top surface so the remover can reach the acrylic.
- Place cotton saturated with the specified remover over the nail, without dripping.
- Wrap with foil or use a proper removal wrap.
- Wait for the manufacturer’s recommended time.
- Slide off softened material with a wooden tool or gloved hand.
- Repeat only as directed.
- Wash and dry your hands afterward.
Keep the cotton and remover away from the cuticle. Don’t leave a soaking wrap on for hours if the product causes burning or irritation.
Filing removal
Thick, reinforced, or resistant enhancements may need filing or an electric file. This removes material mechanically and can expose the natural plate to damage if done aggressively.
Work in short, light passes, keep the nail supported, and stop when the enhancement is at the correct level. Don’t use a large file in a fast back-and-forth motion.
Gel and gel-acrylic removal
Some cured systems require a compatible gel remover or an e-file. File through the cured coating carefully, then soak the residue only as directed.
Avoid scraping product aggressively with a metal tool. If you don’t know which system you’re dealing with, start with a small test area and contact a qualified nail professional when the removal is uncertain.
If the natural nail is very thin, painful, split, or bleeding, stop. Give the plate time to recover rather than attacking the remaining material. A care guide for post-acrylic nail damage can help you plan a gentle recovery, but persistent pain or infection needs professional medical or podiatric care.
Common Mistakes That Lead to Poor Results
Applying too much product
More acrylic doesn’t automatically mean more strength. A bulky enhancement can lift at the cuticle, catch on clothing, and break under pressure. The cuticle area should be thin and clean, while the apex supplies controlled structure.
Working with a very wet brush
A dripping brush makes the cuticle line unpredictable. It can force liquid under the skin and leave the acrylic prone to long-set or uneven curing. Tap off the excess each time.
Pressing down on the bead
Pressure is not the same as control. Pushing can create deep ridges, flat spots, and excess pressure against the natural plate. Use light pats and clean brush strokes.
Skipping the natural-nail prep
You can’t create reliable adhesion by pressing acrylic onto a soft, oily, or unshiny plate. The prep step is not optional unless a specific system explicitly uses a different bonding method.
Covering old lifting
Lifting traps moisture and creates a weak entry point for more product. Remove the loose material and inspect the area before rebuilding it.
Using incompatible products
A traditional base coat, gel base, no-light top coat, and ordinary color polish don’t necessarily belong on the same system. Follow the directions for each product and confirm that the curing or drying method matches.
Filing a soft free edge
A fresh acrylic tip can chip or flex if you file it before it firms. Wait for the correct set or cure stage, support the finger, and use light passes.
Removing too much natural nail
The enhancement needs a stable foundation, but the nail plate doesn’t need to be made paper-thin. Deep filing can make the finished manicure weak and painful.
Follow a Reliable Workflow
A repeatable process helps you spot problems early.
| Stage | Main goal | Quick quality check |
|---|---|---|
| Setup | Keep tools and products separated, ventilated, and ready | No open spills or mixed-up systems |
| Nail prep | Remove oil, dust, and loose cuticle | The plate is clean, dry, and shaped |
| Form placement | Support the intended extension | The form is centered and stable |
| Bead preparation | Make a dense, controllable bead | The bead holds together without crumbling or running |
| Cuticle zone | Keep a thin, clean margin | No acrylic is touching the living cuticle |
| Apex | Add support through the center | The profile is strong but not bulky |
| Sidewalls and tip | Build a continuous extension | No gaps, ledges, or weak spots |
| Set or cure | Harden the acrylic correctly | The enhancement is firm before refinement |
| Filing | Shape and smooth the surface | The sidewalls and underside are even |
| Finish | Protect and decorate the nail | Color and top coat are compatible and fully hardened |
| Aftercare | Support the surrounding skin and manicure | Cuticle oil is applied sparingly and hands stay dry |
A Note on Different Kit Generations
Not every product labeled “acrylic” is chemically the same. Traditional systems often use a powder and liquid that form a flexible, shapeable bead. Gel-acrylic uses a resin that must be light-cured.
Powder-and-paste systems may have a different working time and thickness.
A kit can also be incomplete. Check for:
- A brush that fits the liquid container
- Forms sized for the nail shape
- A compatible primer and dehydrator
- A base and top coat suited to the chosen system
- A lamp if the system requires one
- A file, buffer, and cuticle tools
If you’re using products from different brands, confirm compatibility with each manufacturer. Don’t assume that all clear powders, liquids, primers, and base coats can be mixed.
Some beginner kits advertise everything needed for a full set, while others include only a starter selection. A more complete kit may still not be right for you. The best kit is the one that gives you a consistent, compatible system and enough control to avoid skin contact and uneven application.
Safety and Comfort During Every Session
Take short breaks if you’re working on all ten nails in one sitting. Fatigue leads to heavier pressure, wider beads, and less accurate cleanup. Better to finish four nails correctly than ten quickly.
Stop and reassess if you notice:
- Burning or stinging
- Persistent itching
- Redness or swelling
- Blisters
- Increasing pain
- A nail plate that feels unusually weak
- Product on the skin that you can’t remove safely
- A reaction to a product you’ve used before
Repeated exposure can make sensitivity more likely, and a nail allergy can persist even after you stop using the product. Don’t test a suspected irritant on a small area to see if you “can tolerate” it.
If you develop a reaction, remove any accessible product, wash the skin, and stop using the implicated products. Medical attention may be needed for severe swelling, breathing difficulty, blistering, or symptoms involving the eyes or face.
Common Questions About Using an Acrylic Kit
Can I use an acrylic nail kit without forms?
Yes, if the system specifically supports a formless application and your natural nails have enough growth and strength. A formless application is usually best for a modest enhancement. It’s not the safest or most reliable way to add substantial length, especially for a beginner.
A weak or very short natural nail may need a form or professional correction.
Do I need an LED lamp to use every acrylic kit?
No. Traditional liquid-and-powder acrylic normally hardens through a chemical reaction and doesn’t need a curing lamp. Gel-acrylic, gel base, gel color, and gel top coats do require a compatible lamp.
Read the product instructions rather than deciding from the appearance of the bottle.
What is the correct powder-to-liquid ratio for acrylic?
The correct ratio depends on the exact acrylic system. Some traditional systems use roughly 2:1 or 3:1 by volume, while others use a different method. Use a measuring tool or the manufacturer’s dip-and-tap instructions.
Don’t copy a ratio from a different brand and don’t guess with a large bead.
How long should I wait before filing acrylic?
Wait until the acrylic has reached the firmness specified by its manufacturer. Traditional acrylic should be structurally set, not soft or shifting. Gel-acrylic must be fully cured under the correct lamp.
Filing too soon can drag the material, distort the free edge, or create a weak, uneven surface.
Why is my acrylic lifting?
The usual causes are oil or moisture on the natural plate, too much product in the cuticle zone, skin contact, poor preparation, excessive filing, a damaged natural nail, or incompatible finishing products. Lifting at the growth line can also happen when the manicure receives repeated impact or wet work. Remove the lifting section, clean the plate, and rebuild it with a thin, clean cuticle zone.
Can I use lotion before applying acrylic?
Don’t apply lotion, oil, or hand cream immediately before preparation. It can interfere with adhesion. Wash and dry your hands, remove the shine from the nail plate, and use the compatible dehydrator or prep product before acrylic.
You can moisturize the surrounding skin after the manicure is fully hardened or cured.
How do I keep the acrylic from sticking to my skin?
Control the liquid on the brush, use a small bead, and pat the product from the cuticle toward the center. Leave a thin gap at the cuticle line. Don’t press the acrylic into the skin or drag a wet brush over the cuticle.
If product does contact the skin, stop and wash the area rather than trying to seal it underneath.
How long should a well-applied acrylic manicure last?
How long it lasts depends on growth, nail health, design thickness, and daily exposure. A well-prepared, balanced enhancement can last several weeks, but the natural nail grows out gradually. Impact, water, lifting, and nail damage can shorten that time.
Fill only gaps that need rebuilding; don’t apply a new thick layer over the entire manicure each time.
Can I paint over freshly applied acrylic?
Wait until traditional acrylic is fully set, or cure all light-cured products with the correct lamp. Traditional air-dry color and gel products have different drying requirements. Applying another layer over a dentable or tacky surface can damage the finish and make it peel.
Is it safe to soak acrylic nails in acetone?
Only use a solvent as directed for the exact system, and don’t soak the skin. Keep the liquid away from the cuticle, use ventilation, and follow the product’s safety data sheet. If you have sensitive skin, damaged nails, diabetes, circulation concerns, or an allergy to solvents, ask a medical or nail professional for safer removal guidance.
Build a Clean, Durable Acrylic Finish
The best acrylic manicure comes from consistency, not force. Keep the product system matched, use a measured bead, respect the cuticle margin, and build enough support through the apex without creating a bulky edge. A firm enhancement can be shaped cleanly, finished with compatible products, and maintained with gloves and careful cuticle care.

If you’re new to the technique, practice on one nail, check the set or cure, and refine your bead before doing a full set. That small test step can prevent the most common problems: lifting, rough surfaces, skin irritation, weak tips, and a manicure that doesn’t last.
Amazon and the Amazon logo are trademarks of Amazon.com, Inc, or its affiliates.
Author


Similar Posts