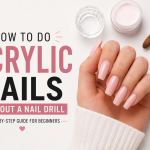
How to Use Acrylic Powder Nails: Step-by-Step Guide
Traditional nail acrylic gives you control over length, shape, and strength, but the product only works when its parts are used correctly. The rule I would give every beginner is simple: use a matched powder-and-liquid system, prepare the nail thoroughly, and apply small beads rather than trying to cover the nail with one thick layer.
You’ll need a nail form unless you’re reinforcing an existing nail or applying a short overlay. The powder doesn’t harden by itself. It combines with a compatible liquid monomer, spreads into a workable bead, and sets at room temperature.
Most traditional acrylic systems don’t need a UV or LED lamp.
How to Use Acrylic Powder Nails
What you need
- Traditional nail acrylic powder
- Its compatible liquid monomer
- A nail form
- An acrylic brush and palette
- A nail file and optional electric file
- Nail dehydrator and primer, if required by the system
- A compatible base and top coat
- Clean wipes, gloves, and good ventilation
The basic process
First, remove old product, shorten the nail, gently move back the cuticle, and lightly buff the natural nail.
Next, fit the form, cleanse the nail, and apply the system’s prep products.
Then, form small beads of acrylic and press them onto the nail while staying slightly away from the cuticle and skin.
Allow each bead to set, refine the shape, and finish with polish or a compatible top coat.
The main safety rule
Keep liquid monomer off your skin and don’t use it to soak the entire nail. If it starts to burn, stop immediately, remove the acrylic with the brush, and rinse the finger with plenty of water.
What Is Acrylic Powder and How Does It Work?
Traditional nail acrylic is a two-part system:
- Acrylic powder is a polymer resin in powder form.
- Liquid monomer is a liquid that activates the powder.
The brush picks up liquid monomer, touches the powder, and carries a small bead of the mixture to the nail. The acrylic then hardens through a chemical setting process as the liquid evaporates.
The powder cannot harden by itself. Water, nail glue, regular polish, and air alone won’t turn traditional acrylic powder into a durable set.
A well-mixed bead should look evenly glossy before placement. It shouldn’t look dry, chalky, stringy, or completely runny.
The nail systems you don’t want to mix
Several nail products look similar but behave very differently.
| Product | What activates it? | How does it set? | Can you brush it like traditional acrylic? |
|---|---|---|---|
| Traditional acrylic powder | Liquid monomer | Air sets through polymerization | Yes, if powder and liquid are compatible |
| Gel acrylic or gel powder | Gel liquid | Usually requires a compatible UV or LED lamp | No |
| Dip powder | Dipping solution or adhesive activator | Sets on the nail after dipping | No |
| Press-on nails | Nail glue or adhesive tabs | Sets through pressure and adhesive | No |
| Water-based nail powder | Water-based liquid, depending on the product | Follows that specific system | Not unless the maker approves it |
Words such as acrylic, gel acrylic, and dip powder are used loosely in stores and online. Check the manufacturer’s instructions rather than assuming every powder works with every liquid.
If a bottle says “acrylic powder” but doesn’t identify a matching liquid, ask the seller for the exact system. Don’t substitute gel base, dip activator, nail glue, or plain water.
Choose the Right Type of Acrylic Application
Not every nail needs a full extension. Using the right method prevents you from building more product than the nail can support.
| Method | Best suited for | What it should accomplish | Main caution |
|---|---|---|---|
| Full set with forms | Healthy nails with enough growth for an extension | Adds controlled length and strength | Length must have proper support |
| Acrylic overlay | Short, healthy nails that need added strength | Reinforces the natural nail without major length | Don’t hide peeling, splitting, or infection |
| Refill | An existing, healthy acrylic set with a growing gap | Replaces lost growth and strengthens the stress zone | Don’t pile product onto a lifting seam |
| No-form application | Very short but healthy nails | Adds a small amount of structure | Less predictable for a first application |
| Local repair | A small chip or break in an otherwise sound set | Restores missing product | Deep cracks may require a full rebuild |
A full set is the most common place to start because a form gives you a guide for the free edge. An overlay is a better choice when the natural nail is short and you don’t want significant length.
I wouldn’t use a thick overlay to conceal a split, separated nail, a fungal-looking nail, or a lifting infection. That only hides the problem and can make it harder to monitor.
If you’re still deciding which method you need, this practical home routine provides a useful visual overview. The detailed instructions below explain the product steps and the reasons behind them.
What Supplies Do You Need?
A beginner doesn’t need a large collection of tools. A matched system and a few essentials matter more than an elaborate setup.
| Supply | Why it matters | What to look for |
|---|---|---|
| Acrylic powder | Forms the durable structure | A reputable system with clear mixing directions |
| Liquid monomer | Activates and carries the powder | The exact liquid approved for the powder |
| Acrylic brush | Picks up and shapes beads | A quality size 2 or size 4 brush for most nails |
| Palette | Gives you a wet mixing area | A smooth acrylic palette that’s easy to clean |
| Nail forms | Guide the extension | A full guide or form-fitting system for the shape |
| Dehydrator | Removes oil and moisture from the nail plate | A product compatible with the acrylic system |
| Primer | Improves adhesion on the prepared nail | A thin, non-flooding primer for the selected system |
| Base coat | Creates the proper foundation | A base specified by the acrylic manufacturer |
| Top coat | Protects color and seals the surface | Nail-polish topcoat or fully compatible cured gel |
| Files | Shape and smooth the set | 180-grit for shaping, 240 to 320 grit for refining |
| Clean wipes | Remove dust, oil, and sticky residue | Lint-free wipes safe for nails |
| Cuticle oil | Condition the skin after set | An oil applied after polish and top coat are dry |
Optional tools include an electric file, a dust-extraction system, disposable gloves, a hand cushion, and clean disposable forms or form guides.
A starter bundle can be convenient, but check the contents before ordering. Some “acrylic kits” include weak files, poorly fitting forms, or unrelated products. This matched starter system explains what a useful kit should contain before you begin.
Why compatibility matters
Acrylic powders and monomers are formulated around specific ratios, bead behavior, and setting times. A liquid that looks suitable may produce a bead that stays sticky or becomes brittle.
Use the manufacturer’s system when possible. At minimum:
- Check the powder and liquid pairing instructions.
- Follow the recommended bead size.
- Allow the stated drying time.
- Don’t substitute one brand’s top coat or primer without checking compatibility.
A label that says 100% acrylic powder usually describes the powder component. It doesn’t mean the powder is ready to brush onto a nail by itself.
Set Up a Safe Workspace
Nail monomer can irritate skin, create fumes, and may be flammable. A safe setup protects you before you open the bottle.
Work with ventilation
Choose a well-ventilated room. Open a window or use local exhaust ventilation so fumes don’t collect around your face.
A fan can help move air, but don’t point it directly at nail dust because that can spread particles. Keep the fan directed toward an open window or exhaust area instead.
Read the product’s safety data sheet if you have access to it. Follow the manufacturer’s directions for storage, ventilation, cleanup, and accidental contact.
The FDA explains that most cosmetic products aren’t subject to premarket approval and should be used according to their labeling in its cosmetic product and ingredient guidance. That’s another reason to use the exact system sold for that product rather than mixing leftovers.
Keep the liquid away from heat and flame
Keep the monomer bottle away from:
- Cigarettes and vaping devices
- Open flames
- Candles
- Heating tools
- Hot electrical equipment
- Food-preparation areas
Store the bottle tightly closed. Don’t leave it open while you shape your nails.
Prevent skin contact
A small bead on the brush is normal. Soaking your finger in monomer is not.
Minimize exposure by:
- Keeping the bottle open for only a short time.
- Wiping excess liquid from the brush.
- Using the smallest workable bead.
- Staying precise at the cuticle line.
- Replacing contaminated gloves.
- Not touching the skin with the product.
If liquid monomer reaches the skin, wipe or rinse it immediately with plenty of water and soap. Remove contaminated clothing or jewelry if needed. Don’t apply another solvent to “neutralize” it.
If burning continues, the skin blisters, significant swelling develops, or breathing becomes difficult, seek appropriate medical help.
Control filing dust
Fine nail dust can irritate the nose, throat, and lungs. File slowly in a ventilated space and use a clean dust-extraction system when possible.
Wear a well-fitting particulate respirator if your work setting requires one, but don’t treat a basic dust mask as a substitute for ventilation. Don’t file while breathing directly over the dust cloud.
Use clean tools
For personal use, clean and disinfect implements according to their manufacturer’s directions. Don’t share files, brushes, or nippers while someone has an open sore, infection, or irritated cuticle.
Don’t apply acrylic over:
- An open wound
- A freshly torn cuticle
- Painful swelling
- Pus
- Spreading redness
- A nail with a strong odor or green, brown, or black discoloration
Those signs need proper diagnosis rather than a cosmetic coating.
Prepare the Natural Nail
Good preparation creates a clean, slightly rough surface and helps the new acrylic bond to the natural nail.
1. Remove old polish and product
Remove polish, gel, glue, or old acrylic according to its own removal method. Old lifting product must come off; don’t apply new acrylic over it.
If the nail plate feels oily after using remover, cleanse it with the acrylic system’s recommended cleanser. Don’t deliberately wipe the bare nail with acetone to “prepare” it because that can leave the plate excessively dry.
2. Shorten the nail
Trim the natural nail straight across, then round the corners lightly. If the nail is very long, choose the final length before adding acrylic.
A long extension increases leverage, especially at the stress zone. You don’t need dramatic length for acrylic to add strength.
3. Soften the cuticle if needed
A brief warm-water soak can make a dry cuticle easier to move back. Dry the nail completely before applying products.
Don’t soak the nail in oil, conditioner, cuticle remover, or monomer. Softened cuticle shouldn’t be allowed to remain on the nail plate because it can interfere with adhesion.
4. Move back the cuticle gently
Use a rounded cuticle pusher with light pressure. Push only the dead cuticle that lifts away from the nail.
Don’t scrape living tissue, dig beneath the cuticle, or use a sharp object. Avoid aggressive nipping. A small hangnail or torn cuticle can become painful and infected.
If you prefer not to use a drill, filing-free preparation is entirely realistic. A traditional file, pusher, and careful hand position can produce a clean result.
5. Lightly buff the nail plate
Use a fine file or buffer to remove shine and natural oil from the surface. Focus on the area where the acrylic will sit.
You want a lightly prepared surface, not deep grooves. Don’t thin the nail or create a rough edge that catches the form.
File over the sidewalls and around the cuticle with a light hand. Keep the nail plate and surrounding skin intact.
6. Fit the form
Fit the form before applying wet products. It must sit directly under the natural free edge and follow the finger’s curve.
7. Dehydrate and prime if the system calls for it
Apply a thin coat of dehydrator to the prepared nail plate. Let it air-dry as directed.
If the system uses a primer, apply a thin layer after the dehydrator. Flooding the nail or carrying primer onto the skin can contribute to irritation and lifting.
Not every traditional acrylic system requires both a dehydrator and primer. Follow the manufacturer’s order and don’t assume more product is better.
Your nail should feel clean, dry, and slightly prepared, not sticky, wet, or artificially rough.
Fit the Nail Form Correctly
A well-fitted form controls the extension and reduces the chance of a crooked or weak set.
- Select a form that matches the width and curve of the natural nail.
- Roll or curve the form to fit the finger from underneath.
- Place it directly under the free edge.
- Center it from sidewall to sidewall.
- Make sure it doesn’t pinch the fingertip.
- Extend the form a little beyond the intended nail length.
- Press it gently into place before your fingers become wet.
The form shouldn’t pull the fingertip downward. If it does, reshape it before you begin.
Thumbs often need a customized form because their natural curve and sidewalls differ from other fingers. Don’t force a narrow finger form onto a thumb and expect the same result.
Mix a Proper Acrylic Bead
Bead control is the most important skill in traditional acrylic application. You’re aiming for a smooth, glossy dome near the brush tip.
Use a clean brush
A brush loaded with old acrylic or oil won’t pick up powder correctly. Keep your application brush clean, and use a separate dry brush for cleaning and dust control.
Pick up liquid first
Most systems use this order:
- Dip the brush into the liquid monomer.
- Remove excess liquid against the edge of the bottle or palette.
- Dip the brush into the acrylic powder.
- Hold the brush steady as the powder draws into the liquid.
- Lift the brush when the bead has the texture recommended by the manufacturer.
Don’t scrape the brush along the powder container. This can force liquid into the bottle, clump the powder, and create contamination.
Judge the bead by its consistency
| What the bead looks like | What it may mean | What to do |
|---|---|---|
| Smooth, glossy, rounded dome | Usually correct for a many acrylic systems | Apply it before it loses shape |
| Very shiny and spreading like liquid | Too much liquid for the chosen bead size | Use less liquid or more powder next time |
| Dull, chalky, crumbly | Too much powder or not enough liquid | Clean the brush and make a smaller wetter bead |
| Stringy or sticky | Liquid-to-powder ratio is wrong, or the product may be cold | Follow the system’s timing and check product condition |
| Thin, flat, and hard to lift | Too little powder | Add more powder on the brush tip |
| Flat, oily patch that leaves the brush | Liquid quality or contamination may be a problem | Stop using the liquid and check the bottle or manufacturer |
A bead can look correct in the hands but spread after placement. That usually means it was too wet, too large, or dropped from too far above the nail.
A good bead should keep its shape long enough for you to press and blend it. If the brand gives a different working time, use that time rather than a rule from another system.
Match bead size to the area
- Use the smallest bead near the cuticle.
- Use a slightly larger bead through the center.
- Use a small reinforcing bead at the free edge or sidewalls.
- Use a larger bead only when building the apex and enough bulk for the shape.
If the area requires several small beads, don’t replace them with one oversized bead. Thick layers take longer to set and are more likely to trap liquid.
Apply a Full Acrylic Set
The number of beads isn’t fixed. Two beads may work on a small nail, while three or more are useful on a wider nail or longer extension. Cover the nail evenly and build the structure rather than chasing a particular bead count.
1. Hold the finger steady
Place your free hand in a comfortable position. Your working finger should be stable without being pressed so tightly that blood flow changes.
A hand cushion can help, but you can also use a rolled towel or your other hand. Keep your wrist supported.
2. Place the first bead near the cuticle
Pick up a small bead and bring it close to the nail rather than dropping it from above.
Leave a small, even gap between the acrylic and the cuticle line. The gap helps the acrylic release cleanly and reduces cuticle irritation.
Press the center of the bead into place with the brush. Pat the product outward toward the sidewalls and free edge. Don’t smear it with the side of the brush.
3. Build toward the tip
Pull some of the acrylic toward the free edge, but leave enough open space to add structure. If you cover the full tip too soon, the extension can become heavy.
Keep the cuticle area thin. A thick ridge at the base makes the nail bulky and can encourage lifting.
4. Add a center bead
Place a medium bead through the middle of the nail, overlapping the first bead slightly. This layer should bring the central area to a consistent thickness.
The middle of the nail is where the apex belongs. The apex is the highest point of the extension and should sit closer to the middle or slightly behind center, not directly at the cuticle.
In side view, the nail should slope gently from the apex toward the free edge. A completely flat top puts stress across the whole nail rather than directing it through the center.
5. Refine the sidewalls
Use light patting or downward strokes to bring the acrylic toward the sidewalls. Don’t push the product into the skin.
The sidewalls should have a gentle downward curve. A C-curve supports the nail’s shape and strength. Pressing the acrylic flat with a broad brush can create a weak, thin-looking set even when it appears smooth.
6. Add a small bead if the area is weak
Look for thin spots, transparent patches, or areas that don’t connect with the previous bead. Add a small bead while the underlying acrylic is still workable if possible.
Avoid adding a large wet bead over a nearly set layer because the layers may set at different rates.
7. Create a supported free edge
If you’re extending the nail, place a small bead along the tip and blend it into the main structure. Support the free edge so it doesn’t become thin and fragile.
The underside of the extension should have a smooth curve. Don’t create a sharp corner where the natural nail meets the form.
8. Use a second layer only when needed
More product isn’t automatically better. A thick layer can look rough, take too long to set, and create extra stress.
A well-shaped overlay should be even and lightly translucent in some areas only because of the viewing angle, not because large sections are paper-thin.
9. Pause if the acrylic spreads
If the bead is running toward the cuticle or sidewall, don’t chase it with dry brush. That can pull product into the skin and make the edge uneven.
Let the acrylic set, then fill the area with a smaller, more controlled bead.
10. Wait for each nail to set
Keep the finger still while the acrylic sets. Touching it early can move the product, flatten the apex, or create a distorted shape.
Traditional acrylic usually hardens at room temperature in a few minutes, but the exact time depends on the system and environment. Follow the product’s directions and don’t judge it by touch alone.
If the product remains sticky, tacky, or soft after the stated time, it hasn’t fully set.
Build the Right Shape
Shape determines both appearance and strength.
Create an even apex
The apex is not an extra bump. It’s the controlled lift that helps the extension feel strong without becoming heavy.
If the apex is too low, the nail may feel weak. If it’s too high, the set can look unnatural and place stress on the free edge.
Keep the cuticle line clean
There should be a small gap between the acrylic and the cuticle. Don’t bury the cuticle under product or let the bead pool beside it.
Follow the natural sidewall curve
Both the acrylic and natural nail should curve gently downward. Don’t create vertical walls or press the surface into a flat plate.
Watch the smile line
The smile line is the curved line you see when you look at the underside of the nail. A healthy-looking extension usually has a balanced curve that supports the apex.
A very deep curve can make the nail feel strong but bulky. A nearly straight underside may lack proper structure.
Use even thickness
The product should be thin near the cuticle, more substantial through the center, and supported at the free edge. It shouldn’t be thickest at the base.
Shape and Finish the Set
Don’t file while the acrylic feels soft. Let the nail set completely according to the product instructions.
Remove the form
Once the acrylic is set, remove the form gently. If it sticks, don’t twist it hard against the nail. Loosen the edges and work around the tip.
File the surface
Use a 180-grit file to even the surface and establish the main shape. Use a 240- to 320-grit file to smooth the top andrefine the sidewalls.
Check the set in profile view as you file. Keep the apex slightly behind center and make sure the free edge supports itself without forming a downward hook.
Smooth the free edge
Use a fine file to soften the underside and tip. Hold the file at a slight angle and make short, controlled strokes.
Don’t turn the fingertip away from you while filing the underside. Support the finger so you can see what you’re doing and maintain control.
A jagged free edge can snag clothing or cause the acrylic to crack. A thin, uneven edge can split sooner, especially when it’s long.
Remove dust and oily residue
Brush away the fine filing dust with a clean, soft brush. If the manufacturer recommends it, wipe the nail with a lint-free pad and the designated acrylic cleanser.
Don’t use an oil-heavy cuticle remover or hand lotion on the nail before polish or top coat. Oil can interfere with adhesion and leave the polish vulnerable to chipping.
Apply Color and a Compatible Top Coat
You can finish traditional acrylic with regular nail polish, a compatible gel-color system, or no color at all. The application rule stays the same: follow the instructions for the finishing products you’re actually using.
Option 1: Regular nail polish
- Apply a thin base coat if the system recommends one.
- add two thin color coats, allowing each coat to dry as directed.
- apply a compatible nail-polish top coat.
- let the polish dry before applying cuticle oil.
Traditional acrylic sets through its own chemical process. Regular polish still needs time to air-dry because its solvents must evaporate.
If you want a specific color, compare long-lasting polish options before you begin. Fewer, thinner coats usually look smoother than one thick coat.
Avoid painting directly over filing dust, cuticle oil, or uncured product.
Option 2: Gel color and gel top coat
Gel color doesn’t dry like regular polish. It cures under a UV or LED lamp, and both the color and top coat must be compatible with that lamp.
A traditional acrylic set can support a cured gel finish, but the application sequence matters. Follow one of these approaches:
- Apply a compatible gel base, cure it, apply gel color and top coat, then cure each layer.
- Follow the acrylic system’s instructions for applying regular polish over the set.
- Use a gel system designed to bond to the full acrylic surface.
Don’t apply traditional gel over unripe, sticky, or uncured acrylic. Don’t expose uncured gel to a lamp either. The acrylic underneath still needs to set on its own.
Check the lamp, gel, and top coat compatibility before you start. A lamp that cures one gel formula may not fully cure another.
Option 3: No color
A clear finish can be enough if you want the natural structure without added color. Apply the compatible base and top coat according to their labels.
Avoid leaving the entire surface bare if you’re concerned about easy snagging. A smoothing top coat can make the surface feel more even.
Finish the Cuticles
Apply a small drop of cuticle oil around the base of each nail after the polish or top coat is dry. Massage it into the skin and around the cuticle for a minute.
Don’t push oil into the cuticle gap. Let it soften the surrounding skin instead.
A thicker, dry cuticle isn’t always caused by a lack of oil. Frequently cutting or tearing it can make the area grow back rougher. Once the acrylic set is complete, switch to regular oiling and gentle cuticle care.
Let the Nails Finish Setting
Traditional acrylic should feel firm before you put your hands into water, sleep on them, or expose them to heavy impact. A dry surface can still have uncured product underneath, so avoid judging only by touch.
Allow the full set time to harden according to the manufacturer’s directions. Keep your hands:
- Away from hot water and steam
- Away from cleaning chemicals
- Out from under heavy objects
- Away from tight shoes, gloves, or pressure
- Free from picking, tapping, or peeling
There’s no need to wait for traditional acrylic under a lamp. The setting process works at room temperature. A UV or LED lamp may be needed only for a separate gel polish or gel top coat.
After a careful finish, this faster drying routine can help with regular polish, but it can’t replace the required curing time for gel.
How to Apply an Acrylic Overlay Without a Form
An overlay is useful when the natural nail needs strengthening but doesn’t need substantial length. It can also correct the structure of a damaged or weak nail.
Choose a healthy, short nail
The natural nail should be clean and intact. Acrylic can support a nail with a simple split, but it can’t safely repair a deeply separated, infected, or badly damaged nail.
Apply the formless bead
- Prep the nail and apply the system’s dehydrator and primer if directed.
- Roll a small bead onto the brush.
- press it onto the center of the nail.
- pat it toward the sidewalls.
- leave a small gap at the cuticle.
- add more small beads until the stress zone and free edge are supported.
- let each bead set before filing.
The center should have a light, controlled apex. Don’t spread the acrylic into a thick ridge at the base.
Understand the limitations
A formless overlay gives you less control over the free edge. It can work well for a short nail, but it’s less predictable for a full extension.
If the nail is very short, shaped unusually, or needs a dramatic length, a fitting form or professional application will usually produce more control.
How to Refill Growing Acrylic Nails
Traditional acrylic often grows out because the new natural nail keeps moving forward while the product remains fixed. That isn’t automatically a problem, but a loose edge should be repaired before it becomes a large gap.
Inspect the stress zone
The stress zone is the natural nail just below the cuticle. It should be slightly thicker and smoothly connected to the lift line.
A small 3/16-inch or 1/4-inch gap may be normal for many nail shapes, including longer extensions. The amount depends on growth rate and the style. Watch for movement, pressure, or color changes rather than reacting to a gap alone.
Stop if the acrylic is lifting
If the set is separating from the natural nail, find out why before filling the gap. Common causes include:
- A poorly prepared nail plate
- Oil or moisture on the nail
- A thick cuticle line
- Excess product near the cuticle
- Excessive pressure from the extension
- Slow growth after the product was applied
- Moisture getting trapped under a lifted edge
- Physical damage
Don’t pour a large bead over a lifting seam. It can trap more liquid and worsen the separation.
Remove only the loose material
If a small edge has lifted, remove it with the appropriate tool and cleanse the exposed natural nail. Don’t strip the entire set unless you intend a full rebuild.
Fill the gap
Apply a small bead of acrylic to the clean nail. Shape it to match the existing set, support the stress zone, and keep the new product close to the natural nail.
The new layer should feel continuous. If it creates a noticeable step, file it after setting.
Reinforce weak sidewalls
Add product only where the structure is thin. A common problem is a weak nail that looks fine from above but bends near the sidewall.
Support the sidewall without creating a heavy ridge. If most of the set feels weak, a partial fill may only hide the problem.
Common Problems and What They Mean
A visual defect often points to a specific part of the process. Use the clues below before changing several products at once.
| Problem | Likely causes | What to change next time |
|---|---|---|
| Powder won’t form a bead on the brush | Brush is too dry, powder container is damp, or the liquid is mismatched | Clean the brush and confirm the powder-liquid pairing |
| Bead is very runny | Too much liquid for the bead size | Use a smaller, steadier bead |
| Bead is crumbly or dry | Too much powder or insufficient working time | Use less powder and apply sooner |
| Acrylic spreads under the cuticle | Bead is too wet or placed too close to the skin | Add a cuticle gap and use a smaller bead |
| Nail looks bumpy | Beads are too large, wet, or placed after the previous layer starts setting | Place smaller beads in controlled layers |
| Small holes appear during filing | Bubbles trapped in the acrylic | Use a thinner bead and avoid trapping air |
| Top layer peels or lifts | Incompatible base, polish, or top coat; oily surface; incomplete prep | Use compatible products and cleanse the surface |
| Nail bends near the stress zone | Thin apex, insufficient support, or excessive length | Add controlled support and reduce length if needed |
| Lifting begins at the stress zone | Cuticle contact, overbuilding, poor adhesion, or heavy pressure | Remove the problem and rebuild the area correctly |
| Nail breaks close to the finger | Excessive length, weak sidewalls, or a sharp stress point | Use a curved sidewall, stronger support, and less length |
| Acrylic feels soft after the stated setting time | Too much liquid, a mixed system, or low-quality ingredients | Use smaller beads and verify product pairing and storage |
| Polish stays soft long after the set hardens | Nail surface was oily, polish was too thick, or a top coat is incompatible | Clean the nail and use thin, compatible layers |
| Set looks good but feels heavy | Product is too thick or the length is unsupported | Reduce thickness and reshape the apex |
Fix one variable at a time. Replacing the brush, powder, liquid, prep products, and top coat together makes it impossible to identify the cause.
Common Mistakes That Damage the Result
Applying too much liquid
An overly wet bead takes longer to set and may shrink or leave a porous edge. It can also run toward the skin.
Use a smaller bead instead of trying to absorb excess liquid later. The product should be controlled at the brush tip before it touches the nail.
Using a very large bead
Large beads take longer to harden and make it harder to control the cuticle line, sidewalls, and apex. Divide the nail into manageable areas.
Ignoring the cuticle line
Don’t let acrylic touch the skin around the nail. A tiny gap makes the finish cleaner and helps it release without pulling living tissue.
Changing brands midway through the bead
One monomer may mix with one powder differently from the next. If the ratio changes, the bead can shift from glossy and controllable to sticky or brittle.
Finish one consistent system before trying another.
Filing before the set is firm
Soft acrylic can pull away from the natural nail, round over, or become uneven during filing. Wait until the full bead has set.
Rushing the free edge
A thin tip is more likely to break. Build enough structure to support the length without creating a heavy hook.
Using a nail file too aggressively
Deep filing can thin the natural plate and create weak ridges. Use light, even strokes and stop if the nail becomes hot or sore.
Applying polish over filing residue
Dust and natural oils can interfere with adhesion. Brush or cleanse the nail before the base coat.
Soaking the whole finger in monomer
The nail plate can swell when it absorbs liquid. This can make the fit of a form change and may contribute to later lifting.
Use monomer only to activate small acrylic beads.
Safety Problems That Require Attention
Stop the application and don’t hide a problem if any of the following occurs.
Severe burning after monomer contact
Monomer doesn’t need to burn to cause irritation, but intense or continuing pain after rinsing is a warning sign. Keep the product away from the skin, remove contaminated jewelry, and rinse the area repeatedly with water and soap.
Seek medical care for blistering, skin damage, significant swelling, or pain that continues after the exposure has ended.
Infection signs
Common warning signs include:
- Increasing pain
- Swelling
- Redness spreading beyond the nail
- Warmth
- Pus
- Fever
- A foul odor
- Green, brown, or black nail discoloration
Don’t soak or press acrylic over an infected nail. A nail technician isn’t a substitute for medical care when infection is suspected.
Severe allergic dermatitis
Some people react to uncured acrylates used in nail products. Symptoms can include persistent itching, redness, cracking, swelling, or a rash on the fingers and sometimes the hands.
A fully set product may be less irritating, but it doesn’t guarantee that a person is allergy-free. Stop using the system and obtain medical advice if a reaction develops or returns.
Wet or infected nail plate
Discoloration that appears to travel from the free edge into the nail, significant thickening, and separation from the bed can be signs of a nail problem. New acrylic can hide progression and make monitoring harder.
Unsafe or improvised work areas
Don’t use nail products near food, open drink containers, or a child. Keep liquids and powder away from the eyes, mouth, and other surfaces. Clean spills immediately according to the product directions.
How to Tell That You Used Acrylic Powder Correctly
A good set has more than a pretty surface.
Look for these signs:
- The acrylic bonds smoothly to the prepared nail.
- The cuticle line remains narrow and clean.
- The nail has a balanced apex.
- The sidewalls curve gently instead of standing straight.
- The stress zone supports the extension.
- The free edge is even and doesn’t flex excessively.
- The surface is smooth without excessive filing.
- The set feels firm after the full setting time.
- Lifting doesn’t begin within days or weeks.
The finished nail can still be slightly translucent under strong light. That alone doesn’t mean the application failed. Weakness, visible bubbles, deep holes, a soft surface, or a separated edge are more useful warning signs.
Common Myths About Acrylic Powder
“Acrylic powder hardens in a lamp.”
Traditional powder-and-monomer acrylic normally sets at room temperature. It doesn’t require a lamp. A separate gel polish or top coat may require UV or LED curing.
“Any clear liquid works.”
No. The liquid must be compatible with the powder’s formula. Glue, dip activator, gel base, alcohol, and water are not interchangeable.
“More powder makes the nail stronger.”
Strength comes from balanced structure, not thickness. An excessive buildup can make the nail heavy and more likely to lift or break.
“It’s normal for nail prep to hurt.”
Preparation should be uncomfortable at most. A properly filed nail plate shouldn’t be painful. Scraping, digging, or filing through blood is a sign of excessive pressure or poor technique.
“Filing and cuticle work must involve a drill.”
A nail drill is optional. Files, gentle pushers, and careful hand positioning can prepare the nail without rotation.
“A thick overlay can repair any damaged nail.”
An overlay can support a weak or slightly split nail, but it can’t safely cover infection, deep separation, or a badly damaged nail plate.
“Oiling the nail plate makes acrylic adhere better.”
Oil reduces adhesion. Cuticle oil belongs on the skin around the nail, not on the prepared nail plate.
How to Maintain Traditional Acrylic Nails
Traditional acrylic doesn’t need retouching on a fixed schedule. Maintenance depends on nail growth, the style, wear, and the condition of the product.
Watch the stress zone
Check the area near the cuticle for movement, tearing, or a deep gap. A small, stable gap is normal. A raised or soft edge is a warning sign.
Keep the nail dry during long water exposure
Soaking can allow moisture to enter a lifted edge and may soften the natural plate.
For dishes, cleaning, or long periods of wet work, wear waterproof gloves. Take them off afterward and let your hands air-dry completely.
Avoid treating acrylic as an impact-resistant plate
Acrylic can provide a useful barrier, but it isn’t a substitute for construction gloves. It can still dent, crack, pop off, or transfer pressure to the natural nail.
Pay attention to pressure and location
A set that stays comfortable may have more freedom of movement than a high-pressure fingernail or shoe contact.
Keep cuticles soft
Apply cuticle oil and don’t aggressively cut living tissue. This is especially important if the set extends near the cuticle or was applied while the cuticle remained high.
Remove the set if it becomes painful
Pain, redness, swelling, separation, or a change in the natural nail means you should stop adding product. If the new nail is not moving forward with growth, a professional assessment may be more useful than another refill.
How to Repair Small Chips and Cracks
A small chip doesn’t automatically require a full removal.
1. Determine the depth
If the break is shallow, clean the area and add a small bead. If the crack extends down the sidewall or into the stress zone, remove the loose product and rebuild more broadly.
2. Create a bevel if needed
A shallow bevel around the sound edge can help a repair blend into the existing acrylic. Don’t carve a deep trench.
3. Apply a small bead
Use a bead matched to the missing area. Don’t cover the entire nail when only a small section is damaged.
4. Blend and set
Let the repair set, then file the transition smooth. If the repaired area is still weak after shaping, a nail professional may need to reinforce it.
Don’t repeatedly fill the same chip without investigating. Repeated buildup can create a bulky edge and a new stress point.
How to Remove Acrylic Nails Safely
Removal should protect the natural nail, especially if you plan to apply another set soon.
The soak-and-wrap method
For fully cured traditional acrylic:
- Remove polish, gel color, and top coat if necessary.
- Soak a cotton pad with pure acetone.
- place the pad directly on the acrylic.
- wrap the fingertip with a small strip of foil or a cloth.
- wait roughly 20 to 30 minutes, checking the nail as you go.
- lift the softened acrylic with a tool made for removal.
- repeat soaking only as needed.
A wide, flat removal file can help lift a set, but keep its pressure light. Don’t scrape deeply into the natural nail.
Pure acetone is a strong solvent. Keep it away from eyes and skin, use it with ventilation, and don’t ignite it. Don’t soak a nail with known splitting, infection, or severe irritation.
Is soaking acetone directly into the dish okay?
No. If a nail plate is open, painful, or damaged, keep the chemical away from the skin. Wrapped cotton pads also expose the entire fingertip, so move them away if the liquid reaches the cuticle or nail bed.
What about pouring monomer over the set?
Monomer can soften acrylic, but pouring a large amount over the whole nail exposes the natural plate and surrounding skin. If you use it at all, keep the quantity controlled and follow the product instructions.
Soak patiently
Repeated dry scraping, boiling water, aggressive metal tools, and forceful prying increase the chance of damaging the natural nail.
Let the removal product soften the acrylic and use controlled pressure. If the set won’t lift without force, pause and seek professional help.
What to Do Before Applying Your Next Set
Let the natural nails recover before building again. Give them time to become firm, dry, and free of pain or irritation.
During the break, keep the nails clean, avoid long soaking, and moisturize the surrounding skin without leaving heavy oil on the nail plate. A gradual post-acrylic nail recovery plan can help you distinguish temporary dryness from a damaged nail plate.
Apply a new set only when:
- The nail plate is intact
- The cuticle is healed
- The nail is not swollen or painful
- There’s no pus, spreading redness, or odor
- The surface can be cleaned and lightly buffed
- The previous removal stopped before the base coat
Practical Timing and Workspace Checklist
Before opening the monomer, gather everything you need. Once your brush touches liquid, you should be able to work without interruptions.
Before application
- The powder and liquid are a matched system.
- The bottle is tightly closed and stored safely.
- The work area is ventilated.
- Forms and files are clean.
- The natural nails are healthy.
- Cuticles are pushed back gently.
- The nail plate is lightly filed, cleansed, and dry.
- Dehydrator and primer are available if directed.
- Base and top coat are compatible.
- Cuticle oil and clean wipes are within reach.
During application
- Beads are glossy and small.
- The cuticle line remains clean.
- Each bead is placed close to the nail.
- The product isn’t dragged into the skin.
- The apex is controlled.
- The extension is supported at the free edge.
- You stop if the product spreads or burns.
After application
- The acrylic has fully hardened.
- The form is removed without force.
- The shape is filed evenly.
- The dust is removed before finishing.
- Polish or gel is applied and dried or cured as directed.
- Cuticle oil is applied only after the surface is dry.
- The hands avoid heat, water, and pressure while the set finishes setting.
Do You Need Acrylic Powder, Gel Powder, or Dip Powder?
Choose the product based on the result you want and the equipment you’re willing to use.
| Question | Traditional powder | Gel powder | Dip powder |
|---|---|---|---|
| Does it need liquid monomer? | Yes | Uses a gel liquid | No traditional monomer |
| Does it need a curing lamp? | No | Usually | No |
| How is it applied? | Wet beads placed with a brush | Gel beads applied and cured | Nail dipped into powder |
| Main skill | Bead control | Thin, even gel application | Full, even coverage and sealing |
| How long does it typically last? | Several weeks when applied well | Several weeks when applied well | Several weeks when applied well |
| Best fit for a beginner? | Manageable with careful prep and practice | Manageable if you already understand lamp curing | Manageable with strong flood coverage |
These are different systems even when all three create a durable enhancement. A tutorial for one shouldn’t be used as a formula for another.
If you like the control of painting details, traditional acrylic is a good base. You can practice line work with gel or polish once the nail itself is even.
How to Choose a Safer Application Practice
There is no risk-free nail enhancement, and no product label can guarantee that every person will react. You can still lower avoidable exposure:
- Read the ingredient and safety information.
- Use the product exactly as directed.
- Keep the liquid away from the skin.
- Don’t use a nail enhancement on an open wound.
- Don’t share implements.
- Replace a brush that’s difficult to clean.
- Keep powder and monomer containers closed.
- Use ventilation.
- Wash your hands after handling uncured product.
- Don’t apply artificial nails over an infection.
- Stop using the product if you develop a persistent reaction.
- Seek medical care for severe skin damage or infection symptoms.
A technician’s salon ventilation system may be much stronger than an open window in a home setting. Taking extra care is especially sensible if you have asthma, contact allergies, sensitive skin, or a history of reacting to beauty products.
Frequently Asked Questions
What is the first step in applying acrylic powder?
Prepare and lightly buff the natural nail, then cleanse it and apply the system’s dehydrator and primer if directed. Fit the form and test the bead before placing product.
Can I apply acrylic powder without liquid monomer?
No. Traditional nail acrylic powder requires its compatible liquid monomer. Dip powder and gel-acrylic systems use different products and follow different application methods.
Does acrylic powder need a UV or LED lamp?
Traditional powder-and-monomer acrylic normally sets at room temperature. A separate gel polish or gel top coat may need a compatible UV or LED lamp.
How much powder should I use?
Use only enough to make a small, controlled bead. Adding more won’t necessarily make the nail stronger. An oversized bead takes longer to set and is harder to shape.
How do I make the acrylic bead easier to place?
Clean the brush, control the liquid-to-powder ratio, and use a bead that holds its shape without spreading. Place the bead close to the nail and press it with the brush instead of dropping it from above.
Why is my acrylic nail wrinkling?
The bead may be too wet, too large, or touching the skin. A thick layer can form wrinkles as it sets. Try smaller beads, keep the cuticle line clear, and press the product into place with controlled strokes.
Can I fix lifting acrylic at home?
Only if the separation is small and there’s no infection or nail-bed damage. Remove the loose edge, cleanse the exposed nail, and fill with a small bead. Don’t bury a large lift under a thick application.
Can I apply nail polish over fully set acrylic?
Yes. Once the acrylic is firm and clean, apply compatible regular polish or a fully compatible gel system. Remove filing dust and keep oil off the nail plate before finishing.
How long should I wait before putting my hands in water?
Let the acrylic set completely and follow the manufacturer’s directions before water exposure. Even a fully set enhancement can be vulnerable at a lifting edge, so waterproof gloves remain useful for long wet tasks.
How do I keep acrylic nails from breaking?
Reduce excessive length, balance the apex, support the stress zone and free edge, and use care when gripping hard objects. Strong-looking nails still depend on proper structure.
Can cuticle oil make acrylic nails grow faster?
No. Cuticle oil can condition the skin around the nail, but it doesn’t cure an infection or make the natural nail plate grow faster. Healthy growth depends on overall health, nutrition, genetics, and avoiding nail damage.
What should I do if the nail plate splits under the acrylic?
Stop adding length and have the damage assessed. A small surface split may be supportable, but a deep split or separation needs proper care before another full set.
The Key Parts to Get Right
For a smooth traditional acrylic application, match the powder and monomer, prep a healthy nail, fit the form correctly, and place small beads. Keep the cuticle line clean, build a controlled apex, support the free edge, and allow each nail to set before filing.
Most nail problems don’t come from using too little technique. They come from rushing the bead, skipping preparation, or adding more product to solve a structural problem that needs a better shape.
Work on one or two practice nails first, take your time, and check the set from the top, front, side, and underside. Once you can control the bead and the apex, the rest becomes much easier.
Amazon and the Amazon logo are trademarks of Amazon.com, Inc, or its affiliates.
Author


Similar Posts