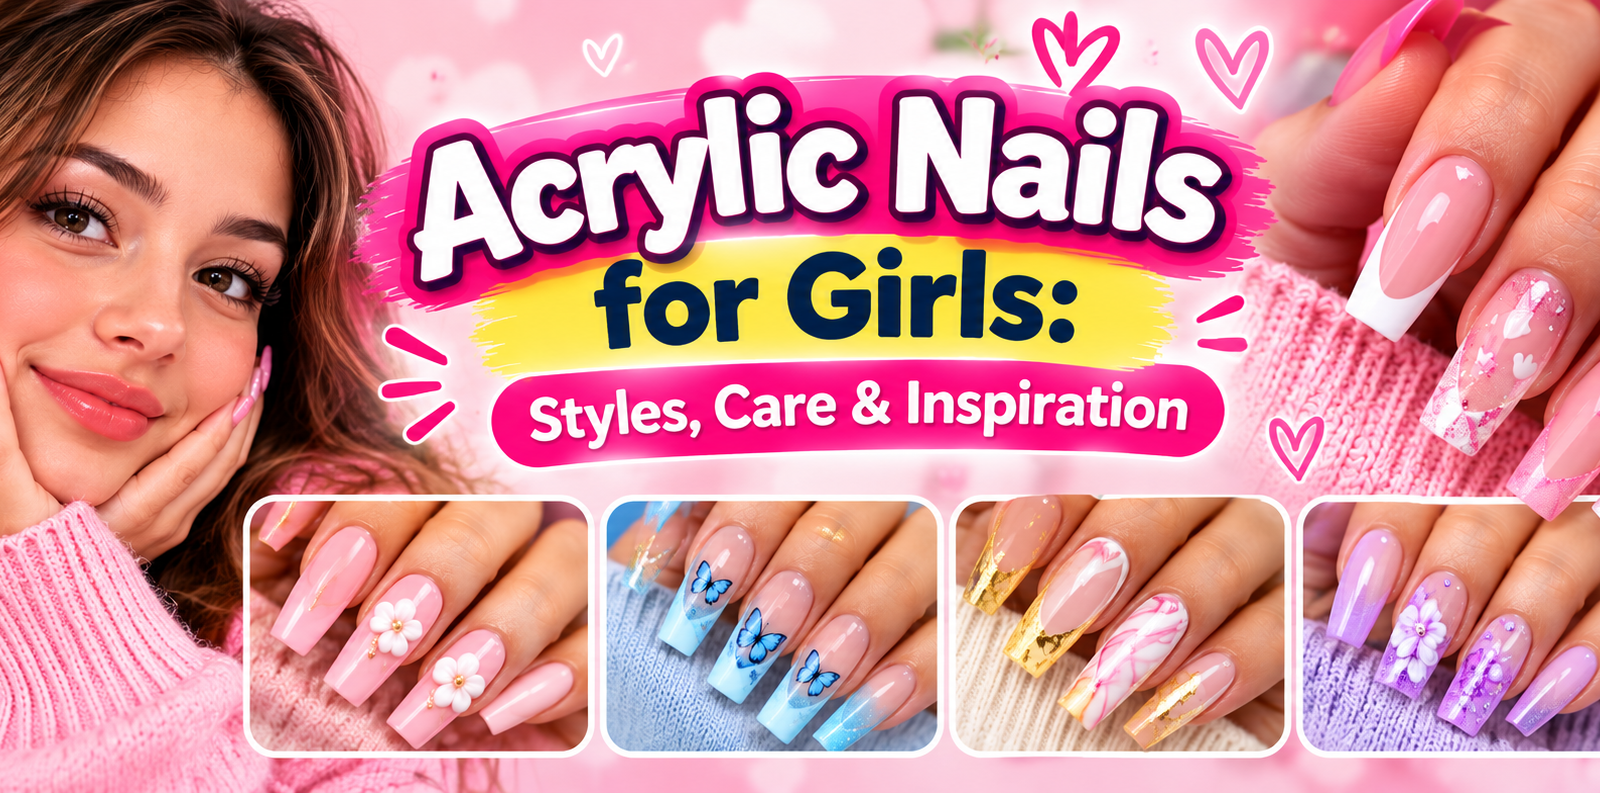
Acrylic Nails for Girls: Styles, Care & Inspiration
Acrylic nails can give short or uneven natural nails a longer, polished shape without waiting for months of growth. They’re also highly customizable, from neat everyday styles to detailed nail art.
The biggest mistake usually isn’t choosing a bold color. It’s choosing a length that’s too long, rushing the preparation, or removing the set with too much force. A well-planned acrylic set should look good while still protecting the natural nail and the surrounding skin.
This guide explains acrylic types, shapes, lengths, kits, preparation, application, maintenance, troubleshooting, and safe removal. It also includes practical choices for school, everyday wear, special events, and girls who are new to nail enhancements.
The Quick Answer
Acrylic nails are a good choice for girls who want a durable, customizable manicure that can last through several weeks with proper care. The most beginner-friendly starting point is a short or medium-length round or squoval acrylic set with a comfortable thickness and a light, everyday design.
Choosing a professional salon is usually best for a first full set, very long or sculpted nails, complex nail art, or removal of a thick set. A careful at-home application can work well, but only with the right system, ventilation, preparation tools, and a plan for maintenance.
When acrylic is applied and removed correctly, the natural nail can remain healthy. Most problems come from filing too deeply, leaving product against the cuticle, letting moisture sit under the set, or pulling the acrylic off before it releases.
What Are Acrylic Nails?
Acrylic nails are artificial enhancements made from a liquid-and-powder system. The liquid, commonly called monomer, mixes with acrylic powder. The mixture is placed on the natural nail or over a tip, then hardens in the air.
Traditional liquid-and-powder acrylic does not need a UV or LED lamp.
The hardened product adds length, strength, and a smooth surface. It can also cover chips, worn edges, or small irregularities in the natural nail.
Acrylic is not the same as gel, dip powder, or ordinary nail glue. Each uses a different adhesive or curing process, so these products shouldn’t be substituted for one another.
Common Acrylic Set Types
Acrylic enhancements serve different cosmetic and structural purposes depending on the application method. The appropriate choice depends on the desired level of coverage, coverage duration, and the natural condition of the nail, ranging from simple overlays to comprehensive sculpted sets.
| Type | What It Does | Best For |
|---|---|---|
| Acrylic overlay | Adds a thin layer of product to the natural nail without a long extension | Short nails, discreet strengthening, and a natural-looking finish |
| Full acrylic set | Uses tips, forms, or a combination of both to create an extended nail | A complete manicure with added length and shape |
| Sculpted acrylic | Builds the extension directly over a nail form | Custom shapes, dramatic length, and advanced nail art |
| Acrylic fill | Adds product to the existing structure as the natural nail grows | Maintenance between full sets |
| Acrylic repair | Replaces a damaged section of the set | Cracks, breaks, or a separated area that can still be repaired safely |
These categories are useful because not every problem calls for a complete rebuild. A small grow-out gap may need a fill, while a large fracture or badly lifted set may be safer to replace.
Why Girls Choose Acrylic
Acrylic is popular because it offers several practical benefits. It provides an immediate transformation, allowing the nails to look long and even on day one. The product offers high customization, allowing you to select the exact length, shape, color, and finish.
It is also durable, as a well-constructed set can handle normal wear with occasional fills and repairs. Moreover, acrylic allows for creative nail art, since colors, French tips, glitter, ombre designs, and decorations can be added over the surface. The material is also familiar, meaning most nail salons can provide acrylic services.
The main trade-offs are application time, maintenance, and removal. Acrylic generally lasts longer than a basic polish manicure, but it does not last forever. The natural nail also needs gradual trimming and healthy growth underneath the enhancement.
Choosing the Best Acrylic Shape and Length
The best acrylic shape is one that suits her hands, daily routine, and tolerance for longer nails. A style that looks attractive in a photograph can become uncomfortable if it catches on clothing, makes typing difficult, or encourages nail biting.
Popular Acrylic Shapes
A popular acrylic style balances personal aesthetics with daily function. The best shape for a beginner typically balances visual appeal with the ability to type, use a phone, and handle everyday tasks comfortably.
| Shape | Appearance | Best For | Beginner Consideration |
|---|---|---|---|
| Round | Soft, curved outline with a circular tip | Everyday wear, school, short natural nails | Usually the easiest shape to maintain and file |
| Squoval | Rounded square with softened corners | Neat, polished, professional-looking sets | A versatile choice for a subtle or classic manicure |
| Oval | Narrow, softly rounded shape | Feminine, elegant styles and moderate length | Needs careful balance to avoid thin or uneven sidewalls |
| Almond | Tapered shape with a softly pointed tip | Classic, dressy, and refined designs | Better once the wearer is comfortable filing a precise outline |
| Coffin or Ballerina | Tapered sides with a flat tip | Statement manicures and artistic nail designs | Requires more structure and careful control at the tip |
| Stiletto | Long, narrow, sharply pointed shape | Dramatic evening or fashion styles | High breakage risk; not ideal for beginners or hard use |
While the round and squoval styles remain the safest and most versatile options for newcomers, transitioning to a slender almond or pointed stiletto requires more precision, balance, and experience with filing.
Choosing a Safe, Manageable Length
Choosing the right length ensures the enhancements remain practical. A short acrylic set stays close to the natural nail, making it the easiest option to manage. A medium length offers noticeable extension while remaining practical for school, work, and everyday tasks.
A long set is best reserved for special events or people who are comfortable protecting and maintaining the nails. A very long set carries a higher risk of snagging, snapping, or bending.
Length alone doesn’t determine whether a set is well made. Thickness, curvature, apex placement, and support matter just as much. A long nail that is thin at the stress zone can be weaker than a shorter nail with balanced structure.
I recommend starting no longer than the point where she can comfortably type, write, use a phone, open containers, and pass objects to other people. A first set should never be so long that she has to change her grip to use her hands.
If the style grows past a comfortable length, it may need to be filed down before it catches. Knowing how to shorten an acrylic set safely can prevent a long set from becoming a problem.
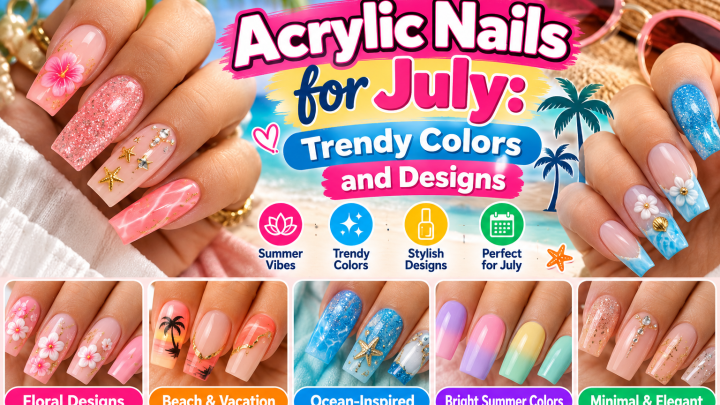
Choosing Colors for Different Skin Tones
Acrylic can carry almost any nail color, but the most flattering choice usually depends on undertone rather than gender or age. Some colors look warm and bright on one person while looking muted or ashy on another.
The color choice involves reviewing several categories. A classic nude should be chosen with attention to the undertone, as warm, cool, and neutral shades can look very different. A soft pastel is ideal for spring, school, and understated summer styles.
Bold shades make a strong statement and are best kept simple if one nail will feature nail art. A French manicure remains a timeless choice and can be created with thin white tips or colored micro-lines. Deep shades such as jewel tones, navy, burgundy, and forest green can work well year-round.
Metallic finishes add a reflective effect to the manicure, while neutral or sheer colors suit a clean, low-contrast style. Finally, a soft or bold ombre allows for a gradual color transition from the nail bed to the free edge.
If she wants polish over the acrylic, compare long-wear color formulas that are intended to remain stable over enhancement products. A palette such as shades for brown skin tones can also make it easier to find colors that create a balanced contrast.
Finish changes the entire result. Gloss creates a traditional salon look, while glitter adds sparkle without requiring a sculpted design. Matte finishes need more careful topcoat handling because fingerprints and rubbing marks show easily.
Chrome powder and textured styles can be striking, but they may need more frequent surface maintenance.
Simple Design Ideas
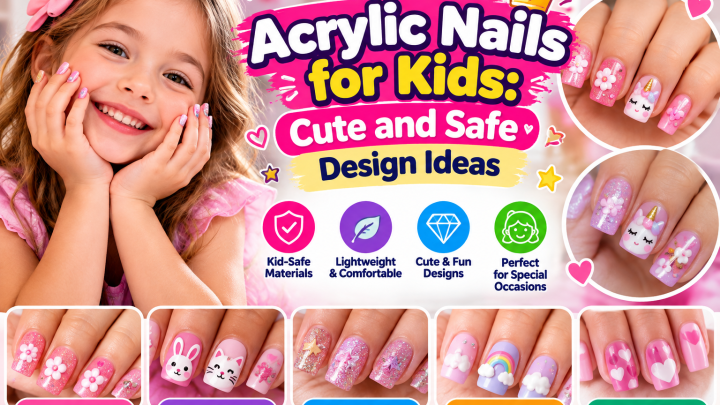
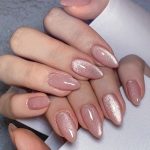
A first set doesn’t need complicated art. Easy designs include one-color acrylic, a classic French tip, or thin accent lines. A small flower, a heart, or simple dots also work well for nail art.
A glitter accent nail, a neutral nude base paired with one bright color, or a short ombre design offer excellent alternatives.
If you want the gradient effect, a blended ombré finish can make medium-length acrylic look more dimensional without adding large 3D decorations.
Long charms and raised gems can catch on clothes. They also make the set harder to clean and easier to break. If she enjoys statement nail art, keep the length controlled and use a stronger overall structure.
What to Look for in an Acrylic Kit
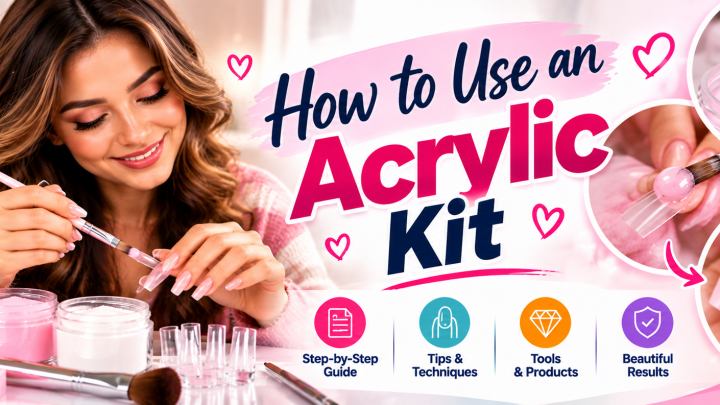
A beginner doesn’t need a huge collection of tools. She needs a compatible, complete system and a clean workspace. A compact acrylic product set can be enough for practice and basic manicures, but the exact contents should be checked before purchase.
Essential Kit Components
Building a complete acrylic manicure requires both the chemical system and the surrounding preparation and finishing tools. A functional kit must pair the liquid-and-powder system with several essential components to ensure a safe, durable, and properly finished set.
| Component | Purpose | What to Look For |
|---|---|---|
| Acrylic liquid and powder | Forms the main enhancement | Products designed to work as one system |
| Acrylic brush | Places and shapes product | Soft, clean bristles that hold their shape |
| Nail forms or tips | Supports the extension | Multiple sizes with a firm fit |
| Dehydrator | Removes moisture and oils from the nail plate | A product compatible with the chosen system |
| Primer | Improves adhesion and supports the acrylic bond | Not interchangeable with dehydrator unless the system states otherwise |
| Base coat | Protects the natural nail and supports adhesion | A thin, compatible layer |
| Top coat | Seals color and adds shine or protection | A durable finish compatible with nail polish |
| File and buffer | Shapes the set and smooths the surface | Medium-grit shaping and fine-grit smoothing files |
| Cleanser | Removes dust, oils, and residue | A product safe for the prepared nail |
| Gloves and ventilation | Protect hands and reduce vapor exposure | Chemical-resistant gloves and a well-ventilated workspace |
A complete setup relies on more than just the acrylic liquid and powder. Proper preparation, protection, and finishing products ensure that the enhancement bonds correctly and cures without damaging the natural nail.
Some kits label primer and dehydrator differently. Read the instructions rather than assuming the names mean the same thing. A bonding product cannot compensate for inadequate preparation or poor application.
Don’t Mix Random Acrylic Systems
Using a powder from one brand with a liquid from another can create inconsistent results. The product may remain too soft, become difficult to shape, or fail to bond as intended. This mixed combination can also cause excessive shrinking, create a chalky finish, or cause skin irritation if the system is not properly formulated.
A matched system also makes troubleshooting easier. If the acrylic behaves unusually, the brand, application technique, and preparation are easier to compare.
Choose Tools She’ll Actually Use
A useful starter setup includes several essential items. An absolute necessity is a small set of files, with one medium-grit file and one fine buffer. The setup should also include a dust brush, disposable cleanup supplies, a protective surface or tray, and nitrile gloves.
Additionally, the space requires adequate ventilation and access to a bright, uncluttered work area.
An electric drill is optional. Many excellent sets can be created with hand files, and working without a nail drill gives the learner more control over pressure.
Nail Glue Is Not Acrylic Monomer
Ordinary nail glue is made for attaching press-on nails, tips, or decorations. It is not a substitute for acrylic liquid, and it should not be brushed over the natural nail to “strengthen” it.
Cyanoacrylate glues can bond quickly, but they may create a hard layer, trap moisture, or cause skin irritation. They also make professional removal more difficult.
Preparing the Natural Nails
Preparation determines how well the acrylic bonds. The goal is a clean, dry, lightly shaped nail plate without removing healthy tissue.
Check the Condition of the Natural Nail
Acrylic should not be placed over a nail that is infected, badly broken, actively peeling, or separated from the nail bed. A manicure can’t repair those conditions.
Seek medical advice before nail enhancements if there is pain, swelling, pus, spreading redness, a foul odor, or a green, yellow, or markedly discolored nail. Thickened or crumbling nails may also need a diagnosis before cosmetic product is added.
Other conditions require special care. Active eczema near the cuticle can make the surrounding skin more sensitive. Nail biting or picking may damage the surface and make a set difficult to keep intact.
Onycholysis, which is the separation of the nail from its bed, requires a healthy and stable base. Anyone with diabetes, circulation problems, or slow-healing conditions should ask a healthcare professional before using enhancement products.
The health of healthy natural nails matters more than a dramatic new shape.
Remove Previous Product Gently
Old polish, gel, or acrylic must be removed before the new set goes on. A rough file should not be pressed directly against the natural nail.
The safer approach is to remove old product using a compatible method, then lightly buff the surface. The nail plate should be cleaned thoroughly, and the cuticle area should be dried. The procedure concludes with light shaping before the new application begins.
For a thick previous set, professional removal may be safer than trying to file everything away at home.
Prepare the Cuticle Area
After washing and drying the hands, gently push back the cuticle with a wooden stick or suitable pusher. Do not cut living skin or force the pusher deep into the nail folds. If excess cuticle remains, a professional can remove it safely.
Many beginners accidentally detach the cuticle seal. The narrow gap between the plate and the living skin helps protect the nail from irritation, and repeated cutting can make the area tender and more prone to lifting.
File Only What’s Necessary
Use a file to remove old shine, even the surface of the previous product, and any rough edges.
Stop before the nail starts becoming thin, flexible, or painful. A healthy nail plate should feel firm, not increasingly soft after filing.
Nails do not “breathe” in the way skin does. They don’t need ventilation spaces around them. However, they do need an intact surface and enough flexibility to move with the fingertip.
Acrylic Application Safety
Acrylic application is cosmetic work, not risk-free. The products can irritate skin, eyes, and lungs, and the liquid components are flammable. Good ventilation, hand protection, and careful handling matter.
Use a Suitable Workspace
A safe workspace should have good room ventilation and a stable, nonflammable work surface. The area must remain clear of clutter and open flames. It is also important to keep the setup away from heaters, hot tools, and sparks.
The user should avoid blowing acrylic dust toward the face and keep food and drinks out of the immediate application area.
A small fan can move air, but it doesn’t replace proper ventilation. Occupational safety guidance from NIOSH’s safety resources explains the broader importance of controlling chemical exposure and airborne contaminants.
For consumer product safety and ingredient information, FDA guidance on cosmetic nail products is a useful primary source.
Keep Skin and Product Separate
Nitrile gloves can help protect the hands during handling, but they should be changed immediately if liquid monomer touches the outside. Gloves don’t make spills harmless.
If the product contacts the skin, wash the area promptly with soap and water. Don’t use acetone, thinner, or another solvent to clean the skin. Those solvents can remove the skin’s natural oils and make irritation worse.
If the product gets into the eyes, begin rinsing with clean water and follow the product’s safety instructions or safety data sheet. Seek urgent medical guidance if the eye remains irritated or vision is affected. For swallowing, don’t induce vomiting; in the United States, contact Poison Control at 1-800-222-1222 or seek urgent advice when needed.
Keep Flammable Products Away From Flames
Acrylic liquid and acetone are highly flammable. Don’t use them near candles, cigarettes, gas flames, heaters, or sparking tools. Cap containers promptly and store them as directed on the label.
Don’t pour large amounts of leftover liquid or remover into a sink or household drain. Use local disposal guidance and the manufacturer’s instructions.
Watch for Acrylate Reactions
Acrylates can cause allergic contact dermatitis in some people. A reaction may appear hours or days after a normal-looking manicure, manifesting as intense itching, redness, swelling, burning, or tiny blisters. The condition can also present as cracking around the nail folds and discomfort that continues after the acrylic is removed.
A small patch test doesn’t guarantee that a person will react, because allergy can develop even after a product has been used repeatedly. If burning, swelling, or a rash appears, stop using the product. Remove it carefully and seek medical advice.
Facial swelling or breathing difficulty requires urgent medical attention.
Don’t Cover Damaged Skin
Acrylic shouldn’t be placed over a cut, open sore, active infection, or severely irritated cuticle. If the application causes pain, stop and remove the product rather than trapping it against the skin.
The hand should also be dry before application. Moisture trapped under acrylic can interfere with adhesion and encourage lifting or microbial growth.
How to Apply Acrylic Nails
Preparation and application are the core of the manicure, and they determine whether the resulting set is smooth, balanced, and durable. A successful application depends on a systematic process that follows the correct sequence from bare natural nail to a polished finish.
1. Wash, Dry, and Prepare the Workspace
Wash the hands with soap, dry them thoroughly, and remove rings or watches that could interfere. Place the tools within reach before starting.
Check that the powder and liquid belong to the same system. Read the manufacturer’s instructions if the cure or application method is unfamiliar.
2. Remove Old Polish or Enhancement
Remove old polish from the natural nail. If there is a previous acrylic set, remove it using the proper method instead of placing new product over a loose or thick old layer.
The natural plate should be clean and free of oil, but it shouldn’t be abraded until it is thin.
3. Shape the Nail and Move the Cuticles
Shape the free edge lightly and push back the cuticles. Use a fine file to soften rough edges, but don’t file deeply into the nail plate.
Check the skin around the nail. If there is redness, a cut, or tenderness, pause and let the area recover.
4. Remove Dust, Oil, and Moisture
Brush away filing dust, then cleanse the plate with a compatible cleanser. Avoid pushing or rubbing the product into the nail fold.
Apply dehydrator according to the system’s directions. Let each layer dry fully before moving on.
5. Apply Primer and Base Coat
Primer supports adhesion, while base coat protects the nail surface. These products should be used according to the acrylic system’s instructions.
Some systems combine these functions. Don’t assume extra product will create a better bond. Excess liquid around the cuticle can cause lifting.
6. Select and Attach the Tip or Form
Choose a tip that fits from sidewall to sidewall without a visible gap. A correctly sized tip is supported by the natural nail and doesn’t press into the center of the nail bed.
For sculpted extensions, attach a form under the free edge. The form should support the desired shape without forcing the nail upward.
Avoid pushing the tip beneath the cuticle or leaving product trapped between the tip and the natural nail.
7. Place the First Bead
A bead is a small amount of acrylic liquid and powder mixed together. The bead should be consistent in texture and size, with the ratio determined by the chosen system.
A useful bead is neither watery nor dry. If it runs across the nail, it may be too thin. If it breaks apart or feels powdery, it may need more liquid.
Place the first bead near the lower third of the nail, leaving the cuticle area clean. Press the bead into place with the brush rather than scrubbing it back and forth. Patting distributes the product while helping it bond.
One bead at a time gives the learner more control. Rushing several beads onto the nail can create uneven thickness and overflow around the sides.
8. Build the Structure
Acrylic is strongest when the stress zone has enough structure. The stress zone is the thicker area near the natural nail’s growth point. It supports the extension and helps distribute pressure.
The product should generally be thinner near the cuticle, slightly stronger through the middle, and smoothly connected to the tip. The nail must be balanced without being built into a bulky ridge.
Work from the cuticle area toward the free edge. Keep the product off the skin and leave a small, clean margin around the nail fold.
A thin, uneven apex is a common reason a set cracks. A very thick buildup can also stress the natural nail, so the goal is balance, not maximum product.
9. Extend and Shape the Nail
Continue placing beads to create the desired length. Keep the sidewalls full enough to support the structure, but don’t build a thick ridge along the entire side.
Blend each new bead into the previous one before the product sets. Use a brush stroke that places product where it is needed rather than dragging it from one area to another.
If a sticky layer remains on the surface, don’t automatically paint over it unless the product instructions call for that step. Covering an uncured or contaminated surface can cause poor adhesion, wrinkling, or lifting.
10. Refine the Surface
After the acrylic has hardened enough to file, use a moderate-grit file to shape the top, sidewalls, and tip. Use a finer file to smooth the surface.
Keep the file moving. Don’t spend several seconds in one spot. Avoid filing down to the natural nail plate.
Dust should be removed with a brush or clean cloth. Don’t blow the dust toward the face.
A soft shine is usually enough after the acrylic is shaped. Over-smoothing can make the surface look thin or create weak areas.
11. Add Color or Nail Art
Apply a thin base color, then build additional coats as needed. Allow each layer to dry before adding the next one.
French tips, blush, glitter, and ombré designs can all be applied over the acrylic. Keep the product away from the cuticle. If the design includes glue, jewels, or charms, follow the adhesive’s instructions and use the smallest amount needed.
A gradual fade is easier to create with a blended ombré technique than with a sudden block of color.
12. Seal and Finish the Nails
Apply a compatible top coat, keeping it away from the cuticle. Let the polish and top coat dry fully.
Cuticle oil can be massaged into the surrounding skin after the manicure is complete. Oil won’t repair acrylic, but it can make the skin feel more comfortable. It shouldn’t be used to soften a poorly bonded set.
Give the enhancement time to harden according to the product directions before soaking, scraping, or exposing it to heavy impact.
13. Check the Final Set
Before finishing, inspect the manicure for several structural elements. The cuticle line should be clean, and the set should be balanced from the front and side. There should be no visible gaps at the sidewalls, and the fill shouldn’t touch the skin.
The entire structure should feel firm, and the free edge should avoid being extremely thin. Finally, confirm that the polish and top coat are fully dry.
If any part is lifting or catching, the problem should be corrected before the set is finished.
Acrylic Nail Care After Application
Good aftercare keeps the enhancement stable and makes fills easier. It also protects the surrounding skin and natural nail.
During the First Day
For the first day, the wearer must avoid soaking the nails in water. The nails should be kept away from heavy impact and should not be bitten or picked. The wearer should avoid opening cans or bottles with the nail tips, and refrain from removing the set when a small gap first appears.
The acrylic should be allowed to harden according to the product directions. Thick or highly pigmented colors may feel different for a short time, but a correctly applied set should not remain soft.
During Daily Use
Wash the hands after handling cleaning products, gardening, or washing dishes. A protective barrier prevents the enhancement from sitting in water or harsh chemicals.
After handwashing, dry the fingers and pay attention to the underside of the free edge. Trapped dirt and moisture can make the manicure look dirty and create a lifting point.
Use cuticle oil on the skin around the nail. Avoid flooding the product with oil, especially near the cuticle. File rough edges instead of pulling or tearing them.
A useful routine includes several simple habits. Start by using a mild soap, and follow up by drying the hands thoroughly. Apply cuticle oil to the surrounding skin, and use a file on rough spots.
Protect the nails with waterproof gloves for wet work, and avoid biting or picking at the cuticle seal.
When to Replace the Color
Color can be changed before the acrylic is removed. Light surface scratches or a small polish chip does not always require a full set.
A color refresh may be enough when the acrylic structure remains sound. A fill is needed when the natural nail has grown away from the structure, the apex feels weak, or a crack has developed. A full replacement is required when the set has widespread lifting, extensive damage, or has become too long and thin.
Don’t pile repeated layers of polish onto the surface. Thick buildup can trap moisture and make the set look bulky.
When to Get a Fill
The need for a fill should be based on the nail’s condition, not just the calendar. Many people schedule maintenance every few weeks, but growth, application thickness, nail health, and daily wear can change the timing.
A fill is usually due when a visible gap appears between the natural nail and the acrylic. It is also indicated if the nail feels flexible, the apex has thinned, or a sidewall looks uneven. A scheduled fill is necessary when the color has worn down to the grow-out area, or a small crack has formed in the stress zone.
A small gap left alone can allow water and debris to collect underneath. A crack that already travels through the structure may need more than a quick fill.
Acrylic Fill and Repair Guide
A fill replaces lost or weakened product while keeping the existing set. It’s not the same as applying an entirely new manicure.
What a Normal Fill Includes
A normal fill typically includes a review of the set and the removal of loose or lifted product. The technician must clean the surface, check the tip or form support, and rebalance the sidewalls. The process continues by adding acrylic to the new growth area and restoring the stress zone.
The new product is blended into the old acrylic, and the surface is filed and smoothed. Once the base color or design is refreshed, the manicure is completed with a top coat.
Don’t add a huge bead simply because the surface looks thin. A fill should restore the intended structure, not make the set dramatically thicker.
Repairing a Small Chip
A tiny chip in the surface may be manageable at home. Clean the area, add a small bead where the product is missing, and blend it into the existing acrylic. Let it harden, file it smooth, and apply a fresh top coat.
The repair should match the existing thickness. If the chip is near the stress zone or tip, the repair may need to be built in layers.
Repairing a Crack
A crack can mean the set is still sound, or it can mean the structure has separated. If the crack is short and the acrylic feels firm, a professional may be able to reinforce it.
Don’t simply place household glue over a crack. Glue can make the surface look repaired while leaving the acrylic underneath weak. It may also make later removal harder.
A large crack, a split near the stress zone, or a nail that flexes with every movement is usually a sign to stop wearing the set and have it professionally assessed.
Dealing With Lifting
A small lift at the edge may sometimes be cleaned and secured, but persistent lifting should not be ignored.
Lifting can occur when cuticle oil, moisture, or excess product is trapped underneath. Other causes include filing too close to the natural plate, failing to support the sidewall, or allowing the nail to grow too far from the structure.
A large lift allows dirt and moisture beneath the whole set. A full removal is usually cleaner than repeatedly gluing the samearea.
A large lift allows dirt and moisture beneath the whole set. A full removal is usually cleaner than repeatedly gluing the same section or flooding the gap with more product.
How to Know When Acrylic Nails Need Replacing
A manicure should be maintained while it remains smooth, comfortable, and structurally sound. It should be replaced when the acrylic becomes thin, cracked, yellowed, or difficult to manage.
Common signs that a full replacement is due include a deep crack traveling through the nail and a set that flexes noticeably. Replacement is also necessary when the sidewalls or stress zone have worn down, or the tips feel loose. Other indicators include widespread lifting, repeated peeling near the cuticle, and an underside that has become rough or porous.
Finally, the set must be replaced if it is several weeks past the usual fill schedule and can no longer be rebuilt cleanly, or if it is too long to file safely without thinning the structure.
A nail that is merely due for a fill can often be saved. A nail that bends at the joint, splits through the middle, or lifts from most of the natural plate needs a professional evaluation.
Don’t Layer Set Upon Set
Applying a full acrylic set over an old one creates excess thickness. The new set may look bulky, and the combined product can put more pressure on the natural nail. The underside of the nail may remain dirty or moist, and the surface can wrinkle or lift.
Instead, remove the old set, let the nail plate be cleaned and stabilized, and apply a fresh layer. If the natural nail needs rest, leave it bare for a short period rather than immediately covering it again.
Safe Acrylic Nail Removal
Removing acrylic at home is different from peeling off glue-applied tips. A thick or sculpted set can take more filing than a beginner should attempt.
The safest removal method is the one that removes the enhancement without taking healthy nail plate with it. A salon is the better choice when the set is very thick, the nail has a deep crack, or the acrylic is fused to the natural nail. Salons are also recommended when the set is difficult to lift after soaking, the wearer has reacted to a previous product, or the application used an unusual system whose solvent is unknown.
Finally, salon removal is necessary if there is pain, infection, significant nail damage, or any attempt at home causes burning or bleeding.
At-Home Removal for a Thin, Simple Set
Only attempt an at-home removal when the acrylic is thin enough to file and the natural nail underneath feels healthy.
Begin by removing polish from the surface. If the system’s removal directions allow soaking, use the recommended soaking liquid for the stated time. Avoid using acetone on the skin or leaving the hand in a solvent for an extended period.
After soaking, lift any loose material gently with a wooden stick, and avoid prying under a tight edge with a sharp metal tool. Thin the remaining acrylic with a file, moving the file in one direction, and stop once the product becomes thin. Finally, lift the softened acrylic slowly, and wash and moisturize the hands afterward.
Use a protective barrier such as petroleum jelly or a barrier product around the surrounding skin if it is compatible with the removal process. Keep the area ventilated and move the hand if the solvent begins to feel warm or uncomfortable.
If the acrylic won’t release with controlled pressure, stop. More soaking or more force can damage the natural nail. A professional can finish the removal safely.
How Long to Leave Acrylic on After Growing Out
A visible grow-out gap doesn’t automatically mean the entire set must be removed. If the acrylic is still sound, a fill can restore the gap before it becomes large.
A fill becomes harder to perform when the gap is wide, the sidewalls have lost their shape, or the new growth is weak. It is also more difficult when the acrylic has thinned, the tip or form can’t be supported, or there is lifting at the edges.
Early maintenance is usually less aggressive than replacing a neglected set. For a first manicure, the salon or nail technician can advise whether the current structure can be filled or should be removed.
How to Safely Remove Product From the Skin
Small amounts of nail glue or acrylic can land on the skin during application. The response depends on the product, but the first rule is the same: don’t scrub aggressively or use a sharp tool.
For minor skin contact, first remove rings and nearby jewelry. The user should wash the area with soap and cool water, and avoid using acetone, nail polish remover, or thinner on bare skin. After rinsing, pat the skin dry and apply a plain moisturizer once the skin is no longer wet.
The person must not tear or peel away dried product aggressively. If the product is bonded, gently soak the area in warm water and let it release over time.
For glue near the skin, more specific techniques may help. If the glue has hardened, warm water can soften some formulas, and a clean cloth can press against the area after soaking. A clean, fine file can be used only on the nail surface when the product sits there rather than on the skin.
The person should seek professional help if the product is close to the eye or covers a large area.
These options can help with removing stubborn nail adhesive without making irritation worse. If a product causes swelling, blistering, severe burning, or breathing difficulty, seek medical care rather than continuing to remove it at home.
Common Acrylic Nail Problems and What Causes Them
Understanding the cause of a problem helps prevent it from happening again. Symptoms like lifting, cracks, and softness rarely have just one cause, so it is important to inspect the entire manicure.
| Problem | Common Causes | What to Do |
|---|---|---|
| Lifting near the cuticle | Moisture, oil, cuticle debris, or thick buildup at the nail fold | Keep the area clean and dry; stop applying product over the lifted edge |
| Lifting at the free edge | Weak sidewalls, excess filing, snagging, or too much grow-out | Shorten carefully or have the set filled before the gap enlarges |
| Small bubble or pocket | Product placed too close to the cuticle, trapped moisture, or a lifted edge | Don’t press more acrylic over it; remove the lifted section and redo the bond |
| Crack through the stress zone | Thin, uneven structure or repeated impact | Seek a repair or replacement before the crack reaches the tip |
| Soft or bendy acrylic | Poor application, an incorrect liquid-to-powder balance, or moisture contamination | Remove the set and restart with a matched, properly mixed system |
| Rough surface | Under-mixing, filing in one heavy spot, or an unsealed surface | Smooth the file marks and apply a compatible finish; replace if the product is porous |
| Separation from the natural nail | Weak preparation, nail biting, nail growth, or excessive pressure | Fill while the gap is small; don’t glue a large loose section back on |
| Pain at application | Excessive filing, pressure against the nail bed, or product on irritated skin | Stop immediately and remove the product causing the pain |
| Redness or itching after removal | Allergic or irritant reaction to acrylate or other manicure ingredients | Stop using the product and seek medical advice if symptoms persist or worsen |
| Green, black, or foul-smelling nail | Possible infection or prolonged moisture beneath the enhancement | Remove the enhancement and seek professional medical or nail-care advice |
Troubleshooting requires addressing the underlying preparation or application issue, as simply covering the problem with more product will not solve it. By inspecting the manicure and reacting early, you can prevent a minor gap or crack from becoming a larger structural failure.
Lifting
A small lift at the free edge is sometimes caused by snagging or a growing nail. A lift near the cuticle is more likely to involve moisture, oil, cuticle debris, or a thick bead.
Don’t flood the entire manicure with primer or product. Excess product can make the problem worse. Clean the lifted area, determine whether the acrylic is still stable, and have it repaired or replaced.
Bubbles
A bubble can form when a tiny pocket of air, moisture, or solvent-like residue sits between layers. It can also appear when the acrylic is pushed too close to the cuticle or a tip lifts slightly.
Don’t cover a bubble with a large bead. If it is small and superficial, the technician may be able to refine the area. If it is deep or close to the natural nail, the set may need to be rebuilt.
Cracks
A crack in the free edge may be caused by impact. A crack near the stress zone can signal reduced support throughout the nail. Repairing only the visible line may leave the underlying weakness in place.
Soft acrylic
Soft acrylic is not a sign that the set needs more time to dry. Traditional acrylic should harden after application. If it stays flexible or tacky, the mixture, product compatibility, or surface preparation may be wrong.
Remove the set rather than wearing a weak extension. A soft set can bend at the joint and create pressure on the natural nail.
Nail biting
Biting or picking an acrylic set often worsens the problem. The acrylic edge can chip, leading to a rough nail, which can encourage more biting. The broken edge then gets picked, causing the cycle to continue.
If nail biting is a habit, a shorter, smooth set is usually more manageable than a long extension. Keeping the nails filed smooth and addressing the underlying habit matters more than adding decoration.
Acrylic Nails and Natural Nail Health
A well-applied set should cover the natural nail without damaging it. The natural plate can look dry or have small ridges when the enhancement is removed, especially after weeks of coverage. Those changes may be temporary, but pain, deep grooves, thinning, or separation should not be ignored.
Protecting the Natural Nail Under Acrylic
Several habits help protect the natural nail. The cuticle should be kept clean and never cut or torn. The manicurist must use a light touch when filing, avoiding filing shiny grooves into the plate.
The product must not touch living skin, and the set should be kept within a manageable length. The wearer must avoid using the nails as tools and choose polish and top coats compatible with the acrylic system. It is also important to replace the set when it becomes structurally weak and use a protective barrier during wet or chemical work.
If the natural nail has visible peeling, stop coating it until the surface has settled. If the peeling is accompanied by pain, swelling, pus, or a strong odor, seek medical care rather than applying another enhancement.
Rest and Recovery After Removal
After removal, leave the nails free of artificial product if they feel thin, tender, or irritated. A simple recovery routine includes washing the hands, drying them carefully, and applying a fragrance-free moisturizer. Cuticle oil can be used on the surrounding skin, and the nails should be kept protected from rough surfaces and repeated manicures.
For nail care after the set comes off, a recovery routine for post-acrylic nails can help readers focus on the difference between temporary dryness and damage that needs more attention.
An intact but dry nail can usually be protected with gentle care. A nail that bends, has deep grooves, or hurts needs more caution. Nail growth cannot be accelerated safely by applying a thicker enhancement over an unhealthy plate.
Choosing Acrylic for School, Work, and Everyday Life
The most useful manicure is the one she can maintain. A beautiful set can still be practical for a student, a busy worker, or someone who exercises, cares for children, or spends time outdoors.
For School
School rules may limit nail length, color, jewelry, or nail decorations. Even when the rules are relaxed, shorter nails can be easier to keep clean and may be less distracting during class or sports.
A good school set usually starts with a short or medium length. The round or squoval shape remains popular because it looks neat without catching on clothing. The color choice can be a nude, pastel, or subtle French, and one small accent nail can provide a playful detail.
The overall style should use matte or glossy finishes sparingly if the school has rules against distracting finishes.
For Work
For work, comfort and function often matter more than dramatic length. A short extension can make uneven nails look neat without interfering with typing or tools. Neutral colors often pair well with a simple finish.
If a workplace requires bare nails or has strict safety rules, those rules should take priority.
For Special Events
Longer or more detailed nails can be a fun choice for parties, weddings, photo shoots, and formal events. If she isn’t used to length, a moderate extension is often more comfortable. An event set should be planned around when it will be worn, and it should be kept short enough to avoid snagging a dress or breaking during travel.
The style can involve a stronger tip shape, nail art, and careful handling. If the nails are decorated, bring them to the event in a protective case if possible.
Before a special event, avoid trying a completely new length and complicated art combination for the first time. Familiar shapes are less likely to create an uncomfortable last-minute problem.
For Active Lifestyles
Sports, swimming, gardening, and cleaning can shorten the life of a manicure. Gloves help with water and chemicals, but no manicure is completely impact-proof. A short set with a thin, smooth tip is usually easier to maintain.
A quick-dry top coat can help when a manicure is done only a short time before leaving the house. Faster drying methods work best when polish is applied in thin, even layers and the hands stay clean and undisturbed while it sets.
Should She Apply Acrylic at Home or Visit a Salon?
Both options can work. The right choice depends on her experience, the condition of the natural nails, and the complexity of the design.
| Consider | At-Home Application | Salon or Professional Service |
|---|---|---|
| Control over the process | Full control, but the person doing the work is also responsible for safety | The technician handles the application and cleanup |
| Time and attention | Requires patience, a clear workspace, and uninterrupted time | More suitable for a long or detailed appointment |
| Learning curve | Good for practicing simple overlays, short extensions, and fills | Often best for a first full set |
| Product control | The kit must be compatible and well organized | The salon should explain the system being used |
| Customized art | Simple art can be practiced at home | More suitable for sculpted nails, complex art, and 3D work |
| Mistakes | Repair or removal may be entirely on the wearer | A professional can assess and correct many issues |
| Safety | Requires ventilation, gloves, and careful handling | Salon standards and equipment may provide added protection |
| Cost and scheduling | May reduce salon appointments, but quality still depends on skill and products | Usually costs more per visit because of the technician’s time and expertise |
A professional application is especially useful for a first full set if the wearer is young, impatient, or unfamiliar with filing and product control. A salon can also provide a useful lesson in removal and maintenance, but the client should still ask what system was used and how to care for it.
At home, a simple short extension is a better practice project than an advanced stiletto design. Practice on one or two nails, or use a practice hand if available, before attempting a full set. For more complete home guidance, a step-by-step home acrylic manicure can be used alongside careful preparation and safety checks.
How to Choose a Reputable Salon
A good salon should make the process easier, not more mysterious. Before booking, the client can ask what acrylic system is used and whether the technician is licensed or trained under the salon’s local requirements. It is appropriate to ask how the nails will be removed, whether the technician uses ventilation, and what they will do if the natural nail is weak.
The client should also inquire about the expected fill time, the removal fee, and how the service is priced.
The technician should examine the natural nail before applying a full set. If the nail is damaged or irritated, they should explain the options rather than simply covering the problem.
A clean workspace is a good sign. The technician should wear gloves during product handling, avoid using an electric drill on the natural nail, and keep the acrylic away from the cuticle. They should also explain how to care for the manicure after the application.
How to Change Acrylic Nail Color
Changing the color is one of the easiest ways to update a manicure without removing the structure.
Refreshing Polish Over Acrylic
To refresh the color, remove the old top coat if necessary, and lightly buff shiny polish where needed. The new color should be applied in thin coats, and the nail should be allowed to dry between each coat. Finish the manicure with a top coat and allow it to cure fully.
Use a polish remover formulated for the nail finish. Avoid soaking the entire nail in remover if the acrylic is already loose or weakened.
Adding Nail Art Over Acrylic
A small design can be added after the acrylic is fully shaped. Keep the art away from the cuticle and allow each layer to dry. For 3D products, use the adhesive exactly as directed and avoid flooding the natural plate.
If the set is new, wait until the acrylic has hardened and the client is comfortable moving the fingers. A rushed design is more likely to be applied too close to the skin or over the edge.
For simple decals or stickers, choose designs that fit the nail and seal them according to the product’s instructions. A clear top coat can smooth the surface, but it may change the appearance of textured stickers.
Acrylic Nails for Different Ages and Experience Levels
There is no single correct age for acrylic nails. The decision depends on maturity, ability to follow care instructions, school or workplace rules, and the condition of the natural nails.
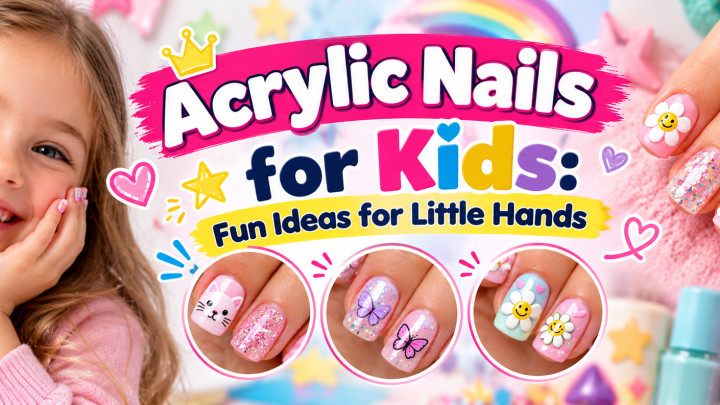
A younger user may do well with a short, plain set. The style should use a comfortable length, a simple color, and no heavy 3D decoration. A thin or well-maintained structure is appropriate, and parents or guardians should be involved when appropriate because she may not fully understand the removal process.
A teenager who is prone to biting or picking at her nails may benefit from a shorter set and regular trims. A more experienced user can try French tips, slim almond shapes, or a structured ombré. Someone who plays instruments or types heavily may prefer a shorter extension.
The key is not to make the manicure more complicated than the person can maintain. If she can’t comfortably wash, dry, and protect the nails, the design is too demanding regardless of how fashionable it looks.
Acrylic Nails vs. Gel, Dip Powder, and Press-Ons
Each option offers a different balance of application time, durability, and removal.
Acrylic vs. Gel
Acrylic usually requires filing and air-curing. Gel often requires a compatible lamp and a specific removal process. Gel may be a good fit for someone who wants a specific polish system, while acrylic offers more flexibility in length and sculpted structure.
Don’t apply conventional gel over acrylic unless the product is designed for that combination. Solvents, filing, and removal can damage the set.
Acrylic vs. Dip Powder
Dip powder uses powder and a liquid adhesive-like system, often with a protective top coat. It has a different application process and removal method. Acrylic is often easier to build into a customized extension, while dip powder can be convenient for a quick strengthening service.
Acrylic vs. Press-Ons
Press-on nails use preformed tips and adhesive. They can be removed and reapplied, although repeated peeling or soaking can weaken the natural nail. Acrylic usually gives more control over the shape and thickness, but it takes more skill and product.
For someone who wants a simple change for a short period, press-ons may be easier to manage. A full acrylic set may be preferable for a longer-lasting, more customized manicure. Proper adhesive selection can also matter for a press-on alternative, as seen in a guide to durable nail adhesives.
Frequently Asked Questions
What age should girls get acrylic nails?
There is no universal age. The decision should consider nail health, maturity, ability to follow care instructions, and any rules at school or home. A short, simple set is generally more manageable for a beginner than long or complicated nails.
A younger wearer should have help from a qualified adult or nail technician if she cannot safely follow the maintenance and removal instructions.
Are acrylic nails safe for girls?
Acrylic can be safe when the application and removal are done carefully, the natural nail is healthy, and the area is properly ventilated. Safety is affected by poor preparation, filing too deeply, product touching the skin, and a reaction to acrylates. Anyone with pain, swelling, infection, or significant nail damage should not cover the problem with an enhancement.
How long do acrylic nails last?
The life of an acrylic set depends on the natural nail growth, application quality, nail health, length, and daily wear. A set may need a fill as the natural nail grows. A thick, damaged, or poorly balanced set may need to be replaced rather than filled.
Follow the salon’s maintenance guidance and return for assessment when the gap or structure changes.
Do nails grow underneath acrylic nails?
Yes. The natural nail continues to grow underneath the enhancement. The acrylic remains attached to the existing set while the natural nail moves forward.
This creates a visible grow-out gap near the cuticle, which is why fills are common.
Should a beginner choose long or short acrylic nails?
Short or medium lengths are easier to control and usually more comfortable. Round and squoval shapes are forgiving and practical. A longer or sharper style can work after the wearer is comfortable filing, protecting, and maintaining the nails.
Can you paint over acrylic nails?
Yes, if the acrylic is clean, structurally sound, and compatible with the polish system. Apply thin coats and seal them with a top coat. Don’t pile on many layers or cover lifting, since trapped product can make the set thicker and harder to remove.
Why are my acrylic nails lifting?
Moisture, oil, cuticle debris, rough sidewalls, nail growth, snagging, and excess product at the edge can cause lifting. A small edge lift should be evaluated early. Don’t flood the entire nail with glue or additional acrylic.
What should I do if acrylic causes burning or itching?
Stop using the product and remove it carefully if it can be done without force. Wash the hands and avoid solvents on the irritated skin. Seek medical advice for persistent redness, swelling, blistering, or pain.
Facial swelling or breathing difficulty requires urgent medical care.
How should acrylic nails be removed?
The safest approach is to soak and lift the product as directed by its system, or to have a nail technician file it away. Never pull a set that is still firmly attached. If removal requires force, causes pain, or leaves the natural nail feeling thin or damaged, stop and get professional help.
The Best First Acrylic Set
For most girls, the best first acrylic set is short or medium in length with a round or squoval shape. Choose a comfortable thickness, a clean cuticle line, and a color that suits her skin tone and daily routine. A simple neutral, soft pastel, classic French, or small accent design gives the best balance of style and practicality.
The application matters more than the trend. The natural nail should be healthy, the product should stay away from the skin, and the structure should support the chosen length. Maintenance should be easier than trying to hide damage with more acrylic.
If the set starts to lift, crack, soften, or grow too long, address it early. A small controlled repair or fill is usually better than waiting for a full set to become unstable. When in doubt, remove it and let the natural nail recover before the next application.
Amazon and the Amazon logo are trademarks of Amazon.com, Inc, or its affiliates.
Author


Similar Posts