How to Use a Nail Drill Like a Pro: Step-by-Step Guide
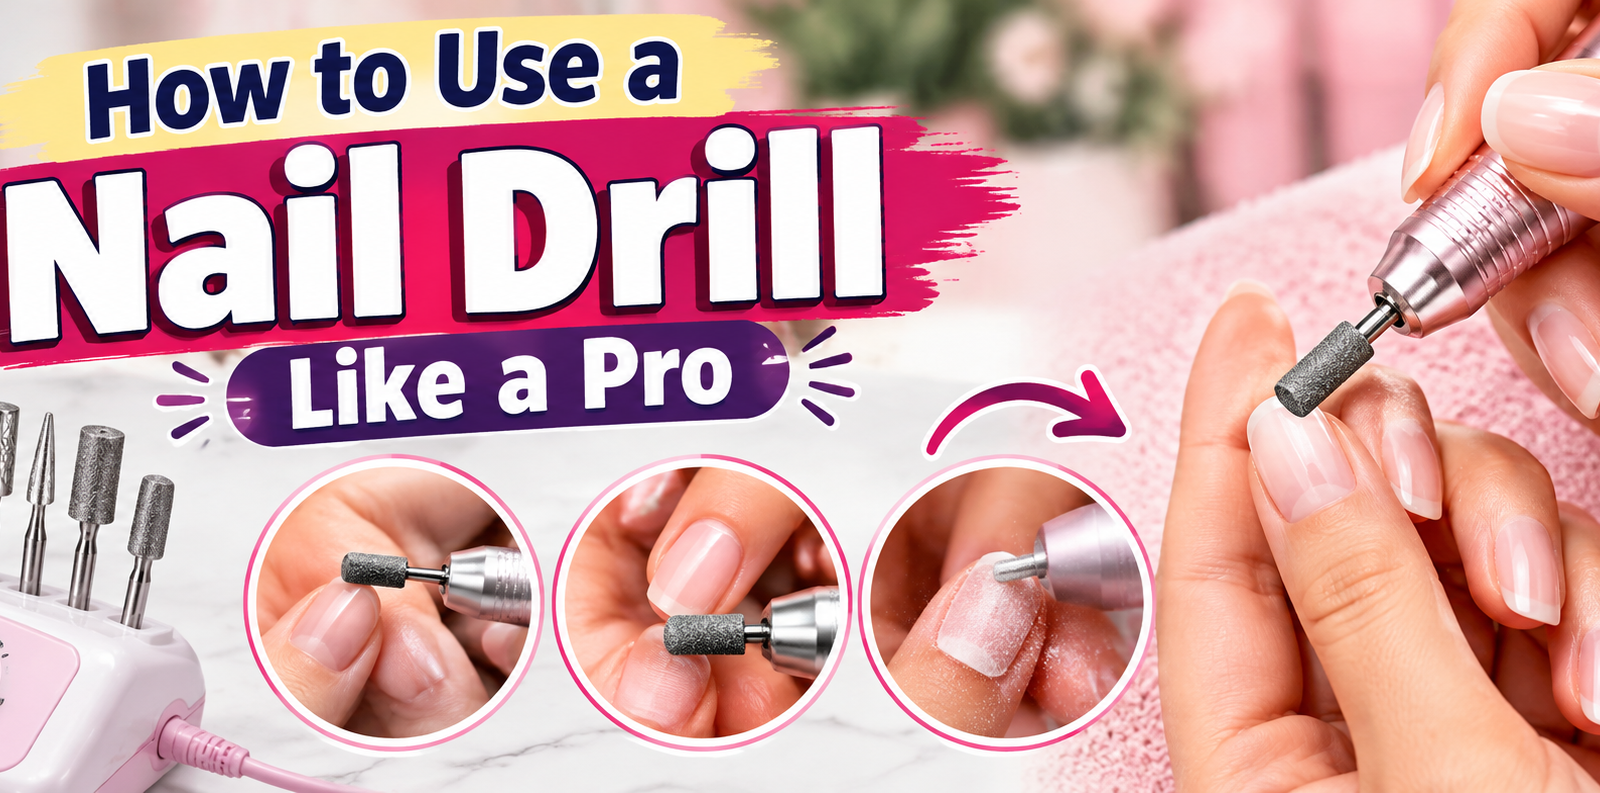
A flawless nail drill how to use guide isn't really about the machine. It's about your hands, your pressure, and the tiny angle you hold the bit at. Most beginners treat an e-file like it's going to take their fingers off.
It won't, if you respect the basics we walk through below.
Manufacturer specs for professional handpieces typically run from 0 to 30,000 RPM, and the sweet spot for most tasks sits well below half that range. As of 2026, the standard guidance from occupational safety bodies still holds: keep the tool moving, limit dwell time to under two seconds, and match grit to material. Let's break down every layer of that into something you can actually do.
Quick Answer
To use a flawless nail drill, start at low RPM. Match the bit grit to your material. Keep the bit moving constantly.
Limit pressure to a feather-light touch. Stop before you reach the skin or nail bed.
Why Your Nail Drill Feels Like a Scary Machine (But Doesn't Have to Be)
Here's the thing nobody tells you. The drill itself is not the danger. Your grip, your speed choice, and your lack of prep are.
A handpiece spinning at 6,000 RPM does essentially nothing harmful if it's gliding across a dry, clean nail plate. The same handpiece at 20,000 RPM, pressed hard into a wet, unprepped cuticle area, is a different story entirely.
Most of the fear comes from watching someone rush through a removal and hearing that sharp "skritch-skritch" that means they're already in the living tissue. That sound should never happen on your plate. It means the product is gone and the bit is grinding bare keratin or worse, the proximal nail fold.
We've seen the aggregate pattern across hundreds of forum threads and Reddit nail-tech communities. Beginners who skip the slow start, who press too hard because the gel seems stubborn, who hold the bit still over one spot for three seconds. All of those lead to the same outcome: a flinch, a drop, and a thin red line on the cuticle.
Not dramatic. But it stings, it looks unprofessional, and it risks micro-infection if your sanitation wasn't tight.
The fix is simple and boring. Go slower than you think you need to. Use less force than feels satisfying.
And build proper filing technique into your muscle memory before you ever spin the motor up past 4,000 RPM. Once those habits stick, the "scary machine" becomes just another tool in your kit, as routine as a buffer block.
Who This Guide Actually Helps
- Home users doing self-care who've been relying on clippers and files and want a smoother, faster result without the guesswork
- New nail technicians in their first 6 months, building confidence before they sit a client down
- Experienced techs refining workflow who notice their removals take 40 minutes when they could be 20
- Anyone working with natural nails who wants to remove acrylics or gels without wrecking the underlying plate
If you fall into one of those groups, the next four sections give you the exact setup, prep, bit selection, and speed logic you need. If you've done this for years and just want a refresher on RPM charts, jump straight to Section 5.
The Tools of the Trade: What's in the Box and What It Actually Does
Before you can use a nail drill flawlessly, you need to understand what's actually sitting on your workstation. "Nail drill" is a catch-all term. In practice, you're dealing with four distinct components, and each one has specific traits that change how the whole system performs.
| Component | What It Does | Key Trait to Check |
|---|---|---|
| Motor / Base unit | Spins the handpiece via flexible shaft or direct drive | Corded vs. cordless; wattage (typically 30W to 100W for pro units) |
| Handpiece | The pen-shaped tool you hold; houses the collet | Weight balance, light feedback (fiber-optic ring), forward/reverse switch |
| Collet / Chuck | The tiny screw at the tip that grips the bit shank | Must tighten fully or the bit wobbles mid-file |
| Speed controller | Knob or digital dial on the base | Range (usually 0 to 30,000 RPM); smoothness of the ramp |
The handpiece is where most of your comfort lives. A lightweight model (under 80 grams) means your wrist stays relaxed during a long set. A heavy handpiece with the weight concentrated near the back makes your pinky drag, which forces you to press harder.
Press harder, and you're in that danger zone we flagged earlier.
Cordless systems freed up movement, but they trade consistent torque for battery anxiety. If you're mid-removal and the motor dips, your instinct is to press harder to compensate. That's exactly the wrong reflex.
Corded units deliver steady power all session, which matters more for consistency than convenience.
Bits and the Collet Sizing Game
Bits come in two main shank sizes: 1/8 inch (3.2 mm) and 3/32 inch (2.4 mm). Your handpiece will state which one it accepts in the manual. Mix them up and the bit either won't seat or will jam.
Always match the shank to the collet diameter.
A loose collet is the number one cause of "my bits keep falling out mid-file." Tighten it until you feel a small click or firm resistance. Test by gently tugging the bit while the motor is off. If it moves even a hair, re-seat it.
A wobbling bit at 15,000 RPM is not just annoying; it creates uneven grooves on the nail and can chip the adjacent skin.
If you're new to the whole process and wondering whether you even need a drill versus just soaking and filing by hand, there are solid manual alternatives for removal that work fine for a single set at home. But for thick acrylic sculpted tips, layered gel, or a dozen clients a week, the drill is the only realistic option. You save 15 to 25 minutes per set, and the finish is dramatically smoother.
Before You Touch the Switch: Prep Work That Makes or Breaks the Job
You can have the best handpiece and the sharpest carbide bit in the room. If your prep is sloppy, none of it matters. The drill amplifies whatever surface conditions you hand it.
A dirty, oily, debris-clogged nail plate turns your smooth glide into a gritty drag that generates heat fast.
Here's the non-negotiable sequence before the motor even starts spinning:
- Sanitize everything. Wipe the handpiece, bits, and your workstation with 70% isopropyl alcohol. CDC guidelines for nail service settings recommend this as a baseline for preventing cross-contamination. Do it even for yourself at home. Old biofilm under a cuticle is a silent infection risk.
- Dry and dehydrate the nail plate. After removing the old product, buff the top seal layer with a 180/180 grit file until you lose the shine. Wipe with alcohol to pull out moisture. A damp plate slides the bit unpredictably and traps friction heat.
- Push back the cuticle manually first. Use an orange stick or a soft pusher tool. Get the skin as far back as it will go comfortably. You don't want the bit chasing cuticle tissue that should have been moved by hand.
- Trim length. If you're working on sculpted acrylics or long gel extensions, clip them down to your target shape first. Drilling a 2-inch free edge with a spinning bit produces shards of product that fly everywhere. Shorten, then refine.
- Set your workspace. Stable table, good overhead light (a magnifying lamp helps enormously near the cuticle), and a chair that keeps your elbow at roughly 90 degrees. If your arm is floating with no support, you'll drift and press unevenly.
One more habit worth building: between each client or each nail, quickly blow off dust with a small brush or air blaster. Clogged bits grind instead of cut. They also heat up faster because the trapped debris acts like insulation.
Taking ten seconds to clear the surface keeps every subsequent pass cleaner.
This prep window takes 4 to 8 minutes per set. Skim it and you'll pay for it in the drilling phase with extra passes, higher speeds, and that uncomfortable "I'm digging" feeling. Do it properly and the actual filing becomes almost mechanical.
You barely have to think about it.
If you work with multiple tools daily, cleaning your prep tools between sessions keeps the whole station hygienic and stops old polish residue from getting ground into the next client's plate.
Pick the Right Bit for the Job: A No-Nonsense Cheat Sheet
This is where most beginners get lost. There are dozens of bit shapes, materials, and grits, and the packaging rarely explains what each one is actually for. Let's cut through the noise.
Material Matters More Than Shape
- Ceramic bits: Run cooler than metal, last longer on gel, and produce less dust. Best default for most enhancement work. Slightly more expensive upfront but you replace them less often.
- Tungsten carbide bits: Aggressive cutting geometry. Ideal for thick sculpted acrylic, builder gel, or bulk removal. They bite deep fast, so pair them with lower RPM and lighter pressure. Never use a carbide bit on natural nails.
- Diamond-coated bits (grit-based): Come in coarse (around 60/80 grit) for product stripping, medium (120/150) for shaping, and fine (180/240+) for smoothing and shine. The diamond layer is bonded to a metal core. You're buying the grit, not the "diamond" marketing.
- Sanding bands and cylinders: Disposable, cheap, and great for quick edge work or a rough shape tweak. They clog after one or two sets. Don't expect longevity.
Matching Grit and Shape to the Task
Here's the practical map. Keep this on a sticky note next to your kit if you're starting out:
| Task | Bit Type | Grit / Geometry | Notes |
|---|---|---|---|
| Bulk acrylic or gel removal | Carbide or 60/80 diamond | Barrel or cone shape | High removal rate; keep moving; don't dwell |
| Shaping the free edge | Medium diamond (120/150) | Flat cylinder or band | Go with the grain; check symmetry often |
| Smoothing and pre-shine | Fine diamond (180/240) | Cone or round | Light touch; stop at the shine, don't chase it |
| Cuticle prep (thin callus) | Ultra-fine diamond (240+) or fine carbide | Small round or teardrop | Lowest RPM on the dial; feather pressure |
| Refining a natural nail | Fine diamond only | Smooth cone | Extremely light; add a nourishing treatment afterward |
| Quick edge cleanup between sets | Sanding band | N/A | Throw away after one client; don't reuse |
When you're working through a full set of sculpted tips, you'll cycle through 2 or 3 bits in one session. Start coarse for the bulk, move to medium for the shape, finish with fine for the surface. Don't try to do it all with one bit.
You'll spend more time fighting the tool than you saved by skipping the swap.
The "No Drill" Boundary
Some jobs shouldn't use a drill at all. Deep under-rim sculpted gel that's fused to the nail fold. Anything that's bleeding or visibly inflamed.
A fungal discoloration underneath the product. In those cases, stop, wipe, and refer to a professional or a derm. Drilling through or around active issues doesn't fix them.
It spreads them.
The Speed Settings Demystified: RPM vs. Safety
This section saves the most injuries. The base of your drill has a dial or a digital screen showing numbers from 0 up to 30,000 (or sometimes 40,000 on industrial units). Most people assume "higher is faster and therefore better." It's not.
Higher RPM increases friction heat exponentially. Past a certain threshold, you're not removing product anymore. You're cooking the nail plate.
The Safe Starting Point
For any task involving a live finger, start below 4,000 RPM. Seriously. Even for thick acrylic. You want the bit to glide, not chew.
You'll know you're in the right range because the sound is a smooth, quiet hum rather than a harsh grind. If it sounds like a sander taking down drywall, back off the speed.
| Task | Suggested RPM Range | Pressure Level | Why |
|---|---|---|---|
| Cuticle area prep | 1,000 to 3,000 | Feather-light (let the bit's weight do the work) | Skin is there; heat tolerance is low |
| Bulk product removal (acrylic/gel) | 4,000 to 8,000 | Moderate; bit removes in visible layers | Fast enough to be efficient, slow enough to control |
| Free edge shaping | 5,000 to 8,000 | Light to moderate; follow the curve | Consistency matters more than speed |
| Surface smoothing / pre-shine | 3,000 to 5,000 | Very light; almost no downward force | You're polishing, not cutting |
| Natural nail refinement | Under 3,000 | Minimal; the bit barely touches | You're preserving the plate, not removing it |
These ranges align with OSHA general industry power-tool guidance on limiting unnecessary exposure and controlling heat in close-contact work. The principle is simple: use the lowest speed that gets the job done. The extra RPM buys you nothing but risk.
The Heat Test (Do This Every 45 Seconds)
Between passes, pull the bit away and touch the back of your fingertips to the spot you just worked. If it's warm, you're generating friction you didn't intend. Drop the speed by 1,000 RPM.
Slow your passes. Add a brief pause for the plate to cool. Repeat.
A healthy, correctly worked nail plate should stay neutral to slightly cool. "Warm" is your warning sign. "Hot" means you've already thinned the keratin and possibly started irritating the matrix underneath.
That's not recoverable in one session. It takes weeks of building resilient natural plates to bounce back from over-filed thin spots.
Forward, Reverse, and When to Use Each
Most handpieces have a forward/reverse toggle. Forward is your default 95% of the time. Reverse is useful for one specific moment: clearing a clog in a sanding band or knocking loose product off a carbide tip without spinning it further into the nail.
Use it for two seconds, never more. Long reverse runs can stress the collet and introduce vibration that makes the next forward pass feel uneven.
One last mental model that fixes 80% of bad drilling. Think of the bit like a very, very fast sandpaper. You wouldn't press a piece of 80-grit sandpaper into a raw wooden table and hold it still for five seconds.
Same physics, same result: a gouge, heat, and damage. The bit is just finer and faster. The discipline is identical.
Move it. Keep it light. Let the rotation do the work.
The Golden Rule: Keep It Moving and Keep Light Pressure
If you remember only one thing from this entire guide, let it be this: the bit must never stop moving while it's touching your nail. A stationary spinning bit at any speed is a heat generator and a digging tool, not a file. The difference between a flawless result and a compromised nail plate is usually two seconds of hesitation.
The Two-Slide Test
Before you even turn on the motor, do a quick check. Hold the handpiece above the nail without touching it. Think about your path.
You're going to make short, controlled slides across the surface, not press into it. Each slide covers maybe 3 to 5 millimeters, then you lift slightly and reset. That's it.
No grinding. No holding. Just sliding.
You'll notice experienced technicians have a rhythm to their hands. It looks almost hypnotic. Up, across, down, up, across, down.
They've built the motion so it's repetitive and predictable. You can train yours too, but it takes conscious repetition at low speed first. Don't build muscle memory at 12,000 RPM.
Build it at 3,000 RPM until the pattern feels automatic.
Angle Matters More Than Force
A 45-degree approach gives you the best control for most tasks. The bit kisses the surface rather than biting into it. If you're working near the cuticle area, tilt it even flatter, closer to 30 degrees, so the edge of the diamond or carbide grazes instead of digs.
For the free edge, you can pick it back up toward 60 degrees to match the slope of the tip.
Pressing harder does not make the bit cut faster. That's a myth that causes the most damage in beginner sessions. Friction already provides the cutting action.
Added force just compresses the keratin and creates heat. You'll feel it as a sudden change in vibration, a tighter resistance in your wrist, or that "stuck" sensation where the bit seems to chew instead of glide. Back off immediately.
The Feathering Principle
As you move across the nail, vary your pressure. Start a pass with moderate, confident contact. As you reach the edges, the sidewalls, and the cuticle zone, reduce that contact to almost nothing.
Let the very perimeter of the bit sweep over those areas. Your fingertips can sense this. It feels like the difference between dragging your hand through fine sand versus barely skimming the surface.
This feathering technique is what separates a clean removal from one that leaves micro-grooves or thin spots near the nail fold. Those weak points become entry sites for moisture and bacteria later. They also cause polish to lift faster because the surface isn't uniformly smooth underneath.
Spend an extra 30 seconds feathering the final passes and your polish application will hold significantly longer.
Step-by-Step: Drilling Soak-offs Without Destroying Your Nails
This process usually scares people the most. Removing acrylics and gels with a drill sounds aggressive. It doesn't have to be, as long as you respect the sequence.
Rush the top layer and you're drilling directly into color polymer or opaque builder gel. Slow the top layer and you leave a perfectly flat canvas for acetone to penetrate evenly.
Phase One: Remove the Seal
Take a medium-grit diamond bit, around 120 grit, and set your RPM to about 5,000. Gently file across the entire surface of each nail until the glossy top coat disappears completely. You're not trying to remove product yet.
You're breaking the sealed layer so acetone can actually reach the gel underneath. That distinction matters.
Work in short, overlapping strokes. Check each nail under your light. The surface should look matte, not shiny.
Any remaining gloss means the seal is intact and your soak time will stretch from 15 minutes to 40 because acetone has nowhere to enter. That's the most common reason soak-offs take forever. You skipped the real first step.
Phase Two: Bulk Reduction
Switch to a coarser bit, either 60/80 grit diamond or a carbide barrel, and bump speed to 6,000 to 8,000 RPM. Now you're removing the bulk of the material. File across the nail in consistent slides, working from the center outward.
You'll see thick dust forming. That's a good sign. It means you're taking product off cleanly.
Stop periodically and wipe the dust away with a lint-free pad. Inspect the surface. You want to leave a thin, even white layer covering the entire nail plate.
When you see that translucent white film across every millimeter, you've hit the safe stopping point. Any further and you'll start grinding the natural nail itself.
| Visual Cue | What It Means | Action |
|---|---|---|
| Thick opaque chunks flying | Still on product surface | Continue; you're in the clear zone |
| White powdery dust with some translucency | Thin layer left; getting close | Slow down, drop RPM slightly |
| Pink or warm spots appearing | You're nearly at the natural plate | Stop immediately; switch to manual buffer |
| Heat felt by touch | Too much friction or dwell time | Back off speed and pressure now |
Phase Three: The Final Polish Pass
Once you have that thin white layer across all nails, go back to a fine diamond bit at 3,000 to 4,000 RPM. This pass evens out any ridges left by the coarse step and creates a uniform surface for the acetone to work into. It's not strictly required, but it makes the soak feel more predictable and speeds up the chemical breakdown.
After this pass, dust off thoroughly with a brush, then soak cotton balls in acetone, press them onto each nail, wrap loosely in foil, and wait 12 to 15 minutes. The softened product should slide off gently with an orange stick. If it resists, the top seal wasn't broken fully.
Repeat the matte-phase step before trying again. Never pry. Prying lifts layers of keratin along with the product.
When you're done with the chemical part, follow up with a nourishing treatment to restore moisture lost during the acetone exposure. Even healthy plates dry out fast once the protective product is gone.
Step-by-Step: Filing and Shaping Natural Nails Flawlessly
Drilling bare nails is entirely different from drilling product. You're not removing anything substantial. You're refining shape, smoothing ridges, and preparing the surface for whatever comes next.
The stakes are lower for speed but higher for precision because you're working directly on the live keratin layer.
When Drilling Bare Nails Makes Sense
Not every natural nail job needs a drill. Simple length trimming, basic rounding, or a quick buff before applying polish can all be handled by hand files alone. But if you have deep longitudinal ridges, uneven free edges from biting, or you want a mirror-smooth surface before a gel overlay, a fine drill pass saves twenty minutes of hand filing and gives a more consistent result.
The key constraint here is grit selection. Anything below 180 grit will scratch the natural plate visibly and permanently unless you buff it out afterward. Always stay at 180 grit minimum for bare nails, and preferably 240 grit or finer for finishing passes.
The finer the grit, the smoother the surface, the better your subsequent products adhere.
The Four-Pass Sequence for Natural Nails
Start with a light prep pass at 2,000 to 3,000 RPM using a 240 grit diamond cone. Glide across the entire surface to remove shine and smooth the biggest ridges. That's pass one.
Don't press. Just sweep.
Pass two focuses on the free edge. Use a cylinder or flat band bit at the same low speed. Match the curvature you're aiming for.
Check both hands frequently to keep symmetry. Nail shapes drift easily when you're watching one hand at a time.
Pass three is a cross-hatch finish. Take a fine cone and lightly run it diagonally across the plate, then horizontally. This breaks up directional scratches and creates an even matte canvas for primer or base coat.
Keep pressure minimal here.
Pass four is the final buff with a soft pad or an ultra-fine ceramic bit. Go over every nail slowly. The goal is uniform texture, not gloss.
A perfect pre-polish surface should feel smooth like sandpaper, not slippery like glass. If it feels slick, you haven't removed enough natural oils and shine for proper adhesion.
This four-pass flow works for both men and women, straight or almond shapes, and takes roughly 6 to 10 minutes total per hand. Faster than hand filing, cleaner than a coarse band, and far gentler than rushing through at high speed.
Common Mistakes That Lead to Bleeding, Burning, or Brittle Nails
These mistakes cluster around the same root cause: impatience masked as efficiency. Everyone wants the service to finish sooner. The drill lets you do that, but only if you don't push past the physical limits of the nail plate.
Cross those limits and you pay for it in bleeding folds, heat burns, and long-term brittleness.
The Pre-Start Spin
Starting the drill before the bit touches the nail is surprisingly common. You flip the switch, the bit accelerates to full speed, and then you bring it down onto the plate. That initial contact at max RPM is like dropping a running saw onto a board.
It bites.
Always start the bit against the nail, then ramp up speed smoothly. Or start at low RPM against the surface, then increase as needed. Either way, never launch the motor into empty air and then slam it onto the plate.
The micro-jerk at contact is enough to catch the surface and gouge it.
Ignoring Heat Until It's Too Late
People sometimes push through warmth because they think "just one more pass." That's how you get thermal damage to the nail matrix. Once the plate feels hot to your fingertip, keratin proteins begin to denature. It doesn't hurt immediately, but it weakens the structure.
Future breaks happen faster. Layers delaminate. The nail stays sensitive to pressure for days.
Set a mental timer: every 3 seconds of continuous filing equals one second of cooling. Lift the bit, pull away, breathe. You're buying insurance for the next minute of work.
It costs nothing and prevents the worst scenarios we discussed in Section 2.
Wrong Angle Near the Cuticle
Approaching the proximal nail fold at anything steeper than 30 degrees is asking for disaster. The cuticle tissue sits right there, just millimeters from where your bit contacts the nail plate. A slight hand tremor or a momentary lapse in focus and you're grinding skin instead of product.
Keep your wrist loose. Anchor your pinky finger against the client's hand or your own work surface. Anchoring gives you tactile feedback and limits the range your hand can drift in sudden jerks.
It's a small habit that saves a lot of painful conversations.
Over-File Induced Thinning
Some beginners treat the drill like it's erasing something. They keep going until the nail feels paper-thin under their thumb. Thin nails snap.
They bend under pressure. They separate from the bed more easily. The whole service becomes a cycle of repair and replacement.
Stop when the surface feels firm under light pressure, not soft. Test by pressing your thumbnail against the filed spot. If it flexes noticeably, you're too thin.
Apply a strengthening treatment and avoid the drill on that nail for several weeks. Repair strategies for damaged plates are far easier than explaining to a client why her nails keep splitting.
Caring for Your Drill: Longevity Tips for a Flawless Tool
A well-maintained handpiece lasts years. An abused one loses torque, wobbles mid-session, and burns out motors within months. The difference is routine care, which takes less than five minutes per day.
You wouldn't skip oil changes on your car. Don't skip lubrication on your drill.
Daily Maintenance Checklist
Clean the bit shank and collet area after every use. Dust and residual product build up inside the chuck and cause imbalance. Use a small brush or compressed air to clear the opening.
If you have solvent-safe parts, wipe the handpiece body with alcohol. Avoid spraying liquid directly into the motor housing.
Inspect bits for chips or uneven wear. A cracked diamond coating throws off the balance instantly and creates vibration that travels up your wrist. Replace compromised bits before the next session.
One bad bit ruins a whole set of nails through inconsistent pressure.
Lubricate the handpiece per the manufacturer's schedule. Most professional units need a few drops of approved oil through the maintenance port every 10 to 15 hours of runtime. Check your manual.
Over-oiling is less common than under-oiling, but both shorten bearing life.
Weekly Deep Clean
Remove bits completely. Wipe the internal shaft gently with a lint-free pad dampened with rubbing alcohol. Let it air dry fully before reinserting.
Moisture trapped in the collet is rust waiting to happen. Rust turns a smooth spin into a wobble.
Check the power cord and foot pedal connections for fraying. Loose wires cause intermittent power loss mid-session, which forces you to restart the motor repeatedly and increases overall heat buildup on the nail plate.
When to Replace vs Repair
If your handpiece suddenly loses speed under load, sounds louder than usual, or vibrates visibly even with a new bit, the bearings are likely worn. Continuing to use it degrades your work quality. Replacement of the handpiece assembly is usually more cost-effective than sending it back to the manufacturer unless it's a premium professional model worth the shipping.
Bit lifespan varies. Diamond bits last the longest if cleaned properly. Carbide bits lose their edge after heavy daily use over several months.
Sanding bands are disposable by design. Plan your supply budget around realistic replacement cycles instead of expecting a single set to last a year.
Following these habits keeps your drill performing consistently and protects your investment. And when you're ready to stock up on supplies alongside your hardware, choosing the right acrylic kit complements the tool work nicely for a complete workstation setup.
When to Stop Drilling and Call in a Pro
There's a line between standard nail work and situations that require someone with medical training or advanced certification. Hitting that line isn't failure. It's responsible practice.
Continuing past it is where infections, permanent plate damage, and legal liability start.
Red Flags That Mean Immediate Stop
These signs indicate you should set down the drill and reassess before continuing:
- Bleeding at the cuticle or sidewall. Even a tiny pinprick means you've breached the skin barrier. Stop immediately. Clean the area with antiseptic, apply pressure if needed, and do not return to that nail until it's fully healed. Drilling over broken skin introduces bacteria directly into the bloodstream.
- Visible white or pink exposed nail bed. If you've filed through the protective keratin layers and can see living tissue underneath, you've gone too deep. This requires professional treatment and possibly a break from enhancement work entirely.
- Severe pain or burning sensation reported by the client. Pain is not normal drilling feedback. It means heat damage or nerve irritation is occurring. Back off instantly and evaluate what went wrong.
- Signs of infection: redness spreading beyond the nail fold, warmth, swelling, or pus. Do not drill near an active infection. Cover the area, advise the client to see a healthcare provider, and reschedule only after full resolution.
Condition-Specific Boundaries
Certain nail conditions change the risk calculation entirely. Here's how to recognize them and what to do instead:
| Condition | Risk Level | Recommended Action |
|---|---|---|
| Onychomycosis (fungal nail) | High | Refer to podiatrist or dermatologist. Drilling spreads spores and contaminates equipment. |
| Psoriasis flares on nails | Moderate to High | Avoid drill on affected nails. Use manual filing only if approved by their provider. |
| Paronychia (acute nail fold infection) | High | Do not work. Refer out immediately. |
| Thin, brittle nails from prior over-filing | Moderate | Skip the drill entirely. Focus on strengthening and repairing damaged plates. Return to drilling only after recovery. |
| Recent trauma or hematoma under nail | High | Avoid that nail completely until healed. |
If you're ever uncertain whether a condition is mild or requires professional care, err on the side of caution. A referral builds trust and protects your license. Clients respect honesty far more than they respect a rushed job that causes complications.
Building Your Referral Network
Keep contact info for at least one podiatrist and one dermatologist in your workspace. It doesn't take long to build those relationships. Send a client their way when something is outside your scope and mention it matter-of-factly: "This looks like it needs a medical evaluation.
Here's a specialist I recommend." You're not failing. You're practicing responsibly.
Professional nail associations like the United States Department of Labor Occupational Safety guidelines emphasize duty of care during cosmetic procedures. Following those standards protects both the client and your business long-term.
Nail Drill FAQs: Clear Answers to Confusing Questions
These questions come up constantly in forums, social media threads, and salon conversations. Here are straightforward answers based on manufacturer specifications, occupational health guidance, and aggregate professional feedback.
Can I use a nail drill on my natural nails every day?
No. Daily drilling on bare nails thins the plate over time, even at low RPM with fine grit. Limit direct drill contact to no more than once per week for natural nails.
On days between services, use hand files, buffers, or gentle pushing tools instead. Reserve the drill for product removal, heavy reshaping, or specialized surface prep tasks.
What RPM should I set for gel removal versus shaping?
Gel removal typically runs best between 4,000 and 8,000 RPM depending on product thickness. Shaping free edges works comfortably at 5,000 to 8,000 RPM with medium grit. Cuticle work stays below 3,000 RPM with ultra-fine bits.
Always start low and increase only if the bit is struggling to cut rather than glide.
How do I know if I'm drilling too deep?
Three signals: visible pink or warm spots on the nail plate, heat felt by touch after 3 seconds of contact, and a sudden change in sound from smooth hum to aggressive grinding. Stop immediately when any of these appear. A thin white layer across the nail means you've hit the safe zone.
Anything beyond that risks the living keratin beneath.
Is it normal for the nail to get warm while filing?
Slight warmth is expected during bulk removal, especially with carbide bits at 6,000 to 8,000 RPM. The nail should never feel hot. If it warms beyond comfortable, reduce RPM by 1,000 to 2,000, shorten your passes, and add brief cooling pauses between nails.
Heat is friction accumulating faster than it can dissipate. Manage it proactively.
Can I share drill bits between clients if I sanitize them?
Never. Bits accumulate microscopic debris, keratin dust, and biofilm that alcohol alone cannot penetrate fully. Use disposable sanding bands or sterilize metal bits in an autoclave between clients.
Single-use bands eliminate cross-contamination risk entirely and are far cheaper than treating an infection claim.
What's the difference between a professional e-file and a drugstore model?
Professional units offer consistent torque across the full RPM range, balanced handpieces under 80 grams, quality collets that don't loosen mid-session, and smooth speed controllers without dead zones. Drugstore models often have jerky acceleration, weak motors that stall under load, and plastic chucks that strip easily. For daily use, the investment in a pro unit pays for itself in reduced fatigue and fewer bit failures.
How often should I replace my diamond or carbide bits?
Diamond bits last 6 to 12 months with daily professional use if cleaned and stored properly. Carbide bits lose sharpness after 2 to 3 months of heavy acrylic work and should be replaced when they start skipping or vibrating instead of cutting smoothly. Sanding bands are single-client disposables.
Test bits monthly by running them at low speed and listening for uneven sounds or feeling wobble in the handpiece.
Should I use water or dust control when drilling?
Dust control is mandatory. Always work with a vacuum brush or dust collector attached. Water cooling is rarely used in nail work because moisture damages the nail plate structure and promotes bacterial growth inside the handpiece.
Dry filing with proper ventilation and filtration is the industry standard for a reason.
How do I fix a nail that's already been over-filed?
Stop drilling immediately. Apply a bonding base coat with nail strengthener to seal and protect the thin area. Avoid acetone soaks on that nail until the keratin regenerates, which takes roughly 6 to 8 weeks for the visible plate.
In the meantime, keep the nail short and shielded. Long-term recovery benefits from regular moisturizing treatments and avoiding further mechanical abrasion on compromised areas.
Can I drill gel polish off the same way I remove acrylics?
Yes, but with gentler parameters. Gel polish is thinner and bonds differently than sculpted acrylic. Use a 180 or 240 grit diamond bit at 3,000 to 4,000 RPM.
File until the glossy layer is matte, then soak for 8 to 10 minutes instead of 15. The product lifts more delicately and requires less aggressive mechanical prep. Rushing this process strips the natural plate faster than the gel would have.
Amazon and the Amazon logo are trademarks of Amazon.com, Inc, or its affiliates.
Author


Similar Posts