Use a few drops of professional nail polish thinner and roll the bottle.
If your favorite color turns thick, you can still save it. I have fixed hundreds of bottles in salons and at home. In this guide on How To Thin Out Nail Polish, I share safe steps, pro tips, and traps to avoid. Stick with me, and you will learn How To Thin Out Nail Polish the right way so your coats glide and shine again.

Why Nail Polish Gets Thick and Goopy
Nail polish is a blend of solvents, film formers, plasticizers, and pigments. When the fast solvents evaporate, the liquid gets thick. A loose cap, long open time, or heat speeds this up.
Pigments can settle and make the mix feel heavy. Dark and glitter shades thicken faster because they hold more solids. Old polish can also cross link over time, which makes it stringy and slow to level.
Keep this simple rule in mind. If you know why polish thickens, you can predict how it will act. That helps you master How To Thin Out Nail Polish without guesswork.
:max_bytes(150000):strip_icc()/polishbottletips_recir-cb8acbeb0e7e422f85efa8c5210af043.jpg)
The Right Way: How To Thin Out Nail Polish with Thinner
Here is the salon-safe method I use when clients hand me a goopy bottle. It works for most regular polishes and top coats.
- Bring the bottle to room temperature. Cold polish feels thicker. Do not heat it.
- Wipe the neck and threads with a pad dipped in acetone. This clears crust that can block the seal.
- Add two to three drops of professional nail polish thinner. Aim for the center of the bottle.
- Close the cap and roll the bottle between your palms for 30 to 60 seconds. Rolling mixes without bubbles.
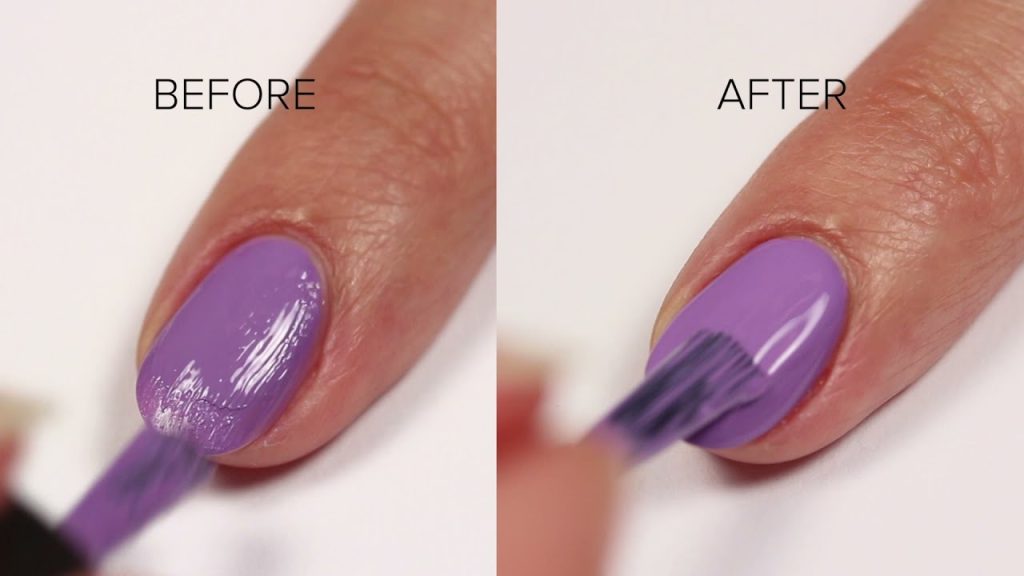
- Test on a swatch stick or a piece of tape. Look for smooth flow and even coverage in two thin coats.
- Still thick. Add one to two more drops, roll, and test again. Work in small steps to avoid over-thinning.
- Let the bottle rest for 10 minutes so microbubbles rise. Then apply to nails.
Pro tips from the chair
- Match your thinner to common base solvents like ethyl acetate and butyl acetate. This keeps the formula stable.
- If you overdo it, leave the cap loose for 2 to 3 minutes so a touch of solvent flashes off, then reseal.
- Use a stainless steel mixing ball if the brand supports it. Avoid random beads that can rust.
Two quick PAA-style answers
- How many drops should I use. Start with two to three drops for a 0.5 ounce bottle. Very thick bottles may need six to eight drops total in rounds.
- Can I shake the bottle. You can, but rolling is kinder. If you shake, let it sit 10 minutes to release bubbles.

Source: youtube.com
What Not To Do When Thinning Polish
I have seen every shortcut, and most of them backfire. Here is what to skip and why.
- Do not use acetone or regular remover. They can break the film, dull shine, and make chips happen fast. They also strip plasticizers, so the coat gets brittle.
- Do not add water, rubbing alcohol, or oil. These do not blend with the formula and can cause streaks or lumps.
- Do not microwave or blast with a hair dryer. Heat warps the balance and can thicken it more after it cools.
- Do not add clear polish to thin a color. You will dilute pigment, shift the shade, and change dry time.
- Do not thin gel polish with regular thinner. Gel is a UV-curing system and needs gel-specific care or a new bottle.
When you learn How To Thin Out Nail Polish, the goal is to restore the original solvent balance. Shortcuts change the chemistry and the wear.

Tools, Products, and Safe Ratios
You do not need a big kit. A few smart tools make the job clean and fast.
- Nail polish thinner with ethyl acetate and butyl acetate
- Dropper or built-in nozzle for control
- Cotton pads and acetone to clean the neck only
- Stainless steel mixing ball made for polish
- Swatch sticks or tape for testing
- A timer to keep mix and rest times honest
Safe starting ratios
- Standard 0.5 ounce bottle. Add two to three drops, test, then add one to two more as needed.
- Very thick or old polish. You may need six to eight drops in rounds. Always mix and test between rounds.
- Never pour in a large slug. Small, steady steps keep color, gloss, and dry time on track.
This setup makes How To Thin Out Nail Polish simple, repeatable, and tidy.

Long-Term Care: Prevent Thickening and Extend Wear
Good care beats constant fixes. Treat your bottles like tiny paint labs.
- Store upright in a cool, dark place. Avoid heat and sun.
- After each use, wipe the neck with a pad and a touch of acetone. This keeps the cap seal tight.
- Open only when you are ready to paint. Long open time speeds up solvent loss.
- Roll the bottle before each use to blend pigments. Gentle motion is best.
- Fridge storage can help in hot climates. Let polish return to room temp before use.
A small habit now saves you from asking How To Thin Out Nail Polish every month.

Troubleshooting: When Thinner Does Not Work
Some bottles are past saving. Here is how to tell when to move on.
- The polish pulls into strings and does not self level even after careful thinning.
- Pigment clumps stay gritty and will not break up with rolling or a mixing ball.
- The base turns watery while glitters sink hard and bald spots appear.
- The smell is harsh but the coat stays soft for hours. The film chemistry is off.
If you hit these signs, retire the bottle. Decant a little for nail art if you like, then dispose of the rest per local rules. When in doubt, replace. It costs less than a ruined manicure.
If you still want to learn How To Thin Out Nail Polish in edge cases, test on a swatch first. Never risk a fresh set before you know the result.

Frequently Asked Questions of How To Thin Out Nail Polish
What is the best product to thin polish?
Use a professional nail polish thinner with ethyl acetate and butyl acetate. These match common base solvents and keep shine and wear stable.
Can I use acetone or nail polish remover to thin a thick bottle?
You can, but you should not. They weaken the film, dull the gloss, and make chips show up fast.
Will thinning change the color or finish?
Small, careful doses should not. Over-thinning can wash out pigment, reduce coverage, and flatten special effects.
How many times can I thin the same bottle?
As many times as needed in tiny steps. If it stops leveling or the color shifts, it is time to replace.
Can I thin gel polish or gel top coat?
No. Gel systems cure under UV or LED and need their own chemistry. Replace the bottle or follow the brand’s gel-specific guidance.
Is it okay to thin base coats and top coats?
Yes, with the same professional thinner and small doses. Test for self-leveling and dry time before a full manicure.
How long should I wait after thinning before painting?
Let the bottle rest for about 10 minutes so bubbles rise. Then test on a swatch and proceed.
Conclusion
A smooth, even manicure starts with the right texture. Now you know How To Thin Out Nail Polish with safe steps, smart tools, and habits that keep your colors fresh. Work in small drops, roll to mix, test as you go, and skip the myths.
Ready to revive your stash. Try the method on one goopy bottle today and see the glide return. Have a question or a win to share. Drop a comment, subscribe for more pro nail care tips, and keep your favorites in rotation.
Amazon and the Amazon logo are trademarks of Amazon.com, Inc, or its affiliates.