Acrylic Nails for Kids: Fun Ideas for Little Hands
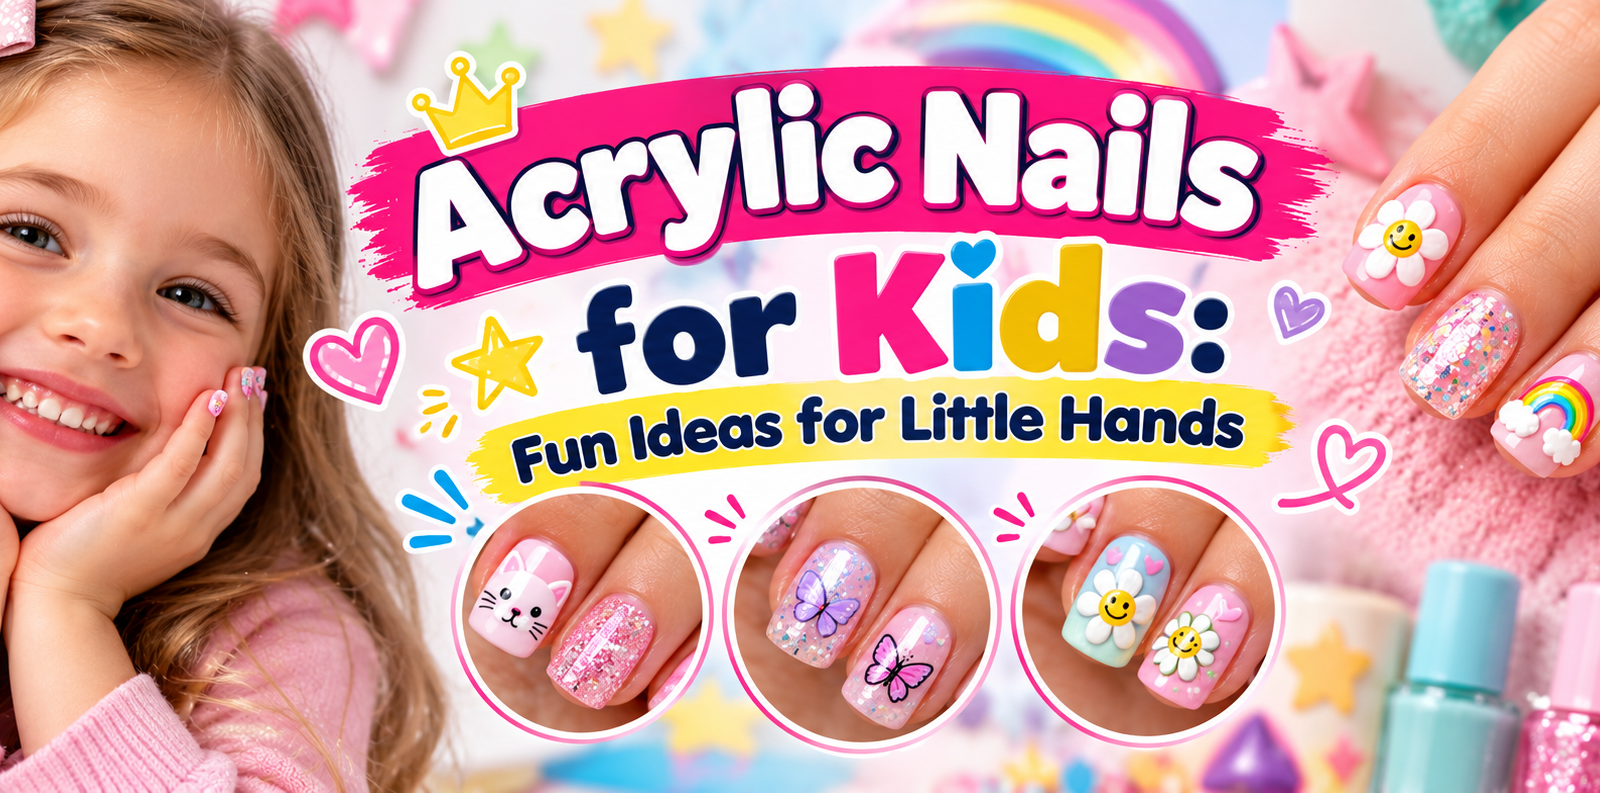
A tiny daisy on one nail can look adorable. A long extension that catches on a sweater can turn a fun beauty idea into a safety problem.
That’s why the best acrylic nails for kids ideas aren’t chosen by color alone. Age, maturity, nail health, nail length, product exposure, and the child’s ability to stop picking or biting all matter. For most young children, a press-on nail or regular polish is a better choice than traditional liquid acrylic.
Older tweens and teens may enjoy short acrylic enhancements, but only with careful product use, professional application, and realistic expectations.
The key is to treat nail art as a creative accessory, not a rite of passage or a shortcut to adult salon treatment. A child should never handle liquid monomer. Liquid monomer and acrylic powder should be mixed and applied by a professional, and the child must avoid skin contact with the chemicals.
Can Kids Have Acrylic Nails?
Most young children don’t need traditional acrylic nails. The safest option for a child under about 5 is regular polish, removable nail wraps, or a very short press-on nail that an adult applies and removes.
There’s no widely accepted age at which acrylic automatically becomes safe. Readiness matters more than the number on a birthday card. A 12-year-old who picks her nail enhancements or doesn’t understand the safety rules may be a poorer candidate than a mature 14-year-old.
Before booking an appointment, parents should check several health and behavioral factors. The child must not have broken, infected, irritated, or peeling nails. The child should be able to leave the enhancement alone, meaning they shouldn’t bite, pick, twist, or repeatedly push at it.
It’s also important to assess whether the child understands that lifting or separating the fake nail from the natural nail can cause damage. Parents should consider whether the child can follow salon instructions and keep the nails clean. Any history of nail-product allergy, eczema, sensitive skin, diabetes, poor circulation, or immune problems requires discussion with an appropriate healthcare professional.
Finally, a short, practical style is usually easier than long or sharp nails.
A simple age guide can help narrow the options:
| Age group | Usually most appropriate choice | Things to consider |
|---|---|---|
| Under 5 | Regular polish, nail wraps, or a very short press-on | Avoid long extensions, 3D decorations, and nail biting. An adult should handle everything. |
| Ages 5–7 | Short press-ons or simple polish | Keep designs tiny and let the child help with color choices, not chemical application. |
| Ages 8–11 | Mostly polish or press-ons; acrylic only in limited circumstances | Consider maturity, ability to stop picking, nail health, and the reason for wanting acrylic. |
| Ages 12–14 | Short professional enhancements may be considered | Choose a conservative length and avoid anything that affects school activities. |
| Ages 15–17 | Professional acrylic may be suitable for responsible teens | Explain maintenance, allergy warnings, cost, and the commitment involved. |
| 18+ | Adult salon rules apply | The person can choose based on nail health, lifestyle, and personal preference. |
Age is only a starting point. A younger child with healthy nails and good boundaries may handle a simple press-on better than an older child who picks at every edge.
Know the Difference Between Acrylic, Gel, and Press-Ons
“Acrylic nails” is often used loosely, so parents and children should know exactly what product is being used.
Traditional Acrylic Enhancements
Traditional acrylic is made by combining liquid monomer and polymer powder. The nail tech shapes the product over the natural nail or a tip and allows it to harden in the air.
Liquid monomer is the main reason traditional application belongs with a trained professional. It can irritate skin and nails, and repeated or heavy exposure can contribute to nail-plate damage or allergic contact dermatitis. The FDA provides safety information and ingredient guidance in its nail product safety overview.
True acrylic is also hard to reverse. A child who wants the nails off before a school trip, sports practice, or a special event may be disappointed by the required removal process.
Gel-Acrylic Hybrids
Gel-acrylic systems combine features of gel and acrylic. Some soak off more easily, while others still require filing. They are not automatically safer or gentler simply because they are called “hybrid.”
Parents should ask what system the salon uses, whether removal requires drilling, and what the full removal process involves.
Press-On Nails
Press-ons are preformed nails attached with nail adhesive or, in some systems, glue. They can be removed more easily than traditional acrylic, although pulling them off forcibly can still damage the natural nail.
Press-ons create a similar decorative effect for special events, holidays, birthdays, school-picture days, and short-term wear. An adult should apply and remove them for younger children. For more ideas, adults can practice supervised press-on applications before doing a child’s nails.
Polish, Stickers, Wraps, and Decals
These options avoid the need to build an extension. They also let the child participate safely by choosing colors, patterns, and placement.
Ready-made decorative motifs can make it easier to create a themed manicure without handling acrylic products. Decals and stickers also allow quick changes when a child loses interest or wants a different look the next day.
Essential Safety Rules for Children
The safest acrylic nail look is one that leaves a child’s natural nail healthy. A beautiful design doesn’t justify skin contact, excessive filing, or a style the child repeatedly damages.
Schedule Around Healthy Nails
Do not place an enhancement over a torn cuticle, infected nail, sore fingertip, or nail that is already peeling. A green, yellow, swollen, or unusually painful nail may indicate infection or injury and should be examined before nail service begins.
If a child is recovering from an injury, wait until the area is fully healed. A nail enhancement can hide irritation and make it harder to clean the damaged area.
Choose a Clean, Well-Ventilated Salon
A good salon should have a clean work area, open the relevant product containers without crowding them, and avoid spilling liquid monomer onto the child’s skin. Ventilation matters because nail products can release vapors that may irritate breathing passages.
Ask direct questions before the appointment. Inquire whether the salon uses ventilation, how the product is applied, and whether the nail tech will file the natural nail, as it’s acceptable to ask, “Will you avoid removing a lot of my natural nail?” You can also ask about product ingredients, the removal process, and the best way to handle an allergy or sensitivity. Finally, confirm how much the appointment will cost, including fills, repairs, and removal.
A salon that dismisses health questions, pressures the child, or promises that a strong nail allergy “can’t happen” is not the right choice.
Keep Liquid Product Away From Skin
Liquid monomer and uncured acrylic should never touch bare skin. The issue isn’t just a quick sting. Repeated exposure can lead to irritation or sensitization, meaning the immune system gradually reacts to the product.
Nail allergies may appear as redness, itching, burning, swelling, blisters, pain, or persistent nail changes. Stop using the product and wash the exposed skin if a reaction develops. Seek medical care for severe swelling, blistering, spreading redness, significant pain, or symptoms that persist.
There is no universally safe duration for a patch test before a nail enhancement. Skin testing at home cannot guarantee that a child will tolerate a full application. Tell the nail salon about previous reactions and ask for an ingredient list if you suspect a sensitivity.
Don’t Let Children Mix or Apply Acrylic
A child should not pour liquid monomer into powder. A child should not brush product into the natural nail or lift a sticky “dough” with bare fingers. Children must not soak or file their nails without an adult supervising and handling the chemicals.
Finally, a child should not grind, drill, trim, or peel the enhancement.
Proper application requires control of the working time, bead shape, balance, and product thickness. A child may copy the action without understanding these risks, which is why adult-only DIY manicures aren’t appropriate.
Keep the Style Low Profile
Short nails are less likely to catch on clothing, scratch the face, or break during play. Rounded, soft square, or short oval shapes usually work better than pointed or sharply squared designs.
The safest size is one the child can manage without looking at it constantly. If the nails are making the child self-conscious, it’s a sign that the style is too attention-grabbing for everyday life.
Avoid Loose 3D Objects
Large rhinestones, metal bows, novelty charms, and other hard decorations can detach. A detached object may scratch the nail, get caught in clothing, or create a choking risk for younger children.
My practical rule is simple: if the decoration can be flicked off with a fingernail, it shouldn’t go on a young child’s nails. Stickers, decals, or firmly secured salon-quality accents are easier to control.
Keep School and Sports Needs in View
Some schools prohibit long nails, nail polish, acrylics, or visible decorations. Some are relaxed. Many are concerned with keeping grooming from becoming a distraction, so a simple dark or neutral color is often more acceptable than a bright design.
Children who play instruments should use short, smooth nails that won’t catch keys or strings. Cheerleaders, dancers, and younger soccer players may prefer a low-profile look, and they should ask a coach before committing to long extensions or raised embellishments.
20 Acrylic Nail Ideas for Kids
Age labels below are only rough guides. A design that works on a patient teen may be a poor choice for a five-year-old, regardless of how trendy it is.
Cute Ideas for Younger Children
1. Tiny French Tips
A narrow white tip on a sheer pink, peach, beige, or soft neutral base creates a clean miniature French manicure. It looks polished without looking grown up.
For a child using press-ons, apply white polish only to the free edge. The result should stay neat without needing fine nail-art brushes. If the child has long, uneven natural nails, press-ons or regular polish will create a more even version.
2. One-Color Candy Pastels
A single pastel shade is often the easiest introduction to nail art. Choose pale pink, mint, butter yellow, lavender, sky blue, or peach.
One color also lets a child observe how the polish looks on their own nails before trying something more complex. Let the polish dry fully before dressing, because a loose sleeve can smudge a freshly manicured nail in seconds.
If regular polish is being used, a quick polish-color comparison can help adults choose a manageable range of shades. Check each product label and keep it out of reach after use.
3. Smiley-Face Accents
Small yellow dots with two curved black lines can be placed on one or two nails. Use nail-art pens or decals rather than loose face charms.
The faces are most effective when the rest of the manicure stays simple. A nude or pastel base with two smiley nails creates a playful design without turning every nail into a character. Avoid exaggerated faces or long raised pieces that could snag.
4. Strawberry Dots
Red or pink polish dots can suggest a strawberry when paired with tiny white highlights and a green accent nail. The design doesn’t require detailed drawing.
For young children, a green index nail and pink polish dots on the others are enough. The colors can also work on press-ons and removable wraps.
5. Mini Daisies
White dots, yellow centers, and a little green produce a cheerful daisy pattern. Only the accent nail needs the full design, while the others can use white polish or a single soft color.
A small decal is faster and more even than freehand work. A simple guide to ready-made decorative motifs can help an adult change the pattern without building a complicated manicure.
Playful Ideas for Tweens
6. Pastel Rainbow
Each nail can use a different pastel shade. Pastel pink, purple, blue, green, and yellow create a rainbow effect without neon brightness.
Keep the colors similar in value. Five completely different shades may look busy, while a coordinated pastel set looks intentional. For school, use this on a special Friday or combine two shades instead of all five.
7. Color-Blocked Nails
Split each nail horizontally or vertically with two simple colors. Navy and white, mint and pink, or lavender and yellow work well.
Color blocking hides minor imperfections better than a highly detailed design. It also photographs well, which makes it useful for birthday pictures or a family celebration.
8. Simple Stripes
Thin stripes can run across the nail or lengthwise. Use two contrasting but friendly colors, such as pale blue and white or coral and navy.
Avoid very wide, uneven stripes if the child will pick at the edges. Decals are a good option when fine control is difficult.
9. Polka Dots
Large dots on one accent nail and tiny dots on another create variety without complex artwork. White dots over red, red dots over pale blue, or black dots over pastel polish all work.
Keep the spacing loose. A crowded pattern can look unfinished, especially on small nails.
10. Two-Tone Smileys
Use one color for the base, a second for the smile, and a contrasting detail for cheeks. The result is cute without covering the full nail.
The classic combination of yellow, black, and coral is bright and easy to recognize. An adult should handle nail-art pens, especially if they are not specifically intended for children.
Trend Ideas for Tweens and Teens
11. Soft Ombre
Ombre moves from one pale shade at the base to another at the tip. A peach-to-pink or lavender-to-white ombre is subtle enough for everyday wear.
Older teens can ask a salon to create the effect on short extensions. A parent reviewing a simple blended-color tutorial can understand the process and discuss how much blending the finished design needs.
Ombre hides small marks near the tip, but it doesn’t make damaged natural nails safe to cover.
12. Clouded Blue
A soft sky-blue base with white cloud shapes creates a calm, summery manicure. A little silver or pearl detail can add shine without heavy glitter.
Keep the silver subtle if the child will wear the nails to school. Large reflective particles may look better in photos but can make the style more costume-like.
13. Tiny Fruit Slices
Orange, lemon, watermelon, and strawberry accents are easy to recognize. Paint the fruit on one or two nails and keep the others solid.
Thin green or white lines can suggest a rind or seed pattern. Avoid attaching physical fruit slices, candy pieces, or plastic food charms. Loose novelty decorations come off too easily.
14. Two-Tone Animal Print
Black and tan, brown and cream, or navy and light blue can create a simple leopard-style pattern. Irregular spots and short curved lines work better than perfectly identical marks.
The pattern is bold, so solid or softly colored accent nails balance it out. For younger children, use the pattern on a press-on nail only rather than every nail.
15. Ocean Waves
Blue waves, white foam, and a pale sandy accent nail create a summery design. The lines should look relaxed and rounded rather than sharp or dramatic.
A child who enjoys swimming or beach trips may still cover the nails with a glove, especially if they are enhanced. Open-toed shoes and repeated wet exposure can make lifting more likely.
16. Checkered Accent Nails
A small black-and-white checkboard pattern can be painted on one nail. A matte top coat gives the graphic pattern a more polished look.
For a simpler version, alternate black and white nails from finger to finger. Keep the checks small enough to remain within the edge of the nail.
17. Soft Marble
Pale pink, gray, and white lines can look like marble. The result should be calm, with plenty of negative space between the lines.
Marble is more forgiving than tiny line art, which makes it useful for a child who doesn’t have a steady hand. A salon can do this effect on short acrylic enhancements or create it on press-ons and wraps.
18. Sun and Rainbow Accents
A small sun on one nail and a rainbow on another create a cheerful theme. Pastel colors tie the design together.
Keep the remaining nails pale yellow, sky blue, or soft pink. The accents should occupy only part of the nail, leaving the child’s natural nail mostly visible.
19. Birthstone or Favorite-Color Set
Assigning a birthstone month to one accent nail is more meaningful than covering the full hand with sparkles. The favorite-color approach is less crowded.
A single accent nail can use pale blue, amethyst, rose, emerald, garnet, or pearl tone. It works on real or press-on nails and gives the child a reason to feel involved in the choice.
20. Initial or Letter Decals
A single initial, a small symbol, or a short name can personalize the manicure. The child may enjoy choosing it themselves, but avoid adding a large number of letters to a nail that is already small.
Decals and printed designs are smoother than hand-painted words. An adult should check that edges are secure and that the letters are not raised enough to catch on clothing.
How to Choose Colors, Shapes, and Finishes
A successful design considers more than the trend. It considers the child’s features, school rules, skin tone, and daily activities.
Choose a Color the Child Actually Likes
Kids often prefer high contrast, a favorite character’s colors, or colors that look good with their clothes. Let them choose two options from a small collection of shades. Too many options make the decision tiring and can lead to last-minute changes.
A balanced palette usually has one main color, one supporting color, and one accent. Three coordinated shades are enough for most themed manicures.
Think About Nail Shape
The selected shape should be shorter than the fingertip or only slightly longer. Short oval and soft square shapes are the easiest everyday options. Rounded styles suit children because they rarely catch on sweater cuffs.
A narrow almond shape is acceptable for older teens who can keep it short. Meanwhile, long stiletto, coffin, and pointed shapes are difficult to maintain and easily break.
If the nail tech suggests extensions because the natural nail is short, ask whether a much shorter shape would still work. A child can change the length later. See our guide to low-profile length options for the practical side of keeping a look manageable.
Keep Raised Details Minimal
A smooth finish is easier to clean and less likely to snag. Rhinestones can remain securely attached in a salon, but a young child may still pry at them. Raised bows, hearts, flowers, and letters add a lot of bulk to a small nail.
A satin or glossy polish can give a finished appearance without added height. A sparkly accent nail is enough when the child wants something more decorative.
Consider the School and Bedtime Routine
Some teachers may ask students to remove very long nails or distracting decorations. Some children can’t paint their nails themselves, so an adult will need to remove them before bed.
Ask the school before booking, especially for high school, dance, sports, or performance programs. For younger children, create a different manicure after school if school rules differ.
What to Tell the Nail Salon
Bring a clear reference image, but simplify it for the child’s age and lifestyle. A photo can show a long, highly detailed adult manicure that isn’t right for a child.
Instead of a general “just copy this” instruction, provide specific preferences. You can tell the nail tech the exact color the child wants, along with the preferred length. Specify the rounded, soft square, or oval shape and request one accent nail rather than ten, requesting short and practical nails.
Specify a simple, low-profile finish, and clearly state that no loose or 3D decorations should be added. Request a product ingredient disclosure and ask the child to be shown how to point out any burning, itching, or discomfort immediately.
A good salon tech will explain which parts of the reference image can be adapted. They should preserve the style’s character without copying details that are unsafe or impractical.
Parents should stay present for a minor’s appointment, especially if the child has never had a manicure. The parent can help communicate, watch for a reaction, and make sure the child knows not to pick at drying product. A child who becomes frightened by the odor, filing, or sounds can ask for a break.
Ask About Fill and Removal Appointments
Don’t judge the salon by the first appointment alone. Ask about three practical questions. First, determine how often fills will be needed and what a fill appointment includes.
Next, clarify whether the enhancement lifts easily or usually needs soaking and filing. Finally, ask what removal will cost and whether special care is needed after the nails come off.
Lifting can happen even with good application. A child may catch the free edge, or hair and soap may become trapped underneath. Keeping the enhancement short reduces leverage, but it doesn’t make the nail unbreakable.
Safer Alternatives for Home and Special Events
Traditional liquid acrylic should stay out of a child’s DIY manicure. That doesn’t mean the child can’t enjoy nail art. Several alternatives create a similar decorative effect with less risk.
Short Press-On Nails
Press-ons are useful for holidays, performances, birthdays, and school pictures. Choose a small size and avoid very long or sharp shapes.
Apply and remove them with adult help. Follow the adhesive directions exactly, and don’t use household glue, craft glue, or superglue. Keep the surface clean and dry, and don’t place a press-on over an irritated nail.
Regular Polish
Polish offers the least complicated manicure. A child can choose between two colors, paint one accent nail, or create dots with the polish brush.
Allow more drying time than you think a child needs. A good airflow fan can help, but don’t place a fan directly against wet polish or use a hairdryer. Hairdryers can overheat the product, and blowing dust onto a wet nail can create a rough finish.
Nail Wraps and Decals
Wraps and decals are useful when a child wants variety without a long appointment. Use a full wrap or sticker on one or two nails and regular polish on the rest for a mixed manicure.
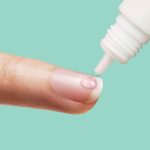
If the design lifts at an edge, remove it rather than leaving it to catch. An adult can also consult gentle adhesive cleanup if residue reaches the skin after a press-on application.
Salon-Only Color Without Extension
A child may enjoy a manicure without needing added length. Regular polish, gel color, or a soak-off nail system may provide the look without a traditional extension. Discuss the full application and removal process before booking.
A gel manicure has its own safety and removal considerations. It should not be treated as a child’s toy or applied without a trained professional.
Wearing and Caring for a Kid-Friendly Acrylic Manicure
The easier the manicure is to live with, the less likely the child is to damage it or her natural nails.
Keep Them Clean
Longer nails can hold dirt, soap, and moisture underneath. Clean beneath the free edge gently, and pay attention to the skin around the nail. If a nail begins to lift, don’t trap moisture underneath it or try to glue it back down yourself.
Avoid wearing a manicure over an open sore. Shoes that rub against the toes can also make toenail enhancements lift, and tight shoes may be uncomfortable when the natural nail is covered.
Don’t Use Nails as a Tool
A child shouldn’t pry open containers, scratch off labels, pick tape, or scrape food from the counter with her nails. Those habits damage both enhancements and natural nails.
Nail biting is especially problematic because it can separate the enhancement from the natural nail and create a moist gap underneath. Offer an adhesive remover, bitter-tasting nail polish formulated for nail biting, or a positive replacement habit before booking a longer manicure.
Keep Appointments Conservative
Most salons will recommend fills or balancing according to the style and the nail’s growth. Don’t assume a child must come back every few weeks if the nails still look good and no gap or lifting appears.
A salon that pressures a parent into a permanent long fill schedule deserves a second opinion. A reasonable salon should explain the need for the appointment rather than treating it as an automatic purchase.
Remove the Product Gently
Do not peel or rip traditional acrylic off the natural nail. A professional can soak and lift the material, then remove the remaining product with care. For very young children, the parent should schedule a professional removal from the start and avoid a DIY removal plan.
After removal, leave the natural nail dry if it feels irritated. Don’t trim or file a soft nail. Apply a simple moisturizer once the skin is intact.
Healthy nails grow slowly, and a damaged nail plate may need several months to grow out, so the best post-removal recovery routine is a patient one.
Support the Natural Nail
Nutrition supports normal nail growth, but no supplement repairs a badly damaged nail instantly. A balanced diet, reasonable hydration, and routine care can support the nail, yet a severely split, weak, or peeling nail may need a healthcare professional’s assessment.
If a child is constantly biting, peeling, or breaking their nails, address that habit before adding an enhancement. Our guide to support for natural nail growth offers useful basics for protecting the underlying nail.
Common Mistakes Parents Can Avoid
Booking Long Acrylics as a Surprise
A long manicure can be exciting for a few days and frustrating for weeks. If the child wants to experiment, start with a short design or press-ons. That way, they can see how they feel about nail care before committing to a long fill schedule.
Assuming “Kid-Friendly” Means Risk-Free
A product labeled for children may still contain materials that irritate a particular child. Ingredient claims don’t guarantee an allergy-free experience. The safe approach is still to avoid skin contact, use good ventilation, and stop the appointment if burning or itching begins.
Letting the Child Handle Liquid Monomer
Even a small spill can irritate skin and nails. Monomer should never be poured into powder by a child or touched without gloves. It should be kept away from the mouth and face, and the container should be closed immediately after use.
Picking a Trend Over the Child’s Features
Long stiletto nails, deep 3D flowers, and multiple loose charms may look striking in a photo, yet they may be uncomfortable at school, and playing with them could increase the risk of breaking them. A simple shape is usually more useful.
Ignoring the Child’s Nail-Biting Habit
If the child already bites or picks at the natural nail, an enhancement may not help. It can create a larger surface for the habit and give the child something to pry at.
Using Strong Adhesive to Make a Press-On Last
Glue is not a substitute for proper nail preparation. Excess adhesive can leak onto the skin and nail, and forcing a press-on to stick can create pressure. Use nail adhesive designed for press-ons and follow the directions carefully.
Treating Lifting as Harmless
A small lift may seem cosmetic, but it can pull on the natural nail. It can also trap water or soap and catch on clothing. Have a professional check it rather than trying to fix it with more glue.
Skipping the Removal Plan
A child must understand that the nails won’t always come off with a quick peel. A salon that applies traditional acrylic without explaining removal is not offering a complete service.
Frequently Asked Questions
What is the safest acrylic nail style for a child?
A short, rounded style is safest because it is less likely to break or catch. Product safety matters even more than the decoration. Traditional liquid acrylic should be applied by a trained nail professional in a clean, ventilated setting.
For a younger child, a short press-on or regular manicure is usually the best choice.
At what age can a child get acrylic nails?
There is no single age that makes acrylic appropriate for every child. Readiness, health, self-control, and the child’s ability to avoid biting and picking are more useful than age alone. Many parents wait until a child is at least in the tween or teen years, and a short style is usually more manageable.
Can a 10-year-old get acrylic nails?
Some children may be physically old enough to sit through a salon appointment, though age doesn’t guarantee safe use. A 10-year-old who has healthy nails and can follow the salon rules may be considered by a professional. A child who bites nails, picks at the manicure, has sensitive skin, or wants a long style may not be ready.
A 10-year-old can ask about press-ons or regular polish first.
Can a child get nail art without acrylic?
Yes. Nail art can be done on natural nails, press-ons, wraps, or decals. This gives a child the colors and patterns without the commitment of a long extension.
A short press-on with a favorite design is also useful for a birthday, holiday, or photo day.
Are gel-acrylic nails safer for children?
Not necessarily. A hybrid product may have different ingredients and a different removal process, but it can still irritate skin or nails. Ask the salon what product is used and whether it requires soaking, filing, or drilling.
No product should be applied to broken or infected nails.
How long should a child’s acrylic nails be?
The nails should be no longer than necessary for the child’s activities. Short rounded, soft-square, or oval styles are usually easier to manage. Long, pointed, or raised styles are more likely to break and catch on clothing.
Are nail polish colors safe for children?
Many nail polishes are not designed to be ingested, and children shouldn’t chew nail-polish bottles. Choose products that are clearly labeled and keep them out of reach. Adults should handle application and removal for younger children.
If polish gets on the skin, wash it away rather than using solvents to “clean” the child’s skin.
How do you stop a child from picking at acrylic nails?
Address the behavior before the appointment, and choose a short, smooth design. A child may pick because the nail lifts, feels uncomfortable, or gives them a habit to focus on. Book a professional check if the nail is separating.
Never fill a large gap with more glue at home.
Can a child remove press-on nails at home?
An adult should handle the removal, especially for a young child. Follow the adhesive or nail-removal directions and avoid pulling the nail sideways. If glue reaches the skin, remove it gently with a safe adhesive-cleaning method instead of tugging at the skin.
How often should a child get acrylic fills?
The answer depends on the child’s nail growth, the style, and whether the enhancement is lifting or snagging. More frequent fills aren’t automatically better. A salon should recommend a follow-up only when the nail needs balancing.
Avoid filling a small gap or leaving a child with a long extension simply because of a rigid appointment schedule.
What should a parent do if a child has a nail allergy?
Stop the product and wash the affected skin. Seek medical care for significant swelling, blistering, spreading redness, severe pain, or breathing symptoms. Tell the salon and future nail professionals about the reaction.
A nail allergy can be unpredictable, so another acrylic formula shouldn’t be treated as a guaranteed solution.
Making Nail Art Fun Without Making It Risky
The best acrylic nails for kids ideas are bright, age-appropriate, and easy to live with. A tiny French tip, a simple daisy, a favorite-color set, or one personalized accent nail can feel special without creating a long, fragile extension.
Start with the child’s age, nail health, and habits. Choose a short shape, limit loose decorations, and use traditional liquid acrylic only through a professional application. For younger children, a press-on, wrap, or regular manicure usually provides the fun with less risk.
The manicure should support the child’s confidence and creativity while leaving the natural nails healthy.
Amazon and the Amazon logo are trademarks of Amazon.com, Inc, or its affiliates.
Author


Similar Posts