Best Acrylic Paint Brush Brands Artists Can Trust
A poor acrylic brush can split the bead, drag the product, or send your application off course. You may still finish the nail, but the surface will be harder to shape and the whole process will take longer.
That’s why, for most people, I start with Winstonia. It offers reliable, professional-style brushes for general acrylic application, especially when you want a useful balance of control and versatility. Ruby Wing is a strong choice for experienced users who prefer tools designed alongside professional nail systems. KAVA, Jessica, and IBD make the list when control, narrow shaping, or fine detail matters more.
This guide compares good acrylic brush brands by brush shape, flexibility, precision, intended use, and value. It also explains how to inspect any brush before buying, because even a reputable brand can’t make an oversized or poorly shaped brush right for the job.
Best Acrylic Brush Brands at a Glance
The ideal acrylic brush depends on whether you’re a beginner, building full coverage, or creating precise nail art. Here’s a summary of the strongest options across different needs and experience levels.
| Brand | Best For | Why It’s Worth Considering | Main Watch-Out |
|---|---|---|---|
| Winstonia | All-around acrylic application | Strong balance of placement, shaping, and control | Add a separate detail brush for very fine work |
| Ruby Wing | Professional and system-based work | Broad range suited to controlled product placement | Choose the correct brush size rather than relying on the brand name |
| Jessica | Precise bead placement | Tapered formats suit controlled application and clean shaping | An oversized head can be harder to use near the cuticle |
| KAVA | Detailed and narrow shaping | Slim profiles are useful for tight C-curves and sidewalls | Small brushes require steadier hands and more frequent loading |
| IBD | One-stroke work and finishing | Useful professional options for fine lines and cleanup | A detail brush shouldn’t be your only tool for full nail coverage |
| AFFAIR | Shaping and full-cover application | Offers different shapes for broader coverage and detailed work | Model names and sizes can vary across sellers |
| Mia Secret | Value-focused starter brushes | Practical choice for building a basic professional-style kit | Verify that the listing is an acrylic brush, not a dust or polish brush |
| Saviland | Affordable beginner and travel options | Convenient for basic application and practice | Compare the exact head shape and seller information carefully |
| Young Nails | Users already working with its acrylic system | Useful option for people who want tools that complement their existing products | Check the current brush range and local availability |
These brands are categorized by their specific strengths rather than as a universal quality ranking. The right choice ultimately depends on balancing your technical experience with the specific coverage, control, and detailing demands of your manicure.
What Makes an Acrylic Nail Brush Good?
A useful brush needs to do more than hold product. It should place the bead where you want it, release the product cleanly, and retain its shape after you finish the stroke.
1. Control
The head should stay centered when you place it on the nail. A loose ferrule or uneven head makes small corrections feel unpredictable.
Look for:
- A head that is symmetrical from side to side
- A secure ferrule with no visible gaps
- A taper that lets you place the product precisely
- A handle that does not roll when your index finger rests on it
2. Flexibility
The bristles should bend without creasing. If the head folds sharply at the same point every time, it may retain that crease and stop placing smoothly.
A brush that is too stiff can press the bead into place but gives you little visual feedback. One that is too soft can collapse under the product and push it sideways. Look for a controlled flex with a quick return toward its original shape.
3. Smoothness
The filament should feel consistent, with an even tip and no rough spots. Split ends can catch on the nail and create lines through the acrylic. A rough ferrule can also scratch the product while you’re trying to smooth it.
4. Balance
A comfortable handle makes prolonged work less tiring. The brush shouldn’t feel top-heavy or overly thin. Full-size nail brushes often suit longer work better than tiny art-style handles, but comfort depends on your hand size and technique.
5. The Right Size
Brush size numbers are not standardized across brands. A size 4 from one maker may behave differently from a size 4 made by another company. Compare the actual head shape, width, and length instead.
6. Purpose
A main application brush, a French brush, and a nail-art detail brush do different jobs. No single brush must handle all of them, but buying two or three well-chosen sizes is usually better than owning a large set of mismatched tools.
Brand-by-Brand Acrylic Brush Picks
These picks reflect use-case fit rather than claims of personal wear testing. Product models and availability can change, so confirm that the seller lists the exact brush you need.
Winstonia: Best Overall for Most Users
Winstonia is my first recommendation for someone who wants a dependable all-purpose acrylic brush. The brand is well known in professional nail care, and its Wonderbrush name is among its most recognizable products. Depending on the market, you’ll also find conventional oval and round brush formats for normal application.
Winstonia works well for:
- Placing and guiding a clear bead
- Building a clean C-curve
- Shaping the apex and side profile
- Smoothing the surface
- Handling full-cover application
The main advantage is versatility. A well-shaped Winstonia brush can reduce the need to keep changing tools while you work. That matters for beginners because constant tool switching adds more opportunities for gaps, bubbles, and uneven product placement.
Choose it if:
- You want one brush for most of the manicure
- You work with traditional acrylic powder and monomer
- You value control more than an extremely fine nail-art point
- You’re building a professional-style kit without buying every specialty tool
I would still pair it with a small flat or detail brush for a straight smile line and precise cleanup. That is a better setup than expecting one general brush to perform every task.
Ruby Wing: Best for Professional, System-Oriented Work
Ruby Wing is a strong fit for experienced users and anyone who wants their brushes to feel like part of a complete professional nail system. The brand offers acrylic and nail-art tools designed for controlled placement, detail work, and shaping.
Ruby Wing brushes suit users who:
- Already understand how to control acrylic’s working time
- Prefer compact, specialized brush heads
- Want consistent tools for detailed applications
- Use Ruby Wing products or appreciate a broad professional range
A system-matched brush can make the application process feel more consistent, but compatibility is not exclusive. A quality acrylic brush can usually work with another manufacturer’s properly formulated liquid and powder.
Pay close attention to the brush format. A small or angled brush gives excellent precision but may be inefficient when you’re building the entire nail. A fuller round or oval brush makes faster work on the main surface.
For most users, the best setup includes one medium application brush and one smaller shaping or detail brush.
Jessica: Best for Controlled Bead Placement
Jessica offers professional nail brushes in tapered and detailed formats that can work well for acrylic application. Their strongest fit is for someone who wants close control without moving to an extremely expensive or specialized system.
This brand is worth considering when you:
- Build the bead near the cuticle and need a compact head
- Refine the smile line
- Shape a tight C-curve
- Work on detailed corrections after the main application
- Prefer a brush with a clear, narrow taper
The most important point is to select a head that matches the size of the nail. A brush that is too wide can place too much product at once, and a small brush loaded heavily can become difficult to control. Jessica is a practical choice when you want more precision than a general utility brush offers.
KAVA: Best for Narrow, Precise Shaping
KAVA is associated with slim nail brushes that appeal to detail-oriented users. These brushes are especially useful when the main goal is controlled shaping rather than quickly covering a large area.
KAVA-style brushes work well for:
- Tight C-curves
- Sidewall shaping
- Defining the smile line
- Placing product close to the cuticle
- Precise corrections
- Thin nail-art strokes with compatible product
The benefit is visibility and control. A narrow head lets you see exactly where the product is landing. The trade-off is speed.
Small brushes hold less product, so you may need more beads and steadier pressure.
If you choose KAVA for detailed work, consider using it alongside a fuller application brush. That combination will usually be more efficient than trying to cover the whole nail with a very small head.
IBD: Best for Detail Work and One-Stroke Techniques
IBD, also known as International Beauté Design, makes professional nail and beauty tools. Its one-stroke and detail brush formats are the main reason to consider the brand for acrylic nail art.
IBD is best suited to:
- One-stroke designs
- Fine decorative lines
- Cleanup around the perimeter
- Small accent work
- Fine product placement
IBD is not the first name I would give someone who needs one broad brush to cover an entire nail. Detail brushes usually have narrower reservoirs and less overall product capacity. They are better as a second tool than as the only acrylic brush in a kit.
For most detail-oriented users, an IBD one-stroke or liner-style brush works best beside a medium oval or round application brush.
AFFAIR: Best for Full-Cover Shaping
AFFAIR offers professional nail brushes in a range of formats for modeling, shaping, and detail work. That range makes it useful for users who need more than a single standard brush shape.
Look for an AFFAIR brush that matches the task rather than automatically choosing the largest option. Wider or fuller brushes can help with:
- Full-cover application
- Moving larger amounts of product
- Building volume
- Shaping a stronger apex
- Smoothing broader areas
A slimmer AFFAIR brush may be better for the cuticle line, sidewalls, and decorative details. The brand is most appealing when you want several shapes in a related range and prefer a more professional-tool aesthetic over a basic artist brush.
Mia Secret: Best Value-Focused Professional Supply Choice
Mia Secret is a practical option when you want a solid starter brush without beginning with one of the most premium tools. Its nail-supply range includes products commonly used alongside broader manicure kits, making it useful for building an application setup gradually.
Look for a medium oval or round brush explicitly labeled for acrylic or nail building. A small flat brush is a sensible companion for French application and straight-edge cleanup.
Mia Secret is a good fit for:
- New acrylic users
- Practice and home application
- Building a kit one essential tool at a time
- Users who want a value-focused option
- People who already know the brush shape they need
The important rule is to read the listing carefully. Make sure the product is an application brush rather than a dust brush, bottle brush, sponge applicator, or brush intended only for nail polish.
Saviland: Best for an Accessible First Brush
Saviland offers an accessible range of nail tools and supplies. Its acrylic brush options can work for basic application, practice, and home manicures, particularly when cost and convenience are priorities.
Choose Saviland when:
- You’re buying your first application brush
- You want a small, affordable set
- You need a brush for travel or practice
- You’re still deciding which shape suits your hand
- You’re building an application kit gradually
The key is to avoid choosing by a dramatic discount alone. Check the head shape, dimensions, material description, and seller information. A good price does not compensate for a brush that is too floppy, uneven, or poorly finished.
A medium oval or round brush should be your first choice for general application. Don’t begin with a tiny liner unless you mainly plan nail art.
Young Nails: Best for an Existing Young Nails Routine
Young Nails is a strong option for users who already use its acrylic products or prefer professional system-based tools. The appeal isn’t exclusivity; many artists mix brands successfully. The value is easier decision-making when the brush, powder, and liquid are treated as parts of the same professional workflow.
A matching brush can be especially useful if you are still learning product consistency and working time. It may also narrow the number of variables when you are troubleshooting an application issue.
Choose this route if:
- You already use Young Nails systems
- Your local distributor carries its current brush range
- You want tools that complement the same professional category
- You value a coordinated application setup
The current product catalog and regional availability should be checked before purchase. Even strong professional brands can change the shapes and sizes they offer.
How to Choose the Right Acrylic Brush Shape
Brush shape affects your application more than any logo on the handle.
| Application Task | Useful Shape | What You Want |
|---|---|---|
| General bead placement | Oval or round | Controlled flex and moderate product capacity |
| Building the apex | Round or fuller oval | Stable head and enough product to shape volume |
| Tight C-curve | Small oval or slightly angled | Precise placement without pushing the bead sideways |
| Straight smile line | Flat or square | Clean edge control and broad surface contact |
| French application | Flat, square, or firm oval | Stable application with minimal product movement |
| Fine nail art | Small round or liner | A compact reservoir and a dependable point |
| Sidewall detailing | Slim oval or angled | Visibility and controlled pressure |
| Dust removal | Fan or dedicated dust brush | Softness and a wide sweeping edge |
| Cleanup | Small detail brush | Precision without disturbing finished areas |
Round Brushes
Round brushes are the most flexible option. They can place a full bead, shape the nail, and refine the surface. They are a good default for beginners because they don’t force you into a highly specialized stroke.
Oval Brushes
Oval brushes are useful for controlled placement and smoothing. The head can carry a useful amount of product while still allowing you to shape the sides of the nail.
Flat Brushes
Flat brushes are valuable for French nails, straight smile lines, and broad smoothing. They are less precise at the cuticle, so many professionals pair one with a smaller round or oval brush.
Angled Brushes
Angled brushes can help with sidewalls and shaping because the head meets the nail at a useful angle. They are not automatically better for every hand. A clean, responsive oval brush may be easier to control for beginners.
Detail Brushes
Detail brushes belong beside the main application brush, not instead of it. They’re useful for small accents and corrections, but loading them with a full bead can make them unnecessarily clumsy.
If you’re planning longer extensions, proper shaping matters as much as brush selection. This guide to safer at-home shaping explains how to shorten and refine the form without overworking the structure.
Synthetic, Natural, or Artist Brush?
Synthetic Filament
Synthetic filament is the most practical default for acrylic nail application. It usually gives consistent performance, is easy to clean, and resists retaining a crease.
A synthetic brush is a good choice when:
- You’re buying your first acrylic brush
- You work frequently with liquid monomer
- You prefer predictable flex
- You want straightforward maintenance
- You replace tools occasionally
Look for an even, tapered synthetic head rather than assuming every synthetic brush feels the same. Filament quality, taper, density, and ferrule construction still differ.
Natural or Mixed Fibers
Natural-hair and mixed brushes can provide a nuanced feel for detailed work. They may be preferred by experienced artists who understand how much pressure a particular head can handle.
The disadvantages are maintenance and cost. They may require more careful cleaning and storage. A brush damaged by monomer residue is expensive to replace.
Natural fibers are not automatically better for general acrylic placement. A well-made synthetic brush is usually the smarter starting point.
Artist Brushes
Pentel, da Vinci, and other established artist-brush brands make useful small round and liner brushes for one-stroke work, cleanup, and fine detail. However, they are not automatically the best main acrylic brushes.
Artist brushes are designed for a different working environment. A brush sold for acrylic painting may contain fibers or adhesives that react differently with nail monomer. A large or soft brush designed for paint can also absorb too much liquid and make nail application imprecise.
Use an artist brush for:
- Fine nail-art lines
- One-stroke effects
- Small cleanup
- Decorative work performed on a stable base
Use a dedicated nail brush for:
- Main bead placement
- Full-cover acrylic
- Apex building
- C-curve shaping
- Broader surface smoothing
This distinction protects application control and avoids relying on a product category that wasn’t created for it.
Best Brush by Skill Level and Manicure Type
Choosing the right brush depends on your technical level and the specific requirements of the manicure. The following table matches common nail artists and applications with their most suitable brush types.
| Situation | Best Brush Type | Strong Choices |
|---|---|---|
| First acrylic manicure | Medium synthetic oval or round | Winstonia, Jessica, Mia Secret |
| Home application on a budget | Simple tapered application brush | Mia Secret, Saviland |
| Professional full-cover work | Medium or fuller round brush | Ruby Wing, Winstonia, AFFAIR |
| Tight sidewalls | Slim oval or angled brush | KAVA, Jessica, IBD |
| French nails | Flat or square brush plus a small round | Winstonia, Jessica, IBD |
| Nail art | Small round, liner, and one-stroke brush | KAVA, IBD, Jessica |
| Mobile or travel work | Compact, sturdy brush set | Saviland, Mia Secret, Winstonia |
| Existing professional system | Matching tool range | Ruby Wing or Young Nails |
Choosing an appropriate brush type for your experience level prevents technical frustration. Whether you are a beginner or a professional, these targeted brush shapes ensure accurate application and control.
A beginner doesn’t need the largest professional kit. Start with one medium oval or round brush that feels comfortable in your hand. Add a small flat or detail brush once you can place the main bead consistently.
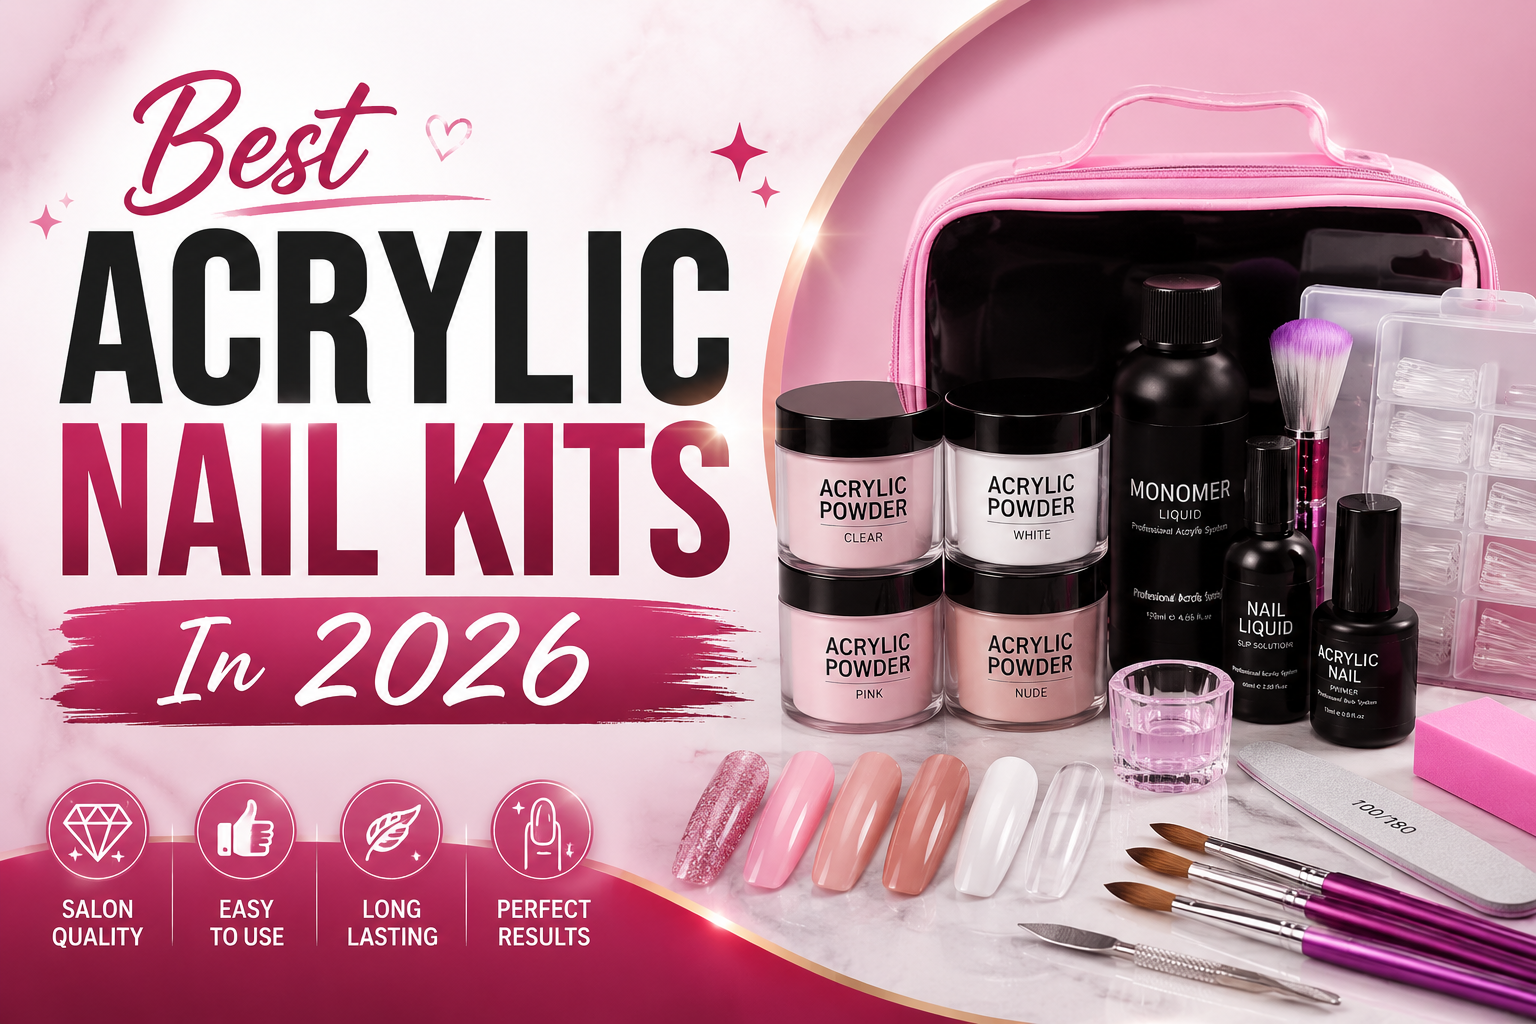
If you’re building a first manicure setup, a ready-made acrylic kit can help you compare the other supplies you’ll need. The brush still needs to suit the size and style of application you plan to do.
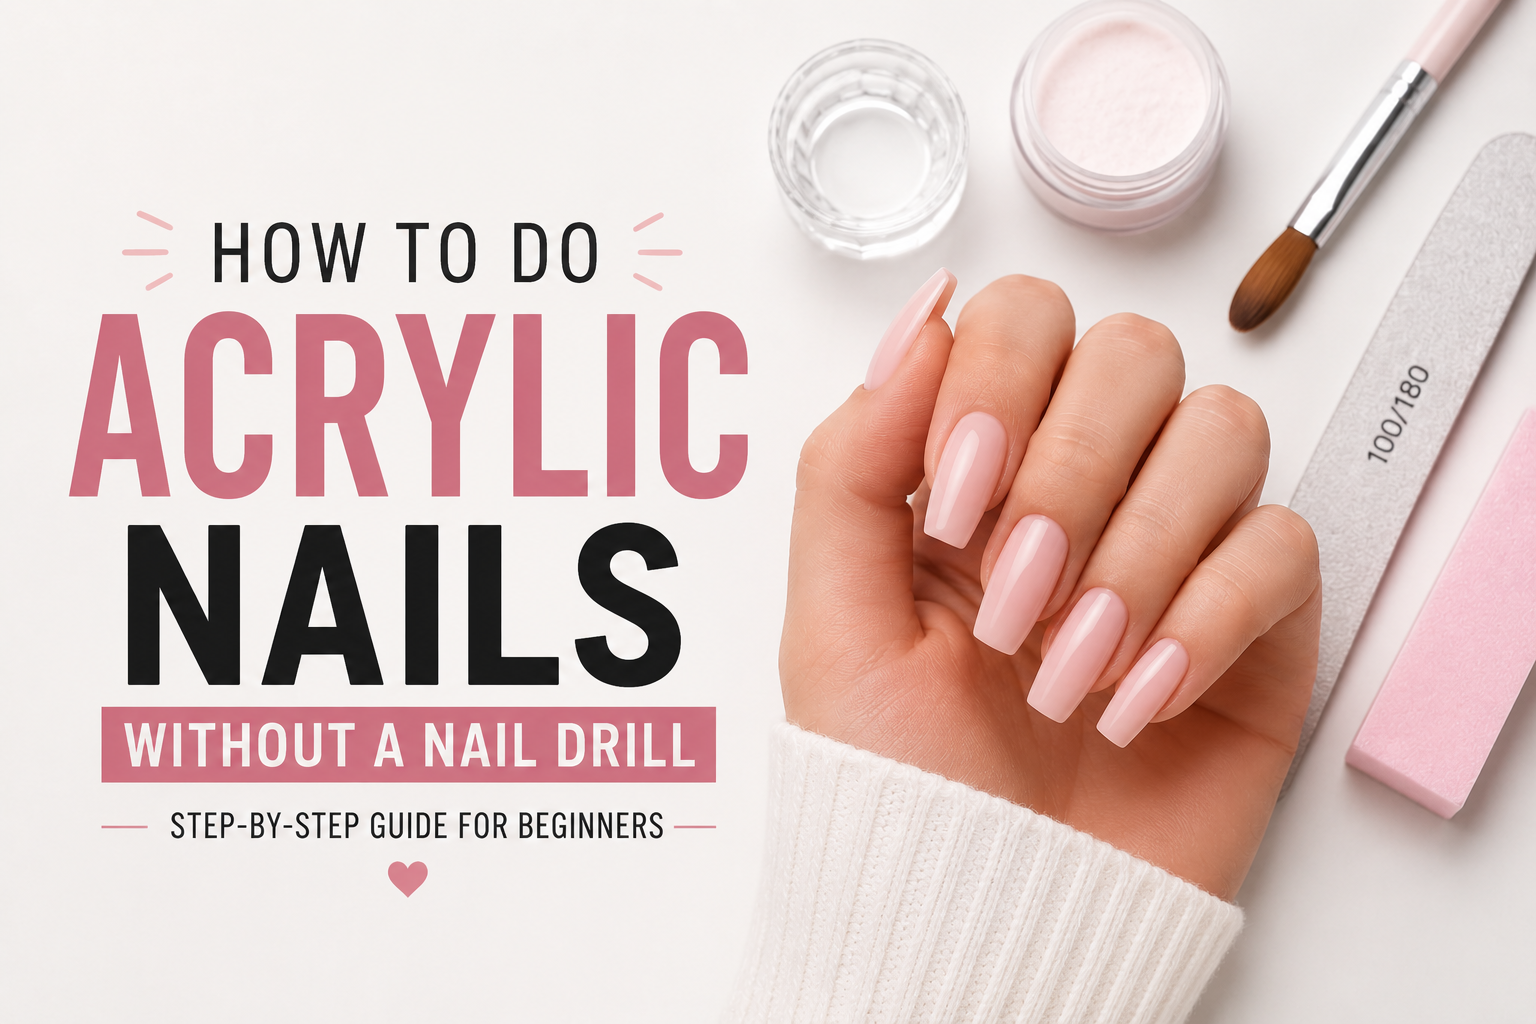
Brush choice also matters when you don’t use a nail drill. Learn the drill-free application method so the brush compensates with controlled product placement rather than extra pressure.
How to Spot a Quality Brush Before You Buy
When you can’t hold the brush first, inspect the product photos and listing. Look for a clean, centered head with a smooth taper.
Check the Head
The bristles should appear even and tightly arranged. Watch for:
- Split or frayed ends
- Uneven length
- A bent tip
- Loose fibers
- Dark gaps in the middle of the head
- A head that shifts inside the ferrule
Check the Ferrule
The metal band connecting the bristles to the handle should sit straight and tight. Raised seams can catch the nail. A loose ferrule affects both control and durability.
Check the Taper
The taper should be gradual. A sudden step or heavy ridge can make the brush drag, shed, or lose its point. The tip should be useful for the job, not so narrow that it collapses after one stroke.
Check the Handle
The handle should feel balanced in your hand. A comfortable grip gives you steadier pressure, especially when shaping a tight C-curve. Avoid handles with rough finishes, visible cracks, or loose components.
Handle length is personal. Longer handles may offer more control for detailed work, while shorter handles can feel easier to rotate. Neither is automatically better.
Check the Seller and Listing
A clear product listing should identify:
- The brush purpose
- The head shape
- The approximate size
- The material
- Whether it is sold alone or in a set
- Any care instructions
Photos are especially useful for judging symmetry. A head that looks evenly tapered in one angle may be uneven when viewed from the front.
Be cautious with vague listings that mix nail dust brushes, sponge applicators, polish brushes, and detail brushes in one package. A set can offer good value, but only if it includes the shape you need.
How to Read Acrylic Brush Labels
Product names can be confusing. Here’s what common terms usually mean in the nail-art world.
“Acrylic Brush” or “Nail-Building Brush”
This normally indicates a brush intended for placing and shaping acrylic product. It may be round, oval, flat, or angled.
“French Brush”
A French brush usually has a flatter head. It can help create a straight smile line and smooth product across the nail. The edge still needs to be soft enough to avoid scraping.
“One-Stroke Brush”
A one-stroke brush is designed for thin decorative lines. It may work with nail paint or compatible art materials, but it is normally too narrow for building a full nail.
“Detail Brush” or “Liner Brush”
These brushes offer control around the perimeter and for small designs. They work best as an addition to a fuller application brush.
“Dust Brush”
A dust brush removes filing dust. It isn’t designed to apply acrylic and may spread product unpredictably.
Brush Size Numbers
A “size 4” or “size 8” doesn’t give you a universal measurement. Brands use different numbering systems, and the same number may refer to different widths and lengths.
Compare these details instead:
- Head width
- Head length
- Taper
- Bristle density
- Flex
- Intended application
A small size number is not automatically more precise. A broad brush can provide better control if its tip is well shaped.
Can an Artist Brush Be Used for Acrylic Nails?
Yes, but it’s usually a supporting tool rather than the main application brush.
A fine artist brush can handle:
- One-stroke designs
- Thin lines
- Small floral details
- Perimeter cleanup
- Fine shadows with a compatible product
For main acrylic application, look for a dedicated nail brush. It generally has a more practical head size, reservoir capacity, and working shape.
Never assume a brush is safe with monomer because it works with paint. Check the filament and adhesive materials, and follow the nail-product manufacturer’s instructions. A brush designed for oil paint may behave differently with nail chemicals.
If you’re building a full nail-art setup, separate application and detail brushes make more sense than trying to force one tiny brush to do everything. If you’re just starting with the manicure, choose a medium nail brush first and add artist-style tools when you need them.
Synthetic or Natural? Which Is Easier for Acrylic?
For most learners and home users, a well-made synthetic brush is the easiest choice. It is predictable, responds consistently, and usually costs less than a natural-hair brush.
Synthetic brushes are best for:
- Everyday application
- Frequent monomer use
- Beginner practice
- Full-cover acrylic
- Users who want simple maintenance
Natural or mixed-fiber brushes are best for:
- Experienced detail work
- Fine control in a specific technique
- Artists who already know a fiber type they trust
- Users willing to maintain the brush carefully
Natural hair can feel responsive, but it isn’t automatically superior. Filament condition, shape, density, and taper affect performance more than a marketing term alone.
If a listing promotes “natural hair” or a specific animal-derived fiber, check the description carefully. If you need a straightforward brush for regular acrylic work, a clearly labeled synthetic brush is usually the safer starting point.
What Makes an Acrylic Brush Last?
A long-lasting brush resists three common problems: loose bristles, a wrinkled head, and permanent product buildup.
Look for a Stable Head
The filaments should stay centered under pressure. A head that changes shape dramatically is harder to control and can create gaps or lines in the acrylic.
Choose a Smooth Ferrule
The ferrule should fit tightly around the bristles. A loose metal band can wobble, snag, and spread product unevenly.
Avoid Excessively Soft Heads
A very soft brush may collapse under a wet bead. That can force you to press harder or wipe off product. A moderate amount of stiffness gives you feedback while preserving control.
Clean It Promptly
Dried acrylic inside the head changes its behavior. It can make the brush stiff, create rough edges, and trap more residue. Cleaning after every use protects the shape.
Store It Correctly
Do not leave a clean brush pressed under heavy objects. A loose bristle can bend into a permanent crease. Store it upright or flat without pressure, with the head protected.
How to Test a New Brush
Even a well-made brush needs a short test. A swatch or practice tip is enough to reveal whether the head gives you the control you need.
- Inspect the dry brush. Check the taper, tip, ferrule, and handle. Bend the head gently. It should flex without folding sharply.
- Prepare a small test bead. Use the same liquid-and-powder system you plan to use in your manicure.
- Load lightly at the center of the tip. If the bead sits heavily on one side, the head or your loading angle needs adjustment.
- Place it in a small section first. Test the cuticle area and one sidewall before moving across the full nail.
- Watch the first stroke. The product should spread in a controlled way instead of shooting sideways or sticking to the brush.
- Check the reverse side. A cramped or uneven head may place product well on one side but poorly on the other.
- Let the brush reset. It should return toward its original shape after you release pressure.
- Repeat after cleaning. The second application often gives a better reading than a first attempt.
If the brush was shipped with a protective cover over the head, remove it carefully. Don’t pull the bristles sideways. If the cover has hardened onto the fibers, follow the seller’s care guidance rather than forcing it.
How to Use an Acrylic Application Brush
Good technique matters more than a complicated brush routine. The goal is to place the product once and guide it into shape without repeatedly dragging it over the surface.
1. Plan the bead
Mix a bead that matches the area you’re about to cover. A larger bead needs a fuller brush. A small section needs a smaller load.
A three-dimensional bead gives you more control than a flat smear. It should sit on the tip rather than soak deep into the bristles.
2. Float the bead into position
Carry the bead toward the nail without letting it touch the surface too early. Once it reaches the correct area, lightly touch the product down.
This “floating” approach helps prevent the bead from spreading before you’re ready. It’s especially useful near the cuticle and sidewalls.
3. Guide the product with one clean stroke
Pull the brush through the product with light, even pressure. Let the shape do the work. Repeated back-and-forth strokes can thin the acrylic and create grooves.
4. Use the tip for correction
Use the point to clean the cuticle line or refine a sidewall. Don’t use the side of a broad head where you need a narrow edge.
5. Build the apex deliberately
The apex is the strongest controlled area of the extension, not simply a thick mound near the center. Guide the brush toward the stress area, then smooth the surrounding surface.
6. Pause to check symmetry
Before you fully refine the nail, look from the top and side. A brush can hide asymmetry until the product sets. Early checks make correction easier.
7. Clean and reset the brush
Wipe away residue using the method approved for your brush and system. Don’t leave a full bead trapped in the bristles while you move on to the next finger.
If you’re still developing your overall process, the at-home acrylic application guide covers the surrounding steps that affect brush performance.
Best Brush Shape for French Nails
French nails reward a clean, stable edge. A flat or square brush can make the smile line easier to see and refine, but it must still have a comfortable tip and enough flexibility.
A common professional setup includes:
- A flat or square brush for the main surface and smile line
- A small oval brush for the cuticle and sidewalls
- A fine liner or one-stroke brush for decoration
Don’t rely on a very stiff flat brush. A rigid edge can scrape the nail and leave a harsh boundary. You want a stable surface without losing control.
For a traditional straight French, keep the product’s free edge consistent. For a smile line, control the curve rather than forcing it into a perfectly straight line. A curved smile line still benefits from a clean edge, but it should follow the intended design.
Best Brush Shape for Full-Cover Acrylic
Full-cover application rewards a brush that can move enough product while keeping a clean perimeter. A medium round or oval brush is usually the most flexible choice.
A brush that is too small can become overloaded. A brush that is too large can place too much product near the cuticle. Size the head to the nail rather than to the brand’s size number.
For full-cover work, consider a brush with:
- A centered head
- A moderate reservoir
- A smooth taper
- Enough stiffness to guide a larger bead
- A tip narrow enough to refine the perimeter
Many artists keep a medium brush for coverage and a smaller brush for cleanup. That arrangement gives you both speed and precision.
Best Brush Shape for Nail Art
Nail-art brushes are selected by the width and behavior of the mark, not by the size of the whole nail.
Round detail brush
Use a small round brush for dots, petals, small circles, and controlled outlines. The tip should spring back after each stroke.
Liner brush
A liner brush is flatter and narrower. It works well for crisp parallel lines and thin accents.
One-stroke brush
A one-stroke brush carries a small amount of paint in its belly and releases it as you pull. It’s useful for leaves, petals, and fine decorative motifs.
French or flat detail brush
A flat brush can make straight edges and broad fills, but it may be less suitable for a rounded petal than a small round brush.
IBD, KAVA, and Jessica are worth comparing when detail work is central to the application. If you mostly build full nails, choose a separate detail brush rather than forcing a broad application brush into narrow lines.
Common Acrylic Brush Mistakes
Using a brush that is too large
An oversized head can overwhelm a small nail and make it difficult to control the cuticle line. The brush should fit the nail, not tower over it.
Loading too much product
A heavy bead is difficult to control. If the product sits deep in the bristles or falls off before you reach the nail, the load is too large.
Pressing too hard
Extra pressure can spread or flatten the bead. It can also make the brush head splay and wear out faster. Use the weight of the brush and a light touch to guide the product.
Dragging the brush repeatedly
Repeated strokes can thin the acrylic and encourage grooves. Make a controlled placement, then use a clean stroke to refine the shape.
Keeping residue in the brush
Dirty bristles spread old product into the next bead. The brush may also become stiff and no longer place the product cleanly.
Cutting the brush head
Trimming an uneven brush can make it worse. A clean, symmetrical head is easier to control than a customized but lopsided one. If a brush is badly misshapen, replacing it is usually more efficient.
Buying only a detail brush
A tiny liner can create fine lines, but it won’t efficiently cover a whole nail. Buy a full application brush first, then add a detail tool if your designs require one.
Ignoring the handle
An uncomfortable handle can cause tension. Tension makes pressure less consistent and can reduce precision. Choose a shape that feels balanced in your hand.
Treating brand and price as the only signals
A famous name doesn’t guarantee that every model fits your technique. Look at the exact brush, especially its head shape and ferrule.
How to Clean an Acrylic Brush Without Damaging It
Clean your brush after every use. The best time is before the product has fully hardened around the head.
At-home cleaning routine
- Wipe away wet residue. Use a lint-free wipe or a method approved by the brush manufacturer.
- Clean the bristles gently. Work from the handle toward the tip. Don’t scrub the tip against a rough surface.
- Remove visible buildup gently. Don’t pull hard fibers backward or twist the head.
- Check the shape. Reshape the bristles while they’re damp if needed.
- Dry it flat or upright. Avoid storing the brush under pressure while it dries.
- Store it with the head protected. Don’t let bristles bend around the handle.
Some brush-cleaning products are designed for use with a particular system. Follow the instructions of the cleaner, acrylic system, and brush manufacturer. Avoid leaving the brush soaking in a solvent that hasn’t been approved for it.
If the brush has old acrylic
Soften the residue according to the acrylic manufacturer’s removal guidance. Then clean the bristles gently. If the head stays rough, stiff, or split, replace it.
No amount of careful cleaning restores a damaged taper completely.
For salon use, follow your local sanitation rules and the instructions supplied with your products and tools. A brush used on one client shouldn’t be reused on another without appropriate cleaning and disinfection.
Acrylic Brush Safety and Skin Care
Acrylic systems contain liquid and powder products that require correct handling. A brush is small enough to hide a mistake, so keep the work area ventilated and follow the product label.
Use the product in a space with good airflow. Avoid breathing concentrated fumes and don’t apply acrylic over irritated, cut, or broken skin. Wear gloves if the product directions call for them or if your skin is sensitive.
Keep uncapped liquid products away from heat, sparks, and flames. Store them as directed by the manufacturer, and close the cap after use.
If a product burns or causes persistent irritation, stop using it and seek guidance from a qualified medical professional. A small reaction can be confused with ordinary dryness, so don’t assume every symptom is harmless.
For information on cosmetic labeling, ingredient disclosures, and nail-product safety, consult the FDA’s nail-products guidance.
Brush safety also includes your workspace. Keep the ferrule from scraping the natural nail, and don’t use a brush with a bent point to force product into a tight sidewall. Small corrections are better made with a clean, correctly sized brush.
How to Store Acrylic Brushes
Proper storage keeps the head from taking on a permanent bend.
Short-term storage
After cleaning, lay the brush flat with light pressure, or let it dry upright in a brush holder. Don’t clamp the head.
Travel storage
Put each clean brush in a separate protective case. A soft tip cover can help stop the bristles from bending, but it should not crush the head.
Make sure the product is fully capped and stored upright. Don’t put damp brushes into a closed bag.
Long-term storage
Keep the brush away from direct heat, humidity, dust, and stray filings. Store it with the head protected and the handle straight. A simple drawer, brush roll, or ventilated holder is enough.
A brush holder shouldn’t squeeze the bristles together. Dense storage can distort a fine point, while pressure from tools can create a crease.
How to Improve the Life of Your Brush
You can get more use from a quality brush by changing how you work with it.
Carry product near the tip
Keep the bead balanced at the point. If product repeatedly sits deep in the brush, you may be overloading it or using a head that is too small.
Use a light touch
Excess pressure bends the head further than necessary. Keep the handle balanced and let the bristles guide the bead.
Clean between fingers
Residue can harden while you work. A quick clean keeps the tip responsive and prevents old product from contaminating fresh acrylic.
Rotate a set
If you own two similarly sized brushes, use one for a full manicure and keep the other as a clean backup. This reduces the temptation to clean the brush too quickly and damage the fibers.
Replace misshapen tools
A brush with a bent tip, loose ferrule, or split head won’t perform like a new one. Replacing it is often faster than trying to compensate during every nail.
What to Look for in a Brand’s Brush Range
Brand consistency can be useful, but a brand’s catalog may include brushes for different stages and techniques. Don’t assume one product is right for everything.
A strong range should make it easy to find:
- A medium oval or round application brush
- A flat or square shaping brush
- A small detail brush
- A fine liner or one-stroke brush
- A separate dust brush
A clean, well-organized range helps with reordering because you can match the existing handle and style. It’s also useful when you’re building a kit around one professional system.
However, brand name and packaging should be only one part of the decision. The head shape remains more important than the color of the handle or the wording on the tube.
The Best Value-for-Money Acrylic Brush Brands
A lower price can be sensible if the brush has a centered head, smooth ferrule, and consistent taper. The best value isn’t the cheapest brush; it’s the one that gives you controlled placement without needing frequent corrections.
Look for a medium brush that’s sold with clear dimensions and close-up photos. Sets can be useful when they include different shapes, but a single well-made brush may be more practical than a large kit filled with tools you won’t use.
If you’re working to a budget, start with:
- One medium oval or round synthetic brush
- One small flat or detail brush
- A protective brush case
You can add other shapes once you know which tasks you perform most often.
The Best Choices for Different Needs
Best all-around brush
Winstonia is the most balanced recommendation for general application. Choose a medium oval or round head for a versatile starting point.
Best choice for professional system-based work
Ruby Wing is a strong option for experienced users who want a professional tool range. Match the brush to the application rather than choosing by brand alone.
Best for precision placement
Jessica is a practical choice when a tapered head and controlled placement matter most.
Best for detailed shaping
KAVA is a strong fit for slim profiles, tight sidewalls, and fine work.
Best for one-stroke nail art
IBD is worth considering when the brush is being purchased specifically for narrow decorative strokes.
Best for shaping and full coverage
AFFAIR offers a range of formats that can serve both broad application and detail work.
Best for a lower-cost starter kit
Mia Secret is a sensible value-focused option, provided you select a brush clearly intended for acrylic application.
Best for a basic home manicure
Saviland can work for practice and affordable starter setups. Check the exact shape and construction before buying.
Best for a Young Nails routine
Young Nails is a reasonable choice when you’re already using its acrylic system and want coordinated tools.
Frequently Asked Questions
What is the best acrylic brush brand?
Winstonia is the best general starting point for many users because its useful brush formats suit placement, shaping, and smoothing. Ruby Wing is another strong choice for professional or system-based work. The best brand for you is ultimately the one that offers the head shape, flex, and size you can control.
What is the best acrylic brush for beginners?
A medium synthetic oval or round brush is the easiest place to start. It gives you enough control for a full nail without requiring the precision of a tiny liner. Choose a comfortable handle and a taper that feels responsive in your hand.
Are expensive acrylic brushes better?
Not always. A well-made brush that suits your nail size and technique can outperform a costly brush with the wrong shape. Look for a centered head, tight ferrule, smooth tip, and comfortable balance.
Is a size 6 acrylic brush universal?
No. Brush numbering differs between manufacturers. Compare the head’s actual width, length, taper, and flexibility instead of assuming that two size 6 brushes behave the same.
Can I use an artist brush for acrylic nails?
You can use one for suitable detail work, but it may not perform well as your main application brush. Choose a dedicated nail brush for full coverage, apex building, and broad shaping.
Should I use natural or synthetic brushes?
Synthetic brushes are the easiest default for regular acrylic application. Natural or mixed fibers can suit experienced detail work, but they may require more careful cleaning and maintenance.
How do I know if my acrylic brush is good?
A good brush places the bead where you want it, spreads the product cleanly, and returns toward its original shape after the stroke. It shouldn’t split, scratch the nail, or leave the tip permanently bent.
How often should I replace an acrylic brush?
Replace it when the head becomes split, rough, loose, misshapen, or difficult to clean. With careful use and prompt cleaning, a good brush may last through multiple manicures, but heavily used salon tools may need replacing sooner.
What’s the best brush shape for French nails?
A flat or square brush is useful for the smile line and broad surface work. Pair it with a smaller oval or round brush for the cuticle and sidewalls. A separate liner is optional unless you’re adding nail art.
Do I need different brushes for full-cover and nail art?
A medium oval or round brush is the most useful for full coverage. A small round, liner, or one-stroke brush is much better for narrow decorative marks. You can start with the application brush alone, but a set gives you more control.
Can I clean an acrylic brush with acetone?
Only use a cleaning method approved for the brush and acrylic system. Some people use nail-product solvents to remove residue, but the brush can deteriorate if the solvent is too harsh, left too long, or used in a way the manufacturer doesn’t recommend. Follow the product instructions and check the brush material first.
Acrylic Paint vs. Nail Acrylic
One of the most common sourcing mistakes is confusing artist acrylic paint with nail acrylic. The two systems are not interchangeable.
Artist acrylics are made for painting surfaces. Nail acrylic systems use a compatible liquid-and-powder process designed for building and shaping a nail enhancement. A brush sold for art paint may not respond well to nail monomer, and a nail acrylic system shouldn’t be used as if it were ordinary paint.
When shopping, read the listing rather than relying on the word “professional” or “artist.” Look for wording such as:
- Acrylic nail application brush
- Nail-building brush
- French nail brush
- Acrylic powder-and-liquid brush
- Nail-art detail brush
If the listing is vague, compare the product with a known nail brush. The handle may look similar, but the fiber and ferrule behavior can differ.
The Best Brush-and-Product Setup
The brush works best with a product system that gives you a consistent working time. A fast-setting mix can feel difficult even with a quality brush because it leaves less time to guide the bead. A slower-working system may be easier for a beginner to control.
A few questions are worth asking before the product sets:
- Does the bead stay centered on the brush?
- Can I place it before the product spreads?
- Does the brush release the acrylic cleanly?
- Is the liquid behaving according to its directions?
- Am I working in a well-ventilated area?
- Does the nail feel normal and intact?
If a brush repeatedly fails with one system but works with another, compare the product’s consistency and instructions before blaming the brush. Liquid thickness, powder ratio, and working time can all change how a nail feels.
Final Thoughts
The best acrylic brush brand is the one that gives you a dependable, comfortable tool for the work you actually do. Winstonia is the most flexible starting point, while Ruby Wing, Jessica, KAVA, IBD, AFFAIR, Mia Secret, Saviland, and Young Nails each fit particular priorities from professional application to detail work and value-focused kits.
Start with the shape, not the number printed on the handle. A medium oval or round brush handles more full nails than a tiny liner, and a separate flat or detail brush can handle precision. Check the head before you buy, use light pressure, clean the brush after every manicure, and replace it when the tip becomes rough or misshapen.
The right brush won’t make difficult technique disappear, but it will make every correction cleaner and every manicure more predictable.
Amazon and the Amazon logo are trademarks of Amazon.com, Inc, or its affiliates.
Author


Similar Posts