Acrylic Nails for Flat Nail Beds: Tips for a Natural Look
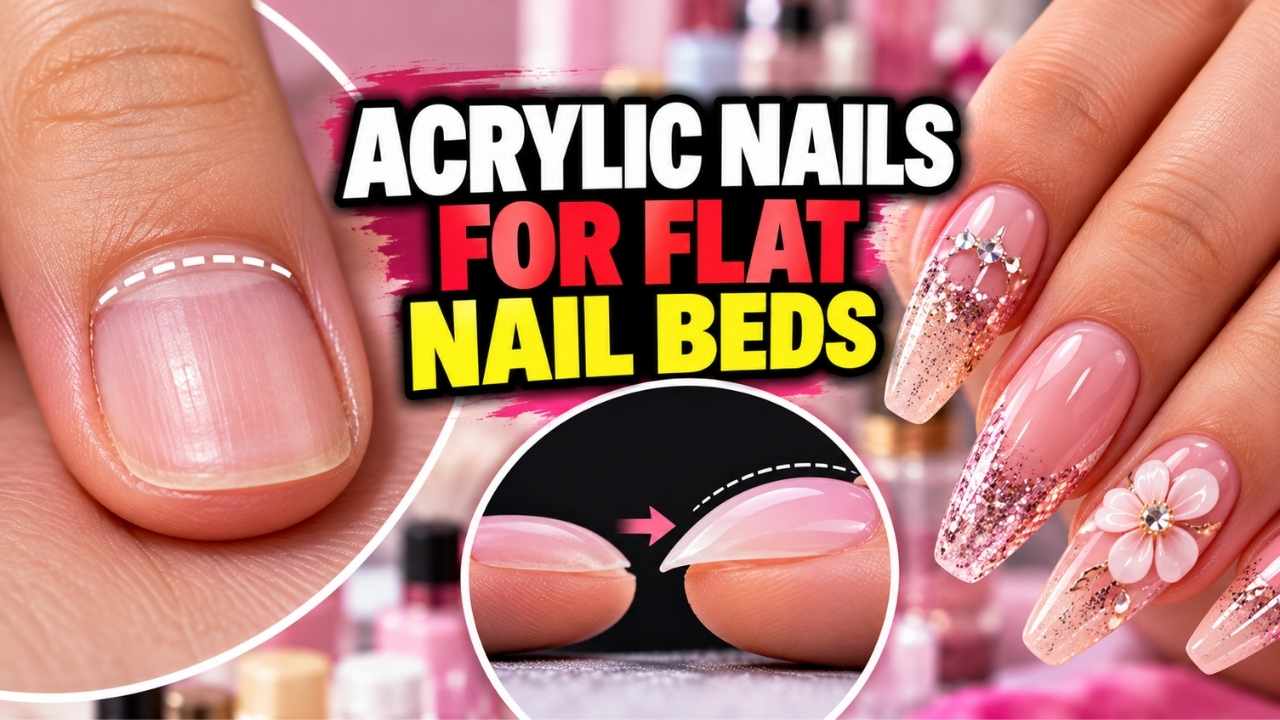
A flat nail plate doesn’t automatically rule out acrylic. It can, in fact, be a good candidate for a structured enhancement that adds a gentle arch, supports the free edge, and creates the shape you want. The key is using structure rather than excess product.
A thick mound placed over a flat nail bed often leads to pressure, cracking, lifting, and painful removal.
The nail plate must also be healthy enough to support the enhancement. This guide explains how to design acrylic nails for a flat nail bed, how to prepare the natural nail, what your technician should do during application, and how to keep the set in good shape.
What a flat nail bed actually means
“Nail bed” is often used for the entire visible nail, but the terms are slightly different. The nail plate is the hard, keratinized layer you see. The nail bed is the living skin beneath it.
The nail matrix produces new nail cells, while the cuticle seals the gap between the plate and living skin. The free edge is the part extending past the fingertip.
When someone says they have a flat nail bed, they usually mean that the visible nail plate has very little arch from side to side. It may look broad, straight, or flatter than the curved shape commonly seen in nail-design photos.
A flat nail plate is often just an anatomical variation. Genetics, aging, nail biting, trauma, or changes in growth can all affect the plate’s curve. Nail biting can shorten the free edge and leave the remaining plate less structured.
Certain skin and medical conditions can also change a nail’s thickness or surface, although a flat shape by itself doesn’t diagnose any condition.
Acrylic attaches to the nail plate. It doesn’t reshape the livingnail bed or alter the way the nail grows. It adds a shaped layer over the natural plate, so the final result depends on the plate underneath and the way that layer is built.
If the plate is flat but firm and intact, a nail professional can create a modest apex and balanced structure. If the nail is thin, split, infected, or separating from the bed, covering it with acrylic may hide the problem rather than solve it.
The terms are often mixed together. The nail plate is the hard, visible part. The nail bed is the living skin underneath it.
The matrix makes new nail cells, and the cuticle protects the area where the plate leaves the skin. When people say they have a flat nail bed, they usually mean that the visible plate has little arch from side to side.
Can you get acrylic nails with a flat nail bed?
Yes. A flat nail plate can usually wear acrylic. The goal is to add structure without creating a heavy mound on top of the nail.
Acrylic does not change the natural nail’s shape. It creates a new outer layer that can look more curved, longer, or more defined. The underlying plate still needs to be healthy enough to hold that layer.
A flat shape by itself is not a problem.
The best results usually come from:
- A moderate, low-to-medium apex
- Even thickness from the base to the free edge
- A firm free edge that can support the chosen length
- Minimal product near the cuticle
- A form that supports the extension from underneath
- Careful filing and balancing
- Regular fills before the nail grows too far from the natural plate
Too much acrylic can make a flat nail look bulky, but too little can leave the free edge weak. The answer is controlled structure, not simply “more product.”
Why flat nail beds need balanced structure
Your natural nail works somewhat like a small bridge. It attaches to the finger at the base and extends past the fingertip. When you add length, the free edge can experience leverage every time you type, open a jar, wash dishes, or press a button.
A nail with a strong curve may distribute that pressure differently from a flatter nail. A flat plate can still work, but the artificial nail needs to be designed so stress doesn’t concentrate at one weak point.
The role of the apex
The apex is the highest point of the artificial nail’s contour. It is not simply a thick blob of product. On a flat nail bed, a small, controlled apex can:
- Support the free edge
- Make the extension feel less flexible
- Improve the appearance of the nail
- Reduce stress on the natural plate
- Help the acrylic hold its shape
A high apex is not always better. Building a steep arch over a flat nail can create pressure along the sidewalls and make the finished nail look raised. In some cases, that extra leverage contributes to cracking or lifting.
The four parts to balance
A well-built extension has four connected areas:
- The base: The acrylic should meet the natural plate cleanly, without flooding the cuticle.
- The apex: This provides gentle support above the main part of the nail.
- The sidewalls: They should be even and not press into the surrounding skin.
- The free edge: This should be strong enough to support the chosen length.
A flat nail bed often needs more attention to these four areas, not a blanket increase in thickness. The sidewalls should be balanced, the free edge should not be paper-thin, and the product should be distributed smoothly from the base to the tip.
| Feature | Flat nail bed | What usually works best |
|---|---|---|
| Apex | May have little visible arch | A subtle, controlled apex rather than a high arch |
| Base | Can look visually flat | A thin, neat transition near the cuticle |
| Free edge | May be short or weak | A firm edge with enough support for the length |
| Overall thickness | Easy to overbuild | Even thickness with no heavy mound |
| Form support | Important for balance | A well-fitting form under the free edge |
| Length | Greater leverage at longer lengths | Moderate length for everyday use |
A nail professional may use a form or another shaping system to create the desired contour. The form supports the acrylic while it sets. It should fit beneath the free edge without pressing into the fingertip or attaching to the skin.
Choosing a length and shape for a flat nail bed
The most flattering shape is not always the most practical one. A flat nail plate needs enough structure to support the extension, but excessive length increases leverage.
Short and medium lengths
A short or medium length is often the safest starting point. It gives you a visible change without placing as much pressure on the free edge. This is especially helpful if you:
- Type frequently
- Work with your hands
- Use tools or a keyboard all day
- Have a habit of biting or picking at your nails
- Are new to acrylic nails
If your natural nail is very short, a small extension can also help protect the fingertip from being bitten. The extension should support the nail, not create a sharp ledge that attracts biting.
Squoval and soft square shapes
A squoval or soft square shape often works well on a flatter nail because it gives the extension structure without an exaggerated curve. These shapes can still look polished and defined.
A straight square shape can also be useful, but the sidewalls and corners need to be balanced carefully. If the corners are too thin, they can chip. If the sidewalls are too heavy, the nail can look bulky.
Oval and almond shapes
Oval and almond shapes can work on a flat nail bed, but they usually need a slightly more deliberate apex and a well-balanced free edge. These shapes have more narrow points, so a weak or thin tip may chip sooner.
An almond shape is best avoided if the nail plate is very short, very thin, or badly bitten. The technician needs enough material to support the pointed end without making the whole extension heavy.
Coffin or tapered shapes
A coffin shape can suit some flat nail beds because its straight sides create a clear, structured outline. However, the shape depends on a well-controlled apex and even sidewalls. A flat nail bed may not need a dramatic arch to support a coffin shape.
Very long coffin extensions are usually less practical. The longer and narrower the tip, the more leverage it creates at the free edge.
Choose for your daily routine
Ask yourself how you use your hands. If you lift, type, cook, garden, or work outdoors, a moderate length and lower apex may serve you better than a long, high-arching set. If appearance is the priority, you can choose a more tapered shape while keeping the structure controlled.
When in doubt, I recommend starting slightly shorter than your ideal length. You can add length at the next fill if the natural plate remains stable.
Is your nail plate healthy enough for acrylic?
A flat shape is usually acceptable. The condition of the plate matters much more than its curve.
You may be a good candidate when the natural nail is:
- Intact
- Firm enough to support an extension
- Free of active infection
- Not lifting from the nail bed
- Not deeply split or severely weak
- Maintained with reasonable care
Be cautious if the plate is:
- Very thin or flexible
- Peeling from the nail bed
- Deeply ridged or cracked
- Wet or soft after frequent soaking
- Recently damaged by biting or trauma
- Surrounded by inflamed cuticles
- Showing pain without pressure
Do not use acrylic to cover a suspected fungal infection, open wound, infected cuticle, or separated nail. Those conditions need attention before a cosmetic enhancement is applied. A nail technician should not pretend that a thicker layer will make an unhealthy nail safe.
People with diabetes, circulation problems, a weakened immune system, or a history of slow-healing wounds should ask a healthcare professional before getting enhancements.
When to postpone the appointment
Postpone the appointment if:
- The nail plate is actively peeling from the bed
- There is swelling, warmth, pus, or spreading redness
- The nail has a strong odor or marked discoloration
- The surrounding skin is cracked or painful
- You recently had an injury or chemical burn
- You’re unsure whether what you see is a nail problem or a product reaction
A nail technician can improve the appearance of a healthy nail. They should not diagnose or treat a medical condition.
Preparing a flat nail plate for acrylic
Good preparation helps the acrylic sit on the plate instead of merely holding onto the surface. It also reduces lifting and makes removal easier.

Similar Posts