Clip or file the length, refine the shape, buff, and seal for a clean, safe result.
If you want salon results without leaving your couch, you’re in the right place. I’ve shortened thousands of sets in the salon and at home, and I’ll walk you through How To Shorten Acrylic Nails At Home with clear steps, pro tricks, and safety notes. You’ll learn what tools to use, what to avoid, and how to shape, smooth, and protect your nails so they look fresh, not hacked.

Why shorten acrylic nails at home?
Life happens. Keys, a new job, or a workout routine can make long nails feel too extra. Shortening them yourself can save time and money. It also keeps your set neat between salon fills.
There are limits, though. If your acrylic is lifting, cracked, or very thick, a pro visit is safer. You should also skip DIY if you see green spots, pain, or redness.
Here’s what you gain when you learn How To Shorten Acrylic Nails At Home:
- You keep the set you love while changing length and shape.
- You avoid cracks from random clipping.
- You extend time between salon visits and manage your budget.

Source: nghianippersusa.com
Tools and materials you’ll need
You do not need a full salon kit. But good tools make a big difference and help avoid cracks.
Essentials:
- Tip cutter designed for acrylic or a sharp straight-edge clipper
- 100 or 120 grit file to reduce length and bulk
- 180 grit file to refine shape
- 240–320 grit buffer to smooth edges and surface
- Dust brush or clean makeup brush
- Isopropyl alcohol 70% and lint-free pads
- Cuticle oil and hand cream
Nice-to-haves for easier work:
- Fine-point marker or tape to mark target length
- Silicone finger guards or paper tape to protect skin
- E-file with a medium ceramic barrel bit if you are trained to use one
- Safety glasses and a dust mask for comfort
These tools help you master How To Shorten Acrylic Nails At Home without splits or jagged ends.

Source: youtube.com
Safety and prep
Good prep is half of the result. It also keeps your natural nails safe.
- Wash and dry your hands. Skip long soaks. Water can make the natural nail swell, which can increase lifting later.
- Sanitize tools with alcohol. Wipe your nails with alcohol to remove oils and dust.
- Remove thick top shine if you have a gel top coat. A few light strokes with 180 grit is enough.
- Mark your new length. I use a tiny dot with a marker on each sidewall so both hands match.
- Protect your skin. Wrap a thin line of paper tape around sidewalls if you are new.
By setting up well, you can focus on How To Shorten Acrylic Nails At Home with calm and control.
:max_bytes(150000):strip_icc()/acrylic-nails-2-4e50789d77d44d04818d1c333d1692b5.jpg)
Source: byrdie.com
Step-by-step: How To Shorten Acrylic Nails At Home
Follow these steps for a clean, even shorten. Work one nail at a time. Check symmetry often.
- Stabilize the finger
Hold the finger steady with your non-dominant hand. Keep the nail straight in your line of sight. - If using a tip cutter
Place the cutter square to the free edge. Make one small cut from one side toward the center. Then cut from the other side to meet it. Do not snap the whole tip in one big cut. That can crack the acrylic. - If using a file only
Hold a 100 or 120 grit file at 90 degrees to the free edge. Use firm, straight strokes in one direction. Count your strokes to keep nails even. I start with 8 to 10 passes per nail, then reassess. - Refine the edge
Switch to a 180 grit file. Clean the new edge and remove micro chips. Lightly bevel the underside to seal layers and reduce snagging. - Shape the sidewalls
Place the file parallel to each sidewall. A few soft strokes keep the nail slim and straight. Avoid over-filing the corners. - Smooth the surface
Use a 240–320 grit buffer. Focus on the tip area you adjusted. You want a seamless blend with the old top coat. - Clean and check
Brush off dust. Wipe with alcohol. Look at your hands at arm’s length. The human eye spots tiny differences better from a small distance. - Seal and nourish
If you removed top shine, add a thin clear top coat and cure or dry as needed. Finish with cuticle oil to rehydrate.
Pro tip from the chair: When I teach How To Shorten Acrylic Nails At Home, I tell clients to shorten less than they think at first. You can always go shorter. You cannot add length back without a fill or tip.

Source: youtube.com
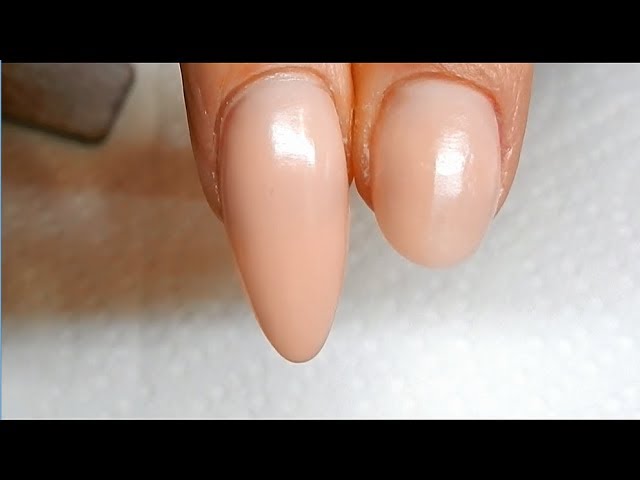
Shape like a pro
Shape changes your whole look. Pick a shape that fits your lifestyle and nail bed. Here is how I guide clients.
Square
- File the free edge flat at 90 degrees.
- Keep sidewalls straight and crisp.
- Soften corners with two tiny passes so they do not snag.
Squoval
- Start square.
- Round the corners slightly with 180 grit.
- Keep the top still flat, not domed.
Oval
- File the free edge into a soft arc.
- Taper sidewalls with light strokes.
- Keep the apex centered for strength.
Almond or coffin
- Taper sidewalls more, but keep them even on both sides.
- For coffin, flatten the tip after tapering.
- Do not over-thin corners. That is where breaks start.
Shaping is easier when you already know How To Shorten Acrylic Nails At Home. The same control and angles apply to both steps.

Source: reddit.com
Finishing touches and aftercare
A tidy finish protects your work and keeps nails strong.
- Buff with 240–320 grit to erase scratches.
- Wipe with alcohol to remove dust and oils.
- Add a thin top coat if needed. Cap the free edge to seal it.
- Massage cuticle oil into skin and sidewalls.
- Moisturize hands. Acrylic and acetone can dry skin.
Daily care after you learn How To Shorten Acrylic Nails At Home:
- Wear gloves for dishes and cleaning.
- Avoid using nails as tools.
- Reapply cuticle oil twice a day.
- Book a fill every 2 to 3 weeks to keep structure sound.

Source: youtube.com
Common mistakes and how I avoid them
These are the slip-ups I see most from DIY attempts. Here is how to fix them fast.
- Big single cuts with clippers
This can crack or pop off product. Make two small cuts or file the length down. - Filing both ways fast
This creates heat and micro cracks. Use steady strokes in one direction. - Over-thinning corners
Corners give strength. Keep them neat but not skinny. - Skipping the bevel under the tip
Unbeveled edges chip and snag. One to two light passes fix it. - Not sealing with top coat after heavy filing
Filing opens the surface. A thin top coat reduces staining and wear.
Over time, these habits make How To Shorten Acrylic Nails At Home feel easy and safe.
Source: globalfashion.md
Troubleshooting and when to see a pro
Sometimes the best DIY move is to stop and get help.
Go to a pro if:
- You see green spots, pain, or heat.
- You have heavy lifting near the cuticle.
- The nail plate is split or bleeding.
- A tip cracked deep into the sidewall.
Quick PAA-style answers:
Can I use regular nail clippers on acrylics?
You can, but use small cuts from each side. Large snaps can crack the acrylic and stress the natural nail.
Is soaking in warm water helpful before cutting?
No. Water swells the nail. File or cut dry to reduce lifting later.
How much length should I take off at once?
Take off less than you think. Start with 2 to 3 millimeters, then reassess and match both hands.
Learning How To Shorten Acrylic Nails At Home includes knowing when to stop. Pain, odd smells, or green patches are stop signs.

Source: youtube.com
Frequently Asked Questions of How To Shorten Acrylic Nails At Home
What is the safest way to shorten acrylic nails without cracks?
Use a tip cutter with two small cuts or file with 100 grit in straight strokes. Then refine with 180 grit and buff to smooth.
Can I shorten acrylic nails with an e-file at home?
Yes, if you are trained and use low speed with a medium ceramic bit. Keep the bit moving and avoid heat by using light pressure.
How often can I shorten at home between fills?
You can tidy once a week in small amounts. Plan a salon fill every 2 to 3 weeks to keep structure and apex balanced.
Will shortening ruin my shape?
Not if you refine sidewalls and the free edge after cutting. Match angles on both sides and check your hands at arm’s length for balance.
Do I need to remove polish before I shorten?
Not always. Remove thick top shine if it is gel, then cut or file. Clean, refine, and reseal with a thin top coat.
What grit files are best for shortening?
Use 100 or 120 for length, 180 for shaping, and 240–320 to buff smooth. Lower numbers are coarser; higher are finer.
Can I shorten acrylic nails at home if one nail lifted?
No. Lifting means product is not sealed to the nail plate. See a pro to avoid moisture getting trapped.
Conclusion
You can master How To Shorten Acrylic Nails At Home with the right tools, calm steps, and smart checks. Cut or file in small moves, refine the edge, shape with intent, and seal your work. Protect your nails with oil and simple daily care.
Try these steps on one hand today and compare. Share your results, ask a question, or request a shape tutorial next. If this helped, subscribe for more at-home nail care guides and pro tips.
Amazon and the Amazon logo are trademarks of Amazon.com, Inc, or its affiliates.