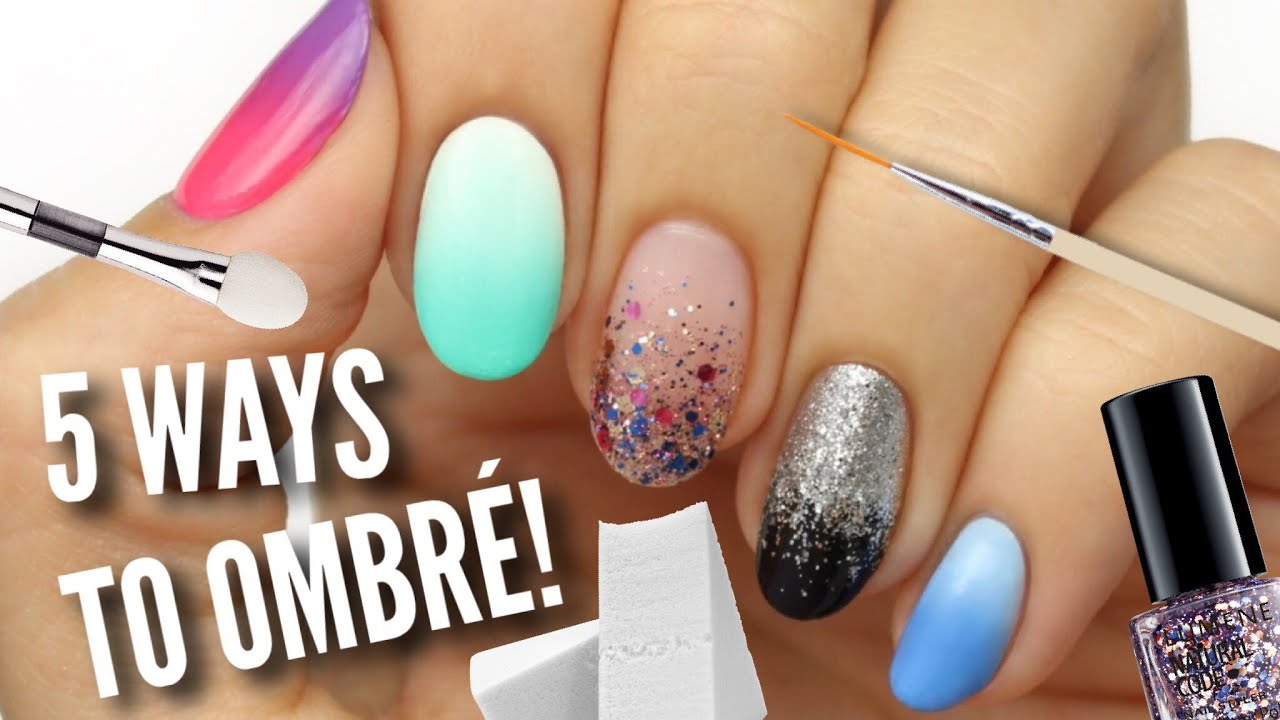
Blend two polish shades with a sponge to create a smooth color gradient.
If you want salon-quality gradient nails at home, you’re in the right place. I’ve taught dozens of beginners How To Do Ombre Nails, and I’ll walk you through every step with clear tips, pro fixes, and real examples. You’ll learn the why behind each move, so you can master the blend, choose perfect colors, and make it last.
What Is an Ombre Manicure?
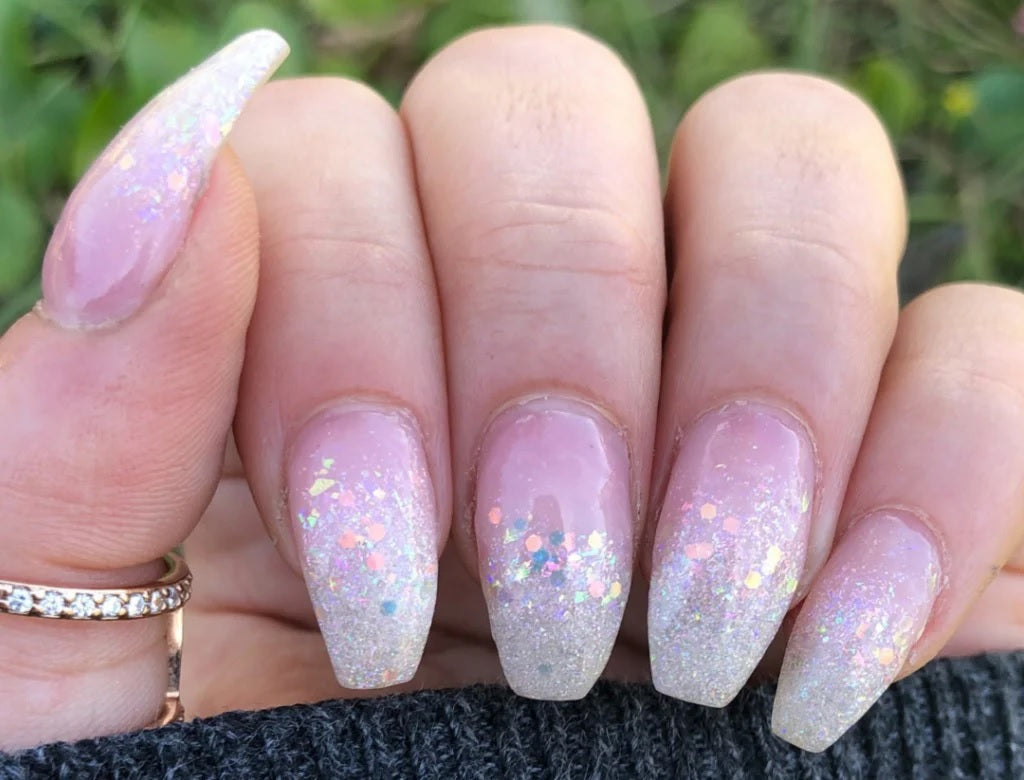
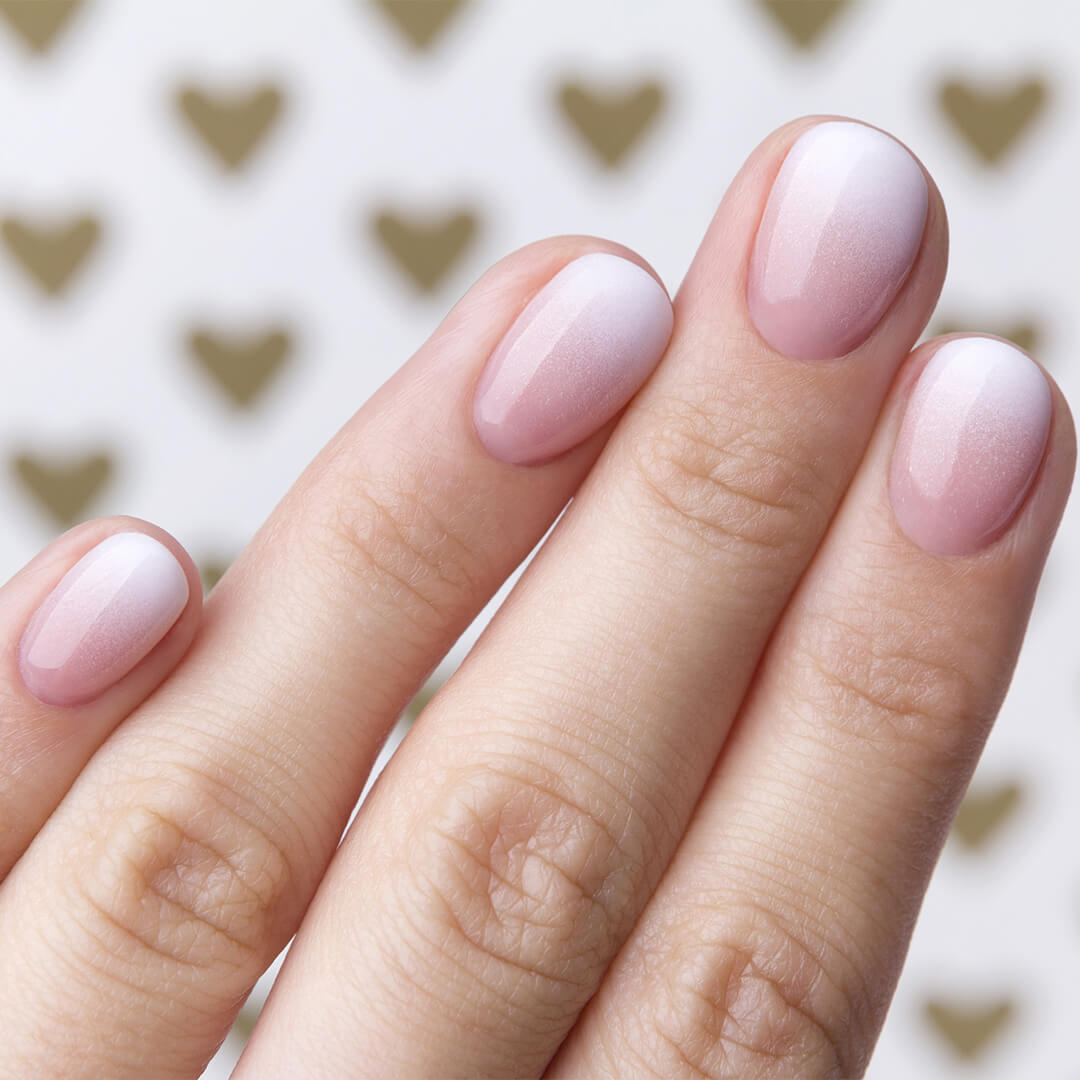
Ombre nails are a soft fade from one color to another. The most common look moves from light near the cuticle to dark at the tip. You can also flip it, blend nudes and whites for a French fade, or add glitter for extra depth.
In salons, ombre is popular because it flatters every nail length. It grows out well and hides tiny chips. If you learn How To Do Ombre Nails the right way, your finish will look smooth, glossy, and pro-level.
Key benefits:
- It works with any color mix. Go neutral, pastel, neon, or bold.
- It makes short nails look longer by drawing the eye.
- It is easy to customize for seasons and events.
Tools and Prep You Need
Good prep is 70% of the result. When people ask How To Do Ombre Nails and get streaks, it’s often a prep issue.
You’ll need:
- Nail file and buffer. Shape with 180 grit. Smooth with 240 grit.
- Cuticle pusher and cuticle remover. Tidy the nail plate.
- Alcohol or nail cleanser. Remove oils for better wear.
- Latex barrier or tape. Protect skin from sponge dabs.
- Makeup sponge or nail art sponge. Fine pores give a smoother blend.
- Two or three polish shades. Choose colors that meet in the middle.
- Base coat and glossy top coat. For grip and shine.
- Cleanup brush with acetone. Sharpen edges.
- Optional for gels: base gel, color gels, top gel, lamp.
Prep steps I use:
- Wash hands and dry well. Oils block adhesion.
- Push back cuticles. Do not cut live skin.
- Shape free edge. Keep all nails a similar length.
- Buff lightly to remove shine. Wipe with alcohol.
- Apply base coat. Cap the tip to prevent early chips.
This setup makes How To Do Ombre Nails easier and faster. Clean prep means fewer touch-ups later.
:max_bytes(150000):strip_icc()/ombre-nails-4-6c1b84afc4484e08a2733e565d03be6a.jpg)
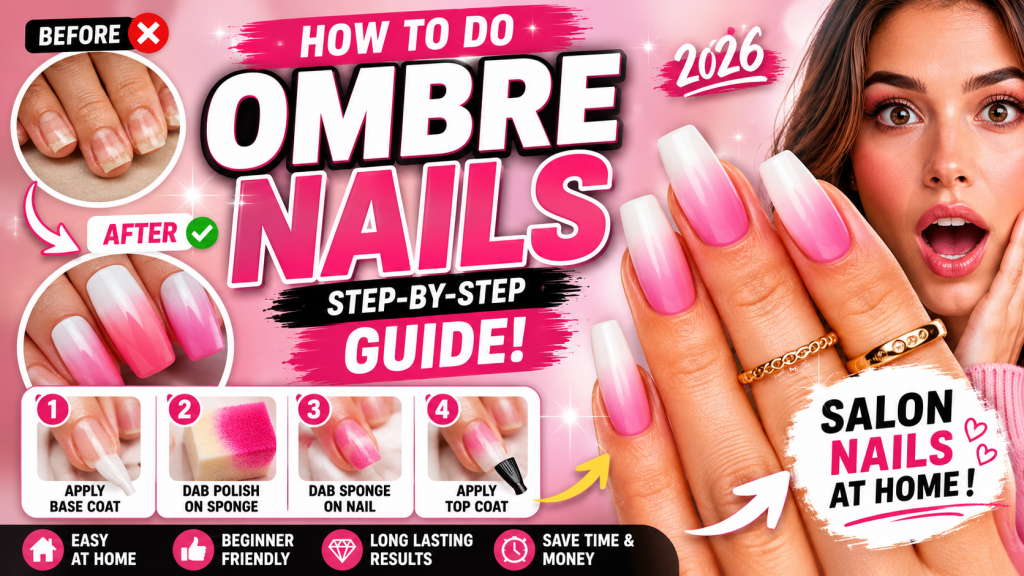
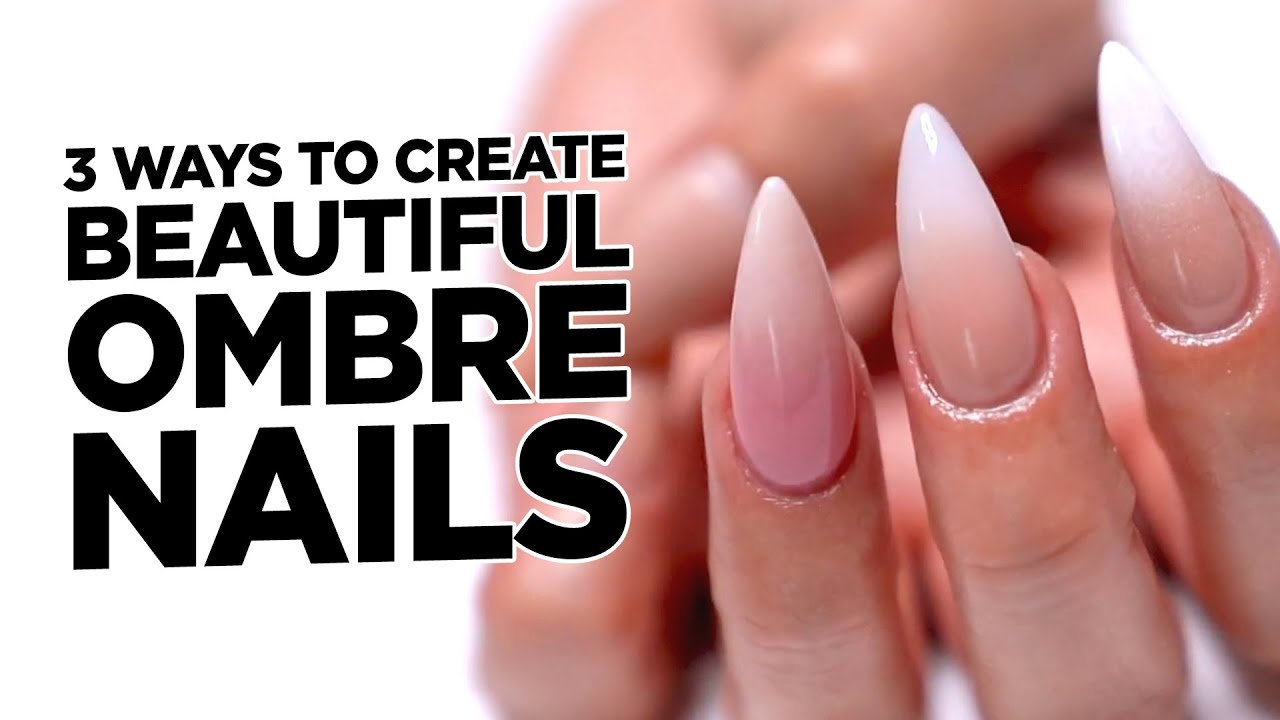
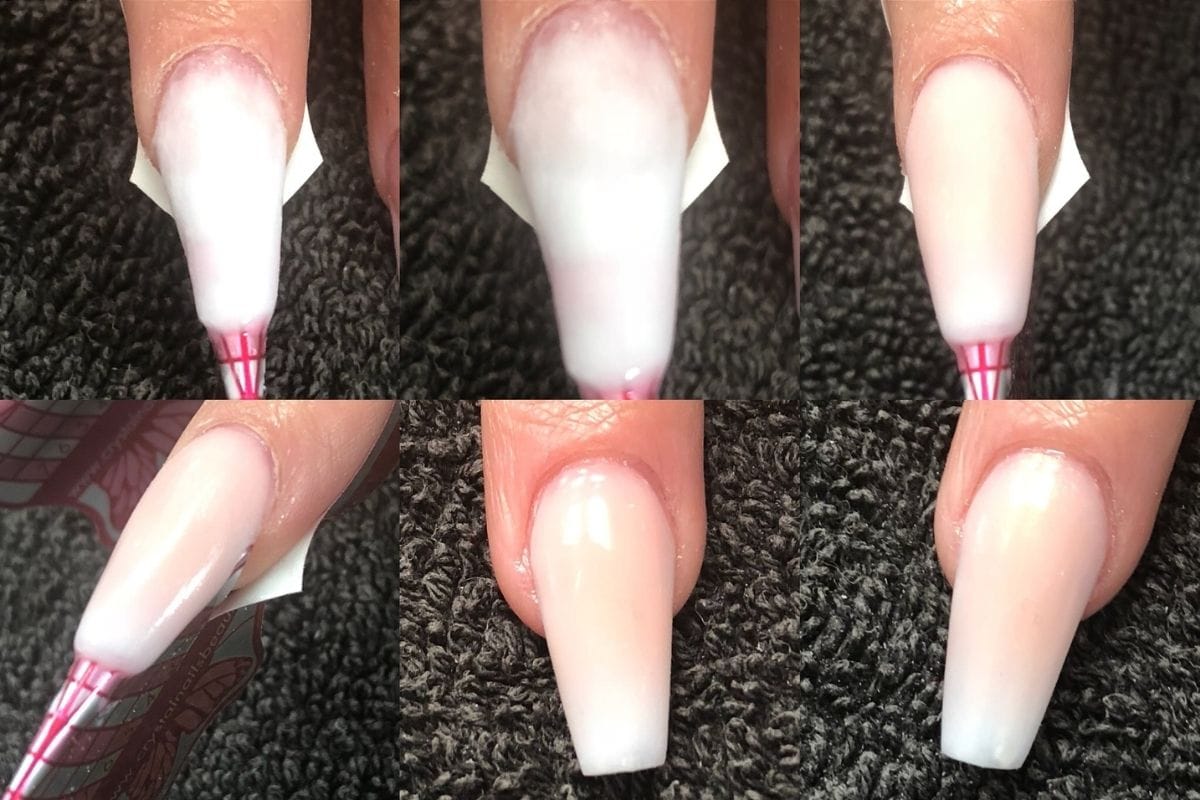
Step-by-Step: Classic Sponge Method with Regular Polish
This is the go-to method I teach beginners. It is simple, fast, and forgiving.
- Apply a thin base color. Use the lighter shade. Let it dry to the touch.
- On a sponge, paint two stripes. Place the light and dark side by side so they touch. Overlap them a bit to pre-blend.
- Dab on a nail gently. Start near the cuticle with the light shade. Move toward the tip where the dark shade lands.
- Roll and tap. Use small taps. Shift the sponge slightly up and down to blend the line.
- Repeat 2–3 rounds. Let each pass set for 45–60 seconds. Add more polish to the sponge as needed.
- Clean edges. Use a small brush with acetone. Work slow to avoid smudges.
- Seal with top coat. Float the brush to avoid dragging the blend. Cap the tip.
Pro tips from the chair:
- Use thin layers. Thick coats bubble and smear.
- Replace the sponge surface often. Fresh pores mean smoother fades.
- If lines look harsh, dab a tiny bit more of the lighter color on the blend area, then top coat.
Once you learn How To Do Ombre Nails this way, you can finish both hands in under 30 minutes.

Gel vs. Regular Polish: Which Method to Choose?
Clients ask me How To Do Ombre Nails with gel for longer wear. Both work well. Choose based on time and tools.
Regular polish:
- Pros: No lamp, easy to remove, budget-friendly.
- Cons: Shorter wear, longer dry time, dents if touched too soon.
Gel polish:
- Pros: Strong, glossy, lasts 2–3 weeks. Cures hard under a lamp.
- Cons: Needs a lamp and gel products. Removal takes more care.
How to blend with gel:
- Apply base gel and cure.
- Brush on a thin light color and cure.
- Dab gel colors on a sponge. Work fast since gel can shrink back before cure.
- Tap the gradient onto the nail. Cure after each pass.
- Smooth with a thin coat of no-wipe top gel. Cure.
Another gel trick:
- Use a small flat brush. Place light and dark gel on the nail. Feather the join with gentle side strokes. Cure and repeat as needed.
Whichever path you choose, the core idea is the same. To master How To Do Ombre Nails with gel or regular polish, keep layers thin and the blend area soft.
Choosing Colors That Always Blend Well
Picking colors is half the magic. When I help clients choose, I look for shades that share a tone.
Reliable combos:
- Nude to white. French fade or baby boomer look.
- Pink to coral. Fresh and bright for spring or summer.
- Lavender to deep purple. Soft and dreamy.
- Sky blue to navy. Clean and modern.
- Taupe to chocolate brown. Cozy and chic.
- Sheer shimmer to any cream shade. Adds depth without heavy lines.
Quick color tips:
- Neighboring colors on the color wheel blend more easily.
- Use the lighter shade near the cuticle for a soft grow-out.
- If in doubt, choose colors from the same brand and formula. They level the same way.
Use these ideas when planning How To Do Ombre Nails, and your blends will look seamless and balanced.
Common Mistakes and Easy Fixes
I’ve seen every ombre fail. Most are simple to fix.
- Patchy or streaky fade. Add another thin dabbing pass. Then use a smoothing top coat to blur the line.
- Sponge marks. Use a sponge with smaller pores. Float top coat without pressure.
- Flooded cuticles. Use less polish on the sponge. Apply a latex barrier. Keep a dry cleanup brush handy.
- Harsh line between colors. Overlap the colors more on the sponge. Tap with tiny movements over the line.
- Chips in a day. Cap the tip with every layer. Let layers dry 60–90 seconds. Avoid hot water for 4 hours.
These fixes will raise your success rate fast. They are the backbone of How To Do Ombre Nails like a pro.

Maintenance and Removal the Smart Way
Good care makes your work last. This is key when you teach others How To Do Ombre Nails.
Make it last:
- Apply a fresh top coat every 2–3 days.
- Use cuticle oil daily to prevent micro-cracks.
- Wear gloves for dishes and cleaning.
- Avoid long hot baths the day you paint.
Quick chip fix:
- Lightly buff the chip edge.
- Sponge a mini blend only on that nail.
- Seal with top coat. It will look like new.
Removal tips:
- Regular polish. Soak a cotton pad with remover. Hold for 30 seconds. Wipe away.
- Gel polish. File off the top coat. Soak cotton in acetone. Wrap with foil for 10–15 minutes. Gently nudge off with an orangewood stick. Never peel. It can harm your nail plate.

Advanced Ombre Techniques to Try
When you want to level up, try these. They look complex but are very doable.
- Airbrush ombre. The smoothest fade. Needs equipment. Great for salons.
- Brush blend. Use a dry flat brush to feather wet polish on the nail.
- Chrome powder ombre. Rub chrome on the tip only over no-wipe top gel.
- Glitter gradient. Start dense at the tip. Thin out toward the center.
- Dip powder ombre. Sprinkle a second color on the tip while base is wet. Then activate and buff.
- French fade. Nude base. Sponge sheer white on the tip. Seal with a milky pink.
As you practice How To Do Ombre Nails, these methods give you more control and more looks.
Safety, Hygiene, and Skin Care
Great nails start with healthy skin. This matters as much as color choice.
Best practices:
- Work in a ventilated area. Fumes can be strong.
- Disinfect tools between uses. Prevents infection.
- Patch test new gels if you have sensitive skin.
- Avoid flooding the skin with uncured gel. Wipe any contact right away.
- Hydrate hands and nails. Oil helps with flexibility and shine.
Dermatology guidance notes that overexposure to certain chemicals may lead to irritation. If you feel burning, itching, or see redness, stop and reassess. Safety is part of learning How To Do Ombre Nails with confidence.
Frequently Asked Questions of How To Do Ombre Nails
Can I do ombre nails without a sponge?
Yes. Use a flat brush to feather the join while both colors are wet. You can also try a silicone tool for a soft blend.
How long does an ombre manicure take?
With regular polish, plan for 30–45 minutes. Gel can be faster because it cures between steps and does not smudge.
What are the best colors for beginners?
Choose two shades from the same color family, like pink to coral. Nude to white is also very forgiving and looks clean.
Why does my ombre look streaky?
Your layers may be too thick or drying too fast. Try thinner coats and do one extra light dabbing pass before top coat.
Can I do ombre on short nails?
Yes, and it looks great. Keep the fade tight so the gradient fits the shorter surface.
How do I stop polish from flooding my cuticles?
Use less product on the sponge and apply a latex barrier. Hold your finger downward so gravity pulls polish away from the cuticle.
Will top coat ruin my gradient?
It can if you press hard. Float the top coat with a light touch, and it will smooth and blend the fade.
Conclusion
You now know How To Do Ombre Nails from prep to finish, plus how to choose colors, fix mistakes, and make it last. Keep layers thin, overlap colors on the sponge, and float the top coat for that glassy blend.
Practice on one nail at a time until your taps feel natural. Then try new combos and advanced methods. Ready to level up? Share your results, ask a question below, or subscribe for more step-by-step nail guides and color recipes.
Amazon and the Amazon logo are trademarks of Amazon.com, Inc, or its affiliates.