Autumn Acrylic Nails: Trending Colors & Designs
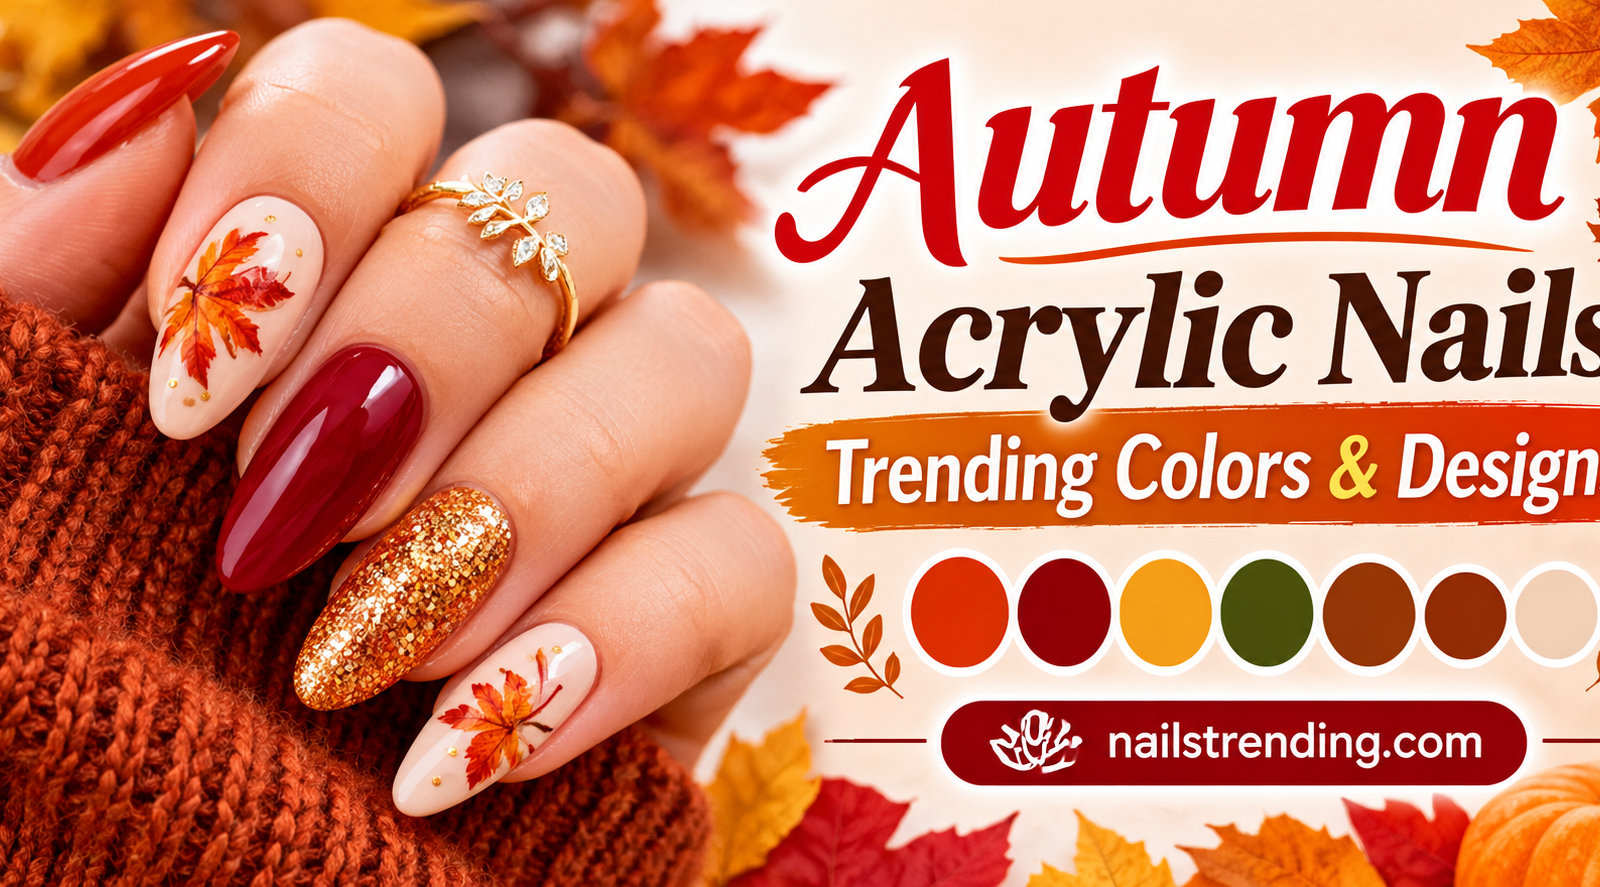
Autumn acrylic nails sit at the sweet spot between cozy color and a crisp, finished manicure. The problem is that fall color is often reduced to one pumpkin shade or one muddy brown, which can look dated before the first cold snap. A modern set works better when it has a controlled palette, a practical length, and a finish that suits your daily routine.
Traditional acrylic gives you a sturdy canvas for French tips, gradients, fine lines, color blocks, and high-contrast accents. It can be short and polished or long and dramatic. What you want to avoid is choosing an elaborate design first and then forcing your natural nails, work habits, and removal schedule to fit it.
My dependable starting point is a medium-length soft almond or soft square in chestnut, mocha, taupe, or olive. Add cream, rust, burgundy, or black with a micro-French, a half-moon, or a few accent nails. Mixing satin or matte finishes with gloss creates depth without making the manicure look overly complicated.
The Best Autumn Acrylic Manicure for Most People
The easiest autumn formula is:
One medium shade for most nails + one deeper seasonal shade for an accent + one light or metallic detail + a comfortable shape.
That formula works for several reasons. A neutral base keeps the manicure wearable. One accent color makes the seasonal message clear.
A small detail adds personality without making every nail look busy. The right length matters just as much as the color because you will wear these nails through work, errands, changing weather, and daily chores.
| Goal | Strong Starting Point | Finish or Detail |
|---|---|---|
| Everyday fall manicure | Warm taupe, mocha, or soft chestnut | Satin or glossy |
| Trend-forward set | Terracotta or paprika with black | Micro-French or a thin outline |
| Elegant seasonal look | Cream or ivory with deep burgundy | Almond shape and gold detail |
| Short, practical nails | Olive, cocoa, or mushroom | Clean square or oval |
| Bold statement set | Oxblood, ink, or black cherry | Matte contrast or metallic accent |
| Holiday-ready manicure | Forest green with copper or gold | Fine line or French tip |
I’d choose medium-length soft almond in warm taupe with a cream micro-French and a matte chestnut accent when I want the manicure to look seasonal without being too themed. It works with denim, sweaters, leather jackets, boots, and neutral office clothing.
How to Build an Autumn Acrylic Color Palette
Autumn color works because it combines warmth, depth, and contrast. The season does not require orange everywhere. It works with earthy neutrals, rich red tones, deep greens, cool berries, and warm metals.
Start by choosing a base shade. This is the color that will cover most of your nails. It should be flattering in natural daylight and easy to wear for several weeks.
If you are choosing a color for an event, think about what clothing and accessories will be nearby. If you are choosing it for everyday wear, think about how often you will handle keys, type, cook, and clean.
Next, pick a transition shade. This can be a warmer, lighter, or darker version of the base. Terracotta fading into chestnut, cocoa fading into cream, or olive moving into sage are all effective fall combinations.
Finally, choose an accent. An accent may be one or two nails, a tip, a side detail, a small line, or a metallic effect. Keep the accent intentional.
A tiny accent often looks more expensive than a design that covers every surface.
A few fall-friendly pairings work especially well across different skin tones. Chestnut paired with cream, mocha combined with rust, olive with nude beige, and burgundy with gold all create strong visual balance. Terracotta with black offers a bolder alternative, while forest green with copper creates a deeper, moodier effect.
Navy with rust provides cool and warm contrast, and mushroom taupe with ivory offers a quieter, more polished appearance.
Your undertone can help narrow the options, but it is not a rulebook. Warm undertones often look especially good in terracotta, chestnut, paprika, and olive. Rosy or cool undertones may prefer cranberry, blueberry, plum, navy, or cooler taupe.
Olive skin can suit moss, forest, terracotta, and warm gold. Deeper skin tones can carry saturated rust, oxblood, emerald, cream, and gold just as beautifully as soft pastels.
The best test is always the same: compare the shade on your nails in daylight, indoors, and under ordinary indoor lighting. A color that looks beautiful on a screen can appear very different once it is applied.
Best Acrylic Nail Colors for Autumn
1. Chestnut and Coffee
Chestnut is one of the most useful autumn acrylic shades because it feels seasonal without looking like a costume. A medium chestnut works for almost any fall outfit and pairs naturally with cream, black, denim, camel, and gray.
For a softer version, choose a warm cocoa or milky coffee. For a sharper version, choose a dark roasted brown with a subtle red or burgundy undertone. The finish can change the mood completely.
Gloss makes chestnut look polished and traditional. Satin gives it a quieter, more modern feel. A matte finish looks dramatic, although it can show fingerprints and texture more readily than gloss.
I like chestnut with a short cream French tip or a fine gold line near the smile line. It gives the manicure a fall accent without making the color look old-fashioned.
2. Terracotta, Rust, and Paprika
These colors are the most recognizable autumn shades, but they work best when the formula is controlled. A soft terracotta can look modern and earthy. A brighter paprika feels more energetic.
A deep rust can look sophisticated when paired with black, cream, or navy.
Terracotta also works well as an accent color on a neutral base. Try one rust accent nail on a taupe or mocha set, or use a thin rust outline around a cream nail. This is easier to maintain than giving every nail a bright orange tone.
If you have a strong preference for orange, choose a shade with a little red or brown in it. That tends to feel less neon and more grounded. Avoid a very orange shade if you want the manicure to look good beyond Halloween or a single fall weekend.
3. Olive and Moss
Olive is one of the easiest autumn colors to wear year-round, but it becomes especially good in fall when paired with rust, cream, plum, or brown. It works particularly well for people who want a seasonal manicure that feels current rather than costume-like.
Moss green is deeper and earthier than olive. Forest green is darker and more dramatic. For an office-friendly option, choose a muted olive.
For a weekend look, choose a rich moss or forest shade. Both can be finished with a satin sheen for a softer result.
A nice fall pairing is olive with a warm nude accent. The nude keeps the design balanced and makes the green the focal color. A thin copper line or a small gold dot adds warmth without making the entire set look busy.
4. Mustard, Ochre, and Golden Spice
Mustard and ochre are strong autumn accents. They are less universally wearable as a full set, but they work well on one or two nails, in a French tip, or beside a darker brown. The shade should be rich rather than neon.
A muted mustard feels more sophisticated than a bright yellow.
Ochre has a golden-brown quality that pairs naturally with chocolate, rust, and cream. It can also work with deep green for a slightly retro look. I’d use this color combination when you want something playful but still coordinated.
If you are choosing mustard for every nail, keep the finish simple. A glossy or satin surface will look more polished than a heavily textured design. A matte mustard nail can look beautiful, but the color needs a clean shape and well-maintained edges to keep the look intentional.
5. Cream, Ivory, and Oat
Cream nails are not exclusively a spring or summer choice. A warm ivory or oat shade can make fall colors look richer by contrast. It is also a good choice for people who want a manicure that feels polished but not dark.
Cream can be the main color, the French tip, or the accent on a chestnut or burgundy set. It works with gold, copper, brown, olive, and black. A creamy shade is usually warmer than a stark white, which makes it easier to wear through autumn.
Be mindful of the finish if you choose a very pale shade. Dark ink, grease, and lint can show more clearly on cream than on deeper colors. A good top coat can create a smooth, protective surface, but it cannot prevent every mark.
Cream is a strong choice forfor anyone who wants a fall manicure to look polished from across the room.
6. Burgundy, Oxblood, and Cranberry
Red shades are the easiest way to make a manicure feel unmistakably autumnal. Burgundy is sophisticated and works well for evening looks, but oxblood has more warmth and pairs naturally with beige, tan, cream, and black. Cranberry is brighter and easier to wear during the day.
The shade you choose depends on the effect you want. Deep oxblood creates a dramatic, almost black-red look, while a brighter cranberry keeps the manicure lively and youthful. Burgundy appears elegant beside gray and navy, whereas a softer red works well with cream.
For a neutral, wearable option, a muted brick red fits well. If you prefer contrast, black and cranberry create a crisp, graphic result.
A burgundy set does not need much extra decoration. A glossy finish, clean almond shape, and one thin gold line are enough. If you want more dimension, use a slightly lighter red near the cuticle and blend it into the deeper shade.
Keep the transition soft if you want elegance; make it sharp if you want a modern, graphic manicure.
7. Forest Green, Ink, and Black Cherry
These darker shades suit people who want fall color without the warmth of rust or paprika. Forest green feels natural beside tan, gold, cream, and brown. Ink blue or nearly black works with every autumn outfit.
Black cherry adds a red undertone that keeps a dark manicure from feeling flat.
Dark acrylics also photograph well, making them a practical choice if you enjoy showing your hands in photos or want a manicure that looks neat with minimal decoration. The tradeoff is that every scratch, filing mark, and bit of dust can be more visible. A smooth application and consistent top coat matter more here than they do with a bright or textured color.
A very dark shade can be softened with a warm gray, mushroom, or taupe accent. For example, pair ink with a stone-colored micro-French, or use black cherry with a sheer beige base. The result feels balanced and wearable.
8. Blueberry, Plum, and Navy
Cool fall shades are often overlooked. Blueberry, plum, navy, and blackberry can look rich against warm sweaters, camel coats, and brown boots. They also work well if your personal style leans more polished than rustic.
Plum has a purple tone that may feel more dramatic than a neutral manicure. Blueberry is slightly brighter and more playful. Navy is the easiest of the group to wear because it reads almost black in low light but becomes noticeably blue in daylight.
Use a metallic accent sparingly. Silver looks crisp with navy, while gold warms up blueberry and plum. Copper works especially well with deep blue because the colors create a strong warm-cool contrast.
Autumn Acrylic Shades by Style
| Desired Effect | Best Autumn Shades | Useful Combination |
|---|---|---|
| Quiet and neutral | Oat, mushroom, taupe, cocoa | Cream micro-French |
| Warm and cozy | Chestnut, terracotta, rust | Gold or copper detail |
| Earthy and moody | Olive, moss, forest green | Beige, cream, or black |
| Bold and dramatic | Oxblood, ink, black cherry | High-contrast French tip |
| Soft romantic | Cranberry, mauve, dusty plum | Silver or pearl detail |
| Retro-inspired | Mustard, ochre, burnt orange | Dark brown or black |
| Holiday-ready | Burgundy, forest, black | Gold, copper, or cream |
| Office-friendly | Warm beige, muted taupe, soft olive | Minimal matte accent |
You can compare the undertones before committing. A shade with orange or red undertones will usually feel warm beside a shade with blue or purple undertones. Natural daylight is the most reliable test because salon lighting can make a polish look more neutral, warmer, or cooler than it does at home.
If you are still deciding, start with a polish you already own. Many seasonal polish options can be layered over a neutral or sheer base to create a custom autumn shade. Layering also makes it easier to adjust the intensity without committing to an entirely different color.
Popular Autumn Acrylic Nail Designs
A strong color needs a design that supports it. The best fall manicures have one clear idea: a French shape, a color gradient, a defined line, a textured surface, or a controlled contrast. Combining five trends on ten small nails rarely looks intentional.
Micro-French
A micro-French uses a narrow band of color around the tip instead of covering a large portion of the nail. It is subtle, clean, and particularly useful for short or medium lengths. A chestnut base with a cream micro-French feels autumnal without looking heavily themed.
For a bolder version, use a black micro-French over warm taupe or a burgundy micro-French over mocha. Keep the line narrow and consistent. The width should follow the curve of the natural tip and remain visible from a normal viewing distance.
A drill is not necessary to create this effect. You can shape the smile line with a fine file, then add color with a detail brush. My drill-free application method is useful if you prefer a slower, more controlled approach.
Classic French With a Fall Twist
The classic French manicure is still one of the most reliable fall designs. Change the standard white tip to ivory, cream, rust, burgundy, or forest green. Warm beige bases make the colors look refined rather than bold.
You can also reverse the color arrangement. Use a creamy base with a chestnut tip, a taupe nail with a black tip, or a muted nude base with a paprika line. Keep the tip crisp.
A clean edge does more for a French manicure than adding extra decoration.
Ombré and micro-French gradients
Ombré uses one color that gradually changes into another. For autumn, the most wearable direction moves from a lighter shade near the tip to a deeper shade near the cuticle. Chestnut fading to cream, cranberry fading to blush, or forest green fading to sage all have a seasonal feel.
Traditional ombré can require several layers, so a smooth ombré technique helps you control the transition without making the nail surface uneven. A micro-French gradient gives a softer result and works well on medium or short nails.
A different option is the reverse ombré. Apply the lighter shade at the base and the deeper shade at the tip. The result can look modern and clean, especially in taupe and white or cream and burgundy.
Color blocking
Color blocking uses two or more clearly defined areas on the nail. It is a good match for negative-space fall manicures because the sharp lines create a deliberate look.
Try these combinations:
- Half the nail in chestnut and half in cream
- A taupe base with a rectangular black tip
- A vertical split between olive and rust
- A deep green base with a mustard corner
- Burgundy and muted pink color blocks
- A solid tip with the cuticle area left sheer
Keep the design consistent from nail to nail. If every nail has a different arrangement, the set can feel busy. A few coordinated variations usually look more polished.
Fine-line fall art
Thin lines, tiny leaves, simple arcs, and minimal dots can give an autumn manicure personality without covering the color. A curved line near the tip can frame a chestnut nail. A single gold line can separate a cream micro-French from a burgundy base.
Tiny matte dots can add a playful element to a solid olive manicure.
Avoid overly detailed illustrations unless you have steady hands and plenty of time. On a small nail, a simple line often looks cleaner than a complicated leaf with uneven edges.
Textured finishes
Matte, velvet, glitter, and subtle 3D details all work in fall. Matte texture suits cocoa, olive, navy, and burgundy. Fine glitter works best when the particle size is small enough to read as shimmer rather than rough grit.
Velvet or flocked powder can make a warm taupe or burgundy set look rich, but it adds thickness. Apply it sparingly near the tip or as a small accent. Large rhinestones and heavy 3D charms can also overwhelm an autumn color.
If you choose one dramatic nail, keep the remaining nails quiet.
Minimal seasonal details
Fall does not need pumpkins, leaves, or spiders. A thin outline, muted gold arc, or warm tonal stripe can suggest the season without making the manicure feel like a costume. This is especially useful if you want one set to work from September through November.
For a restrained design, choose a neutral base, one deeper accent, and a single metallic detail. Your clothes can supply the seasonal color.
How to Choose the Right Shape and Length
Color often gets the attention, but shape determines whether the manicure looks elegant or overdone. Choose a length that matches your nail beds, hand shape, and routine.
A good rule is to select the shortest length you genuinely like. You do not need long acrylics to achieve a dramatic autumn design. A short coffin nail with black detailing can look just as striking as a long version.
| Length | Best Fall Design Choices | Practical Consideration |
|---|---|---|
| Short | Solid color, micro-French, thin outline | Less snagging and easier maintenance |
| Medium | French, color block, ombré, fine art | Fits most fall wardrobes |
| Long | Gradient, layered color, statement line | Requires more filing and careful daily handling |
| Extra long | Dramatic shape, bold color, ornate detail | Often impractical for active hands |
Short nails
Short acrylics are a strong choice when you type, work with your hands, or dislike the feeling of long extensions. A medium-width square, soft oval, or short almond gives enough surface for color without adding excessive length.
Autumn shades that work especially well on short nails include chestnut, oxblood, forest green, navy, and warm taupe. Keep the French tip narrow. A standard thick white tip can overwhelm a short nail, while a micro-French leaves more of the color visible.
Medium nails
Medium length is the most flexible option. It works with French tips, gradients, fine art, and color blocking. Soft almond and soft square shapes are particularly flattering because they extend the nail without creating sharp corners.
A classic medium almond in burgundy with a gold line can look elegant without feeling formal. A medium coffin in walnut brown with a matte top can look more dramatic. A medium square in olive with a cream tip is balanced and easy to wear.
Long nails
Long acrylics create a large canvas, which means small imperfections are more visible. They also require more effort to keep from catching on clothing, hair, keys, and work surfaces. Choose a length you can control, not simply the longest available option.
A long coffin shape suits deep seasonal colors and clean geometric designs. A long almond shape looks softer and works well with ombré. A long stiletto can be striking, but it is less practical and harder to shape accurately at home.
If your long set begins to feel awkward, learn how to trim acrylics safely before letting the length become a problem. Do not wait until the nail is bent, cracked, or snagging.
Shape and cuticle balance
The best manicure is not only about length. The cuticle line should be tidy, and the natural nail should support the acrylic without excessive tension. If the nail plate is weak, a very long extension can worsen lifting or separation.
A thicker enhancement may be needed to create a smooth apex, but thickness is not the same as strength. Applying too much product near the cuticle can cause early lifting, and applying too little near the free edge can make the nail feel weak. The structure should be smooth and proportional.
If you are new to acrylics or have damaged natural nails, supporting the underlying nail health matters more than forcing an elaborate fall design.
How to Get Autumn Acrylics at Home
A salon-quality result depends on preparation, a compatible product system, and control of the application. The color is usually the easiest part. The structure determines whether the manicure lasts.
1. Inspect the natural nails
Remove old enhancements before starting if lifting, separation, or thick residue is present. Do not apply fresh acrylic over trapped moisture. A lifting edge can harbor debris and continue to worsen underneath the new enhancement.
Avoid applying acrylic over visibly split, deeply cracked, irritated, or infected nail tissue. If you have pain, swelling, pus, or a sudden change in the nail, address that first. AAD’s healthy nail care guidance is a useful starting point for protecting the natural nail.
2. Choose a compatible system
Use a liquid-and-powder system designed to work together. Randomly mixing products from different brands can produce unpredictable consistency, cure behavior, adhesion, and wear. This is especially important for transparent and nude shades because their chemistry affects how easily bubbles and lines appear.
If you are buying supplies, compare complete acrylic nail kits by the included items rather than counting small bottles. You may need the correct brush, file, buffer, primer, dehydrator, top coat, and curing or drying product. Not every included accessory is useful for the technique you intend to use.
3. Prepare the nail plate
Remove old polish, lift the cuticles carefully, and lightly buff the shiny surface of the natural nail. Do not file deeply into the nail plate. Excessively rough filing can create thin areas that flex and peel.
Wipe away filing dust with a clean lint-free wipe. If the manufacturer recommends a dehydrator, use it according to the instructions and allow the nail to dry fully before applying primer. Keep moisture and lotion off the nail plate.
4. Apply the base and first bead
A thin, even base layer can improve coverage and color application. It should not flood the cuticle or create a ridge around the nail. Follow the system’s directions because application thickness and timing vary.
Use a small, controlled bead near the center of the nail. With a bead brush, press the product into place and guide it toward the free edge without flooding the cuticle. A second smaller bead can help build the apex and upper surface.
The bead should be slightly thicker through the stress area and thinner near the cuticle and free edge. Heavy buildup makes the nail bulky. Too little product near the center can create a weak apex and a narrow stress area.
5. Shape before the set becomes rigid
Work while the acrylic is still workable. Smooth the upper surface, refine the smile line, and check the balance before the product fully hardens. Use a file that will not lift or tear the developing layer.
Hold the file at a consistent angle and make light strokes. Long, aggressive strokes can create grooves. Short, controlled strokes are safer and usually produce a smoother reflection.
A full home application routine can help you set up a clean workspace and follow each stage without rushing.
6. Apply the autumn color
For solid color, apply two thin color coats rather than one heavy coat. Thin layers usually dry more evenly and look more saturated. White or cream pigments often need an extra coat because they are less opaque.
For a French tip, paint color across the free edge and refine the smile line before the color firms up. For a micro-French, use a small amount of color and a fine detail brush. Practice on one nail first to control the width.
If you are painting a design onto the acrylic, use a compatible color system and keep the surface completely cured. Nail art color may need different curing requirements from the acrylic enhancement. Follow the manufacturer’s directions and do not assume that the entire set cures under the same conditions.
7. Add the top finish
A top coat can improve shine, fill small surface irregularities, and make color easier to maintain. Apply a thin, even layer and cap the free edge. Do not press so hard that the brush drags the polish onto the skin.
Acrylic cures in air, but the finishing coat may contain gel. If you use a gel top coat, it has its own curing requirements. A faster finishing routine can reduce handling mistakes, but the cure time stated for the product must still be respected.
8. Finish the cuticles
Once the surface is set, remove any color or skin-safe residue around the nail. Do not use harsh solvents repeatedly on the skin. If glue is attached to the skin rather than the nail, use a controlled adhesive cleanup method to avoid burning or drying the area.
Push cuticles only if they are safe to move and your technique does not damage the living tissue. The final look should have a clean border without an aggressively cut or irritated nail bed.
Safety Practices for Acrylic Application and Removal
Acrylic systems generally cure through a chemical reaction rather than UV light, but the liquid monomer, powder, primer, solvents, and filing dust still deserve care. Sensible precautions are more useful than panic or exaggerated claims.
Work in a ventilated area
Open windows or use a functioning fan to move air away from your face. A small tabletop fan that blows directly across the product can spread dust and aerosolize liquid. It should not point toward your eyes or breathing area.
Review FDA guidance on nail products for practical information about product exposure, labeling, and safe use. The surrounding environment matters too. Ventilation works best in a space that is not crowded with people or animals.
Wear suitable gloves
Nitrile gloves can reduce routine skin contact during mixing, filing, cleanup, and removal. They are not a substitute for ventilation. Gloves can also tear or leak, so inspect them before use and change them when damaged.
Do not assume the inside of disposable gloves is perfectly chemical-proof. Select protective equipment based on the product directions and the safety data available for the formulation.
Avoid prolonged skin contact
Concentrated liquid can irritate or burn skin, especially if it sits under a glove or remains on a damp surface. Wipe contact away promptly using the method recommended by the manufacturer. Do not use acetone on a large area unless the product is intended for that use and you are following its instructions.
Keep cuticles dry and free of oil before acrylic application. Oil can interfere with adhesion, but the nail plate should not be repeatedly soaked or scrubbed. Both extremes can create problems.
Know the signs of irritation
Mild dryness around the nail can occur from frequent washing, solvents, and filing. Persistent itching, swelling, rash, burning, or cracking may indicate irritation or an allergic reaction. Acrylate exposure can affect people who have had no previous nail allergy because sensitization may happen after repeated use.
Stop using the product if a reaction develops. If symptoms persist or involve the eyes, face, hands, or widespread skin, seek medical advice. Do not conceal a reaction with another coating and continue wearing the enhancement.
Avoid unsafe shortcuts
Do not place acrylic on an open sore. Do not use liquid monomer directly on the natural nail as a strengthening treatment. Do not heat the product to make it dry faster.
Do not mix incompatible products simply because they are both labeled for nails.
Keep product containers closed when they are not in use. Do not leave uncapped monomer on a towel or tabletop. Dispose of soaked wipes, gloves, and porous materials according to the manufacturer’s local disposal instructions rather than pouring liquid into household drains without checking the product label.
How to Maintain Autumn Acrylics
The autumn palette will stay clear when the surface stays smooth and the cuticles remain dry. Maintenance is not complicated, but it works best as a routine rather than a response to visible damage.
Clean the enhancement gently
Wash your hands as usual and use a mild soap around the nails. A soft nail brush can help clean the underside of the free edge and the gap near the cuticle.
Avoid harsh household cleaners and prolonged soaking, especially if the nail polish is not fully cured. Gloves help when you are exposed to cleaning products, but take them off afterward and wash your hands rather than leaving damp skin trapped inside them.
Refresh the cuticles
Apply cuticle oil to the surrounding skin and massage it in gently. The enhancement itself does not “need” oil because acrylic is not living tissue. Oil is mainly useful for the skin and cuticle area.
Stop before you create a sticky surface where dust can collect. If the nail plate is already healthy, oil around the cuticle is enough. After removal, more intensive care may be appropriate, including guidance on restoring nails after acrylics.
Treat small lifting carefully
Small lifting at the free edge is not always a reason to remove the entire set. If the area is clean and only a few millimeters are affected, the technician may be able to trim the lifted edge and fill it carefully.
Do not press the lifting area back down with glue or coat it with a thick layer of color. A shortcut can trap moisture and make the separation larger. Deep separation, odor, redness, or pain calls for complete removal.
Watch for structural wear
Thin, rough nails do not always mean the acrylic has lifted. The enhancement can wear down, especially at the ends of active hands. A professional can rebuild the structure or replace the set before the damage reaches the natural nail.
A translucent nail becomes yellow or gray as the enhancement ages. This is mainly an aesthetic change, but it is a sign that the surface has worn and may need refreshing.
Replace the set at the right time
Acrylic can last several weeks, but wear time depends on the system, nail preparation, lifestyle, and application quality. A set is ready for attention when the lift no longer feels secure, the structure becomes uncomfortable, or the nail looks thin and uneven.
Do not wait for severe pain before addressing a problem. The purpose of maintenance is to protect the natural nail, not merely preserve the manicure.
How to Remove Acrylic Nails Safely
There are two common removal methods. A nail professional can soak the nails in acetone and lift the enhancement, or a drill can file it away more quickly. The method chosen depends on the thickness of the product, the technician’s skill, and the condition of the natural nail.
A simple removal process generally follows these steps:
- Remove polish if the color layer is not compatible with the solvent.
- Soak the enhancement in pure acetone for a limited period.
- Lift the softened product with a metal tool or a separate plastic tool.
- Repeat soaking and lifting rather than forcing the acrylic.
- Buff away residue without aggressively thinning the natural nail.
- Wash, moisturize, and allow the nail to recover.
Force is the main warning sign. Prying with a sharp tool can scratch the natural plate, separate it from the bed, or cause painful inflammation. If you cannot lift an edge with light pressure, soak again.
A thicker layer may require more than one soak. Pushing the soak time too far does not make the nail safer; it increases your exposure to acetone and can dry the natural plate. Pay attention to the manufacturer’s instructions and take breaks.
After removal, the nails may feel thin, ridged, or sensitive. Avoid immediate extensions, aggressive filing, and frequent acetone exposure. A clear nail recovery plan can help protect the natural structure while it regains its usual strength.
Match the Manicure to Your Skin Tone and Personal Style
Skin tone can guide color choice, but personal preference should make the final decision. Saturated color, contrast, and finish often matter more than assigning one autumn shade to every person.
Warm undertones
Cinnamon, golden, olive, or peach undertones often pair well with terracotta, rust, chestnut, mustard, forest green, and warm gold. These colors echo the warm shades often found in autumn clothing.
If a shade looks too bright but the hue feels right, choose a muted version or use it as an accent. A small rust accent on a cream or cocoa set can be more wearable than five bright orange nails.
Cool undertones
Rose, pink, or blue undertones can look strong in cranberry, plum, navy, blueberry, black cherry, and silver. Cool tones also work well with mushroom, soft gray, and clean white.
Do not force a warm fall color if it makes your complexion look gray. The season does not define your palette. Rich, cool colors can look just as autumnal as rust and orange.
Olive undertones
Olive, neutral, and deep undertones can carry both warm and cool shades. This flexibility makes it easy to combine terra-cotta with forest green, plum with copper, or chocolate with cream.
If a color looks uneven, compare it under daylight rather than relying on salon lighting. A slight difference in undertone can also come from the base shade beneath the color.
Deep and rich skin tones
Rich skin tones can look striking in saturated creams, oxblood, forest green, gold, copper, paprika, and navy. These colors create contrast without needing to look pastel or extremely light.
Deep or matte shades may show fine dust and surface texture, so application quality and top-coat care matter. A glossy finish can create a crisp reflective surface. A satin finish can be more forgiving if you prefer less shine.
Light and fair skin tones
Warm taupe, soft chestnut, muted cranberry, mauve, oatmeal, and forest green can work well on fair skin. Pale taupe and cream need careful application because uneven nail beds can show through.
The goal is not to hide the natural nail but to create a smooth, even enhancement. A high-quality base and thin color coats will give a better result than trying to make one thin coat look heavily pigmented.
How to Choose Autumn Acrylics for Different Lifestyles
The best manicure is the one you can still enjoy six weeks later. Before choosing a shape, color, and finish, think about your actual week.
For office and customer-facing work
Choose medium or shorter nails with a clean shape. Chestnut, taupe, burgundy, and muted olive are professional without disappearing into a uniform. Avoid very long stiletto nails or heavy 3D decoration if your work involves frequent hand use.
A sheer or satin finish is practical when you need to take handwritten notes or work closely with others. If your workplace permits nail polish, check any independent policy rather than assuming a ban is universal.
For active hands
If you cook, clean, garden, or work outdoors, prioritize a medium-short length and a durable finish. A darker color hides small marks better than cream, but durable maintenance matters more than hiding imperfections.
Consider “messy-friendly” French tips or muted micro-French designs. They can last through the transition into holiday season without looking out of place when you are busy.
For special events
Choose a more detailed design when the manicure will receive attention. A medium-length almond in burgundy with gold line art works for an evening event, while a chestnut and cream micro-French suits a daytime gathering.
Check the dress code before applying long or highly decorative nails. Some venues request natural nails, and some professional settings treat artificial nails differently. The rule is not always written, so ask when it matters.
For beginners
Start with a familiar shape, two colors, and one detail. A short almond square in taupe with a burgundy tip is easier to control than an elaborate 3D design on long coffin nails.
Learn the basic application before adding painted details. Once you can create a smooth surface and a consistent cuticle line, color placement and design become much easier.
Seven Common Autumn Acrylic Nail Mistakes
1. Painting an orange that feels like Halloween
A bright pumpkin shade can be fun, but it is not the only fall option. Try rust, paprika, terracotta, ochre, or burgundy for a color that works through the season. Keep the brighter orange as an accent if you love it.
2. Making every nail detailed
A full design on every nail leaves no visual rest. Pick one or two accents, or use a detailed nail surrounded by solid colors. The simpler nails make the feature nail look more intentional.
3. Ignoring the cuticle line
Dirt and uneven skin around the nail can make an expensive autumn color look unfinished. Finish the border carefully, but do not overcut. Irritated cuticles are more noticeable than a small amount of natural growth.
4. Applying too much product
An overly thick enhancement can feel heavy, snag easily, and lift sooner. Build the apex and upper surface with controlled layers. Do not add extra product in an attempt to correct a small cosmetic gap.
5. Skipping the color seal
Fresh color can scratch, chip, or stain even when the acrylic is fully cured. A compatible top coat helps protect the design. Reapply a fresh top coat when the first layer wears down if the nail surface remains suitable for it.
6. Keeping lifting acrylic too long
Lifting is a common maintenance issue, but forcing the set to stay attached can worsen separation. Do not use glue on the nail plate or repeatedly press the lifted edge down. Clean the area and address the cause.
7. Choosing a long length for the wrong reason
Very long nails can look dramatic in a photo, but you must be able to type, dress, drive, and perform daily tasks without constant concern. A medium-long almond or coffin shape can provide a bold look with better control.
A Four-Week Autumn Acrylic Plan
A seasonal manicure can last well beyond one outfit. This plan keeps the look current while giving each option a purpose.
Week 1: Neutral transition
Choose taupe, cream, mushroom, or a soft nude with a satin finish. These shades bridge summer clothing and early fall layers. Add one accent nail in a slightly deeper tone.
Week 2: First fall color
Move to chestnut, rust, terracotta, or olive. Keep the shape comfortable and use one simple design such as a micro-French. This is a good week to test a richer shade without committing to a heavily embellished set.
Week 3: Layered or darker set
Choose burgundy, forest green, navy, or black cherry. Add a thin gold, copper, or silver detail. If the color is dark, keep the top coat smooth to reduce visible fingerprints.
Week 4: Holiday transition
Use cream, cranberry, evergreen, or black with a metallic accent. A micro-French or a small gold line works well with both fall clothing and early holiday outfits.
How to Refresh Acrylic Nails Between Appointments
You do not need a new set every time you want a new look. If the structure remains sound, a salon may be able to refill and reshape the nails or remove the previous color before applying a fresh fall shade.
Keep the tip and underside clear of old color. Thick layers of polish can make the tip look bulky and reduce the neatness of the smile line. If a light refill is needed, build the structure before changing the color so the result remains balanced.
A new set is often better when lifting reaches the cuticle area, the apex has thinned, the free edge is uneven, or the natural nail has changed shape. Trying to disguise major wear with more product usually creates an unstable enhancement.
What Makes an Autumn Acrylic Manicure Look Expensive
The most polished fall manicures are often the simplest. Their quality comes from clean color, balanced structure, and restrained decoration.
For a refined set, use these principles:
- Choose a color with enough depth to look intentional.
- Keep the cuticle border tidy without excessive cutting.
- Match the length to your hand and daily routine.
- Use one consistent detail rather than a different design on every nail.
- Refine the smile line and sidewalls before applying top coat.
- Choose a finish you can maintain and revisit as the set ages.
- Save very high-contrast art for one or two accent nails.
A warm chestnut set with a cream micro-French, a burgundy set with a fine gold outline, or an olive set with a copper half-moon can look refined because the elements work together. They do not need rhinestones or elaborate art.
How to Match Fall Acrylics With Seasonal Clothes
Your manicure can work as a small part of an outfit rather than competing with it. The goal is harmony, not an exact match.
With denim
Chestnut, medium blue-gray, cream, and indigo pair naturally with denim. A denim-blue nail color can work, but it should be deep enough to distinguish itself from blue jeans.
With camel and tan coats
Rust, paprika, cream, chocolate, and deep olive look especially strong. Keep the manicure fairly clean so the coat remains the focal point.
With black dresses and skirts
Bordeaux, black cherry, oxblood, forest, and glossy black all work. A cream accent can keep an otherwise dark set from feeling too severe.
With gray knitwear
Blueberry, navy, silver, mauve, and cream create a cool contrast. Cocoa can add warmth. A small metallic detail is enough.
With boots and leather accessories
Chestnut, black, oxblood, cognac, and forest green echo the warm tones often found in accessories. Avoid matching every clothing item exactly; tonal coordination is more natural.
With white shirts
Navy, burgundy, black, rust, and forest green stand out against white. A French tip may feel crisp, while a solid color gives a stronger, cleaner look.
Fall Acrylic Nail Care Checklist
Use this checklist before a salon appointment or at-home application:
- The natural nails are free of open irritation or split damage.
- Old lifting product has been removed or properly addressed.
- The nail plate is clean, dry, and lightly prepared.
- The powder and liquid belong to the same compatible system.
- The product is applied in a ventilated space.
- The cuticle area is not flooded with acrylic.
- The apex is supported without excessive thickness.
- The free edge and smile line are balanced.
- Color is applied in thin, even layers.
- The top coat is compatible and fully finished.
- The manicure is a comfortable length.
- You know how the enhancement will be maintained and removed.
FAQ
What are the most popular autumn acrylic nail colors?
Chestnut, terracotta, rust, burgundy, olive, forest green, cream, cranberry, navy, and black cherry are among the most useful fall colors. Chestnut, taupe, and cream are the easiest to wear for most people. Rust and paprika create a stronger orange influence, while burgundy and forest green offer a deeper look.
What autumn acrylic design looks good on short nails?
A solid color, micro-French, thin outline, or single accent works well on short nails. Medium-width square, oval, and soft almond shapes maintain balance without adding unnecessary length. Keep the French tip narrow so the color remains visible.
Can I do a French manicure on acrylic nails?
Yes. Acrylic nails can be painted after the enhancement is shaped and set. A classic white tip looks clean, but cream, rust, burgundy, or forest green creates a more distinctly autumn style.
Apply thin color layers and a compatible top coat for the most even result.
What color goes best with warm-toned autumn clothes?
Warm-toned clothing usually pairs well with terracotta, chestnut, paprika, cream, olive, gold, and burgundy. A neutral or jewel tone can balance the outfit if the clothing already contains strong color. The best match depends on the clothing’s undertone and how much color the pattern contains.
Are matte fall acrylics hard to maintain?
Matte surfaces tend to show fingerprints, lint, and texture more than glossy ones. A satin finish is easier to maintain while still looking softer than gloss. If you choose matte, use a clean application and be prepared to refresh the surface or switch to gloss during maintenance.
How long should autumn acrylic nails be?
Most people get the most wear from short-to-medium lengths, while medium and long nails allow more dramatic designs. Choose a length that fits your nail beds and daily routine. A medium almond or soft square is an easy all-season choice.
Very long stiletto or extreme shapes require more maintenance.
Can I change the color on my acrylic nails?
Often, yes, if the structure remains healthy. A nail technician can remove the old polish and apply a new shade. If the enhancement is lifting, thin, uneven, or damaged, replacing the set may be necessary.
Painting over a poorly attached surface can hide damage rather than fix it.
Is it safe to wear acrylic nails with nail polish?
Acrylic enhancements and nail polish are generally worn together when compatible products are used. Safety improves with a clean workspace, ventilation, careful application, and avoiding prolonged skin contact. The FDA’s nail product guidance is helpful for understanding the importance of ventilation and following product instructions.
Stop wearing the set if you develop persistent irritation or swelling.
The Best Autumn Acrylic Set for Your Routine
The strongest autumn manicure is not the most complicated one. It is the set whose color, length, and finish you will still enjoy when the weather changes again. For most people, a medium-length soft almond or soft square in chestnut, taupe, burgundy, or olive is a reliable starting point.
Add a cream micro-French, a thin gold line, or one contrasting accent nail, then maintain the structure with gentle care.
Choose a macro look with clean technique when you want the manicure to look expensive, not elaborate. If the colors feel too bold, mute them with cream, mushroom, cocoa, or sage. If they feel too quiet, add rust, cranberry, gold, or black.
Autumn gives you plenty of room to make that choice.
Amazon and the Amazon logo are trademarks of Amazon.com, Inc, or its affiliates.
Author


Similar Posts