Acrylic Nails for June: Fresh Ideas You’ll Want to Try
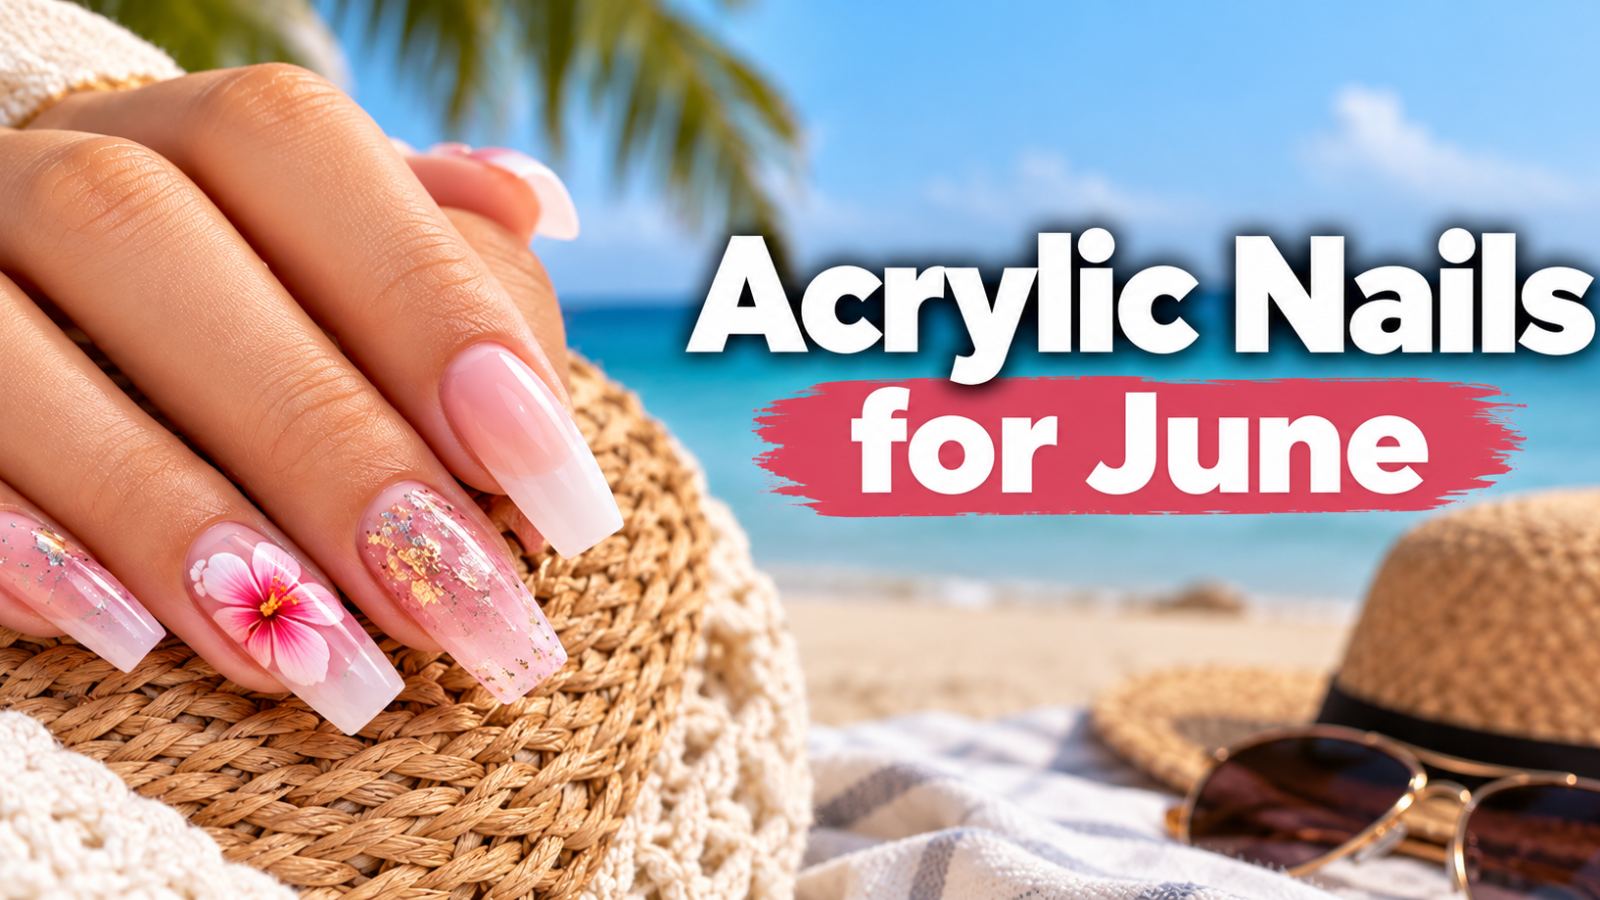
June manicures look best when they feel fresh without looking like they require a lot of maintenance. A clean almond shape in sea glass green, a short square set with a micro French tip, or medium coffin nails with butter-yellow ombré can all capture the season.
The strongest June acrylic manicures share three features:
- Color: soft citrus, fresh greens, cool pastels, warm coral, or crisp contrast
- Shape: short squares, squirrels, and medium almonds suit most hands and everyday routines
- Detail: one clear idea, such as a tiny French tip, an ombré, or minimal florals
You don’t need every trend in one set. In fact, the most polished manicures usually mix one color story, one shape, and one accent detail.
Best June Acrylic Style at a Glance
The best acrylic nails for June depend on your personal style, nail shape, and how much maintenance you want. Here are my top choices for different preferences, from minimal to bold designs, using various shapes, colors, and finishes.
| Preference | Best June choice | Why it works |
|---|---|---|
| Low-maintenance | Short almond or squoval in sea glass green | Fresh color without elaborate nail art |
| Office-friendly | Nude base with a white micro French | Clean, neat, and season-neutral |
| Trendy but wearable | Butter-yellow square or almond | Bright enough for summer without looking novelty-heavy |
| Bridal | Sheer pink, pearl, or soft lavender | Photos well without competing with the outfit |
| Creative | Lavender-to-pink ombré with tiny silver stars | Soft color with a controlled statement |
| Bold | Cobalt reverse French or coral color blocks | Strong contrast and a clear June look |
| Short nails | One accent nail or a simple smile line | Detail stays visible without crowding the nail |
| Long nails | Minimal gradient, fine stripes, or abstract florals | Large canvas without excessive decoration |
These combinations ensure that whether you prefer a simple, clean aesthetic or a bold, creative statement, there is a design that balances seasonal trends with practical wearability.
Acrylic is the strengthening layer, while the visible color can come from regular polish or gel color. The acrylic itself hardens at room temperature. A regular top coat air-dries, but a gel-style top coat needs the lamp and curing time stated on its label.
Popular June Acrylic Nail Colors
June color works because it can look bright without becoming heavy. Soft shades reflect the lighter season, while deeper reds, browns, and cobalt give you more contrast. The best choice depends on your undertone, the shape of the set, and how often you expect to change the color.
June color chart
The following comparison evaluates popular June acrylic nail colors by detailing their mood, the best design applications, and the skin tones that naturally complement each shade.
| Color | Mood and effect | Best June design | Undertone note |
|---|---|---|---|
| Milky lavender | Soft, calm, and slightly romantic | Ombré, micro French, or solid almond set | Flatters many cool and mixed undertones |
| Butter yellow | Warm, cheerful, and fresh | Solid color, color block, or tiny citrus details | Especially good on warm and golden undertones |
| Peach coral | Soft and flattering | French tip, gradient, or glossy almond | Works across warm, cool, and mixed undertones |
| Sea-glass green | Calm, coastal, and modern | Solid set, ombré, or fine botanical accents | A muted sage leans warm; a blue-green leans cool |
| Fresh lime | youthful and energetic | Accent nails, French tips, or color blocks | Best when softened with a neutral or pastel |
| Sky blue | Airy and easy to wear | Cloud design, micro French, or solid square set | Look for a blue with the right depth for your undertone |
| Watermelon pink | Playful but not overly bold | French tip, smile line, or pink-to-red blend | A cool pink suits cooler skin; a coral pink suits warmer skin |
| Cherry red | Rich, polished, and high-impact | Glossy almond, reverse French, or minimal detailing | A blue-red feels cooler; an orange-red feels warmer |
| Cobalt blue | Dramatic and modern | Reverse French, geometric blocks, or clean solid set | Best when the color is balanced with neutral skin around it |
| Chocolate brown | Deep and sophisticated | French tip, ombré, or marble effect | Warm brown flatters golden tones; cool brown has more contrast |
| Pearl or silver | Clean and light-catching | Micro French, thin lines, or one glitter accent | A neutral silver usually works across undertones |
| Sheer nude | Low-maintenance and elegant | Solid set, micro French, or soft ombré | Match the depth, not just the color family |
By selecting a specific shade and applying it to a suitable design, you can effectively match your preferred mood with your natural undertone.
Choosing a shade for your undertone
Skin undertone is more useful than skin color alone. Your undertone is the warm, cool, or mixed coloring beneath the surface of your skin. You may notice it more easily in natural daylight than under bathroom or warm evening bulbs.
Cool undertones often pair well with:
- Lavender
- Cherry red
- Cobalt
- Cool fuchsia
- Deep blue
- Blue-based sea glass
- Black with a cool cast
Warm undertones often pair well with:
- Butter yellow
- Peach
- Terracotta
- Coral
- Warm sage
- Berry shades with a blue-violet base
- Warm chocolate brown
Mixed undertones can wear either family. The best test is contrast, not a hard color rule. A cool shade may look crisp against warm skin, while a warm shade can create a pleasing golden contrast on cool skin.
Deep skin tones can wear any of these colors; brighter and lighter shades simply create a different effect.
If you’re choosing polish for a full set, compare swatches on two or three nails before committing. This shade-tested polish shortlist can help you compare color depth, finish, and wear before you start.
Should June colors be glossy or matte?
Gloss is the easiest finish for a clean, expensive-looking set. It also makes soft colors look fresh and helps tiny details stand out.
Satin is softer and works well for neutral and bridal shades. Matte can make a color look more modern, but it shows fingerprints and is harder to maintain over several weeks. A thin glossy top coat over a matte color can create a velvety finish with more wear.
Metallic and pearl finishes catch the strong seasonal light. Keep them as an accent unless you want the entire set to feel bold. Glitter works best when placed near the cuticle or used sparingly on one or two nails.
Acrylic polish doesn’t have to air-dry if you use a compatible gel color and gel top coat. Follow the exact curing instructions, including the correct lamp, timing, and placement of the hand. Don’t treat a gel top coat like regular polish.
20 Acrylic Nail Ideas for June
A good June design needs a focal point, not a collection of unrelated decorations. Pick one main technique, limit the color count, and leave some negative space around the design.
Clean and Minimal
A micro French tip provides an excellent choice for almost every June shape. Paint a very thin white or tinted line across the natural edge. Keep the smile line slightly curved and consistent rather than drawing a thick stripe.
On short nails, the detail should be no wider than the visible free edge. If you have a low natural free edge, use a sheer nude base and let the contrast do the work.
Alternatively, a milky neutral set offers a soft alternative to a traditional nude manicure. Mix a translucent milky shade with a small amount of white, or use a ready-made milky neutral. Apply it over a warm beige, cool pink, or neutral base that matches your undertone.
The finish should look like clean skin with more shine, not chalky white. This style also works beautifully with a short square, almond, or rounded shape.
For a pop of color, consider a butter-yellow color block. Paint the upper third of each nail butter yellow and keep the lower section sheer nude or soft pink. Use a thin, clean line rather than a thick stripe.
The same idea can be reversed so the color sits near the free edge. On shorter nails, keep the block within the center third to avoid making the design look crowded.
A half-moon accent provides another easy option. Outline the curved base of the nail with a fine arc of coral, silver, or white. The rest of the nail can stay a sheer neutral.
This works particularly well on short round and square nails, where the shape of the cuticle already provides a clean guide. A half-moon design is also less formal than a full French tip, making it useful for everyday wear.
A one-accent-nail manicure is ideal when you want color but prefer a balanced set. Keep four nails in nude, milky pink, or a pale neutral, then choose one design for a single accent nail. Add a tiny daisy, a slim stripe, or one small chrome heart.
I recommend keeping the accent simple if your set is medium or long, because a large design on one nail can look disconnected from the rest of the set.
Soft and Seasonal
Lavender aura ombré makes a strong choice for medium or long almonds. Keep the base pale, then blend a deeper lavender around the center of each nail before finishing at the free edge. The effect should look like a soft glow rather than a sharp spotlight.
If you need a detailed process, this ombre blending guide explains the balance and layering that create a smooth transition.
A sea-glass ombré uses a muted blue-green shade at the tip and a sheer nude or milky base near the cuticle. Keep the transition soft and avoid loading the nail with too much product. This design looks especially good on almond and coffin shapes because the color follows the length of the nail.
It also works for a relaxed summer manicure that still looks deliberate.
For a cloudy sky effect, paint a pale blue base, then add small patches of white with a fine brush. Keep the white areas irregular and leave plenty of blue visible. A glossy top coat makes the clouds look almost dimensional.
On short nails, use one or two small clouds near the center instead of trying to cover the whole surface. Add a single silver star if you want a more playful finish.
Mini daisies bring a classic design into the summer season. Paint five small white petals around a yellow or orange center. The flowers can sit near the cuticle, at the tip, or along one side of the nail.
On a short nail, one flower is enough. On longer nails, repeat the pattern without spacing the flowers so tightly that the background disappears.
A citrus accent is another fun way to use color. Outline a small lemon, orange, or grapefruit slice with white, yellow, or coral. Keep the detail thin and place one citrus slice on the accent nail.
For a quieter set, use one pale lemon shape on each nail beside a warm neutral base. This works well for June birthdays, brunches, vacations, and other warm-weather plans.
Painted botanicals offer a way to use a current trend without adding raised decorations. Draw small leaves with a fine brush in sage, mint, or deep green. Keep the stems narrow and the leaves slightly separated.
A single stem on each nail looks tidy, while a cluster of leaves works better on longer nails. Use a clear or pearl top coat to keep the design protected without hiding the artwork.
A soft sunset gradient works by blending coral near the base into pale pink or lavender at the tip. Keep the colors close in value so the transition remains soft. This design looks good on rounded squares and medium almonds.
If you want more contrast, place a small gold line where the colors meet, but don’t outline the entire cuticle area.
For a picnic gingham pattern, use thin, evenly spaced white lines over a pale pink, red, or lavender base. Make one set of lines vertical and the other horizontal. You can create the look with a striper brush, tape, or a careful gel-color detail.
On short nails, a single gingham square near the tip is more readable than a full pattern.
Bold and Graphic
A reverse French reverses the usual contrast, placing the colored line along the nail bed rather than the tip. Cobalt, cherry red, coral, or dark green all create a bold result. Keep the line thin and use a steady hand, because the cuticle curve is the most noticeable part of this design.
A reverse French looks especially good on almond and oval nails.
A cobalt microtip provides a cleaner take on this look. Use a cobalt base or a sheer nude base with a narrow cobalt edge. The key is to keep the tip narrow enough that the nail still looks balanced.
If you are working with a very short nail, a full cobalt set may be easier to maintain than a tiny contrasting tip.
A cherry metallic set combines a deep red base with a fine silver or gold shimmer. Apply one thin metallic layer instead of several heavy coats, then seal it with a clear top coat. The result should look like polished red with light catching the surface, not like chunky glitter.
This color works for evenings, dinners, and June events where a softer pastel may feel too understated.
A lavender-and-white marble begins with a pale lavender or milky white base. Add thin gray, deeper lavender, or white veins while the color is still workable. Keep the lines asymmetrical and let some areas remain plain.
Too many veins can make the design look cracked rather than polished, so stop when the pattern becomes busy.
A coral color block uses two or three clean sections. Coral and cream, coral and navy, or coral with a muted green can all feel fresh. Keep the blocks straight for a graphic look, or use a soft diagonal for a less formal design.
On shorter nails, split the nail into two large sections rather than adding several small bands.
A minimal polka-dot set stays modern when the dots vary slightly in size. Use a fine brush or a nail art pen to place small coral, white, navy, or black dots over a contrasting base. Leave space between each dot.
A regular pattern looks crisp, but hand-placed dots can add a playful, less formal feel. Keep the top coat thin so the dots don’t become raised.
A checkerboard accent is a great choice for short nails. Use two contrasting shades, such as white and cobalt, coral and cream, or pink and chocolate. Make the squares small enough that they remain visible without looking like a checkerboard printed on a tiny surface.
One accent nail is usually enough. A full checkerboard set can be fun, but it requires very clean lines and a steady hand.
A foil-framed accent adds a polished detail without a large motif. Paint a small shape, such as a heart, star, crescent, or leaf, and outline it with thin metallic foil. Keep the shape centered or place it near the free edge.
The metallic frame gives the design definition, while the underlying color keeps it soft. This works well on medium and long nails where there’s enough surface area for the detail.
A tiny confetti mosaic can work on longer nails without becoming childish. Use small blocks of lavender, blue, coral, white, and silver. Keep the shapes irregular but limited to two or three colors.
A clear glossy top coat helps the pieces look flat rather than raised. On short nails, a simple confetti tip is more practical than covering the entire nail.
How to Choose the Right Shape and Length
The most beautiful trend design can look awkward if its proportions don’t suit the nail bed. Before choosing a reference photo, compare the shape with the natural nail and the way you use your hands.
| Shape | Best June design | What to consider |
|---|---|---|
| Round | Micro French, daisies, sheer polish | Very comfortable and suits narrow nail beds |
| Square | Butter yellow, color block, small dots | Clean and modern; keep the sidewalls straight |
| Squoval | Ombré, soft florals, neutral polish | A balanced shape for wider or longer nail beds |
| Almond | French tip, aura ombré, botanical art | Elegant and flattering across many hand shapes |
| Coffin | Marble, gradient, metallic accent | Strong and dramatic; requires enough length to look balanced |
| Stiletto | Graphic tip, negative space, minimal detail | Very bold and more likely to catch on clothing or objects |
Round nails
Round nails are the easiest shape to maintain at home. They work well with narrow nail beds and shorter lengths. A sheer base, a small French tip, or a single accent flower is usually enough.
If you choose a longer set, keep the length comfortable enough for typing and opening jars.
Square nails
A square tip makes butter yellow, coral, and cobalt look crisp. The sidewalls should be straight and the free edge should be level. Avoid trying to create a square shape on a very short nail if the corners would press into the skin.
A softened square or squoval may be more comfortable.
Almond nails
Almonds are a strong choice for June because the shape works with almost every seasonal design. Micro French, ombré, painted leaves, and slim color blocks all look refined. If you need to shorten an overlong almond set, work from the sides slowly and check the shape before removing more from the center.
This safe trimming and filing routine can help you avoid creating a thin, uneven tip.
Coffin nails
Coffins are a good match for marble, ombré, and strong color. The shape needs enough length to look intentional. If you want a moderate version, ask for a short coffin rather than a long statement shape.
On a coffin set, one detailed accent nail usually looks cleaner than placing the same complex design on every nail.
Stiletto nails
Stilettos can look sharp and dramatic, but they take more planning. Keep the design minimal, use a reinforced tip, and check the length before leaving the appointment. These nails may catch on fabric or interfere with keys and tight buttons.
If you play a manual instrument, type often, or work with your hands, a rounded almond may be more practical.
The best length for everyday wear
Choose a length that allows you to:
- Type without hitting the keys with the underside of the nail
- Close your hand comfortably
- Open containers and use tools
- Wear gloves without tearing the enhancement
- Avoid catching the free edge on clothing
- See your natural nail growth clearly between appointments
Short sets can still show a June design. Clear space around the cuticle, a narrow French tip, and a fresh color create more impact than crowded nail art. Medium length is the easiest balance between visibility and practicality.
Choose the Right Finish
The finish can change the entire feel of an acrylic manicure.
A glossy finish is the most versatile option. It makes pale colors look fresh, gives darker colors more depth, and helps tiny nail art stand out. Apply a thin top coat to avoid ridges, then inspect the underside of each nail for coverage.
A satin finish softens the contrast and works well with lavender, nude, sea glass, and butter yellow. It can also make a long set look less formal. A satin top coat may show fingerprints more readily than a glossy finish, so keep a top coat nearby for refreshes.
A matte finish works best when the color is smooth and the design is simple. Tiny art, thick glitter, and several layers of polish can make a matte surface look uneven. A glossy top coat over a matte layer can create a mixed finish if you want more shine.
A metallic or chrome finish is an effective accent for June. It reflects light and works well on a single nail, the tip, or a thin line near the cuticle. Make sure the metallic powder or polish is compatible with the acrylic system and the top coat.
Don’t assume every chrome powder behaves like regular polish.
For a glitter finish, use a thin layer of glitter polish rather than dropping loose glitter into the acrylic near the cuticle. Loose glitter can create a rough edge, collect debris, and make removal more difficult. A small, controlled glitter accent is easier to maintain than a full glitter set.
DIY or Salon Acrylic Nails?
Both methods can produce a good result. The right choice comes down to your experience, available time, and the look you want.
| Method | Best for | Advantages | Main challenge |
|---|---|---|---|
| At-home application | Simple colors, short sets, practicing shape | Control over color and timing | Requires steady hands and basic technique |
| Salon full set | Structured shape, longer length, detailed art | More consistent structure and faster access to corrections | Cost and appointment timing vary |
| Salon fill or change | Maintaining an existing set | Refreshes the color and growth gap without a full rebuild | Only suitable if the existing acrylic is healthy |
| Hybrid appointment | Custom color with simple shaping | Combines professional prep with a focused design | Requires clear communication about what the tech will do |
A salon is the better choice if you need a pronounced almond or coffin shape, a large design, or a repair on a damaged nail. A full set also makes sense if you have little experience with application and shaping. Bring a clear reference photo, but ask the technician to adapt the design to your nail bed and lifestyle.
A DIY set is more realistic when you’re working with a short shape, one color, or a simple tip. If you’re new to the process, this beginner application walkthrough explains the basic sequence before you begin.
A Safe At-Home Acrylic Application Routine
Before you start, choose a well-ventilated work area and read the instructions for the exact powder, liquid, base coat, and top coat you’re using. Systems are not always interchangeable. A current acrylic kit shortlist can help you compare basic supplies, but the manufacturer’s directions still come first.
Gather the right supplies
You’ll need:
- Acrylic powder and matching liquid
- A nail brush
- Forms or properly sized tips
- Cuticle pusher
- File and buffer
- Nail plate cleanser or dehydrator
- Base coat and color system
- Compatible top coat
- Paper towel or lint-free wipes
- Gloves for product cleanup
- Ventilation and an ignition-free workspace
Some systems require a primer or bonding liquid. Use it only when the manufacturer calls for it. Applying a bonding product designed for one system under another can create unnecessary buildup or adhesion problems.
Check your natural nails first
Do not apply acrylic over an open cut, infected nail, weeping skin, or a nail that is actively peeling. If you have diabetes, reduced circulation, a weakened immune system, or a history of nail problems, ask a healthcare professional before changing the nail structure.
If you want to improve the natural nail underneath, start with natural nail care basics. Healthy prep helps the acrylic sit correctly, but no base coat can make damaged nail tissue strong.
Apply the set
Begin by choosing your length. For forms, map each finger on a practice form or a form guide before applying. The form should follow the natural nail’s curve and sit beneath the free edge without leaving a large gap.
If the form is too wide, the acrylic can spread sideways and create weak sidewalls.
Next, clean each nail plate and remove old polish, oil, and moisture. Avoid pushing the cuticle with a sharp metal tool. Use a wooden or plastic pusher, move slowly, and stop if the skin hurts.
Dry the nail plate fully. Excess moisture can contribute to lifting, especially if it remains under the enhancement.
After lightly buffing the shine from the nail plate, apply the primer or dehydrator specified by the system. Then size the forms or tips, pressing each one gently into place. Don’t allow glue to touch the skin.
If you’re using tips, the fit should be secure without squeezing the fingertip.
As you apply the acrylic, dip the brush, roll off excess liquid, and form a small bead. Place the bead near the center of the nail, leaving a small margin at the cuticle and free edge. Stroke the product down the center toward the tip, then shape the sidewalls.
Work from the center outward to keep the apex and stress area balanced.
Apply additional beads only where the product needs support. Let each bead spread according to the system’s instructions. Don’t flood the cuticle or build a thick ridge around the skin.
Replace the brush if it becomes sticky or difficult to control.
Continue until the structure is strong and the line of the nail is visible. A good acrylic set should have a thin, even apex and straight sidewalls. If the free edge keeps lifting away from the form, stop adding more product and correct the form fit.
Shape the set with a file, then smooth the surface with a buffer. Hold the file in the direction of the growth pattern and take light passes. This file-free shaping routine shows how to refine a basic set without relying on an electric drill.
Apply color while the acrylic remains compatible with the polish system. Finish with a thin top coat and follow its curing or drying instructions. Keep skin and cuticles clean before the product sets.
Don’t flood the nail with multiple thick layers just to speed things up.
How to Make June Acrylics Last
Most people need a fill or replacement based on the visible growth gap, the condition of the enhancement, and their nail habits. A calendar can help with planning, but it shouldn’t override lifting, thinning, or damage.
A fill is usually considered when you notice a noticeable gap, especially near the cuticle. Some sets need attention sooner than others, and a set that is already stressed shouldn’t be left longer simply because the original appointment was four weeks ago.
| What you see | What it may mean | What to do |
|---|---|---|
| Small growth gap, no lifting | Normal nail growth | Book a fill or refresh the color |
| Edge has separated | Moisture, poor prep, or stress | Stop soaking and have the lifting assessed |
| Nail feels thin | Product was placed too lightly or old acrylic was filed aggressively | Avoid further filing and consider a professional repair |
| Polish chipped near the tip | Surface wear or a weak free edge | Repair the balance and replace the color |
| Green or dark area under the old set | Staining or, less commonly, infection | Do not cover it with more polish; get a professional assessment |
| Nail bed is sore or swollen | Pressure, infection, or injury | Remove the pressure and seek professional or medical advice |
Daily care matters more than complicated aftercare rituals.
Clean around the nail, not over the enhancement
Wash your hands as usual and dry around the cuticles. Moisture trapped under a lifting edge can make the problem worse. If you use cuticle oil, massage a small amount into the surrounding skin and cuticle.
Don’t pile oil onto the nail plate before applying polish.
Wear gloves for wet work
Gloves are useful when washing dishes, cleaning, gardening, or doing other work that involves water and detergent. They won’t make the set indestructible, but they reduce repeated exposure. Choose gloves that don’t pinch the fingertips or force the enhancement against the nail.
Avoid long soaking right after the set
Follow the product instructions. Many acrylic systems benefit from avoiding long water exposure during the first part of the wear cycle. If you’re getting ready for a pool day or beach trip, keep the set dry when possible and dry it thoroughly afterward.
Don’t pick at lifting edges
A small gap can tempt you to pull or glue the edge back down. Doing so can pull the natural nail or trap moisture underneath. Leave the set alone and schedule a repair.
Keep the free edge balanced
A set that is too long at the center can catch on objects, while a thin free edge can break. If filing, check the profile from the side and don’t make one area much thinner than the rest. If the nail already feels weak, stop.
Acrylic Nail Safety
Acrylic products can be used safely when you follow the product directions, protect the natural nail, and pay attention to symptoms. Safety also depends on ventilation, clean tools, and choosing the right removal method.
The FDA’s nail-product guidance explains the difference between cosmetic nail products and products that make medical or treatment claims. It also provides useful information about ingredients, labeling, and adverse reactions.
Watch for skin irritation and allergies
Methacrylate and related acrylate ingredients can cause contact irritation or allergic dermatitis in some people. Reactions may show up as redness, itching, burning, swelling, blistering, tenderness, or changes in the natural nail.
A new product is not automatically safer for everyone. “Acrylate-free” or “hypoallergenic” does not guarantee that a product will suit every sensitive person. The reaction can also come from other ingredients or from repeated exposure.
If the skin around the nail becomes irritated, stop using the product. Don’t try to cover the area with more acrylic or polish. If the reaction persists, spreads, or affects the nail, seek advice from a healthcare professional.
If you already know you have an acrylate allergy, tell your technician before the appointment.
Avoid prolonged skin contact
Keep the acrylic liquid away from the cuticle and skin. If product touches the skin, don’t spread it around. Follow the cleanup instructions and use gloves if the product repeatedly contacts your fingers.
A nail that is beautiful but surrounded by irritated skin is not a successful manicure.
Ventilate the room
Work in a well-ventilated space and follow the product label and safety data sheet. Keep liquid and acetone-based products away from heat, sparks, and open flames. Don’t soak nails near a lit cigarette, candle, or other ignition source.
If you file acrylic, protect your breathing from dust. A well-fitting particulate respirator can help when used correctly, and a vacuum can reduce airborne particles. Avoid blowing dust toward your face.
Choose a clean salon
A professional appointment should feel organized and sanitary. Look for tools that are cleaned between clients, fresh files and buffers, organized products, and a technician who explains what they’re doing. Shared nail dust, dirty trays, and tools that are only wiped off can increase the risk of cross-contamination.
Ask what the salon does when a client has an active infection. A good technician should decline to cover a weeping or infected nail until it has been assessed.
Don’t cover a problem nail
Do not apply acrylic over a nail that is infected, peeling, cracked, or surrounded by open skin. A coating may hide the surface while the underlying problem continues. If the nail has a persistent odor, green or dark discoloration, drainage, marked pain, or swelling, remove the enhancement and seek an appropriate professional.
Be cautious if you have certain medical conditions
People with diabetes, poor circulation, reduced sensation, or a weakened immune system may need extra care with any nail enhancement. If you’re unsure whether acrylic is suitable for you, speak with a healthcare professional before treatment.
Acrylic Nail Removal and Aftercare
A correct application is only part of a healthy nail routine. Removal determines how much stress the natural nail has to handle next.
Signs you should arrange removal
Removing the set may be wise if the nail plate feels thin, painful, or unusually weak. Also remove it if the acrylic is breaking away in large pieces, the nail is separating, or you need to change the shape or length. You should arrange removal if a lifting edge is trapping moisture or if the nail is becoming thinner with every fill.
Furthermore, removal is necessary if you notice an active infection, irritation, or a product reaction.
Safer removal at home
If you have experience and the nail plate is healthy, start by removing the color and detaching any long extension carefully. Do not pull the free edge straight sideways while it is still firmly attached.
Next, soak the nail with an acrylic-compatible remover or acetone, as directed. Keep the area ventilated, wear gloves, and keep the product away from flame. Don’t force the product off a nail that is not ready to release.
Work at the underside of the acrylic with a tool designed for nail care, then lift the product away from the natural nail. Avoid scraping aggressively or using a blade. If the layer is thick, file down from the top in small, controlled passes while checking the natural nail underneath.
Stop when the acrylic has been removed. Filing and soaking cannot repair an already thin nail plate. Keep the surrounding skin and cuticles clean, and apply moisturizer after the nail is fully dry.
A salon removal is safer when the set is very thick, the nail is weak, or you are not comfortable distinguishing acrylic from the natural nail. A professional can also remove it with less pressure on the nail bed.
Restore the nail afterward
Acrylic doesn’t “ruin” every natural nail. Problems occur when the prep is too aggressive, the product is removed forcefully, or an overfilled set is filed repeatedly. Once the overlay is gone, focus on gentle care and allow the nail to grow back normally.
The post-removal strengthening routine is most useful when it supports a simple routine rather than promising instant results. Nailgrowth takes time, and a thin nail plate may need several weeks to feel normal again. During that period, keep the surface smooth, avoid snagging it on fabric, and skip extensions that add tension.
If the nail is peeling, painful, or discolored, stop treating it as a cosmetic issue and have it assessed.
A gentle routine while the nail recovers
A simple routine is enough while the natural nail grows back:
- Wash your hands as usual and dry the nail plate and surrounding skin.
- File only rough edges, and move in one direction to avoid creating splits.
- Apply cuticle oil to the skin around the nail rather than soaking the nail plate.
- Avoid pulling at peeling sections or trimming the nail extremely short.
- Give the nail time to recover before scheduling another thick enhancement.
If the nail feels weak but looks healthy, a short, lightly structured set may be more comfortable than a long statement shape. If the nail plate is visibly damaged, a full set can add pressure. In that case, a nail professional can help you decide whether the best next step is a break from enhancements or a more flexible nail treatment.
Planning a June Acrylic Manicure
June often brings weddings, graduations, vacations, birthdays, and outdoor events. Since appointments and natural nail growth can shift the schedule, it helps to plan backward from the date you care most about.
| Timing | Useful option | What to consider |
|---|---|---|
| One to two weeks before an event | Fill or color refresh | Helps tidy the cuticle line and update the look |
| Two to four weeks before an event | Full set or shaped set | Gives you time to adjust length and comfort |
| A few days before a trip | Simple polish refresh | Choose a shade that works with several outfits |
| Before a beach or pool day | Shorter, practical set | Bring gloves if you can and dry the nails afterward |
| After a nail has been weakened | Removal and a low-pressure care period | Avoid building a new set over damaged or irritated nail tissue |
The best appointment time depends on your own growth rate and how quickly the salon can fit you in. Some people prefer a full set with plenty of time to test the length. Others choose to fill shortly before an event so the cuticle line looks neat.
Bring a reference, but describe the important details
A reference photo can show a technician the general style, but it may not translate perfectly to your nail shape or natural nail bed. When booking, mention these details:
- The length you want and the length you can comfortably wear
- The exact shape, such as almond, squoval, square, or coffin
- Whether you want a regular-polish or gel-color finish
- The level of detail you prefer
- Whether the set needs to work for typing, sports, childcare, or manual work
- Whether you have had acrylic before and how your natural nails responded
For a June design, a simple description often works better than a complicated brief. For example, “short almond, sheer nude base, sea-glass green micro French, glossy finish” gives the technician clear direction. You can add a little metallic accent or a small flower if you want more detail.
Choose the design around your daily routine
A dramatic set can still be practical. Long stiletto nails may look striking with a graphic French tip, but they can catch on clothing and interfere with typing. A medium coffin shape can work well with a soft ombré, but it may not suit someone who needs very short nails for work.
For a low-maintenance June set, consider:
- A short almond or squoval shape
- A sheer nude, milky pink, sea glass, or butter-yellow shade
- A narrow French tip or one thin accent line
- A glossy or satin top coat
- Gloves for dishes, cleaning, and gardening
The goal is a manicure that still looks neat after two weeks of ordinary use.
June Weather and Acrylic Nail Care
Warm weather can put acrylic nails through more exposure than a typical indoor routine. The enhancement is not automatically damaged by sunshine or water, but dirt, chemicals, heat, and repeated wet work can make the finish look tired or contribute to lifting at the edges.
Sunscreen and daily products
Apply sunscreen to the skin around the hands as directed, but wipe excess product from the nail plate and cuticle area. Sunscreen can leave a residue that interferes with polish adhesion or create a stain on a light-colored set.
If you apply sunscreen after your manicure, give it time to dry and clean around the nails. Keep lotion and hand cream on the skin. A thick layer of product on the nail plate can make polish bubble, peel, or lift sooner.
Pools, beaches, and outdoor trips
Rinse the hands after swimming, especially if the nails were exposed to chlorine, salt, sand, or sunscreen. Dry them thoroughly, including the space around the cuticle. If you’re spending time near sand, keep grit from collecting under the free edge.
Pool chlorine can affect the surface of polish, while sand can create small scratches when rubbed against the enhancement. Neither is a reason to avoid a manicure, but a quick rinse and dry can reduce the chance of a dull, rough finish.
When you know you’ll be doing housework, gardening, or dishwashing, put on gloves before water and cleaning products reach the set. Choose gloves that don’t press the free edge into the fingertip.
Heat and travel
Keep acrylic nails away from very hot styling tools and other sources of excessive heat. Don’t place a hand in a hot car for hours while wearing a fresh gel top coat, and avoid exposing a curing nail to heat before it has finished setting.
For travel, carry a small file, cuticle oil, and a clean cloth. If an edge snags, don’t pull it. File only what is loose and ask a nail professional for help if the damage reaches the natural plate.
Common Acrylic Nail Mistakes to Avoid in June
Many disappointing June manicures come down to a small preparation or shaping problem. Watch for these common errors.
Applying too much product near the cuticle
Acrylic should support the structure of the nail without covering the skin. Product that touches the cuticle can irritate the skin and create a rough edge. Leave a small, comfortable margin and clean the perimeter before the product fully hardens.
Building an uneven apex
The apex is the strongest part of the acrylic structure, located slightly ahead of the center of the nail. If too much product is placed in the center, the nail may feel bulky. If too little is placed there, the free edge can break or flex.
Aim for a smooth, balanced line rather than a thick ridge.
Making the free edge too thin
Long June nails often look beautiful but are vulnerable at the tip. A very thin center edge can snag and split. Keep the tip strong enough for the length and shape you choose.
Using incompatible polish and top coats
Regular polish, gel color, and gel top coat have different curing requirements. A product that works over one acrylic system may not perform as expected over another. Follow the manufacturer’s instructions and avoid assuming that any glossy product will air-dry or cure in the same way.
Leaving a lifting edge in place
A small gap can become a route for water, lotion, and debris. Don’t peel the acrylic back yourself or glue the edge down without cleaning and assessing it. A proper repair starts with removing contamination and checking the natural nail.
Choosing a shape from a photo alone
Long almond nails on one person may look completely different on another. The natural nail width, cuticle shape, and hand proportions matter. Ask the technician to adapt the reference to your nail bed and daily needs.
Frequently Asked Questions About June Acrylic Nails
What are the best acrylic nail colors for June?
Soft lavender, butter yellow, peach coral, sea-glass green, sky blue, and milky pink are versatile June colors. For a cleaner look, use a sheer nude base with a colored micro French. For a bolder set, try cobalt, cherry red, coral, or a warm chocolate brown.
Choose a shade that contrasts well with your undertone and matches the level of detail you want.
What acrylic nail shape is best for June?
A short almond or squoval is a flexible choice for most people. Round nails are easy to maintain, while square nails suit crisp color blocks and minimal French tips. Medium coffin nails work well with gradients and marble effects, but they need enough length to look balanced.
Choose the shape based on your nail bed and how you use your hands, not only on the latest photo.
Can June acrylic nails be short?
Yes. Short acrylic nails can look polished with a solid color, a sheer base, a thin French tip, or one small accent. Keep the design simple so the nail art remains visible.
A small daisy, smile line, or color block can work better on a short nail than a complex pattern.
How long should acrylic nails last before getting a fill?
There isn’t one schedule for everyone. A fill is commonly considered when a visible growth gap appears, but the condition of the set matters more than the calendar. Some people need attention sooner because of lifting, nail damage, or a fast growth rate.
If the nail feels thin or painful, book an assessment instead of waiting for the next regular appointment.
Can I change the color without removing the acrylic?
Usually, yes, as long as the acrylic is sound and free of infection or irritation. Remove the old polish, clean the surface, and apply the new June shade over an appropriate base. Deep color, glitter, or multiple layers may require more buffing.
Tell the technician if the acrylic feels weak, because repeatedly stripping the surface can cause damage.
Are acrylic nails safe for weak natural nails?
Not every nail is ready for an enhancement. Avoid applying acrylic over a cracked, infected, peeling, or open nail. If the nail is thin because of a previous set, a proper removal and recovery period may be safer than adding another full layer.
A healthcare professional can help if you have pain, swelling, diabetes, reduced circulation, or a known acrylate allergy.
Can I do a June ombré at home?
You can, but a simple gradient is easier to control than a detailed design. Use a translucent base, add color in small amounts, and blend the edges while the product is still workable. A milky base makes the transition softer.
If you’re using gel color, cure each layer according to the product directions rather than treating it like regular air-dry polish.
What should I do if my acrylic nail lifts in June?
Stop exposing the edge to water and don’t pull or glue the acrylic back down. Keep the area clean and dry, then book a repair. If the nail bed is painful, swollen, discolored, or draining, seek professional or medical advice rather than covering the area with another layer of product.
Can I wear June acrylic nails to work?
Yes, if the length and design suit your work environment. Short almonds, rounded squares, or squovals with a neutral or soft color are usually practical. If you type all day, play an instrument, work with tools, or need protective gear every day, choose a shorter length and avoid raised embellishments.
How do I keep white or pastel acrylic nails clean?
Apply a thin top coat, clean the hands regularly, and wipe away sunscreen or lotion from the nail plate. Pastel and white colors show dirt and yellowing more readily than dark shades, so a clean, smooth finish matters. Keep a clear top coat handy and refresh it according to its directions instead of applying several thick layers over the color.
For a June manicure that feels seasonal and still works after a full week of errands, choose a balanced shape, a fresh but wearable color, and one clean detail. A sea-glass micro French, a butter-yellow color block, or a lavender ombré on short-to-medium nails gives you the summer look without making the manicure harder to maintain than it needs to be.
Amazon and the Amazon logo are trademarks of Amazon.com, Inc, or its affiliates.
Author


Similar Posts