How to put on press on nails without glue is a question many beauty lovers ask—especially those who want gorgeous nails without the mess, damage, or commitment of nail glue. Press-on nails have exploded in popularity across the U.S. and UK in recent years, and it’s easy to see why. They’re affordable, stylish, and can transform your hands in minutes without a trip to the salon.
Social media platforms like TikTok and Instagram are filled with nail enthusiasts showing off stunning press-on sets that look almost identical to professional acrylics. From minimalist designs to dramatic, extra-long shapes, press-on nails make it possible for anyone to experiment with nail art at home.
But while many press-on nail kits include glue, not everyone wants to use it.
Can You Put on Press-On Nails Without Glue?
Yes — you can absolutely put on press-on nails without glue, and many people actually prefer this method for temporary wear. Glue-free application is simple, beginner-friendly, and much gentler on natural nails.
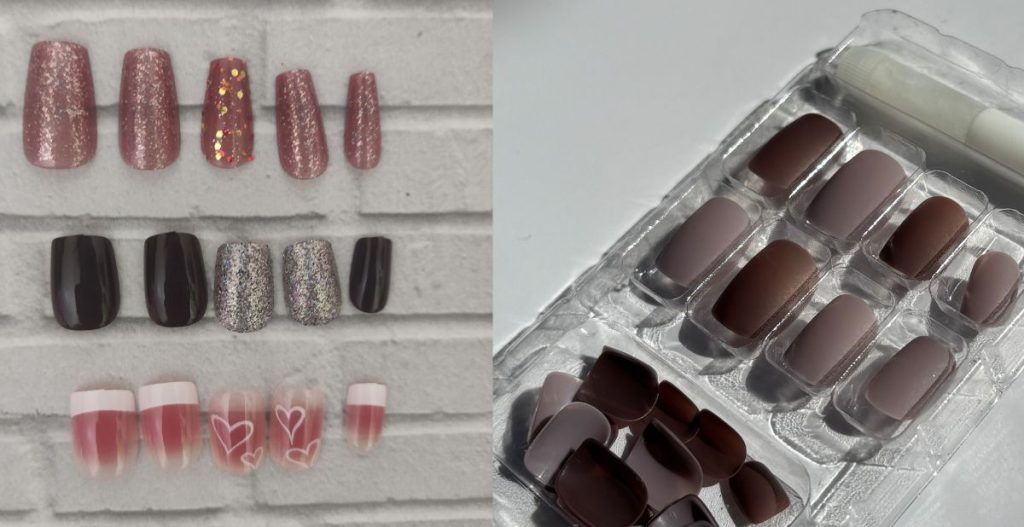
Instead of traditional nail glue, most people use adhesive tabs, double-sided nail stickers, or temporary bonding methods. These options allow you to enjoy stylish nails for a few hours or a few days without committing to strong adhesives.
The key difference is duration. Glue typically lasts 1–2 weeks, while glue-free methods usually last a few hours to several days, depending on preparation and care.
For many situations, that shorter wear time is actually a benefit rather than a drawback.
Situations Where Glue-Free Press-On Nails Work Best
There are many real-life situations where learning how to put on press on nails without glue makes perfect sense.
Temporary Events
If you’re attending a wedding, party, dinner, or holiday event, press-on nails can give you a polished look without the long-term commitment.
Many people apply glue-free press-ons for:
- Weekend events
- Date nights
- Birthday celebrations
- Holiday gatherings
Once the event is over, the nails can be removed easily without soaking or damaging the natural nail.
Photoshoots and Content Creation
This is one of the biggest reasons influencers and stylists use glue-free nails.
For photoshoots or social media content, you might want:
- Multiple nail designs in one day
- Quick changes between looks
- Temporary styling for product photography
Adhesive tabs allow quick swaps between sets, making them ideal for creative projects.
Sensitive or Weak Nails
Some people avoid glue because their nails are thin, brittle, or sensitive.
Repeated glue removal—especially if done incorrectly—can weaken natural nails over time. Using glue-free methods reduces that risk and allows nails to recover while still looking stylish.
This is why many beginners researching what to use instead of nail glue for fake nails start with adhesive tabs.
First-Time Press-On Nail Users
If you’re completely new to press-ons, glue-free application is a great starting point.
It allows beginners to:
- Practice sizing and placement
- Learn how press-on nails feel
- Remove them easily if something looks off
Many tutorials on how to put on press on nails for beginners recommend starting without glue for this reason.
When Nail Glue Might Still Be the Better Choice
While glue-free methods are convenient, they aren’t perfect for every situation.
Nail glue may still be the better option if you want:
- Nails that last 7–14 days
- A stronger hold for long nails
- Durability for heavy hand use
- Waterproof wear (frequent washing or swimming)
Many people even combine techniques—using adhesive tabs for quick wear and glue for longer events.
If you’ve ever wondered “do you put glue on press on nails?”, the answer is: you can, but it’s not always necessary.
For everyday style or short-term wear, glue-free application works surprisingly well when done correctly.
How to Put on Press On Nails Without Glue (Step-by-Step)
Applying press-ons without glue is easier than most people think. With proper nail prep and adhesive tabs, you can get a clean, salon-like look in less than 10 minutes.
Below is the beginner-friendly method I personally recommend when someone asks how to put on fake nails without glue or tape.
Step 1: Clean and Prep Your Natural Nails
Good preparation is the secret to making press-on nails stay in place.
If nails aren’t clean, even the best adhesive tabs won’t stick properly.
Start with these simple prep steps:
- Wash your hands thoroughly
Use soap and warm water to remove dirt, lotion, and natural oils. - Push back your cuticles
Use a cuticle pusher or wooden stick to gently push back the cuticles.
This gives the press-on nail more surface area to grip. - Remove oils from the nail surface
Wipe each nail with:- rubbing alcohol
- nail prep wipes
- acetone-free remover
Natural oils are the biggest reason press-ons fall off early.
Some professionals also lightly buff the nail surface for extra grip, but beginners can skip this if they prefer a gentler approach.

Step 2: Choose the Correct Nail Sizes
Sizing is one of the most overlooked steps when learning how to put on press on nails for beginners.
If a nail is too small, it won’t cover the nail bed.
If it’s too large, it may lift from the sides.
Each press-on should fit perfectly from sidewall to sidewall without overlapping skin.
My Personal Beginner Sizing Trick
A trick I personally use is this:
- Lay all press-on nails on the table.
- Match them to each finger before applying adhesive.
- Arrange them in order from thumb to pinky.
This saves time and prevents mistakes once adhesive tabs are applied.
If a nail is slightly too big, you can gently file the sides to customize the fit.
Step 3: Use Adhesive Tabs Instead of Glue
Adhesive tabs are the most popular solution for people searching what to use instead of nail glue for fake nails.
They are small, double-sided stickers designed specifically for press-on nails.
How Adhesive Tabs Work
Adhesive tabs create a temporary bond between:
- your natural nail
- the press-on nail
They provide strong hold but are easier to remove than glue.
Most press-on nail kits now include these tabs.
Best Placement Method
Follow this process:
- Select a tab that matches your nail size.
- Stick the tab onto your natural nail, not the press-on.
- Press it down firmly.
- Remove the protective film on top.
Once the film is removed, the adhesive surface is ready for the press-on nail.
Try to avoid touching the adhesive too much, since oils from fingers can weaken it.
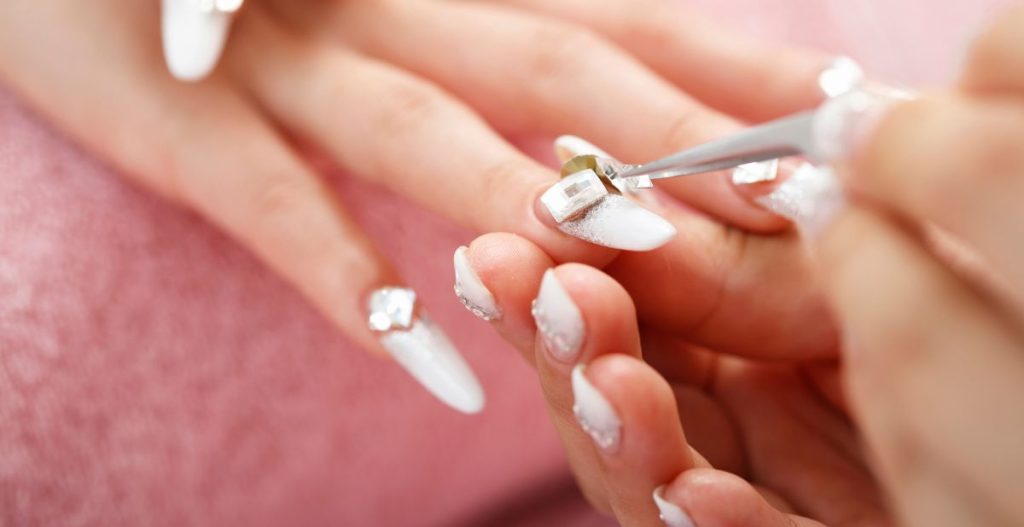
Step 4: Press and Hold the Nail Firmly
Now it’s time to apply the press-on nail.
Place the press-on at a slight downward angle, starting near the cuticle.
Then slowly press it forward onto the nail bed.
This technique helps prevent air bubbles.
How Long to Hold the Nail
Press the nail firmly for 20–30 seconds.
Apply pressure in the center and along the edges to ensure the adhesive spreads evenly.
If done correctly, the nail should feel secure immediately.
Repeat this process for each finger.
Step 5: Avoid Water for 1–2 Hours
This step is surprisingly important.
Adhesive tabs need time to fully bond with the nail surface.
Try to avoid:
- washing hands
- showering
- doing dishes
- using lotion
for at least 1–2 hours after application.
Giving the adhesive time to set can significantly improve wear time.
When done properly, glue-free press-ons can last 1–3 days, sometimes longer with gentle care.
And the best part? Removal is easy and damage-free.
How to Put on Fake Nails Without Glue or Tape
Many people searching how to put on fake nails without glue or tape are looking for quick, gentle, and temporary ways to wear press-on nails. Maybe you only need them for a few hours, or perhaps your natural nails are sensitive and you want to avoid strong adhesives altogether.
The good news is that there are several creative alternatives people use when they want a completely glue-free application. While some methods are more reliable than others, each can work in the right situation.
Below are the most common techniques people try when they want press-on nails without traditional nail glue.
Method 1: Nail Adhesive Tabs
Adhesive tabs are by far the most popular glue-free option for press-on nails. In fact, many modern press-on nail kits include them as the default application method.
These tabs are small, double-sided adhesive stickers designed specifically for nails.
Why adhesive tabs are beginner-friendly:
- Easy to apply
- Gentle on natural nails
- No strong chemicals
- Simple removal
- Great for temporary wear
To use them, you simply stick the tab onto your natural nail, peel off the protective layer, and press the fake nail on top.
For beginners learning how to put on press on nails without glue, adhesive tabs are usually the safest and easiest place to start.
Most people get 1–3 days of wear when using high-quality tabs and proper nail preparation.
Method 2: Double-Sided Fashion Tape
Another temporary solution some people try is double-sided fashion tape, the same type often used in clothing styling.
While it wasn’t originally designed for nails, it can work in a pinch when you need a quick solution.
Fashion tape works best for:
- Photoshoots
- Short events
- Content creation
- Trying on nail designs
However, it’s not as strong as nail adhesive tabs.
Pros:
- Easy to find
- Very gentle on nails
- Completely temporary
Cons:
- Weak hold
- Not water-resistant
- Usually lasts only a few hours
If you’re experimenting with how to put on fake nails without glue or tape alternatives, this method works best for short-term wear.
Method 3: Clear Top Coat Trick
The clear polish trick is one of those beauty hacks that floats around online, and surprisingly, it can work for very short wear.
Here’s how people use it:
- Apply a thin layer of clear top coat to your natural nail.
- While the polish is still slightly tacky (not fully dry), press the fake nail onto it.
- Hold for 20–30 seconds.
This creates a mild adhesive effect.
But it’s important to understand that this is an emergency solution, not a long-lasting method.
Expected wear time:
Usually a few hours, sometimes half a day.
Still, if you suddenly need press-on nails for an event and don’t have glue or tabs, it can work surprisingly well.
Method 4: DIY Sticky Base Method
Some beauty enthusiasts experiment with DIY sticky bases when they don’t have nail products available.
One example is using a thin layer of reusable adhesive putty or other temporary craft adhesives.
This method is more of a creative hack than a recommended beauty technique, and results vary widely.
Potential issues include:
- Uneven nail placement
- Weak hold
- Sticky residue
Because of these risks, most nail professionals still recommend using proper nail adhesive tabs instead.
They’re inexpensive, designed for nails, and far more reliable.
What to Use Instead of Nail Glue for Fake Nails
If you want press-on nails without traditional glue, several safe alternatives are widely used in the beauty community.
People often search what to use instead of nail glue for fake nails, especially when they want gentler or temporary wear.
Here are the most common options.
Nail Adhesive Tabs
Adhesive tabs are the most widely recommended alternative to nail glue.
They are designed specifically for press-on nails and provide a secure but temporary hold.
Pros
- Beginner-friendly
- Easy removal
- Gentle on natural nails
- Usually included with press-on kits
Cons
- Shorter wear time than glue
- May loosen with heavy water exposure
Typical wear time: 1–3 days
Nail Stickers
Nail stickers are similar to adhesive tabs but often thinner and more flexible.
They are sometimes used in nail art kits and can function as temporary press-on adhesives.
Pros
- Lightweight
- Very easy to apply
- Minimal damage to nails
Cons
- Not as strong as adhesive tabs
- May lift at the edges faster
Gel Adhesive Tabs
Gel adhesive tabs are a stronger version of regular adhesive tabs.
They have a thicker, cushion-like texture that fills gaps between the press-on nail and natural nail.
Pros
- Stronger hold
- More flexible
- Better for longer nails
Cons
- Slightly thicker feel
- Slightly more expensive
Typical wear time: 2–5 days
Double-Sided Beauty Tape
Beauty tape or fashion tape can also work as a temporary nail adhesive.
Pros
- Easily available
- Gentle removal
- Works in emergencies
Cons
- Weak hold
- Not water resistant
- Short wear time
My Personal Favourite (Alternative)
After trying several methods while learning how to put on press on nails without glue, I found that gel adhesive tabs work the best.
They strike a perfect balance between strength and nail safety.
They last longer than regular tabs but still allow easy removal without soaking your nails in acetone.
For beginners especially, they’re one of the simplest ways to get reliable results.
How to Put on Press On Nails for Beginners
If you’re brand new to press-on nails, the process can feel slightly intimidating at first.
When I applied my first set, I assumed it would be as simple as sticking them on. But within two hours, two nails had already popped off.
Looking back, the problem wasn’t the press-ons themselves—it was my preparation.
Learning how to put on press on nails for beginners often comes down to avoiding a few simple mistakes.
Beginner Mistakes I Made (And Many People Do)
When I first tried press-ons, I made several mistakes:
- I didn’t clean my nails properly
- I guessed nail sizes instead of testing them
- I touched the adhesive too much
- I pressed the nails straight down instead of from the cuticle
These small issues can drastically reduce how long press-on nails last.
Beginner Tips That Make a Huge Difference
If you’re applying press-ons for the first time, these tips will help.
Always size your nails first
Before using adhesive, match every press-on nail to the correct finger.
Lay them out in order to avoid mistakes during application.
Prep nails carefully
Clean, oil-free nails help adhesives stick much better.
Even a small amount of lotion can weaken the bond.
Avoid touching the adhesive
Oils from your fingers can reduce stickiness.
Handle adhesive tabs by the edges whenever possible.
Press from the cuticle downward
Instead of placing the nail flat, start near the cuticle and press forward.
This prevents air bubbles and improves hold.
Once you practice these basics, applying press-ons becomes surprisingly quick and easy.
How to Apply Press On Nails to Last Longer
Even when you’re learning how to put on press on nails without glue, it’s possible for them to last 2–5 days with the right technique.
The secret isn’t just the adhesive—it’s how you prepare and care for your nails.
Here are the strategies that make the biggest difference.
Tips That Help Press-On Nails Stay On Longer
1. Proper Nail Preparation
Clean nails allow adhesives to bond better.
Always remove oils, lotions, and residue before applying press-ons.
2. Lightly Buff the Nail Surface
A very gentle buff removes the shiny layer of the nail.
This creates a slightly textured surface that adhesive grips better.
3. Use High-Quality Adhesive Tabs
Not all adhesive tabs are equal.
Gel tabs or professional-grade nail tabs usually last longer than basic ones.
4. Press Each Nail for 30 Seconds
Holding each nail firmly helps activate the adhesive.
Apply pressure in the center and around the edges.
5. Avoid Water Immediately
Water exposure is one of the biggest reasons press-ons fall off early.
Wait 1–2 hours before washing hands or showering.
6. Wear Gloves When Cleaning
Cleaning chemicals and water can weaken adhesives.
Wearing gloves protects both your nails and the press-ons.
My Personal Tip: What Worked Best for Me
After experimenting with many methods while figuring out how to apply press on nails to last longer, one combination worked best.
I started doing three things consistently:
- Lightly buffing my nails
- Using gel adhesive tabs
- Pressing each nail for a full 30 seconds
Once I adopted this routine, my glue-free press-on nails started lasting three to four days consistently.
For something that takes less than ten minutes to apply, that’s a pretty impressive result.
How to Apply Press On Nails With Glue (Alternative Method)
Even though many people search how to put on press on nails without glue, some readers still prefer the traditional glue method because it offers a stronger and longer-lasting hold.
Nail glue can keep press-on nails secure for 7–14 days, which makes it ideal for vacations, busy schedules, or anyone who doesn’t want to reapply nails frequently.
If you decide to use glue, the process is still quick and beginner-friendly.
Step 1: Prep Your Natural Nails
Preparation is just as important with glue as it is with adhesive tabs.
Follow these steps first:
- Wash your hands with soap and warm water
- Push back your cuticles gently
- Lightly buff the nail surface
- Wipe nails with alcohol or nail prep wipes
This removes natural oils and allows the glue to bond properly.
Skipping this step is one of the biggest reasons press-on nails fall off early.
Step 2: Apply a Small Amount of Nail Glue
A common beginner mistake is using too much glue.
Instead, apply:
- A small drop of glue to the press-on nail
- A thin layer to your natural nail (optional but helpful)
Using a small amount prevents messy overflow and helps create an even bond.
Step 3: Place the Press-On Nail
Position the press-on nail at a slight downward angle near the cuticle, then press it onto your natural nail.
This helps prevent air bubbles and ensures the nail sits flush against the nail bed.
Make sure the nail is aligned before pressing down fully.
Step 4: Hold the Nail for 20 Seconds
Press the nail firmly for about 20 seconds.
Apply pressure in the center and along the edges so the glue spreads evenly underneath the nail.
Once secure, move on to the next finger.
Step 5: Wipe Away Excess Glue
If glue squeezes out from the sides, wipe it gently with:
- a cotton swab
- a nail wipe
- a wooden cuticle stick
Cleaning excess glue helps the nails look more natural and polished.
Glue vs Glue-Free Method: Which Is Better?
Both methods work well depending on your needs.
| Feature | Glue-Free Method | Glue Method |
|---|---|---|
| Wear time | 1–5 days | 7–14 days |
| Removal | Very easy | Requires soaking |
| Nail health | Very gentle | Safe if removed correctly |
| Beginner friendly | Very beginner-friendly | Slightly more commitment |
If you’re experimenting with how to put on press on nails without glue, adhesive tabs are usually the best starting point.
But if you want long-lasting results, nail glue can be a great alternative.
Do You Put Glue on Press On Nails?
Short answer: No, you don’t always need glue for press-on nails.
Many modern press-on nail kits already include adhesive tabs, which allow you to apply nails without glue. This makes them easier to remove and gentler on natural nails.
Why Glue Is Optional
Press-on nails were originally designed to be used with glue, but beauty brands have developed alternatives that work well for temporary wear.
You may find press-on nail kits that include:
- Nail glue
- Adhesive tabs
- Both options
This allows users to choose how long they want their nails to last.
Glue vs Adhesive Tabs
Here’s a simple comparison.
Nail Glue
Pros:
- Stronger hold
- Long wear time (up to two weeks)
- Good for long nails
Cons:
- Harder removal
- Requires acetone soaking
- Slight risk of nail damage if removed improperly
Adhesive Tabs
Pros:
- Very easy removal
- Gentle on nails
- Perfect for beginners
Cons:
- Shorter wear time
- Less durable for heavy use
Because of this flexibility, many people switch between both options depending on the situation.
Common Mistakes When Applying Press-On Nails
Press-on nails are simple, but small mistakes can make them fall off quickly.
Avoiding these common errors will help your nails last longer and look more natural.
Skipping Nail Preparation
Applying press-ons to unprepared nails is the most common mistake.
Oils, lotion, and residue prevent adhesives from sticking properly.
Always clean nails before application.
Using the Wrong Nail Sizes
Press-on nails should match the width of your natural nail.
If a nail is too small, it won’t stay in place.
If it’s too big, it may lift at the edges.
Sizing nails before applying adhesive saves a lot of frustration.
Applying Nails on Oily Surfaces
Even natural skin oils can weaken adhesive tabs.
Using alcohol wipes or nail prep wipes removes these oils and improves hold.
Getting Nails Wet Immediately
Water can weaken adhesive before it fully bonds.
After applying press-ons, wait 1–2 hours before washing hands or showering.
Using Too Much Glue
More glue does not mean stronger hold.
Excess glue can cause:
- messy edges
- longer drying time
- uneven bonding
A small drop is usually enough.
Pros and Cons of Applying Press-On Nails Without Glue
Many people prefer glue-free press-ons because they are easier and safer for natural nails.
Here’s a quick breakdown.
Pros
No nail damage
Since there is no strong adhesive bond, removal is usually gentle.
Easy removal
Most glue-free press-ons can be removed simply by lifting the nail carefully or soaking briefly in warm water.
Perfect for temporary wear
They work well for events, weekends, or trying new nail designs.
Beginner-friendly
Adhesive tabs make application simple even for people with no nail experience.
Cons
Shorter wear time
Glue-free nails usually last 1–5 days, depending on activity level.
Less durable
If you do heavy work with your hands, adhesive tabs may loosen faster.
Even with these limitations, glue-free press-ons are still one of the easiest ways to get salon-style nails at home.
Frequently Asked Questions (FAQ)
How do you put on press on nails without glue?
To apply press-on nails without glue, start by cleaning and prepping your natural nails. Remove oils with alcohol or nail prep wipes, then select the correct nail sizes. Apply adhesive tabs to each natural nail, remove the protective film, and press the press-on nail firmly for about 20–30 seconds. Avoid water for at least one hour so the adhesive can fully bond.
What can I use instead of nail glue for fake nails?
Common alternatives include adhesive nail tabs, gel adhesive tabs, nail stickers, and double-sided beauty tape. Among these options, adhesive tabs are the most popular because they are designed specifically for press-on nails and provide a secure but temporary hold.
Can press-on nails stay on without glue?
Yes, press-on nails can stay on without glue if you use high-quality adhesive tabs and prepare your nails properly. With the right preparation and care, glue-free press-on nails can stay on for several days.
How long do press-on nails last without glue?
Most glue-free press-on nails last 1–3 days, though some people get up to 5 days with strong adhesive tabs and proper nail preparation. Avoiding water and heavy hand activity can help them last longer.
Are adhesive tabs better than nail glue?
It depends on what you want. Adhesive tabs are gentler on natural nails and easier to remove, making them great for temporary wear. Nail glue provides stronger hold and longer wear but requires more effort to remove.
Can beginners apply press-on nails easily?
Yes. Press-on nails are one of the easiest nail enhancements for beginners. With basic preparation and proper sizing, most people can apply a full set in less than 10 minutes.
Final Thoughts
Learning how to put on press on nails without glue is one of the easiest ways to upgrade your nail routine without damaging your natural nails.
The simplest method is using adhesive tabs, which are beginner-friendly, quick to apply, and easy to remove. With proper nail preparation and careful application, glue-free press-ons can last several days and still look just as stylish as salon nails.
Glue-free press-ons are perfect for:
- beginners
- temporary events
- people with sensitive nails
- anyone who enjoys switching nail designs often
From my own experience experimenting with different methods, gel adhesive tabs combined with proper nail prep offer the best balance of hold, comfort, and nail safety.
If you’ve never tried press-on nails before, this is a great place to start.
With just a little practice, you can achieve beautiful, salon-style nails at home in minutes—and now you know exactly how to put on press on nails without glue.
Amazon and the Amazon logo are trademarks of Amazon.com, Inc, or its affiliates.