As an Amazon Associate I earn from qualifying purchases.
If you’ve ever scrolled through Instagram or Pinterest and wondered how nail artists create those dreamy, watercolor-like effects, the secret is often blooming gel polish. This unique nail product has quickly become a trend in nail art because of its ability to make designs spread and “bloom” effortlessly on the nail.
So, what exactly is blooming gel polish? Think of it as a special base layer that reacts with regular gel polish or nail art paint, causing it to expand into beautiful marble-like patterns, floral effects, or abstract swirls. Whether you’re into delicate designs or bold, statement nails, blooming gel makes it easier to achieve salon-quality looks at home.
In this guide, you’ll learn how to use blooming gel polish step by step, explore different blooming gel nail art designs, and pick up tips to avoid common mistakes. By the end, you’ll be ready to experiment with blooming gel marble nails, floral looks, or even your own original patterns — all without feeling overwhelmed.
What Is Blooming Gel Polish?
At its core, blooming gel polish is a special type of clear gel designed to make colors spread out naturally on the nail surface. When you apply another gel color or nail art paint on top of blooming gel, the product reacts by diffusing the color, giving you that soft, flowing effect. This makes it a favorite tool among both professionals and DIY nail lovers who want to create artistic designs without needing advanced freehand skills.
Blooming Gel vs. Regular Gel Polish
- Regular gel polish is meant to give a smooth, solid coat of color that stays put until cured. It doesn’t move or spread once applied.
- Blooming gel polish, on the other hand, acts like a “canvas” that makes added polish expand and blend. Instead of crisp lines, you get a watercolor or marble-like finish. Think of it as the difference between coloring with markers (regular gel) and painting with watercolors (blooming gel).
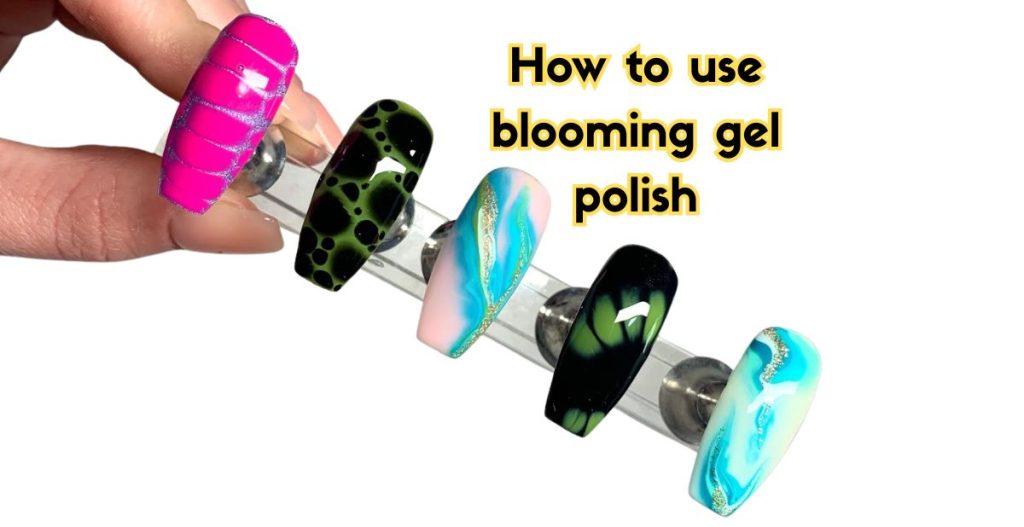
Popular Looks You Can Achieve with Blooming Gel
One of the biggest reasons blooming gel has exploded in popularity is its versatility. Here are some of the most loved styles you can create:
- Marble Nails – Mimic the elegance of real marble stone with soft, veined swirls.
- Watercolor Designs – Achieve a dreamy, hand-painted effect without needing a brush.
- Abstract Art – Play with random drops and strokes for a trendy, high-fashion look.
- Tie-Dye Nails – Layer multiple colors for a playful, summer-ready design.
- Floral Patterns – Create blooming flower petals that spread out naturally, just like ink in water.
Because the gel does most of the work for you, even beginners can experiment and end up with nails that look like they came straight out of a salon photo shoot.
Tools & Supplies You’ll Need
Before you dive into creating stunning blooming gel nail art designs, it’s important to have the right tools and products on hand. Having a complete setup will make the process smoother and help your designs turn out beautifully. Here’s what you’ll need:
- Blooming Gel Polish – The star of the show. This special gel is what makes your designs spread and “bloom.”
- Base Coat and Top Coat – A base coat ensures your nails are protected and the polish adheres properly, while a top coat seals in your design for long-lasting shine and durability.
- UV/LED Lamp – Essential for curing gel products. Make sure you have a lamp that works with your gel system (most modern lamps work with both UV and LED gels).
- Nail Art Brushes or Dotting Tools – These help you apply your designs with precision. A thin liner brush is especially useful for marble effects and detailed patterns.
- Colored Gel Polishes – Choose a few contrasting shades that will “bloom” against each other. White, black, and bright neon colors are especially popular for this technique.
- Optional Extras – Want to take your designs up a notch? Add rhinestones, glitter, metallic foils, or stickers after your blooming gel art for extra flair.
Pro tip: Keep a small clean-up brush dipped in alcohol nearby. Blooming designs can spread quickly, and this will help you fix any areas that go outside the nail or don’t look quite right.
Step-by-Step Guide: How to Use Blooming Gel Polish
Creating blooming gel nails designs is easier than you might think. Follow these simple steps to master the technique and get salon-worthy results at home.
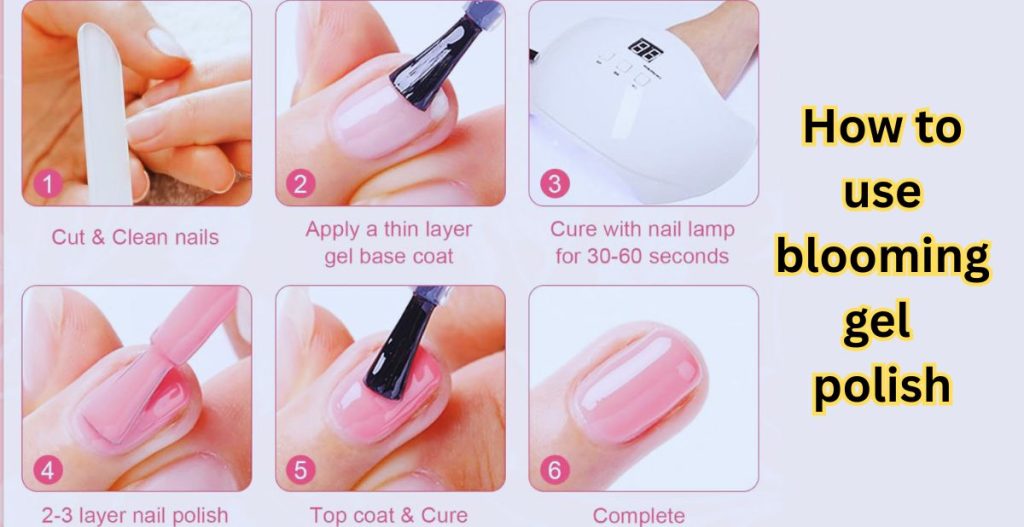
Step 1: Prep Your Nails
- Start with clean, dry nails. Remove any old polish or oils.
- File and shape your nails to your desired length and style.
- Apply a base coat to protect your natural nails and ensure better adhesion.
- Cure the base coat under your UV/LED lamp according to the polish instructions.
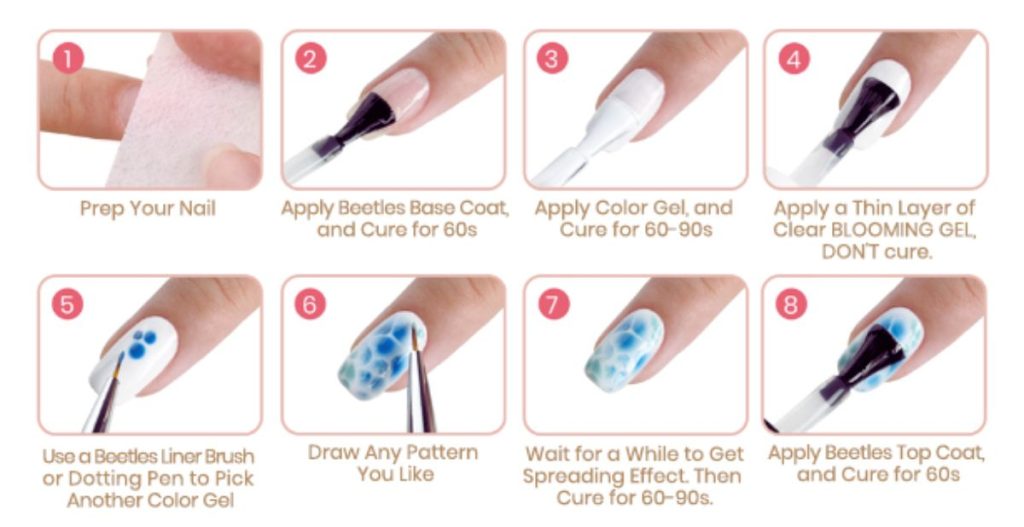
Step 2: Apply Blooming Gel
- Apply an even, thin coat of blooming gel polish to each nail.
- Do not cure yet—the blooming effect only works while the gel is still wet.
Step 3: Add Color Drops or Lines
- Dip a nail art brush or dotting tool into your chosen gel polish color.
- Gently place dots, lines, or swirls on top of the wet blooming gel.
- Watch as the polish naturally spreads and creates soft, flowing patterns.
Step 4: Customize Your Design
- Use your brush to drag or swirl colors into marble-like veins, flower petals, or abstract shapes.
- Add one or two more shades for a layered effect (but don’t overcrowd the nail).
- Tip for beginners: Less is more—start with just a few drops so the design stays neat and balanced.
Step 5: Cure and Seal
- Once you’re happy with the design, cure your nails under the UV/LED lamp.
- Apply a top coat to lock in your design and give it a glossy, long-lasting finish.
- Cure again, and you’re done!
With practice, you’ll learn how much polish to use and how quickly it spreads, giving you full control over your blooming gel art.
Blooming Gel Nail Art Designs & Ideas
One of the best things about blooming gel polish is how versatile it is. Whether you love chic minimalism or bold statement looks, this technique can be tailored to your style. Here are some of the most popular blooming gel nail art designs to try:
Marble Nails – Elegant and Timeless
Marble nails never go out of fashion, and blooming gel makes them effortless. By layering white and gray or adding gold accents, you can recreate the look of natural stone. These are perfect for a classy everyday manicure or special events where you want your nails to look refined.
Floral Bloom Designs – Soft and Feminine
If you’re aiming for a delicate, romantic vibe, try floral blooming designs. Place a few drops of pink, purple, or pastel polish on the blooming gel and watch them spread into petal-like shapes. Add a tiny rhinestone or glitter dot in the center, and you’ve got a blooming flower on your fingertips.
Abstract / Watercolor Effects – Trendy and Artistic
Abstract nails are all about freedom and creativity. Use bright neon shades or contrasting colors, and let them spread naturally for a watercolor effect. Each nail will look different, giving you a unique, artsy manicure that feels like wearable modern art.
Tie-Dye or Ombre Nails – Bold and Colorful
For summer or festival season, tie-dye nails are a must. Apply drops of multiple vibrant colors on blooming gel and let them merge for a playful tie-dye pattern. You can also use blooming gel to blend shades seamlessly, creating an ombre look that’s bold yet smooth.
Accent Nails – Subtle but Stylish
Not ready for a full set of blooming designs? Try using blooming gel on just one or two nails as accents. For example, keep most of your nails a solid color and add a marble or floral blooming design on your ring finger. It’s an easy way to dip your toes (or fingers!) into the trend without committing to a full look.
he beauty of blooming gel polish is that no two designs are ever exactly alike. Each set becomes its own little masterpiece, letting you express your creativity in endless ways.
Tips for Beginners
If you’re just starting out with blooming gel polish, don’t worry—this technique is beginner-friendly once you get the hang of it. Here are some practical tips to help you achieve clean, eye-catching designs from the start:
- Work Quickly – Blooming gel spreads as soon as you add color on top, so don’t wait too long to place your drops or lines. The faster you work, the more control you’ll have over the final design.
- Practice First – Before applying directly to your nails, try a few designs on nail tips or swatch sticks. This way, you’ll get a feel for how the gel reacts with different colors.
- Play with Color Combinations – Don’t be afraid to experiment. High-contrast shades (like black on white) create bold marble looks, while soft pastels give you dreamy watercolor vibes.
- Use Thin Layers – Less is more with blooming gel. Applying thick layers of polish can cause designs to run together and look messy. Thin coats give you sharper, cleaner results.
- Keep a Clean-Up Brush Handy – A small brush dipped in alcohol is your best friend for correcting smudges or cleaning up the cuticle area before curing.
Remember: Practice and patience are key. The more you play with blooming gel, the more you’ll discover your own unique style and favorite techniques.
Common Mistakes to Avoid
Even though blooming gel polish is fun and beginner-friendly, there are a few mistakes that can make your designs look less than perfect. Knowing what not to do will save you time and frustration. Here are the most common pitfalls:
- Using Too Much Polish
Adding large drops or thick lines of color may seem tempting, but it often leads to smudging or messy designs. Start small—just a few drops go a long way when working with blooming gel. - Skipping the Base Coat
A base coat protects your natural nails and ensures better adhesion. Without it, your manicure won’t last as long and could cause staining from darker colors. - Letting the Gel Sit Too Long Before Curing
Once you’ve created your design, cure it promptly. Waiting too long allows the polish to spread excessively, which can blur your design and ruin crisp details. - Overworking the Design
It’s easy to get carried away, but dragging colors around too much can make the nail look muddy instead of artistic. Apply your drops, make a few gentle adjustments, and then stop—sometimes less is more.
By avoiding these mistakes, you’ll keep your blooming gel designs clean, balanced, and professional-looking—even if you’re just starting out.
FAQs About Blooming Gel Polish
Here are some of the most common questions people ask about how to use blooming gel polish and the designs you can create with it. Each answer is beginner-friendly and optimized for quick, clear takeaways.
How to use blooming gel for beginners?
For beginners, start by prepping your nails with a base coat and curing it. Apply a thin layer of blooming gel but do not cure it yet. Add small drops or lines of colored gel polish on top and watch them spread into patterns. Once you like the design, cure under a UV/LED lamp and finish with a top coat.
Can you do marble nails with blooming gel?
Yes! Blooming gel is one of the easiest ways to create marble nails. Apply a thin layer of blooming gel, then drop white or gray polish on top of a dark base. Use a liner brush to swirl gently, and the gel will spread the colors into natural marble-like veins.
Do you cure blooming gel before adding color?
No, you should not cure blooming gel before adding your design. The spreading effect only happens when the blooming gel is still wet. After placing your colors and adjusting the design, then cure everything under the lamp.
What are the best blooming gel polish designs?
Some of the most popular blooming gel nail art designs include marble nails, floral blooms, tie-dye effects, watercolor abstracts, and ombre blends. Accent nails (just one or two designed nails per hand) are also a trendy choice.
How long does blooming gel last on nails?
When applied correctly with a base coat, blooming gel polish designs can last two to three weeks without chipping. Durability also depends on the quality of the products used and how well you prep your nails before application.
These quick answers make it easy for beginners to start experimenting while also helping more experienced nail lovers perfect their designs.
Conclusion
Blooming gel polish has truly changed the way we approach nail art. It turns even simple manicures into creative, eye-catching designs with minimal effort. From elegant marble nails to soft floral blooms and bold tie-dye patterns, the possibilities are endless—and you don’t need to be a professional to achieve them.
Personally, I love blooming gel because it allows me to create quick, professional-looking nails at home without spending hours on intricate details. Each design feels unique, and the process itself is fun and satisfying.
Now it’s your turn! Grab your blooming gel polish, experiment with colors and techniques, and let your creativity flow. Start with one accent nail or try a full set—either way, you’ll be amazed at the stunning results you can achieve.
Ready to transform your nail game? Your next masterpiece is just a few drops away!
Amazon and the Amazon logo are trademarks of Amazon.com, Inc, or its affiliates.