As an Amazon Associate I earn from qualifying purchases.
If you’ve ever wondered how to do nail art at home without tools, the good news is—you don’t need a drawer full of fancy brushes, stamping kits, or dotting pens to create gorgeous nails. With just a little creativity (and a few everyday items you already have at home), you can design fun, stylish, and eye-catching nail looks that rival salon results.
In this guide, we’ll walk you through:
Easy nail art designs without tools that anyone can try
Clever household alternatives you can use instead of expensive nail art tools
Step-by-step beginner-friendly tips for neat, long-lasting results
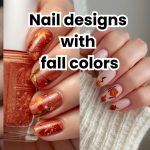
Inspiration for trendy patterns like marble, ombré, and polka dots
Whether you’re a student on a budget, a beginner experimenting with polish, or someone who simply loves DIY beauty, this article will show you how to make your nails look stunning—no professional tools required.
Why Nail Art Without Tools Is Totally Possible
Nail art doesn’t have to be complicated or expensive. Many people think you need a full kit of brushes, sponges, and stamping plates, but the truth is—you can achieve stunning results with just your regular nail polish and a little imagination.
Everyday Items Can Replace Salon Tools
Instead of buying pricey dotting tools or thin striping brushes, you can grab things you already have at home:
- Toothpicks for tiny dots and swirls
- Bobby pins for clean, round shapes
- Cotton buds for gradients and ombré looks
- Tape or stickers to create sharp lines and patterns
These common items can give you nearly the same effects as salon-grade tools if you know how to use them.
Creativity Matters More Than Equipment
What really makes nail art pop is creativity. Mixing colors, trying out patterns, and layering polishes are all about experimenting—not about owning the most expensive set. Some of the trendiest designs, like marble nails or abstract dots, actually look better when they’re a little imperfect, giving them a playful and personal touch.
A Quick Personal Note
When I first tried nail art, I didn’t own a single tool. I used the tip of a pencil to make dots and a piece of sponge from old packaging to blend colors. It wasn’t perfect, but I loved the results—and more importantly, it made me realize that DIY beauty is about fun, not perfection. If I could do it as a beginner with zero tools, you absolutely can too.

What Can I Use Instead of Nail Art Tools?
If you’ve ever asked yourself, “What can I use instead of nail art tools?”—the answer is simple: look around your home. Many everyday items can double as nail art tools and help you create trendy designs without spending a penny. Here are some clever swaps:
Toothpick or Bobby Pin → Dots & Fine Lines
- A toothpick is perfect for delicate details, swirls, or tiny flowers.
- A bobby pin (the rounded tip) works like a dotting tool, creating neat circles for polka dots or accent patterns.
Cotton Swab → Gradient or Smudge Effect
Dip a cotton swab into polish and dab lightly for a soft gradient. It’s also handy for creating a smoky or blurred nail look without needing a sponge.
Tape → Geometric Lines & Sharp Edges
Cut strips of scotch tape or masking tape and press them on your nail to block off sections. Paint over the exposed part, peel the tape off, and you’ll have perfect lines, triangles, or negative-space designs.
Makeup Sponge → Ombre Designs
For a smooth ombre or gradient effect, a makeup sponge works like magic. Dab two or three shades of polish onto the sponge, then press it gently onto your nails for that blended, salon-like finish.
Old Makeup Brushes → Texture Effects
Don’t toss out your old eyeshadow or eyeliner brushes. A flat brush can create cool streaks and dry-brush textures, while a thin liner brush helps with freehand designs.
Personal Tip: What Worked Best for Me
When I started experimenting, the bobby pin and sponge were my favorites. The bobby pin gave me the easiest polka dots, and the sponge made ombre nails look effortlessly professional. The best part? They cost nothing extra.
Easy Nail Art Without Tools – Step-by-Step Designs
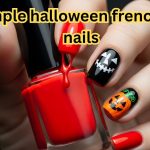
If you’re looking for easy nail art without tools, you’ll be surprised at how many stylish looks you can create in just a few minutes. Below are six beginner-friendly nail art tutorials you can try at home using only nail polish and common household items. These methods are simple, fun, and a great way to learn how to do nail designs without tools.
Polka Dot Nails with a Toothpick or Bobby Pin
Polka dots are one of the easiest easy nail designs without tools, and they look playful on any nail length.
Steps:
- Paint your nails with a base color and let it dry.
- Dip the rounded end of a bobby pin (or the tip of a toothpick) into a contrasting polish.
- Gently press dots onto each nail—randomly or in neat rows.
- Seal with a clear topcoat for shine and durability.
Beginner tip: Start with larger dots, then try layering smaller ones on top for a cool double-dot effect.
Gradient Nails Using a Makeup Sponge
Want a salon-style ombré look? A makeup sponge can blend colors beautifully.
Steps:
- Apply a light base coat (white or nude works best).
- On a makeup sponge, paint two or three stripes of nail polish side by side.
- Dab the sponge onto your nail, blending the colors together.
- Repeat until you get the gradient effect you want.
- Finish with a glossy topcoat to smooth it out.
Pro tip: Use colors from the same family (like pink to purple) for a soft fade, or go bold with contrasting shades.
Tape Nail Art for Clean Lines
This design is all about geometric shapes and sharp edges.
Steps:
- Paint your base color and let it dry fully.
- Cut small strips of scotch tape and stick them onto your nails in the shapes you want (diagonals, triangles, stripes).
- Paint over the uncovered section with a contrasting polish.
- Carefully peel the tape off before the top layer dries.
- Lock it in with topcoat.
My experience: When I first tried this, I learned that waiting until the base is completely dry makes all the difference. Otherwise, the tape pulls the polish up.

Swirl or Marble Nails with a Toothpick
Swirls are trendy, and you don’t need a professional brush to pull them off.
Steps:
- Apply a base coat and let it dry.
- Add two or three drops of different colors onto your nail while still wet.
- Use a toothpick to gently swirl the colors together in random curves.
- Don’t overmix—less swirling gives a prettier marble effect.
- Top it off with clear polish.
Beginner-friendly trick: Stick to two shades for a cleaner look; three or more can look messy if overdone.
French Tips with Just Tape or Cotton Swabs
Classic French nails never go out of style, and you don’t need a striping brush to achieve them.
Steps:
- Paint your nails with a nude or light pink base.
- Stick tape across the lower part of your nail, leaving the tips exposed.
- Paint the tips white and carefully peel off the tape.
- No tape? Dip a cotton swab in polish remover and clean the edges for a crisp line.
- Seal with topcoat for that timeless finish.
Quick tip: Experiment with colored tips (like black, gold, or neon) for a modern twist.
Glitter Accent Nails Without Tools
Glitter makes any nail art instantly festive—and it’s the easiest no-tool design.
Steps:
- Paint your nails with a solid color.
- While still tacky, sprinkle loose glitter over one or two accent nails.
– Or dab glitter polish just at the base or tips for a gradient sparkle. - Tap off the excess and press lightly to set.
- Apply a thick layer of topcoat to lock in the sparkle.
Beginner tip: Use glitter on one or two nails instead of all ten for a chic, balanced look.
10 Effortless No-Tool Nail Art Design Tutorials (Quick List)
If you’re short on time but still want pretty nails, here are 10 quick and easy nail designs without tools you can try today. Each one takes only a few minutes and uses everyday household items instead of salon equipment.
- Polka Dots with a Bobby Pin – Dip the rounded end into polish for neat, playful dots.
- Ombre Sponge Effect – Blend two or three colors on a makeup sponge and dab onto nails.
- Glitter Gradient – Apply glitter polish from the tips downward for a sparkling fade.
- Striped Nails with Tape – Place thin strips of tape, paint over, and peel for sharp stripes.
- Two-Tone Diagonal Nails – Use tape to block half the nail and paint each side a different color.
- Swirl/Marble Design – Drop a few colors on wet polish, then swirl gently with a toothpick.
- French Tips with Cotton Swab – Clean edges with remover-soaked swabs for chic French lines.
- Accent Nail with Glitter – Coat one nail in glitter for a bold, eye-catching detail.
- Half-Moon Design with Tape – Stick a round sticker near your cuticle, paint over, and peel for a retro moon shape.
- Smudge Art with Sponge – Dab contrasting polish randomly with a sponge for an artsy, textured effect.
Tip: These designs look great on both short and long nails, so don’t worry about nail length—just focus on having fun.
How to Make Nail Art Tools at Home
If you’re curious about how to make nail art tools at home, the answer is easier than you think. You don’t have to run to the beauty store—just repurpose simple items you already have. With a little creativity, you can DIY tools that work almost like professional ones.
Toothpick as a Dotting Tool
The classic hack: a toothpick works wonders for dots, swirls, and even tiny flower petals. For larger dots, use the flat end; for smaller ones, use the tip.
Sewing Pin in an Eraser for Detailed Designs
Take a sewing pin and stick it into the back of an eraser or cork. This creates a mini “dotting pen” with a comfortable handle, perfect for small, neat details.
Folded Tape for Stencils
Fold scotch tape or masking tape into shapes (like triangles, stripes, or half-moons). Stick them onto your nails, paint over, and peel away to reveal sharp, clean designs.
My Quick Hacks That Saved Me Money
When I started experimenting with nail art, I didn’t want to invest in a kit. Using toothpicks, tape, and an old eyeliner brush gave me the same creative freedom without the price tag. Honestly, the fun part was inventing my own tools—it made each design feel personal.
Tips for Beginners Doing Nail Art Without Tools
If you’re new to DIY nails, don’t worry—how to do nail art at home without tools for beginners is all about starting simple and building your confidence. Here are some beginner-friendly tips that helped me when I first started:
- Start with Simple Designs First
Go for polka dots, stripes, or glitter accents before attempting complex swirls or gradients. - Use Contrasting Colors
Bold color pairings (like black and white or pink and gold) make even simple designs stand out. - Apply a Good Top Coat
A clear topcoat not only seals your design but also makes it last longer without chips. - Keep Nails Clean and Prepped
Wash your hands, push back cuticles, and apply a base coat to prevent staining and ensure smoother application. - Personal Lesson: Patience Is Key
When I rushed, my designs always smudged. Waiting just an extra minute for polish to dry made a huge difference—and saved me a lot of re-dos.

Common Mistakes to Avoid When Doing Nail Art Without Tools
Even though DIY nail art is simple, there are a few mistakes beginners often make. Avoiding these will help your designs look cleaner and last longer:
- Using Thick Layers of Polish
Thick coats take forever to dry and often smudge. Always apply thin, even layers instead. - Not Waiting for Layers to Dry
Patience is everything. Rushing the process can ruin your design when colors blend together. - Skipping Base Coat/Top Coat
A base coat protects your nails from staining, while a topcoat seals your art and keeps it shiny. Skipping them means your design won’t last. - Expecting Salon Results Right Away
Remember—practice makes progress. DIY nail art is about creativity and fun, not perfection. Even pros had to start somewhere.
Tip: Treat each session as practice. The more you try, the better your hand control and creativity will get.
FAQs About Nail Art Without Tools
Here are some quick, beginner-friendly answers to the most common questions about how to do nail art at home without tools:
How to do nail art at home without tools for beginners?
Start with simple designs like polka dots, stripes, or glitter accents. Use items like toothpicks, tape, or cotton swabs instead of brushes, and always apply a topcoat to protect your work.
How to do nail art at home with a toothpick?
Dip the tip of a toothpick into polish to create tiny dots, flowers, or swirls. The flat end can also make larger circles. It’s one of the easiest no-tool methods.
What can I use instead of nail art tools?
You can use bobby pins, cotton swabs, tape, makeup sponges, or even old makeup brushes. These everyday items work as affordable substitutes for salon tools.
Can I create trendy nail designs without professional brushes?
Yes! Ombre nails, marble swirls, French tips, and glitter accents can all be done with simple household items. Creativity matters more than equipment.
What’s the easiest no-tool nail design for beginners?
Polka dots are the easiest. Just use a bobby pin or toothpick to dot contrasting polish over your base color. It’s quick, stylish, and almost impossible to mess up.
Final Thoughts – Nail Art Without Tools Is Easy and Fun
Learning how to do nail art at home without tools proves one thing: you don’t need expensive kits to get creative, stylish nails. With patience, practice, and a little imagination, your nails can look just as trendy as salon designs.
At the end of the day, nail art is about self-expression—not perfection. Use what you have, try new ideas, and enjoy the process.
Personal tip: When I started, I thought I needed pro tools, but my best designs came from improvising with things like bobby pins and sponges. Sometimes the most beautiful results come from keeping it simple.
Amazon and the Amazon logo are trademarks of Amazon.com, Inc, or its affiliates.