Ever wanted to get a salon-worthy manicure right at home? The MEFA Gel Polish Kit might just be the ticket. It’s like bringing the nail salon to your kitchen table—cool, right? We’ll walk through everything: what you get, how to use it, tips for best results, and even removal. Let’s jump in.
Understanding the MEFA Gel Polish Kit
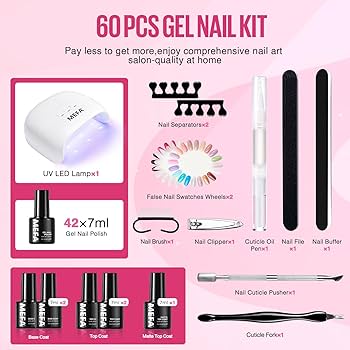
What’s inside the kit
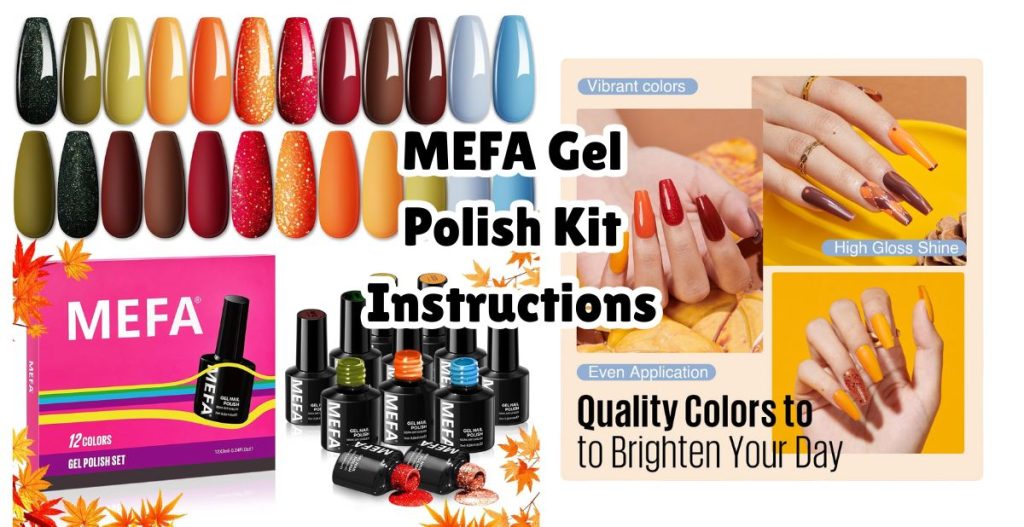
The MEFA Gel Polish Kit typically includes a set of colour gels (for example 32 colours in one version) plus a base coat, top coat(s) (glossy and/or matte), and a UV/LED nail lamp.
You’ll often get manicure tools too, like a nail buffer/file and cuticle oil or pen.
Why this kit might be a good choice
- Convenience: Everything you need in one box—ideal for DIY at home.
- Variety: Many colours to choose from, so you can pick based on mood or outfit.
- Cost-effective: Compared to frequent salon trips, this could save time & money.
- Control: You decide when and how your manicure looks.
That said, like any product, you’ll get the best results when you follow instructions carefully.
Getting Ready: Prep & Workspace
Choosing your spot
Pick a well-lit, dry space with a stable table. Good lighting helps you apply smoothly and cleanly. Avoid humid rooms or places with drafts.
Clean your nails
Start by removing any old polish, then wash your hands. Push back cuticles gently (don’t cut aggressively). Use a nail file to lightly buff the surface so the gel adheres better. One reviewer noted:
“With gel polish, it is all about the prep work to dehydrate the natural nail first.” (Fine Polish)
Then wipe nails with alcohol or a wipe to remove dust and oils.Gather your tools
Ensure your lamp is plugged and working, you have your base/top/colour bottles ready, a nail file, buffer, cuticle oil, and cleanup brush or cotton swab. Having everything ready makes the process smoother.

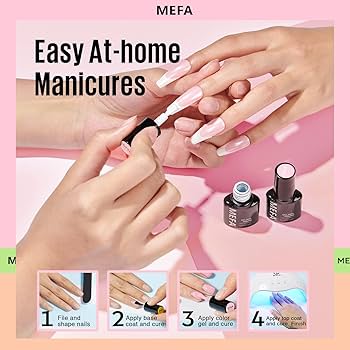
Step 1: Base Coat Application
What is a base coat for?
How to apply the base coat
- Apply a thin layer, avoiding cuticles and skin.
- Make sure you cap the free edge (the tip) of the nail to seal it.
- Don’t flood the skin—that can cause lifting.
- One user tip: after application, you might see a slight tacky layer — that’s fine. (Fine Polish)
Curing the base coat
With the MEFA kit’s lamp (for example a 72 W LED lamp) it lists curing times: ~30-60 seconds for normal coats, perhaps 90 seconds for thicker or tricky colours like black/white. (Amazon)
Make sure your hand is placed fully inside the lamp. The lamp may auto-turn on when your hand enters (depending on model).
Step 2: Colour Gel Layers
How to apply colour gel smoothly
- Apply a thin layer of colour gel. Thin = better adhesive; thick = risk of lifting.
- Cap the free edge.
- Avoid getting gel on skin/cuticle area — it may lift or irritate.
- If you get stray gel on skin, use a brush dipped in acetone or isopropyl alcohol immediately to clean up.
Curing colour layer
Place the hand in the lamp and cure for the time recommended (e.g., 60 seconds). If you used a thick or dark colour like black/white, you might double the time (e.g., 120 seconds) according to user instructions. (Amazon)
When to apply a second coat
If after curing your nails look slightly sheer, uneven, or not fully opaque, apply a second thin colour coat and cure again. Many reviewers of MEFA say their colour required 2-3 coats for even coverage. (Fine Polish)
Step 3: Top Coat (Glossy or Matte)
Glossy or matte finish?
Depending on the kit, you may have a glossy top coat, a matte top coat, or both. Pick the finish you like. Glossy gives shine; matte gives a slower, velvety finish.
Applying the top coat
- Apply a thin layer of the top coat.
- Again, cap the free edge of the nail tip.
- Avoid skin.
- If you used a “no-wipe” top coat (check your kit), you may not need to wipe the tacky layer after curing.
Final curing
**
Cure under the lamp for the recommended time (often 60-90 seconds). With some “special” colours or finishes this may be longer. The kit spec mentions for “special colours” you may need ~120 seconds. (Amazon)
After curing, give the lamp a moment to finish and your nails should feel smooth and “set”.
Aftercare & Maintenance
Clean up edges and cuticles
Use a small brush or cotton-swab dipped in alcohol or acetone to remove any gel on skin/cuticle. This helps avoid lifting or irritation.
Caring for your manicure
- Use cuticle oil regularly to keep the skin around nails healthy.
- Avoid heavy contact with harsh chemicals (cleaning agents) without gloves—this helps your gel manicure last longer.
- Some users on Reddit mentioned that if prep isn’t done well the gel can peel early. For example:
“I have a hard time getting it off but this peeled within 3 days.”
Proper prep + thin coats = longer wear.
Removal of the Gel Polish
Why proper removal matters
Removing gel improperly (e.g., by peeling or forcing) can damage your natural nail. Take your time, be gentle.
How to remove safely
Here’s a common method:
- Use a coarse nail file to gently file the top layer of the gel (just the surface top coat) so acetone penetrates better.
- Soak cotton balls in pure acetone and place on each nail, wrap in foil (or use silicone soak-off caps) for ~10-15 minutes.
- Check if the gel lifts easily with a wooden stick or cuticle pusher. If yes, gently push off; if not, soak a bit longer.
- Once gel is off, wash your hands, apply nail oil and give your nails a rest day if possible.
One reviewer of the MEFA set suggested doing this and acknowledged removal was “the same as any of the other gels” when done properly. (Fine Polish)
Troubleshooting Common Issues
“Why is my gel peeling?”
Common reasons:
- Nail surface wasn’t cleaned or buffed enough. The product notes: “Insufficient cleaning of the nail surface affects adhesion.” (Amazon)
- Base coat or colour coat was applied too thick. Thin coats = better curing, stronger adhesion.
- Edges/tips weren’t capped.
- Exposure to water/chemicals (like doing dishes without gloves) too soon after curing can weaken the gel. The product says: “Frequent soaking in water/contact with chemicals … can accelerate detachment.” (Amazon)
My lamp didn’t cure properly”
- Check power/plugs. The kit notes: “Check the plug and socket connection… Confirm that the switch is turned on.”
- Make sure your hand is placed fully inside the lamp and not touching the sides in a way that blocks the sensor.
- Clean the lamp interior regularly – dust can block light and reduce effectiveness. (Amazon)
Colour looking streaky or thin
Some user reviews noted that certain MEFA colour gels were “a little streaky” and required three coats for full coverage. (Fine Polish) If you notice this:
- Warm the bottle in your hand for a minute before using to lower viscosity.
- Use thin even coats rather than thick ones — thin = better curing.
- Consider applying a third coat if needed, then top coat.
Safety Tips & Best Practices
- Always do a patch test if you’re using gel for the first time (gel polish can cause allergic reactions). (Fine Polish)
- Avoid getting gel polish onto skin or cuticles — it can lift or irritate.
- Work in a well-ventilated area to avoid inhaling fumes from gel or remover.
- Use protective gloves when doing heavy cleaning within 1-2 days of your manicure.
- Don’t rush removal. Be gentle to protect your natural nails.
Conclusion
If you’re looking to bring the salon experience home, the MEFA Gel Polish Kit is a solid choice. It gives you variety, convenience, and if used properly, professional-looking results. It really boils down to prep, thin even layers, correct curing, and careful removal. Follow this guide step by step, and you’ll likely walk away with a long-lasting, beautiful manicure you’ll be proud of.
FAQs
Q1: How long will the gel manicure last with this kit?
A: With good prep and proper application, many users report 2–3 weeks of wear. But longevity depends on how well nails were prepared and how harsh your daily tasks are.
Q2: Can I use this kit on my toes (pedicure) as well?
A: Yes — you can use the same steps for toes. Just be sure the lamp can accommodate your toes comfortably and you cure fully.
Q3: Is the LED/UV lamp safe for my hands?
A: The lamp emits UV/LED light, which is typical for gel manicures. It’s safe for nails when used properly. Avoid looking directly at the light and limit exposure when not curing.
Q4: What if I want to change the gel colour after a few days?
A: You can remove and redo a manicure anytime. Just follow the safe removal steps above, let your nails rest for a bit if possible, and then re-apply.
Q5: Can I apply regular nail polish over or under the gel?
A: It’s not recommended to apply regular polish under gel — this can affect adhesion. Some people apply regular polish on top after the gel top-coat, but it may shorten the wear-time and increase risk of chipping.
If you like, I can pull up a video tutorial specifically for this kit or some colour swatches to help you choose your next manicure look. Would you like me to do that?
Amazon and the Amazon logo are trademarks of Amazon.com, Inc, or its affiliates.