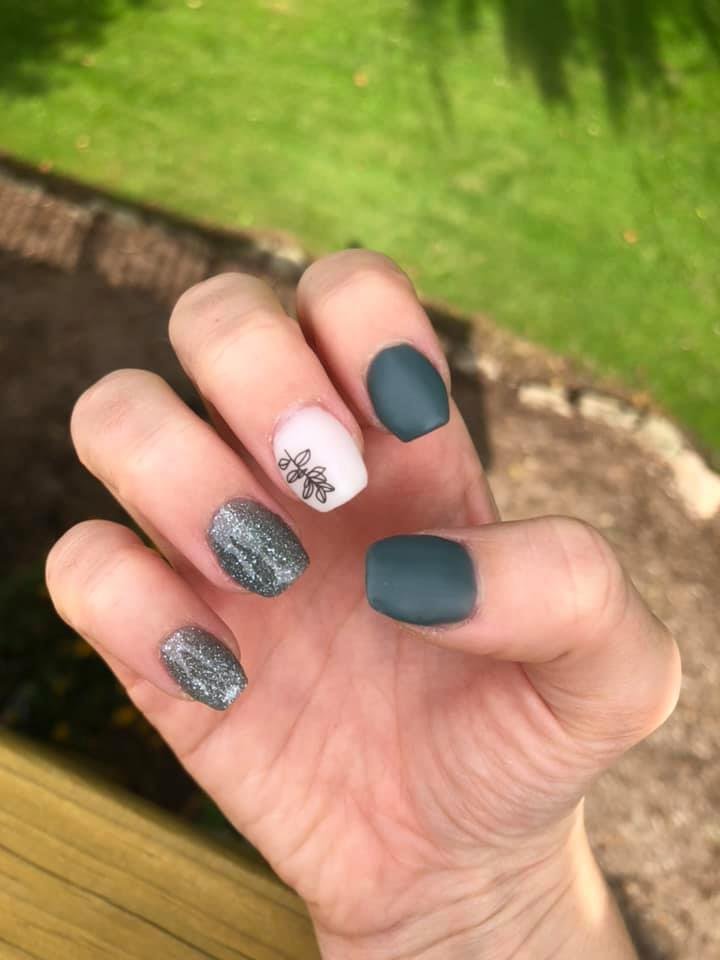
How to use nail tattoos is one of those beauty questions that sounds simple—until you actually sit down with a tiny sheet of decals, a pair of tweezers, and freshly painted nails, wondering if you’re about to ruin your manicure. If that’s ever been you, you’re not alone. Nail tattoos (also called nail decals or nail art tattoos) promise salon-level designs at home, but no one really tells you how to use them the right way.
That’s exactly why this guide exists.
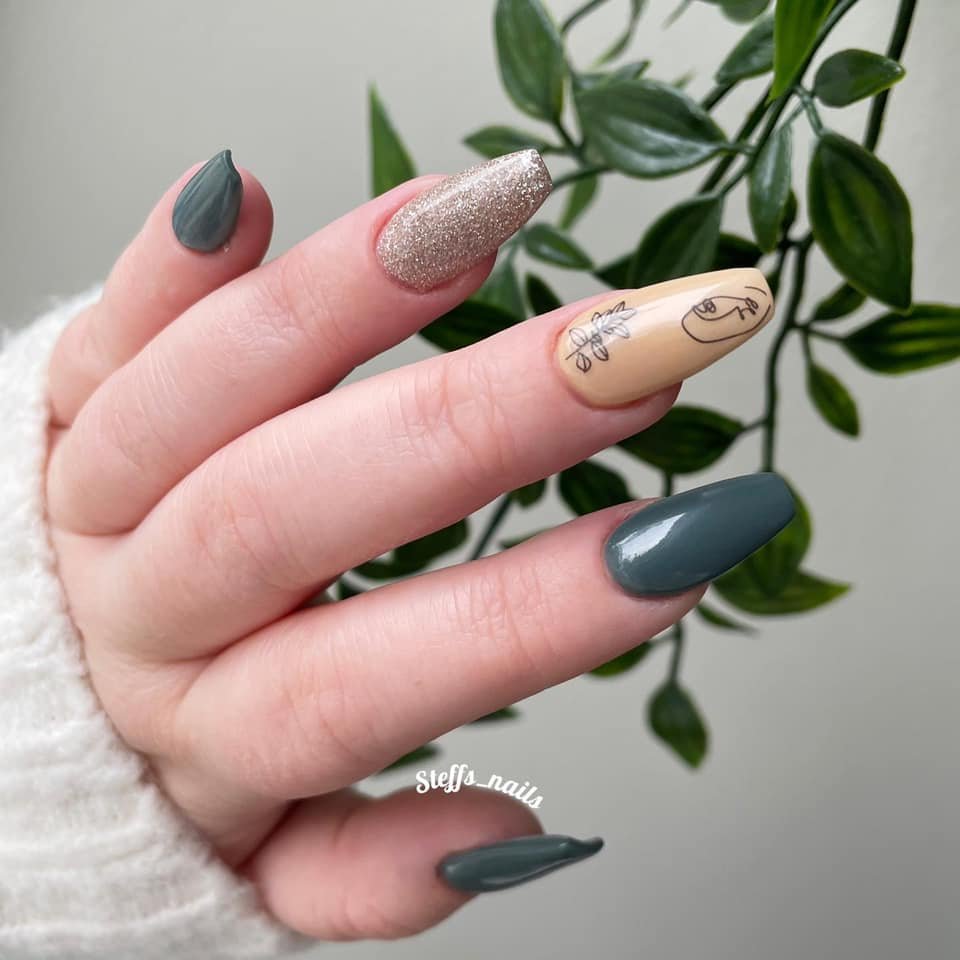
Nail tattoos have quietly become one of the easiest ways to get detailed nail art without years of practice, expensive tools, or professional appointments. From minimalist florals and abstract lines to bold graphics and seasonal designs, they let everyday people create eye-catching nails in minutes. The problem? A lot of tutorials skip key steps, rush the process, or assume you already know the basics—leading to wrinkled decals, peeling edges, or designs that vanish after one day.
What Are Nail Tattoos and How Do They Work?

BUY PRODUCT HERE
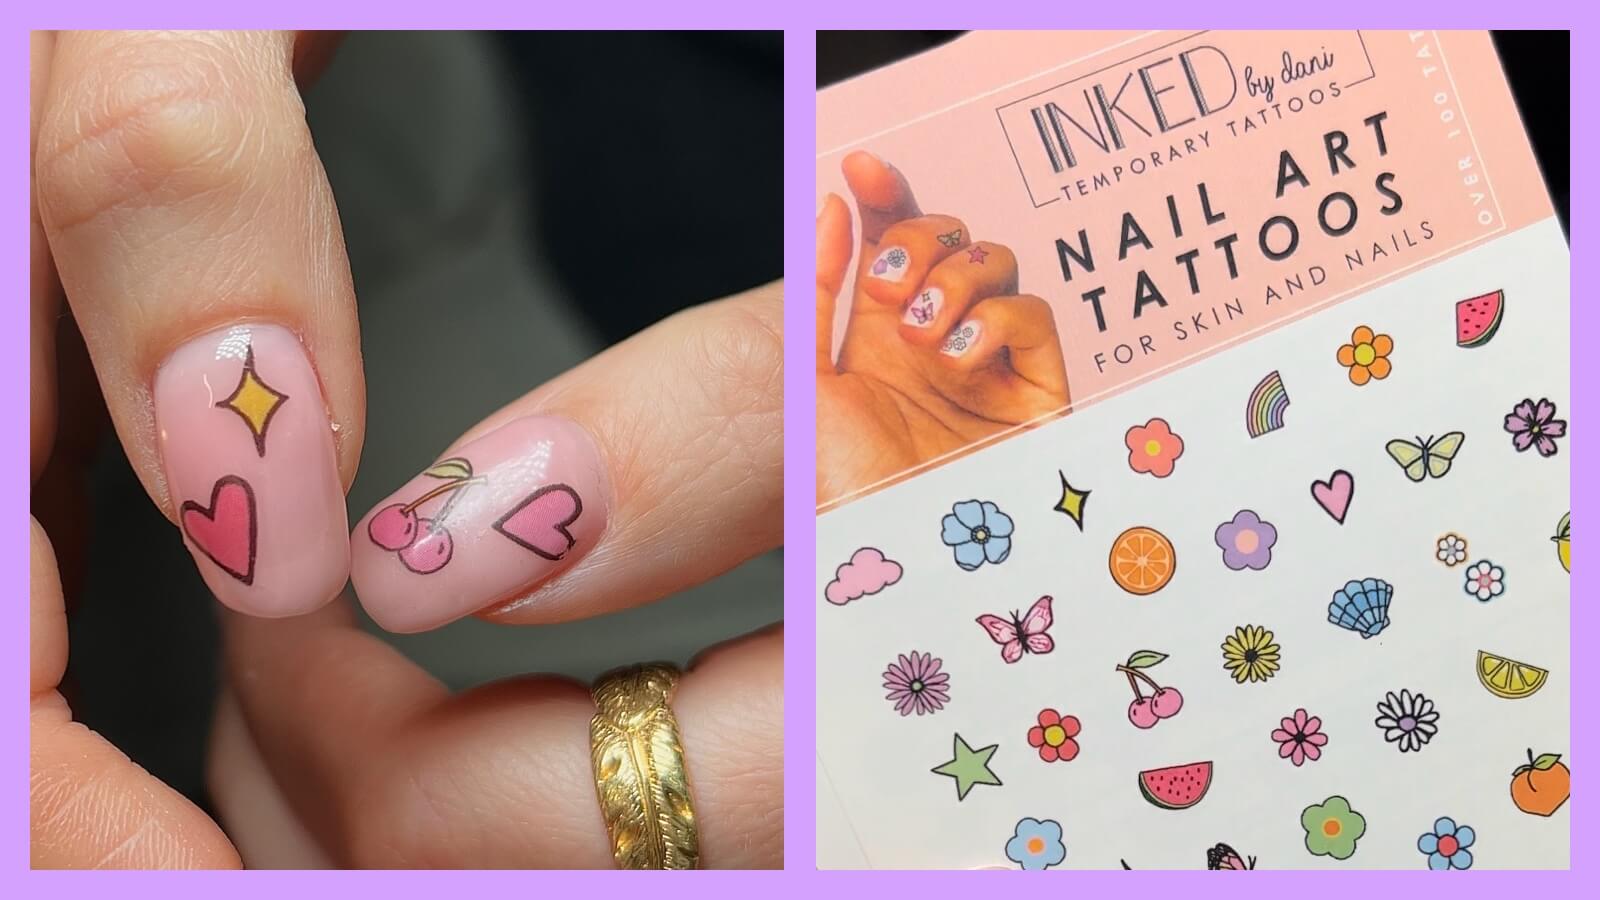
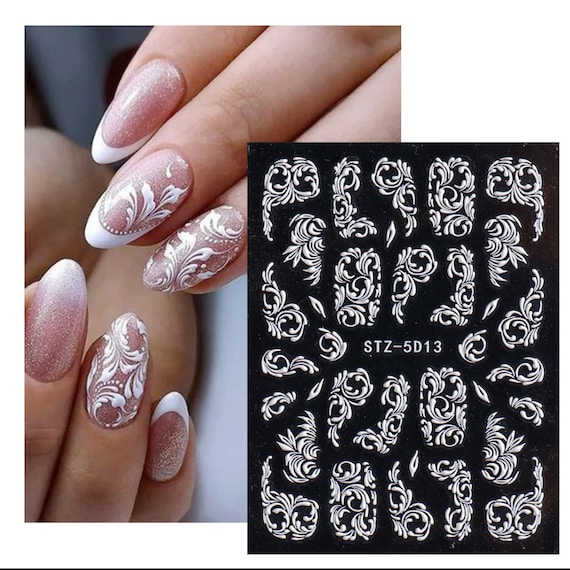
Nail tattoos are thin, printed designs that transfer onto your nail surface to create detailed nail art—without needing drawing skills or special tools. Think of them like temporary tattoos, but made specifically for nails. You apply them over polish, press or slide them into place, seal them with a top coat, and that’s it. The result looks hand-painted, even though you didn’t paint a thing.
At their core, nail tattoos work by bonding a printed design to the nail surface. Some use water to release the design from its backing paper, while others are peel-and-stick. Once applied and sealed, the tattoo becomes part of your manicure and can last anywhere from a few days to two weeks, depending on how you seal it and what polish system you’re using.
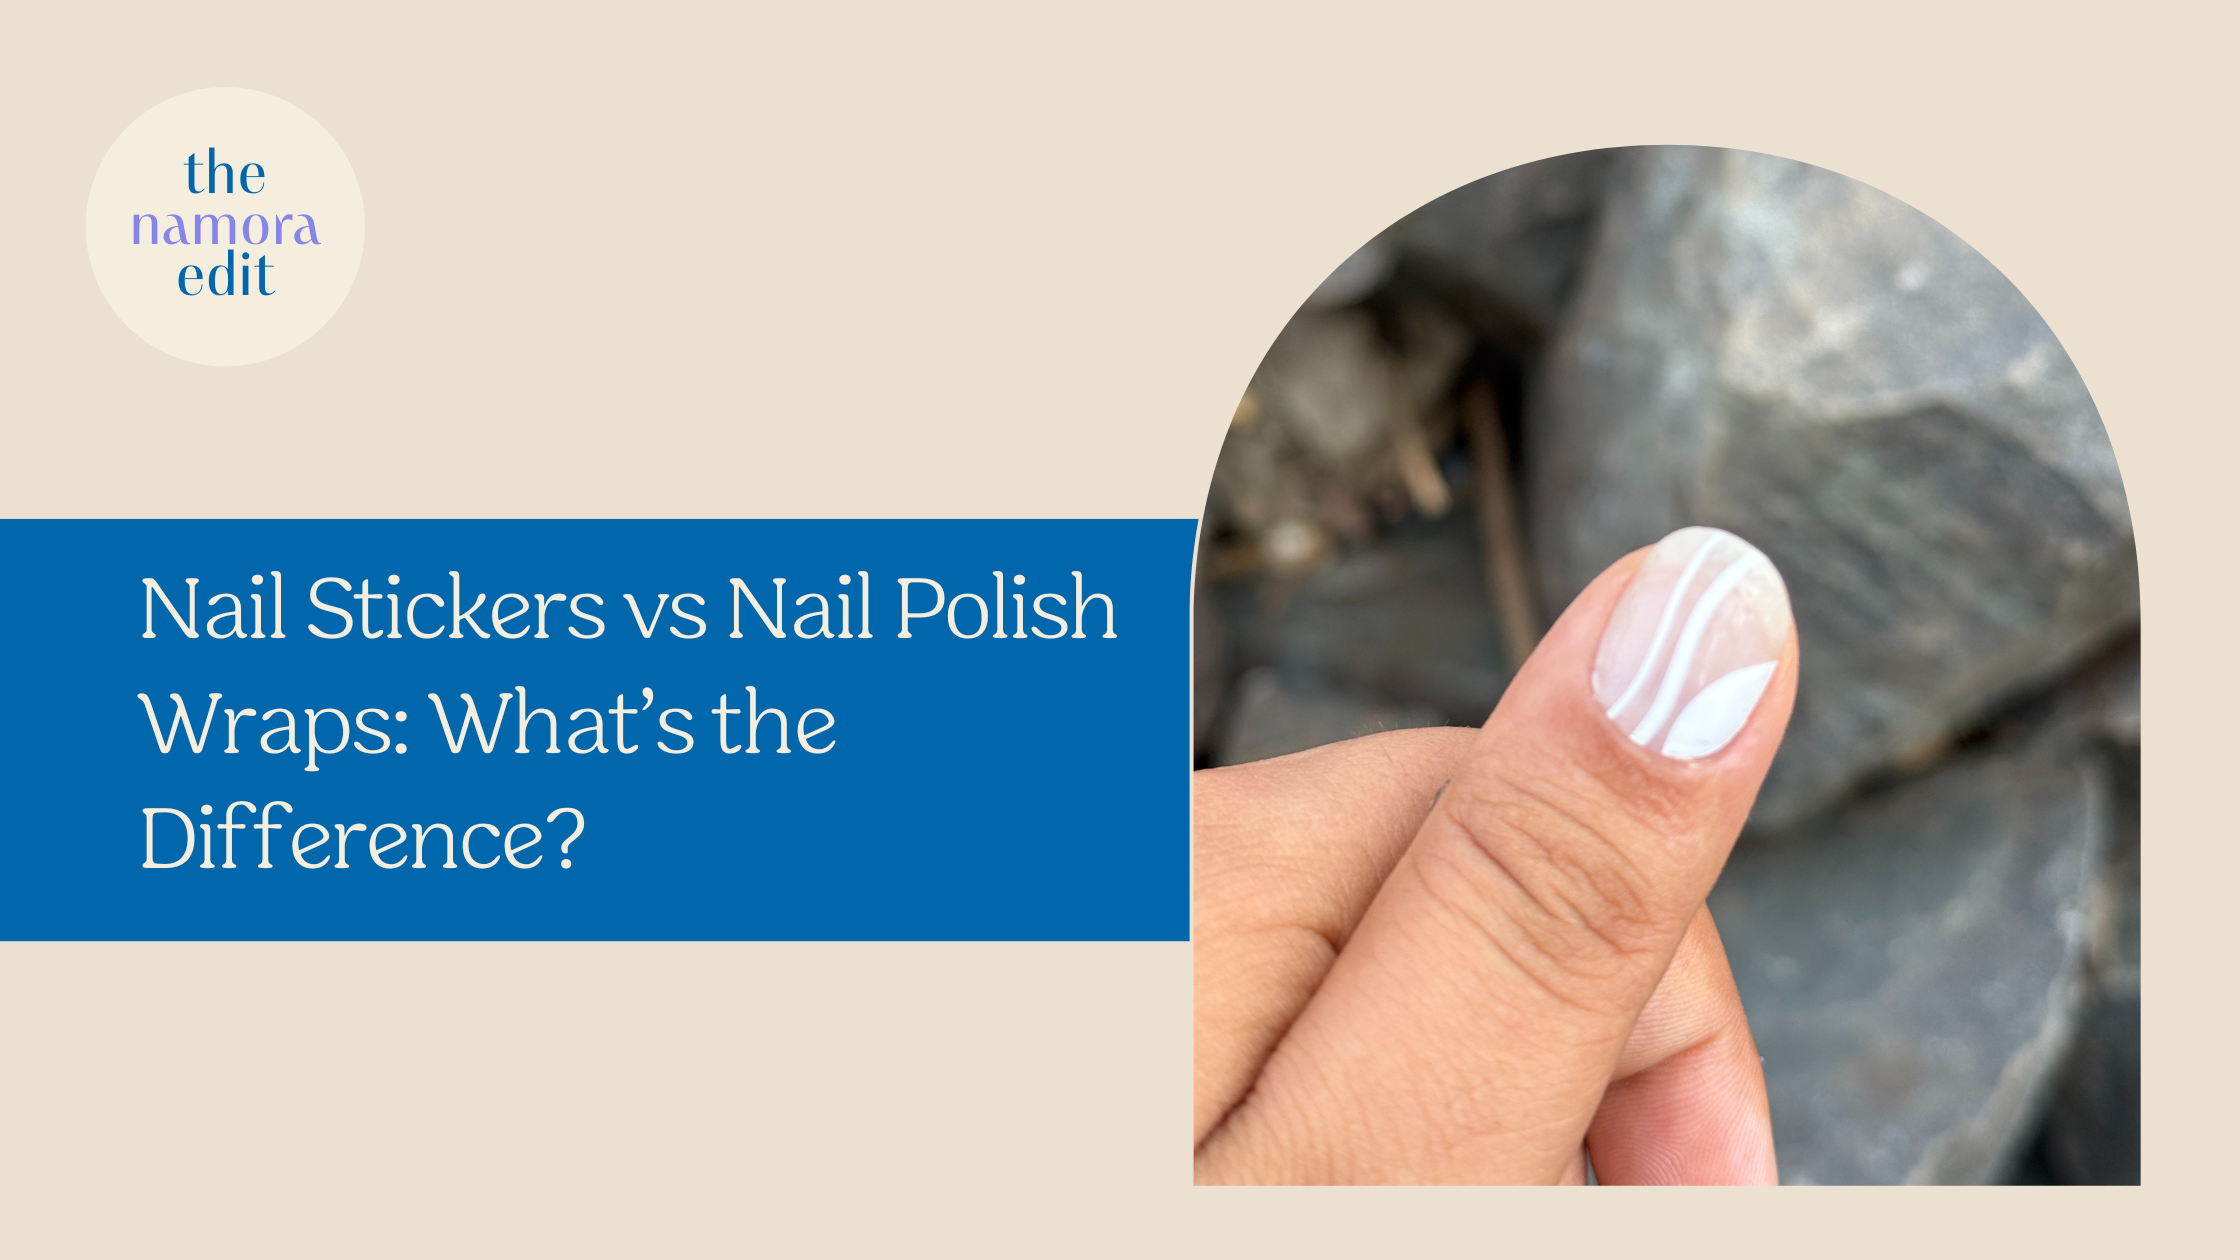
Nail Tattoos vs. Nail Decals vs. Nail Stickers (What’s the Difference?)
These terms are often used interchangeably, which causes a lot of confusion—especially for beginners. Here’s a simple breakdown without the jargon:
- Nail tattoos (water-slide decals):
These need a little water. You soak them briefly, slide the design off the paper, place it on your nail, and seal it. They’re ultra-thin and look the most “painted-on.” - Nail decals:
This is the umbrella term. It can include water-slide tattoos and some peel-and-stick designs. Most professional-looking nail art decals fall into this category. - Nail stickers:
These are thicker and usually peel straight off the backing. They’re easier to apply but can look slightly raised if not sealed well.
If your goal is realistic, salon-style nail art, nail tattoos and water-slide decals are usually the best choice. They sit flatter on the nail and blend seamlessly under top coat.

BUY PRODUCT HERE
Why Nail Tattoos Are So Popular for DIY Nail Art
Nail tattoos exploded in popularity for one simple reason: they remove the hardest part of nail art—drawing.
You don’t need:
- A steady hand
- Tiny brushes
- Artistic talent
- Hours of practice
Instead, you get instant access to designs that would normally take a professional nail artist years to master. Florals, lettering, fine lines, faces, geometric patterns—things that are nearly impossible to freehand suddenly become doable at home.
They’re also:
- Time-saving: Full nail art in minutes
- Affordable: One sheet can last multiple manicures
- Beginner-friendly: Low risk, low learning curve
- Versatile: Work with regular polish, gel polish, and dip powder
For people who love the look of nail art but not the stress, nail tattoos feel like a shortcut that doesn’t cut corners.
BUY PRODUCT HERE
Who Nail Tattoos Are Best For
Nail tattoos are especially great if you fall into one of these groups:
- Beginners:
If you’ve ever tried nail art and ended up wiping it all off, nail tattoos are a confidence booster. You can get great results on your first try. - Busy people:
If you want nice nails but don’t have an hour to spare, tattoos let you upgrade a basic manicure fast. - At-home users:
Perfect for DIY manicures between salon visits—or instead of them. - Detail lovers:
If you love intricate designs but hate the effort, this is your sweet spot.
They’re also ideal for special occasions—weddings, holidays, vacations—when you want something extra without booking a nail appointment.
Why I Started Using Nail Tattoos (And What I Got Wrong at First)

BUY PRODUCT HERE
I didn’t start using nail tattoos because I was good at nails. I started because I was tired of failing at them.
The first time I tried nail tattoos, I was genuinely excited. I’d seen photos online—perfect little flowers, clean lines, designs that looked like real nail art. I assumed it would be foolproof. Stick it on, top coat, done. Right?
Not exactly.
My First-Time Experience (A Reality Check)
I rushed. I didn’t wait for my polish to fully dry. I placed the design crooked, tried to fix it, and stretched it by accident. Then I slapped on top coat like I was in a hurry to leave the house.
Within hours:
- The edges lifted
- The design wrinkled slightly
- One nail peeled off entirely
I remember thinking, “Okay, so these only work for people who already know what they’re doing.” That couldn’t have been more wrong.

BUY PRODUCT HERE
Common Beginner Confusion (You Might Relate)
Most beginners struggle with the same few things:
- Not knowing how wet the decal should be
- Unsure when to apply top coat
- Confusing stickers with water-slide tattoos
- Pressing too hard—or not enough
None of this is obvious when you’re new. And most quick tutorials skip these details completely.
The Mistakes I Made Early On
Looking back, my mistakes were simple—but important:
- Rushing the process: Nail tattoos reward patience, not speed
- Poor placement: Once they stick, you have a short window to adjust
- Improper sealing: Top coat technique matters more than brand
BUY PRODUCT HERE
I assumed nail tattoos were fragile. In reality, my technique was.
Why Nail Tattoos Are Easier Than They Look
Once I slowed down and learned the basics, everything changed.
Nail tattoos aren’t hard—they’re just different from polish. They don’t need talent; they need timing. When you understand how they behave on the nail, they become predictable and forgiving.
That’s the good news: if you’ve ever thought nail art “just isn’t for you,” nail tattoos are probably the most approachable way to prove yourself wrong.
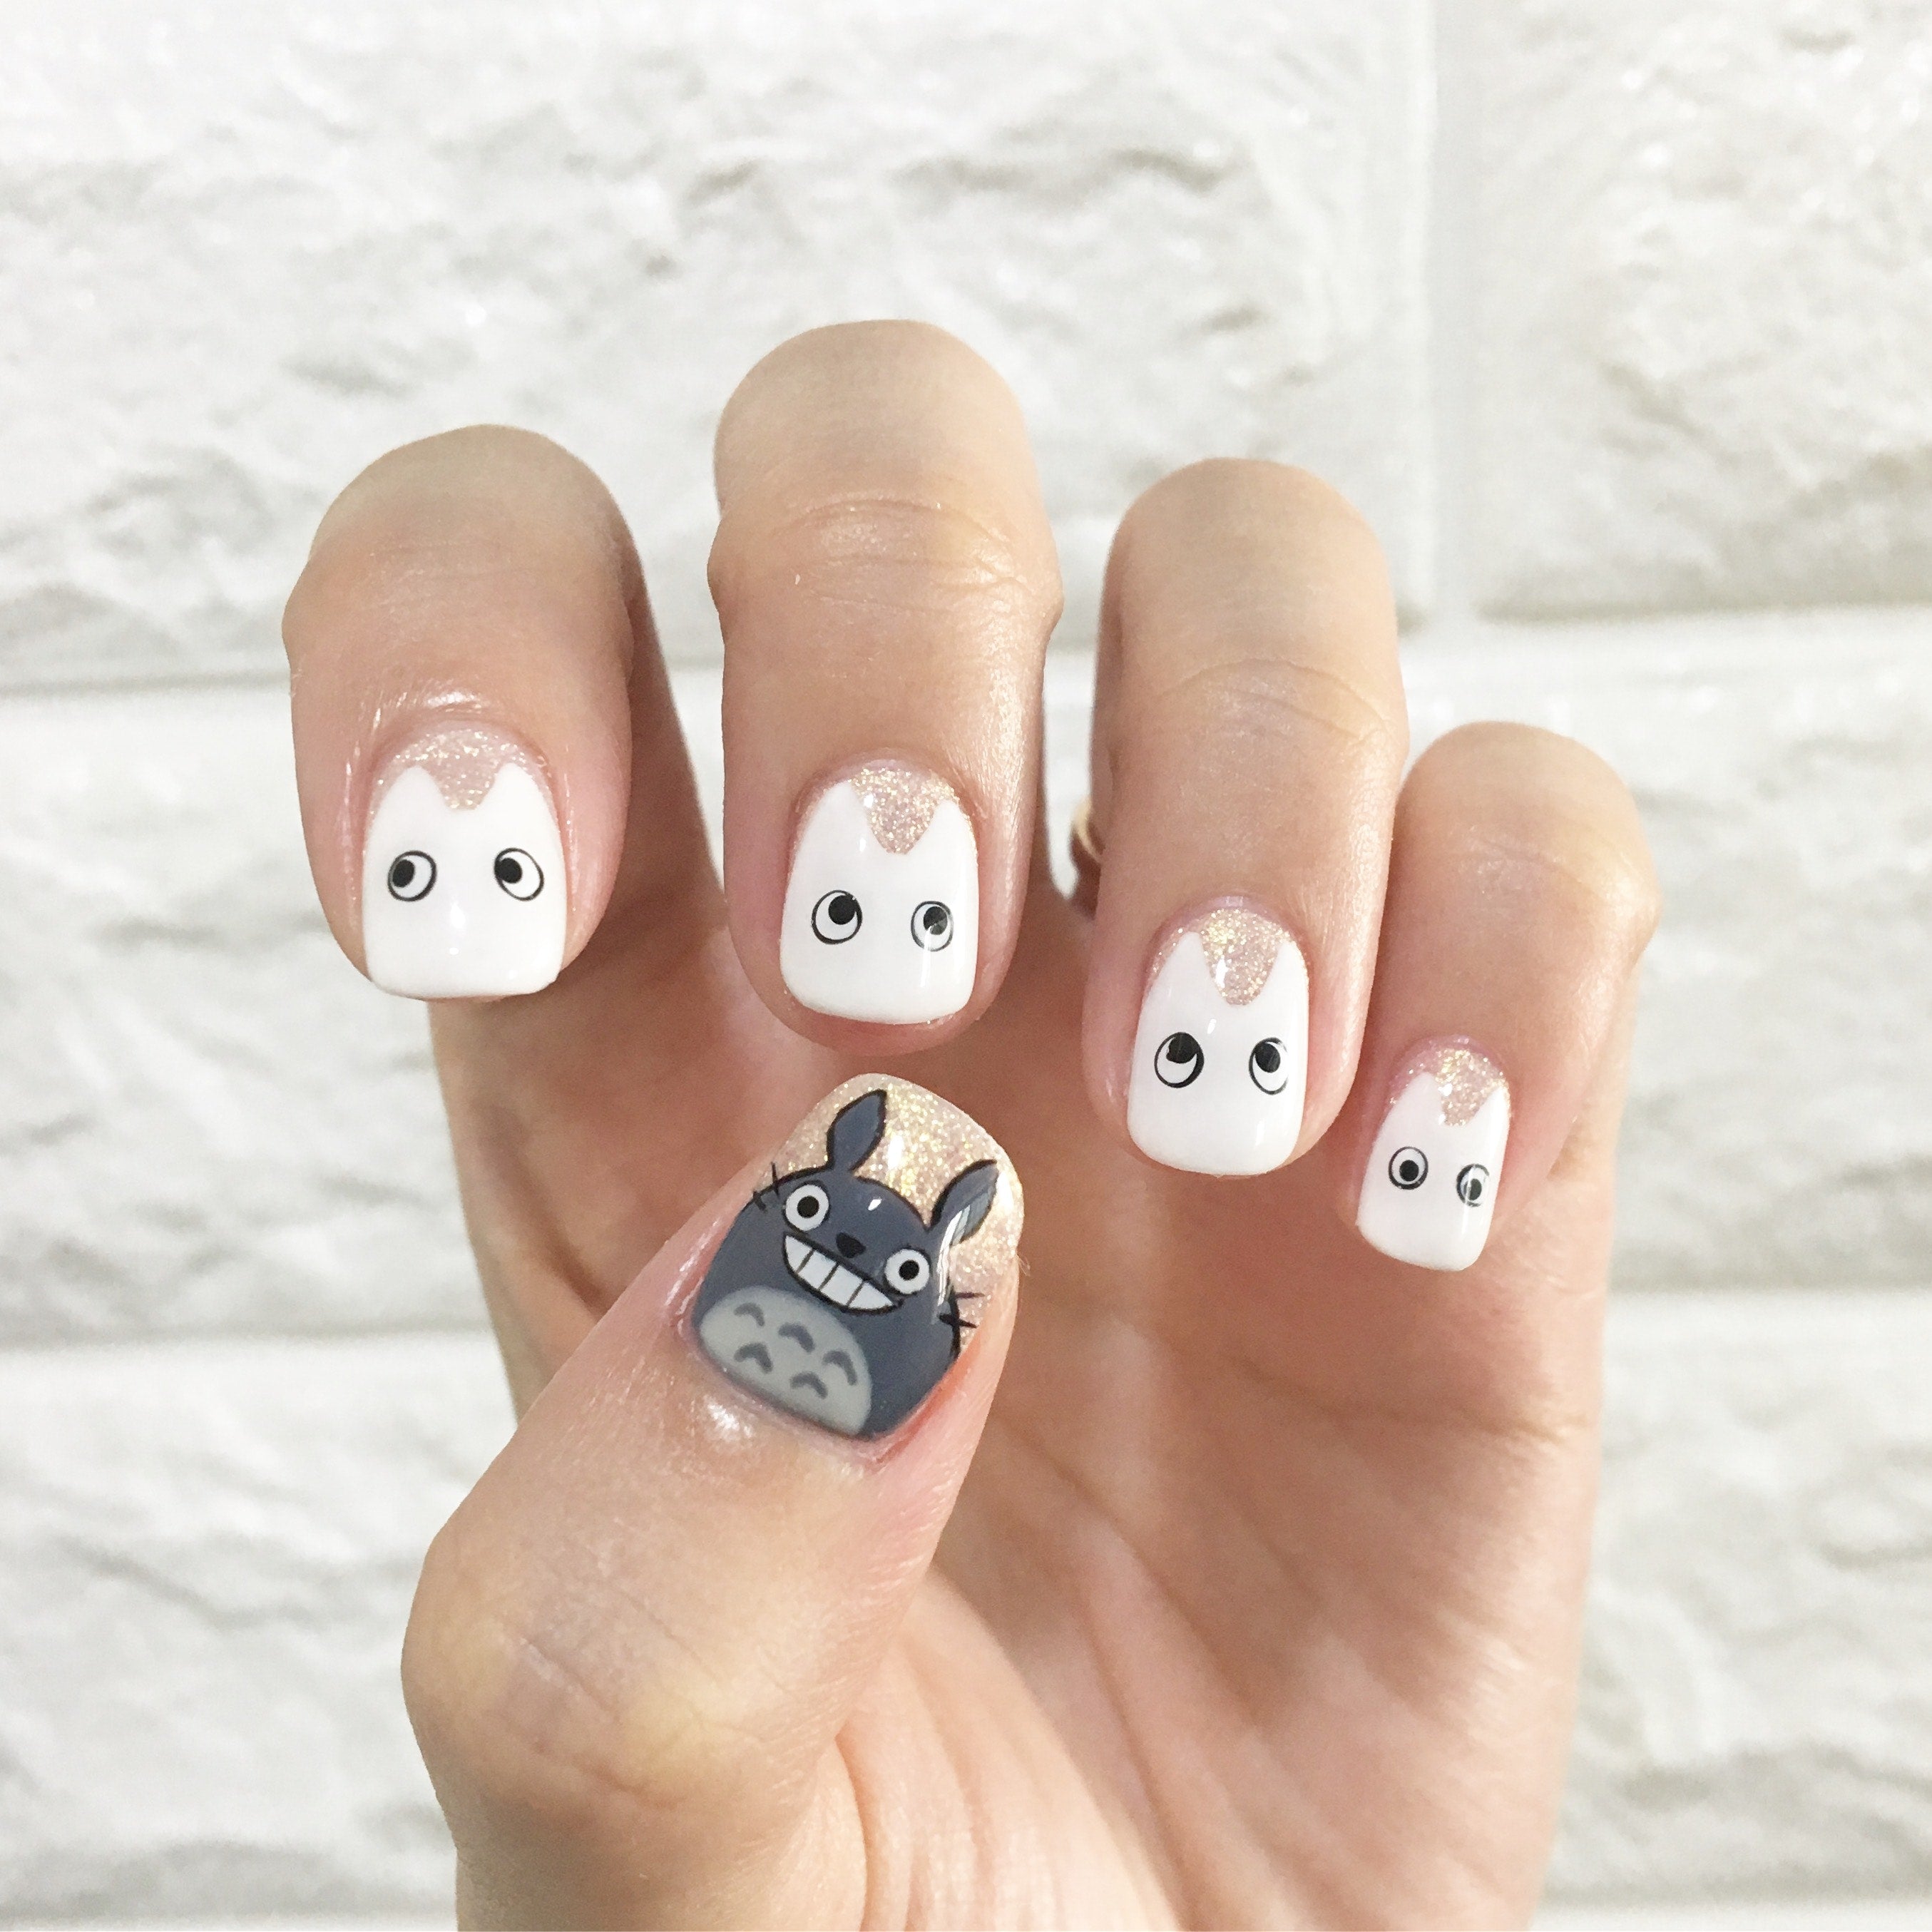
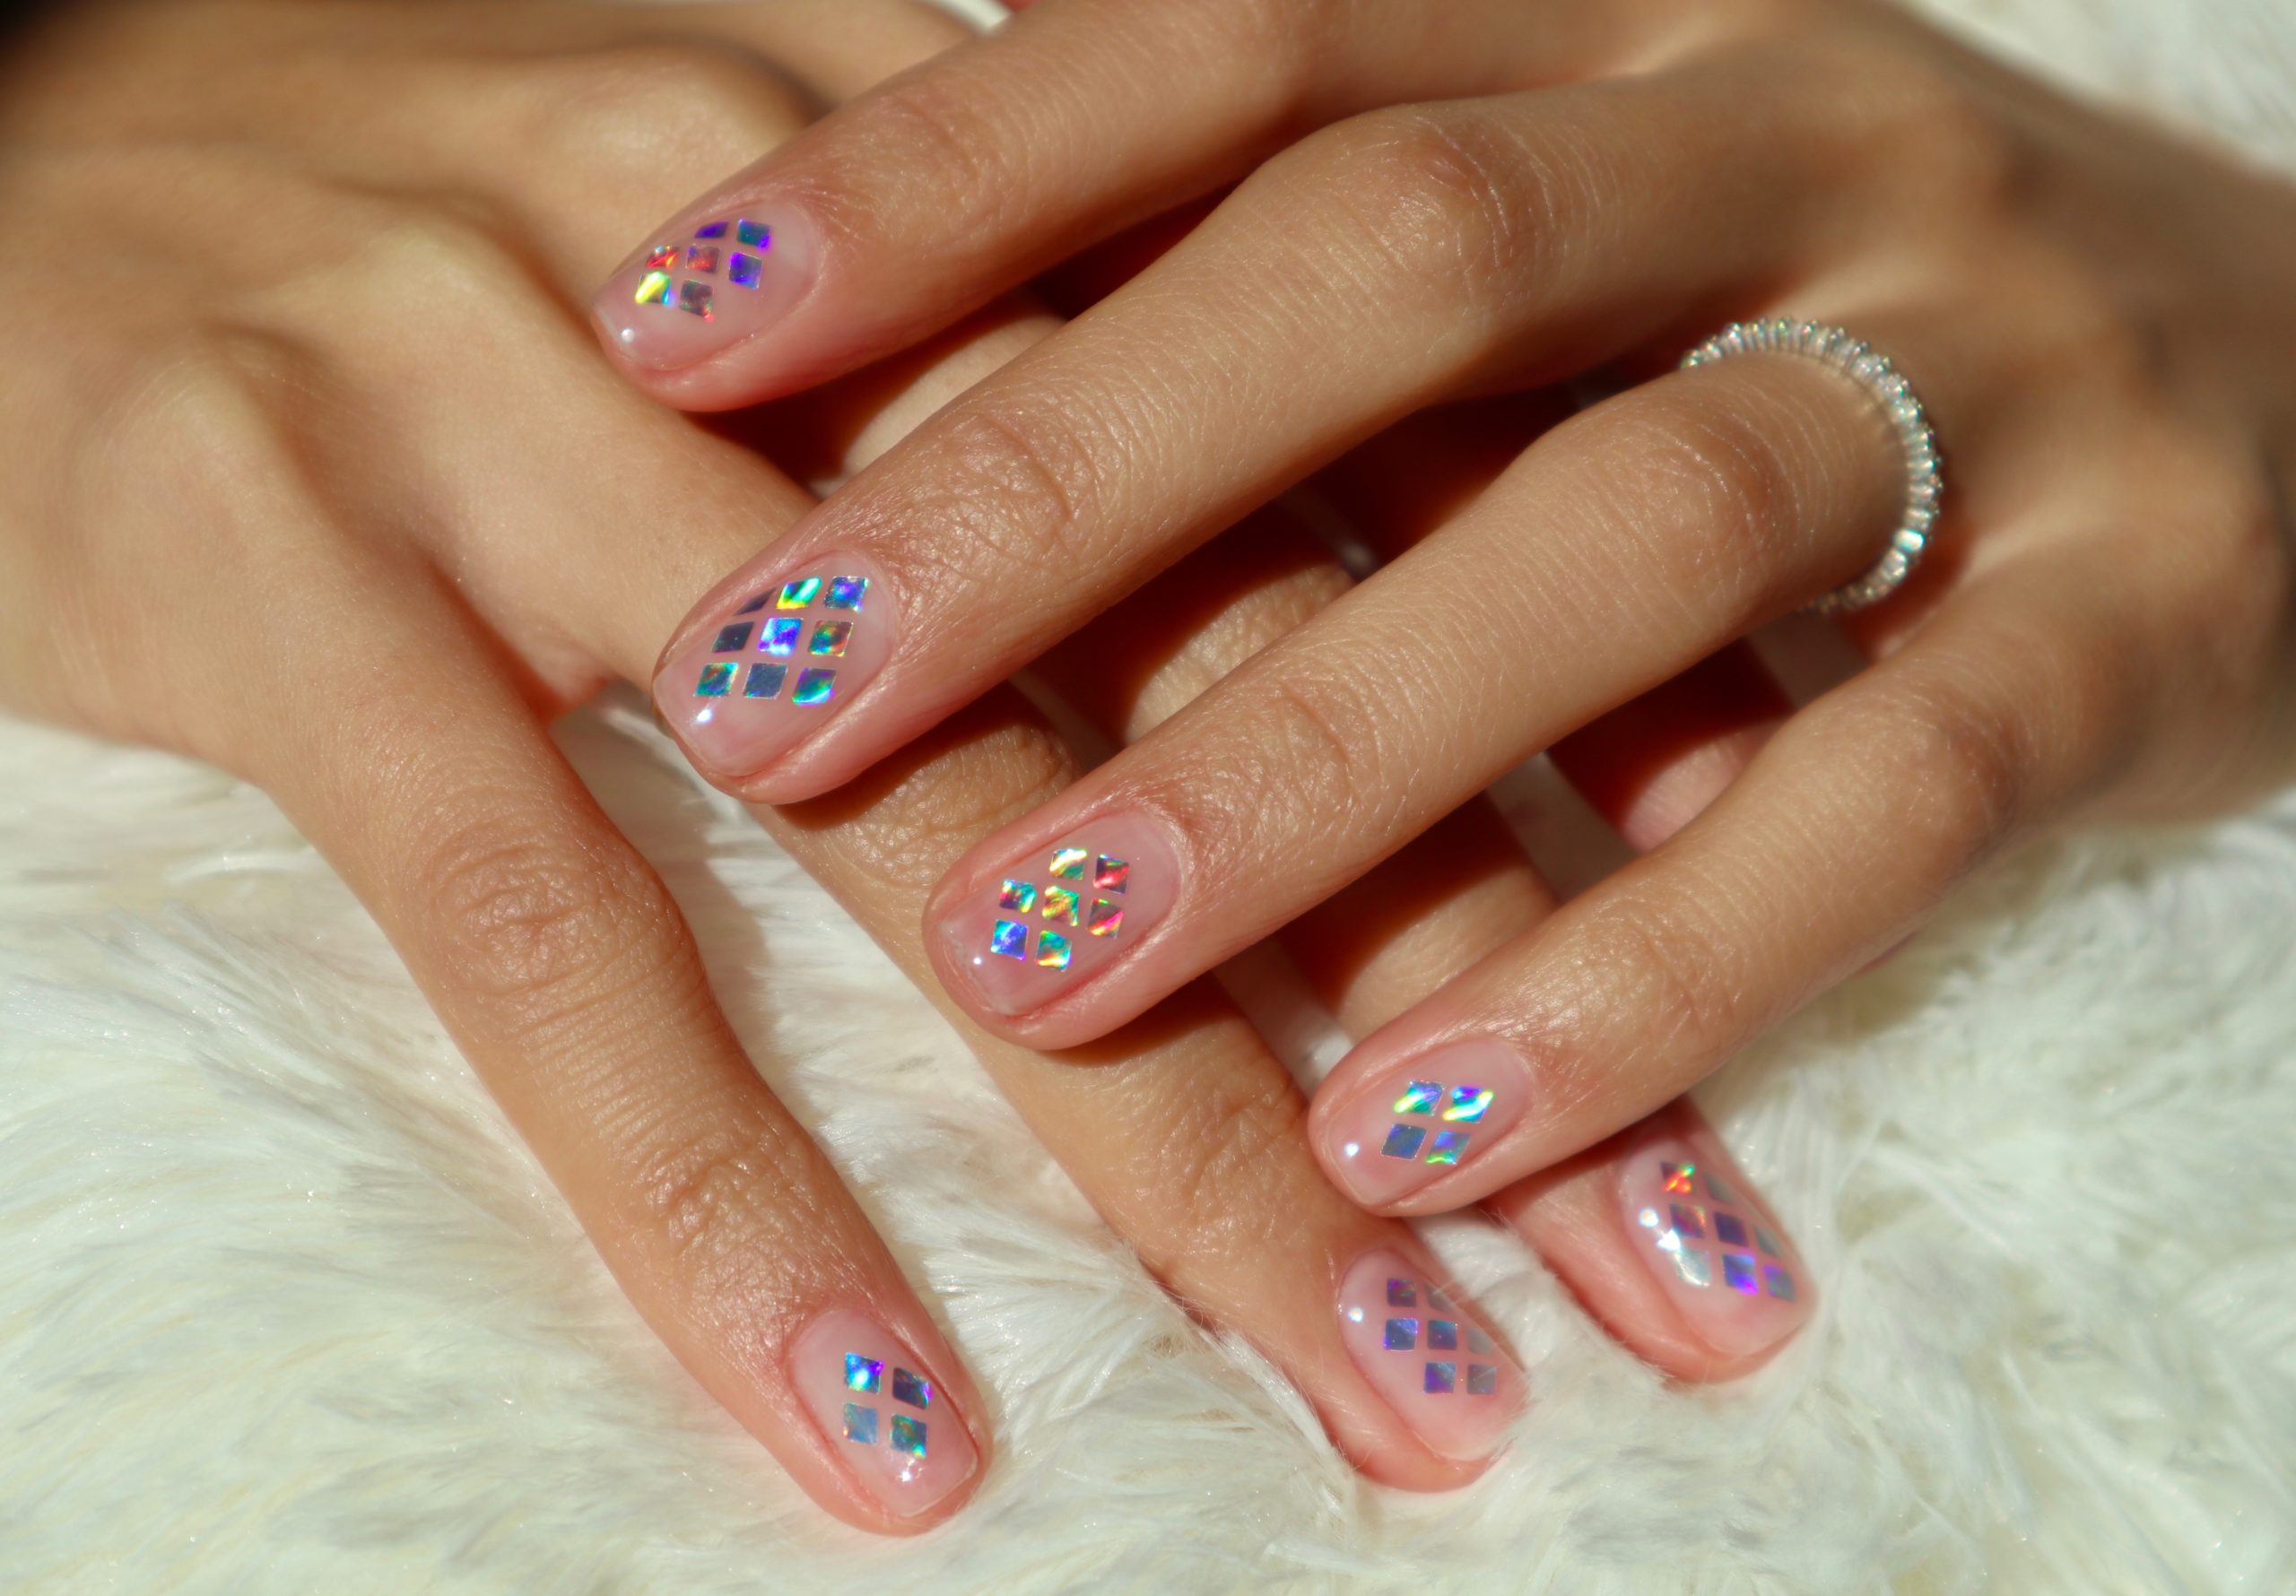
Types of Nail Tattoos and Decals (Know Before You Apply)

BUY PRODUCT HERE
Before you learn how to use nail tattoos, it’s important to understand that not all nail tattoos work the same way. Many application problems happen simply because someone uses the wrong technique for the wrong type. Once you know what you’re working with, everything becomes easier.
There are two main types you’ll see most often: water-slide nail tattoos and nail tattoo stickers. They may look similar on the sheet, but they behave very differently on your nails.

BUY PRODUCT HERE
Water-Slide Nail Tattoos
Water-slide nail tattoos are the most popular choice for detailed, professional-looking nail art. They’re also the ones most people mean when they say “nail tattoos.”
How They Activate
These tattoos sit on a paper backing. When you place them in water for about 5–15 seconds, the printed design loosens from the paper. You don’t soak them for long—just enough so the design can slide freely. Once loose, you gently slide the design onto your nail.
The magic happens because the design itself is extremely thin, almost like a second skin. That’s why, once sealed, it looks painted on rather than stuck on.

BUY PRODUCT HERE
When to Choose Them
Water-slide nail tattoos are ideal when:
- You want intricate details (flowers, faces, fine lines, text)
- You care about a flat, seamless finish
- You’re using gel polish or dip powder
- You plan to seal properly with top coat
They take slightly more patience than stickers, but the payoff is worth it.
Nail Tattoo Stickers

BUY PRODUCT HERE
Nail tattoo stickers are exactly what they sound like: peel-and-stick designs with adhesive on the back.
Peel-and-Stick Basics
You remove the sticker from the sheet, place it directly on the nail, press it down, and seal it. No water required. Because of this, many beginners feel more comfortable starting here.

BUY PRODUCT HERE
Pros and Cons
Pros
- Faster application
- No water needed
- Easier to reposition briefly
Cons
- Slightly thicker than water-slide tattoos
- More prone to raised edges
- Can look “sticker-like” if not sealed well
Stickers are great for simple designs or accent nails, but they need careful top-coating to blend into the nail.

BUY PRODUCT HERE
Nail Art Tattoos vs Nail Decals (Quick Comparison)
| Feature | Nail Art Tattoos (Water-Slide) | Nail Decals / Stickers |
|---|---|---|
| Durability | High when sealed correctly | Medium |
| Ease of Use | Moderate | Easy |
| Finish Quality | Ultra-flat, painted look | Slightly raised |
| Best For | Detailed, professional designs | Quick, simple designs |
If you’re aiming for salon-style results, water-slide nail tattoos are usually the better option. Stickers shine when speed matters more than perfection.
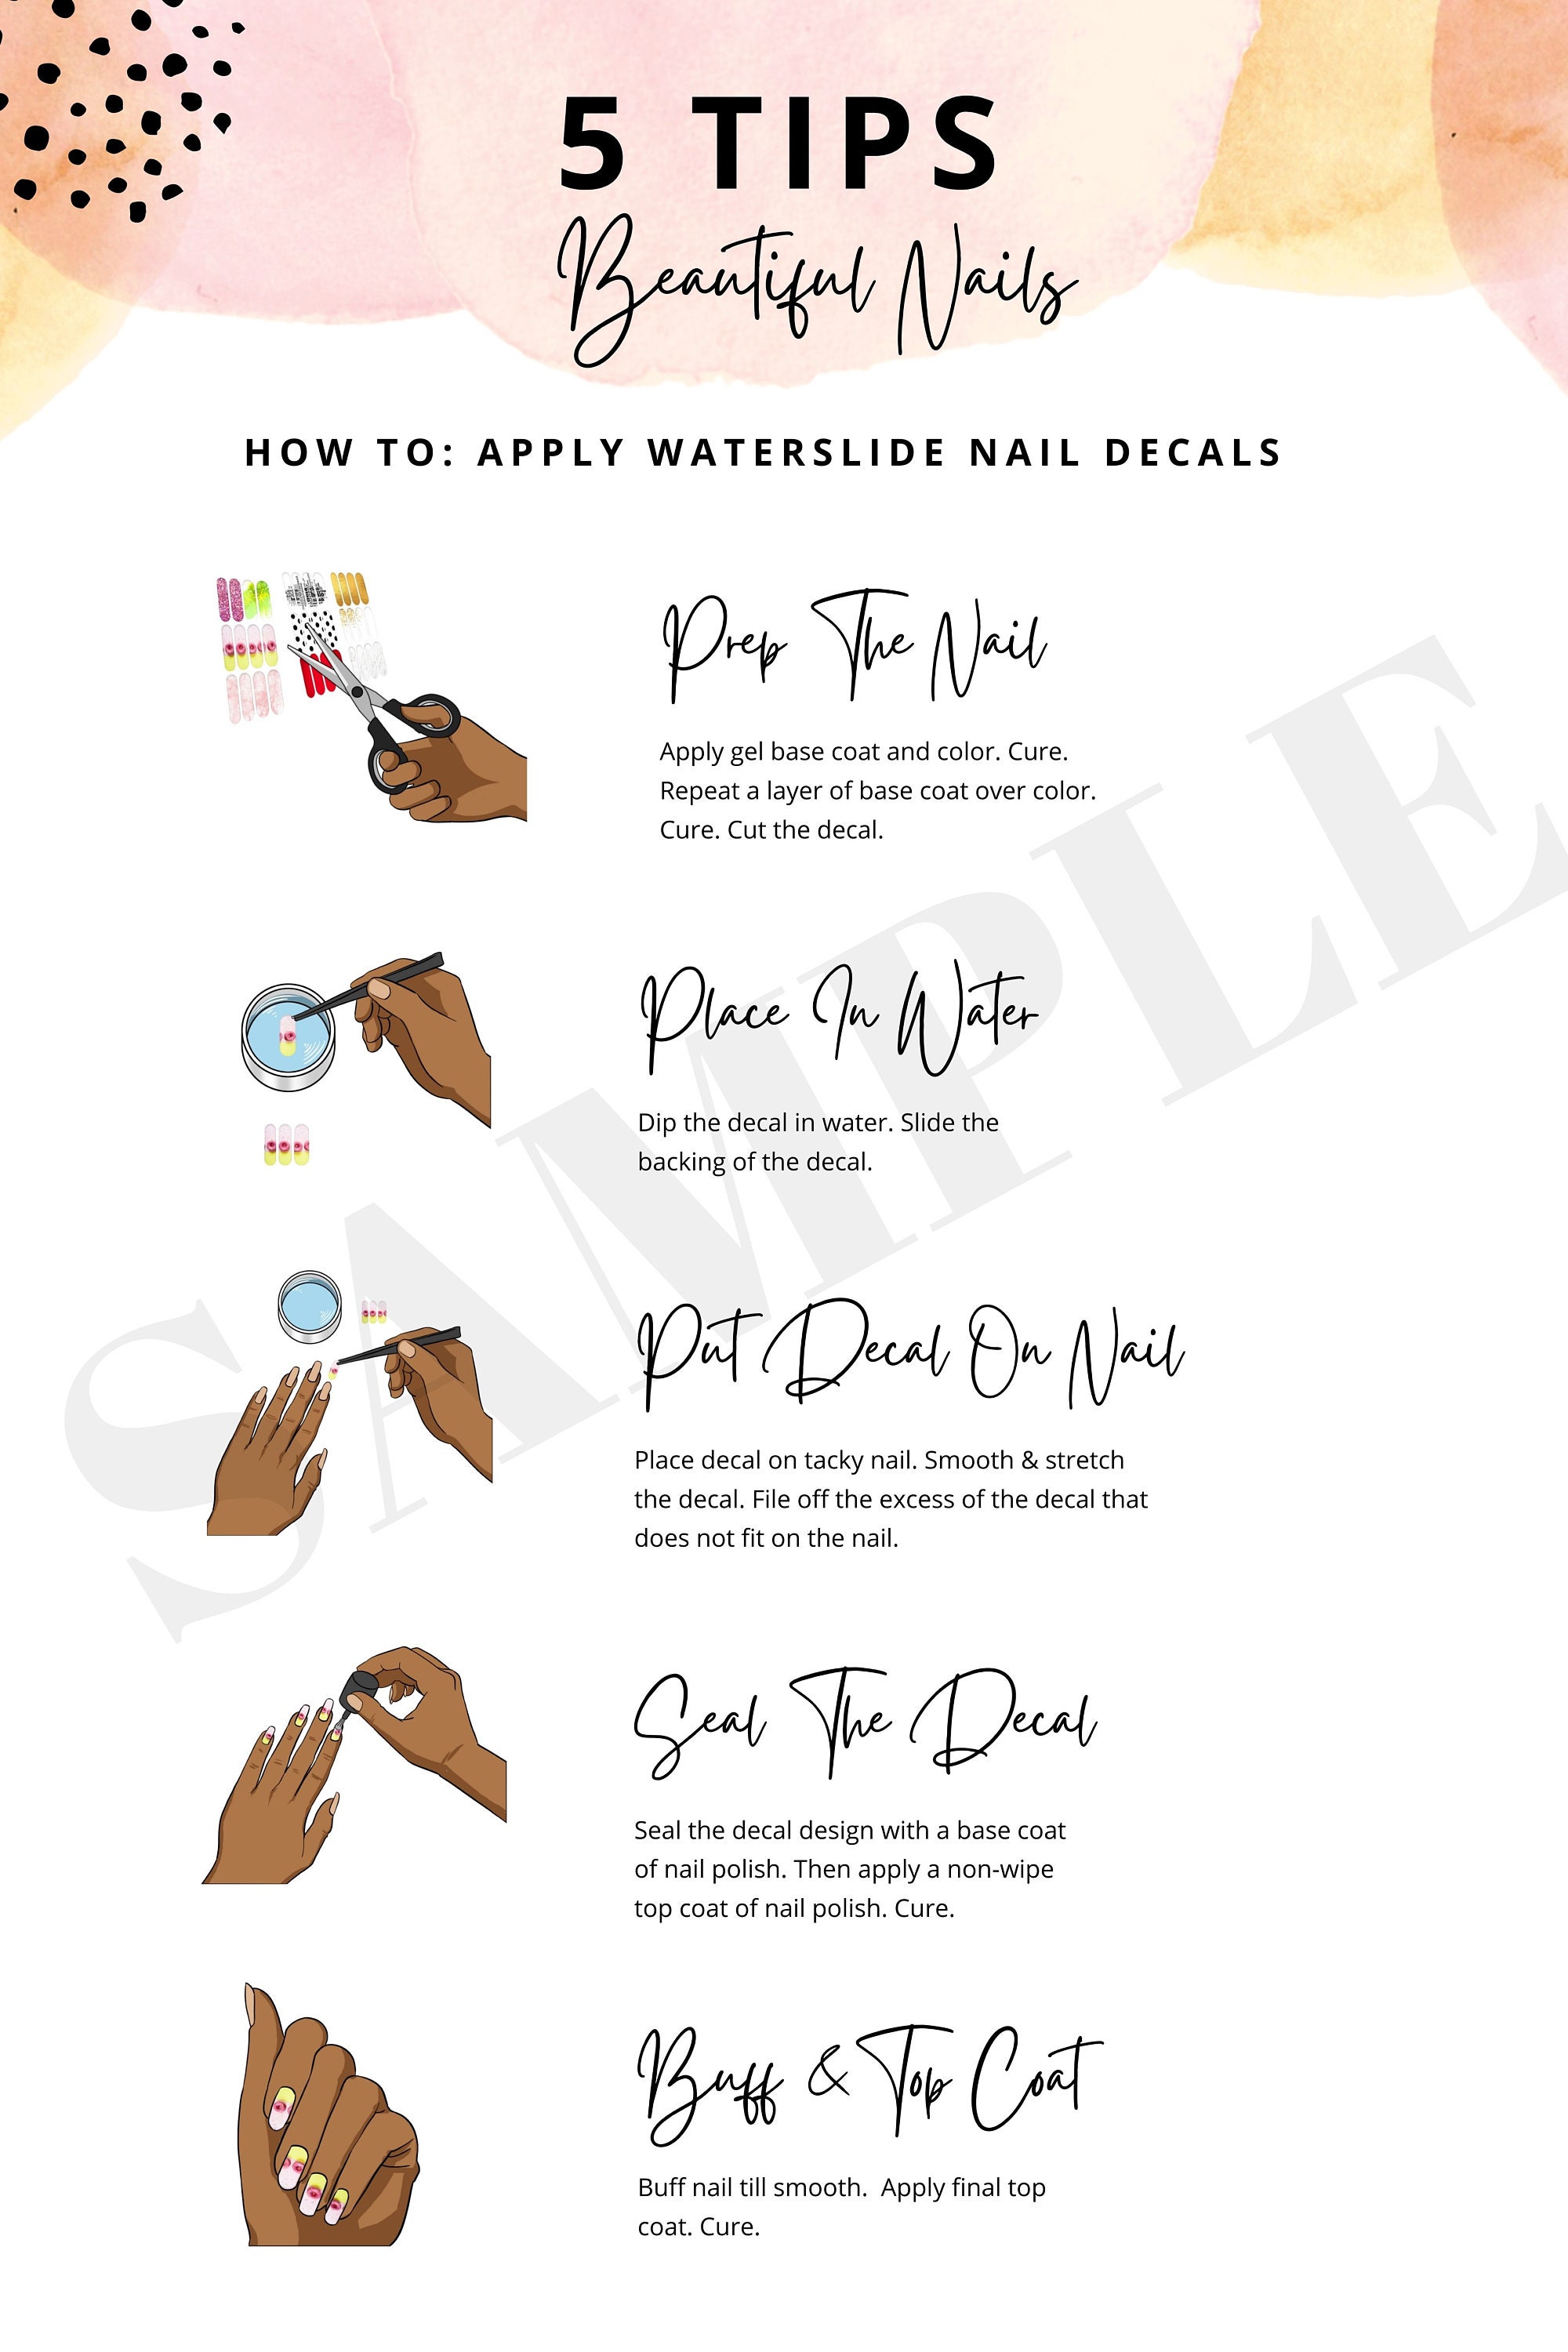
How to Use Nail Tattoos (Step-by-Step)
BUY PRODUCT HERE
This is the core process most people are looking for when they search how to use nail tattoos. Follow these steps closely, and you’ll avoid 90% of common mistakes.
1. Nail Prep Basics
Good nail tattoos start with good prep:
- Clean nails (no oils or lotion)
- Shape and lightly buff
- Apply base coat and color polish
Let your polish dry completely. If it’s even slightly tacky, the tattoo can tear or wrinkle.
BUY PRODUCT HERE
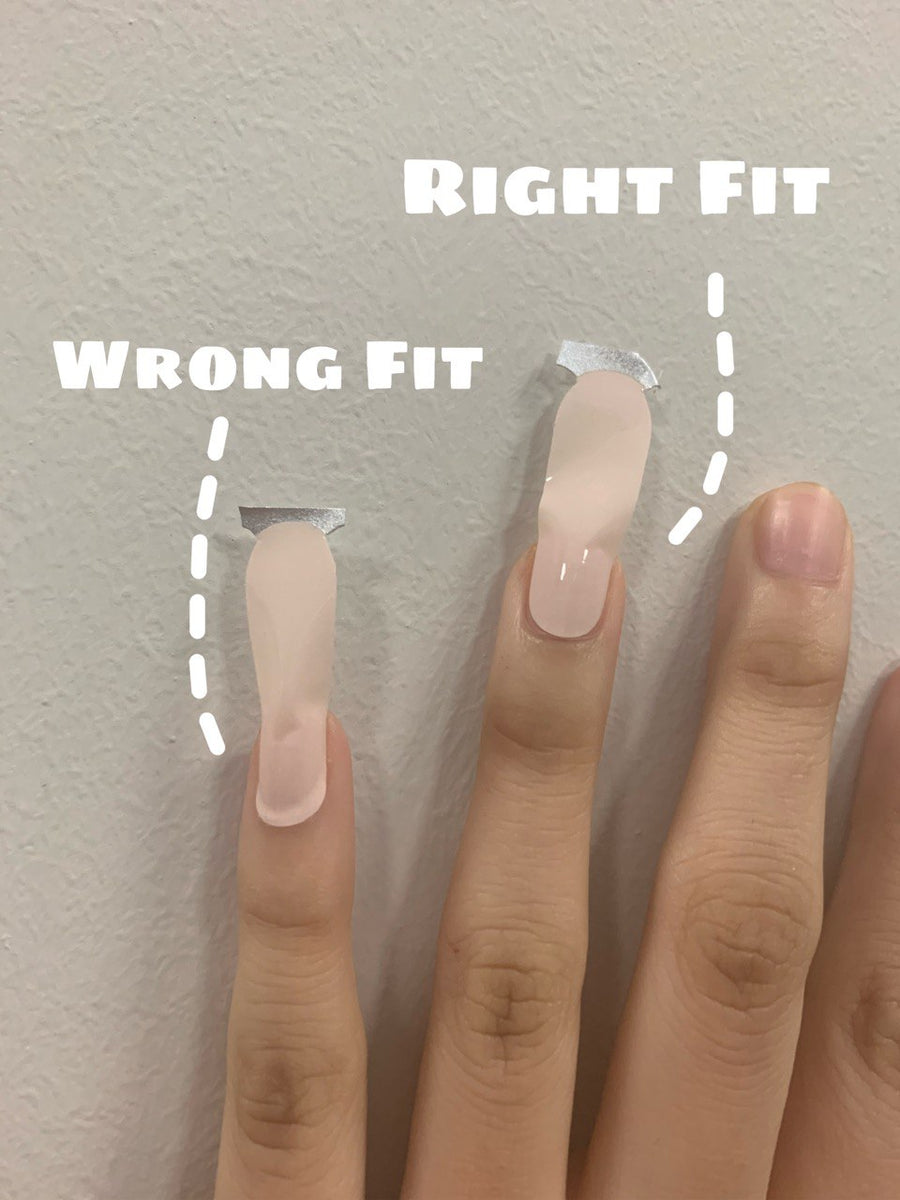
2. Choosing the Right Size
Always choose a tattoo slightly smaller than your nail, especially near the cuticle. You can stretch or trim gently, but oversized designs are harder to control.
3. Placement Tips
- Dip the tattoo in water for a few seconds
- Slide it halfway off the backing
- Position the exposed edge on your nail
- Gently slide the rest into place
Use tweezers or a silicone tool—not your fingers—to avoid tearing.
BUY PRODUCT HERE
4. Sealing Correctly
This step matters more than anything else:
- Let the tattoo dry for at least 1–2 minutes
- Apply a thin floating layer of top coat (don’t press)
- Seal the edges carefully
A second top coat adds durability once the first is dry.
5. Drying Time Explained
Even though it looks done, give your nails 15–20 minutes before touching anything. This prevents smudging and lifting.
How to Apply Nail Tattoo Stickers
BUY PRODUCT HERE
If you’re specifically learning how to use nail tattoo stickers, the approach is simpler—but precision still matters.
When Stickers Work Best
Stickers are ideal for:
- Short nails
- Accent designs
- Quick manicures
They work best on smooth, glossy polish.

BUY PRODUCT HERE
Avoiding Bubbles and Wrinkles
- Place the center of the sticker first
- Smooth outward toward the edges
- Use a soft tool, not your fingernail
If a wrinkle forms, gently lift and re-place immediately—don’t force it flat.
My Placement Trick for Clean Edges
Apply the sticker slightly away from the cuticle, then push it down gently with a silicone tool. This prevents lifting once sealed.
Always finish with two thin top coats, sealing the free edge of the nail.
How to Apply Nail Tattoos Over Regular Nail Polish

BUY PRODUCT HERE
Applying nail tattoos over regular polish is the most beginner-friendly option—and also the easiest to mess up if you rush.
Best Polish Finish (Gloss vs Matte)
- Glossy polish: Best for beginners; decals slide easily
- Matte polish: Works, but tattoos grip faster and need precision
If you’re new, always start glossy.
BUY PRODUCT HERE
Dry-Time Importance
Your polish should be:
- Dry to the touch
- No dents when pressed lightly
- At least 20–30 minutes old
Soft polish causes tearing and bubbling.
Top Coat Compatibility
Most standard clear top coats work well. Avoid quick-dry formulas for the first sealing layer, as they can shrink the tattoo.
Once sealed, you can use your favorite top coat for shine and protection.
How to Use Nail Decals with Gel Polish
BUY PRODUCT HERE
Learning how to use nail decals with gel polish is a game changer. Gel manicures last longer, look glossier, and protect nail art better—but only if decals are placed at the right moment in the gel process. Most failures happen because decals are added too early, too late, or sealed incorrectly.
Here’s the simple, reliable method that actually works.

BUY PRODUCT HERE
Where Nail Decals Go in the Gel Process
This is the golden rule:
Nail decals always go after your gel color is fully cured—but before your final top coat.
A correct gel sequence looks like this:
- Prep nails (clean, buff, dehydrated)
- Gel base coat → cure
- Gel color coat(s) → cure each layer fully
- Apply nail decals
- Gel top coat → cure
- Optional second top coat → cure
Never place decals between base coat and color. They will wrinkle, shift, or disappear under pigment.
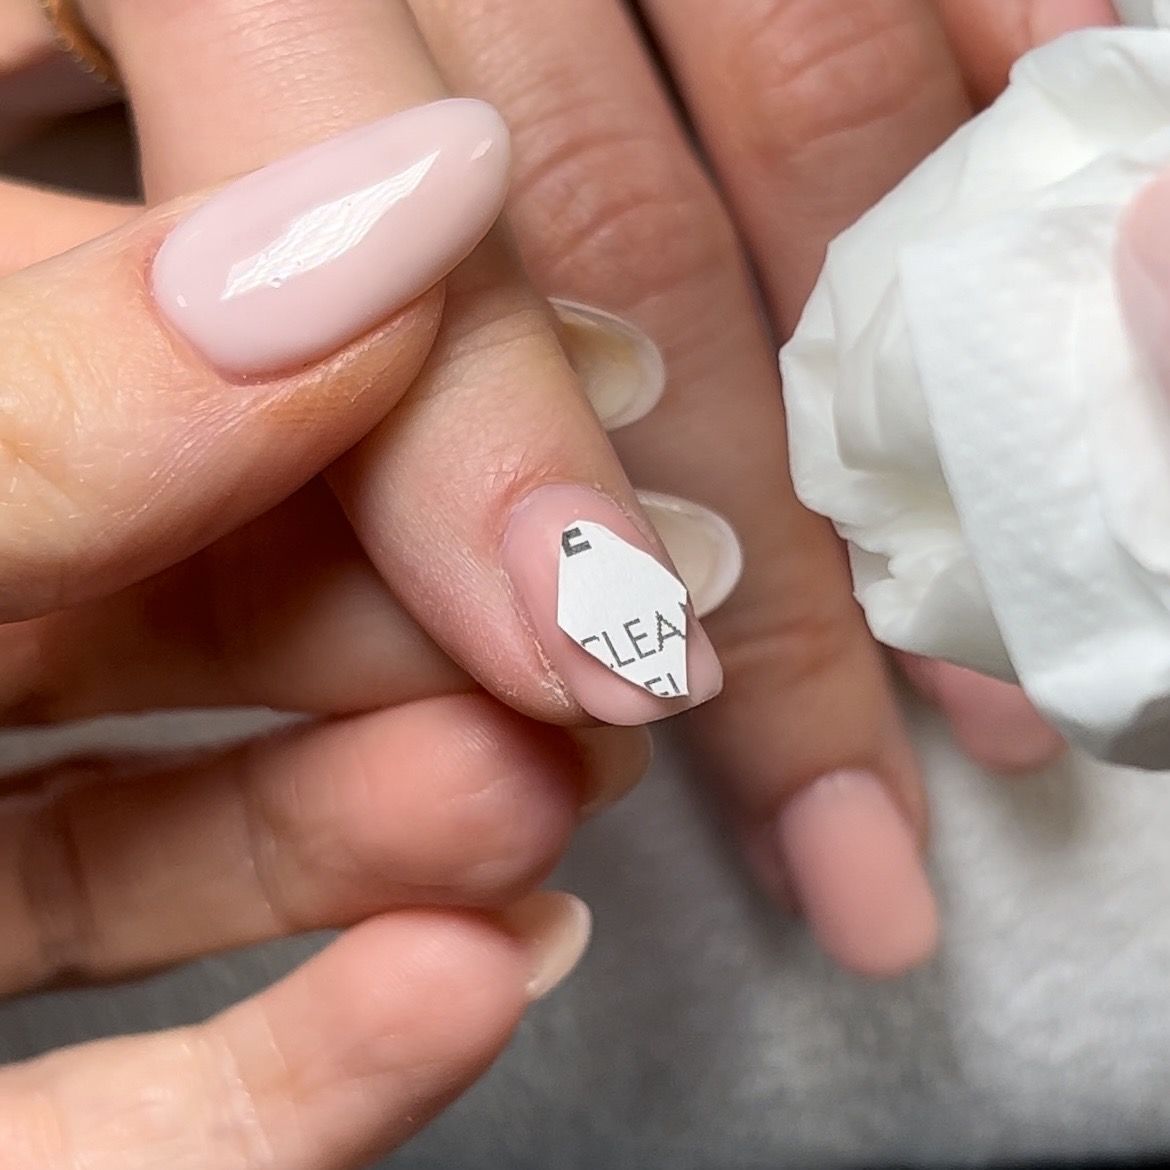
For water-slide nail tattoos, lightly remove surface shine from the cured color with a lint-free wipe and alcohol. This gives the decal something to grip without damaging the gel.

BUY PRODUCT HERE
Curing Mistakes to Avoid
Gel polish makes things easier—but also less forgiving. Avoid these common curing errors:
- Placing decals on uncured gel:
They will slide uncontrollably and tear. - Over-curing before placement:
Extremely slick gel can cause decals to drift. A light wipe helps. - Curing too soon after placement:
Let the decal air-dry for at least 60–90 seconds before sealing. - Pressing during top coat:
Floating the top coat is essential. Pressure traps air and creates wrinkles.
BUY PRODUCT HERE
My Gel-Safe Sealing Method (This Changes Everything)
This sealing method prevents lifting and shrinking—especially with detailed designs:
- Apply a thin floating layer of gel top coat
- Do not touch the brush to the decal
- Cure fully
- Apply a second, normal top coat
- Cure again
If the decal edge is thick, lightly seal around it with a fine liner brush before curing. This locks everything in without flooding the design.
When done correctly, gel-sealed nail decals can last 2+ weeks without peeling.
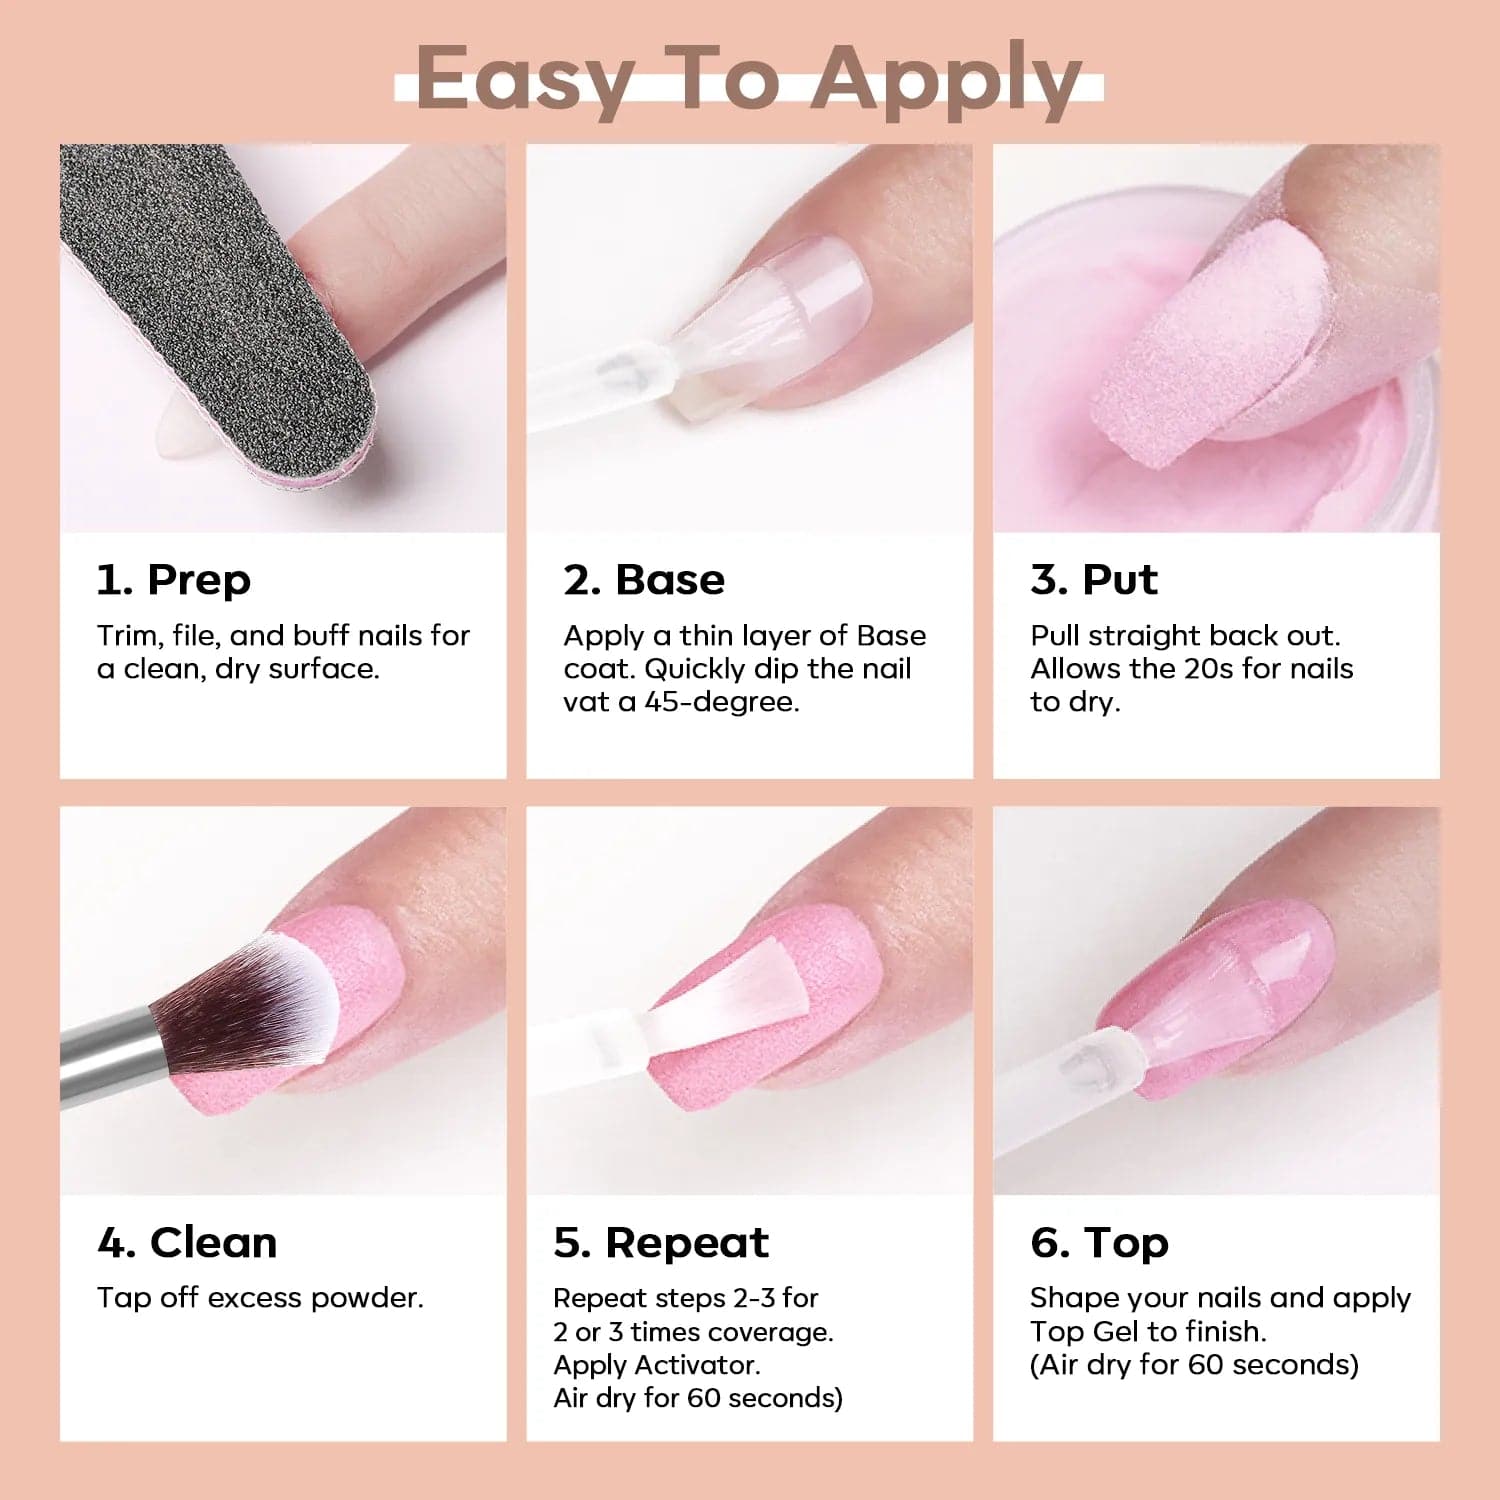
How to Use Nail Decals with Dip Powder
BUY PRODUCT HERE
Dip powder nails are durable, but they intimidate people when it comes to nail art. The truth? Dip powder and nail decals work beautifully together—as long as you place them at the right stage.
When to Apply Decals in Dip Steps
The safest placement point is after your dip layers are complete and smooth, but before your final top coat.
A reliable dip sequence:
- Prep nails
- Base + dip layers (as usual)
- Activate
- Buff and smooth thoroughly
- Apply nail decals
- Seal with top coat
Never apply decals directly onto powder before activating. The surface is too porous and will tear the design.
Smooth Finish Tips
Dip powder surfaces must be flat—any texture will show through thin decals.
Before applying decals:
- Buff evenly (no ridges)
- Remove all dust
- Apply a thin clear layer if needed for smoothness
If the surface feels rough to the touch, it’s not ready yet.
BUY PRODUCT HERE
Preventing Lifting with Dip Powder
Dip powder is strong, but edges can lift if not sealed properly.
To prevent this:
- Keep decals away from cuticles and sidewalls
- Seal edges first with a light top coat
- Apply a full top coat once edges are locked
This two-step sealing method prevents water from sneaking underneath the design.
Common Mistakes That Ruin Nail Tattoos
BUY PRODUCT HERE
Even people who know how to apply nail decals still run into issues. Almost every problem comes back to timing, pressure, or sealing.
Here are the mistakes that cause 90% of failures—and how to avoid them.
Applying on Wet Polish
If the base polish isn’t fully dry or cured, decals stretch, tear, or sink. Always wait longer than you think you need to.

BUY PRODUCT HERE
Skipping Top Coat
Unsealed decals won’t last. Even “self-adhesive” designs need protection to survive daily wear.
Stretching the Decal
Pulling to make a design fit weakens it. Trim instead. A relaxed decal always looks better than a stretched one.
Using Thick Top Coats Too Fast
Heavy top coats applied quickly can shrink decals, create bubbles, or wrinkle details. Thin, controlled layers win every time.
How to Make Nail Tattoos Last Longer
BUY PRODUCT HERE
Learning how to use nail tattoos is only half the story. The real win is making them last. When nail tattoos peel early, it’s rarely the product—it’s usually small habits before and after application that make the difference between a 2-day manicure and one that lasts over a week (or longer with gel).
Here’s what actually matters.
Prep Habits That Matter More Than You Think
Longevity starts before the tattoo ever touches your nail.
The most important prep habits:
- Oil-free nails: Wash hands and wipe nails with alcohol before polish
- Smooth surface: Light buffing removes ridges that trap air
- Dry polish: Decals only last on fully dry or cured layers
Cuticle oil is the biggest silent enemy. Even a tiny amount left on the nail plate can break adhesion later.
If your decals lift quickly, ask yourself one thing first: Were my nails truly clean and dry?

BUY PRODUCT HERE
Best Top Coats for Nail Tattoos
Top coat choice and technique matter more than brand hype.
What works best:
- Thin, flexible top coats for the first sealing layer
- Gel top coats for maximum durability
- Two-layer sealing instead of one thick layer
The key is the first coat. Float it on gently without pressure. This locks the decal in place. Once that layer is dry or cured, you can apply a stronger top coat confidently.
Avoid fast-dry top coats for the first layer—they can shrink decals and cause cracking at the edges.

BUY PRODUCT HERE
Daily Habits That Protect Nail Art
What you do after your manicure matters just as much as how you apply it.
To protect nail tattoos:
- Wear gloves when cleaning
- Avoid hot water for long periods
- Reapply cuticle oil daily (around the nail, not under it)
- Don’t use nails as tools
Even perfect nail art won’t survive rough handling. Gentle habits dramatically extend wear time.
Realistic Wear Expectations (Honest Truth)
Here’s what most people can expect:
- Regular polish + decals: 4–7 days
- Gel polish + decals: 10–14 days
- Dip powder + decals: 14+ days
If you see lifting after a few days, that’s normal wear—not failure. Nail tattoos are durable, not indestructible.
When Nail Tattoos Are Better Than Hand-Painted Nail Art
BUY PRODUCT HERE
Hand-painted nail art looks beautiful—but it isn’t always the smartest choice. In many situations, nail tattoos are simply the better tool for the job.
Time Comparison (This One Isn’t Even Close)
Hand-painted nail art can take:
- 30–60 minutes for simple designs
- Hours for detailed work
Nail tattoos:
- 5–10 minutes for full nail art
- No drying time between details
If you’re short on time, tattoos win every time.
BUY PRODUCT HERE
Cost Comparison
Professional nail art costs add up quickly:
- Salon nail art: $$$ per nail or per design
- Touch-ups often cost extra
Nail tattoos:
- One sheet = multiple manicures
- No professional tools needed
For at-home users, the cost difference is huge.
Skill Level Differences
Hand-painted nail art requires:
- Steady hands
- Brush control
- Practice and patience
Nail tattoos require:
- Basic placement
- Light pressure
- Patience—not talent
That’s why beginners often get better results with tattoos than paint.

BUY PRODUCT HERE
Who Should Choose Nail Tattoos Instead
Nail tattoos are the better choice if you:
- Want detailed designs without stress
- Do your nails at home
- Prefer predictable results
- Don’t enjoy freehand art
Hand-painted art still has its place—but nail tattoos make high-level nail design accessible to everyone.
FAQs – How to Use Nail Tattoos
These are the most common questions people ask when learning how to use nail tattoos, written clearly and directly for voice search, featured snippets, and quick answers.
How do you use nail tattoos step by step?
To use nail tattoos step by step, start by prepping clean, dry nails and applying your base color. Let the polish fully dry or cure. Cut out the tattoo, soak it briefly in water, slide the design onto the nail, and position it gently. Allow it to dry for one to two minutes, then seal with a thin floating layer of top coat. Once dry, apply a second top coat for durability.
How long do nail tattoos last?
Nail tattoos typically last 4–7 days with regular nail polish, 10–14 days with gel polish, and up to two weeks or more with dip powder when sealed correctly. Longevity depends on nail prep, sealing technique, and daily habits like avoiding excessive water and using gloves for cleaning.
Can you use nail tattoos with gel polish?
Yes, nail tattoos work very well with gel polish. Apply them after your gel color is fully cured and before your final gel top coat. Let the tattoo dry completely before sealing, and always use a thin floating layer of gel top coat first to prevent wrinkling or shrinking.
Do nail tattoos work with dip powder?
Nail tattoos work with dip powder when applied at the right stage. They should be placed after dipping, activating, and buffing, once the surface is smooth. Never apply decals directly onto raw dip powder. Seal carefully to prevent lifting at the edges.
Why do my nail decals peel off?
Nail decals usually peel off because of one of these issues: applying them on wet polish, skipping proper top coat sealing, stretching the decal during placement, or exposing nails to water too soon. Clean prep, patience, and thin sealing layers solve most peeling problems.
Should nail tattoos go under or over top coat?
Nail tattoos should always go under top coat. They are placed on dry or cured polish, then sealed with one or two layers of top coat. Never apply nail tattoos over top coat, as they won’t adhere properly.
Are nail tattoos beginner-friendly?
Yes, nail tattoos are one of the most beginner-friendly forms of nail art. They don’t require artistic skill or special tools—just patience and proper placement. Many beginners get better results with nail tattoos than with hand-painted designs.
Final Thoughts
If you’re new to nail art, it’s normal to feel nervous the first time you try something new. But the truth is, how to use nail tattoos is far simpler than it looks. They’re designed for real people—busy schedules, shaky hands, and all.
You don’t need perfection. You need practice.
The first set might not be flawless. That’s okay. Each application teaches you something: how wet the decal should be, how light your top coat needs to float, how much drying time really matters. Those small lessons add up fast.
Nail tattoos are meant to be fun, not stressful. They’re a creative shortcut that lets you experiment with styles you’d never attempt freehand. Florals, minimal lines, bold graphics—try them all. Mix designs. Use accent nails. Play.
The more you practice, the easier it becomes. And before you know it, you’ll reach for nail tattoos not because they’re “easy,” but because they work—and they make your nails feel like you.
If you’ve ever wanted beautiful nail art without pressure, this is your sign to start.
Amazon and the Amazon logo are trademarks of Amazon.com, Inc, or its affiliates.