As an Amazon Associate I earn from qualifying purchases.
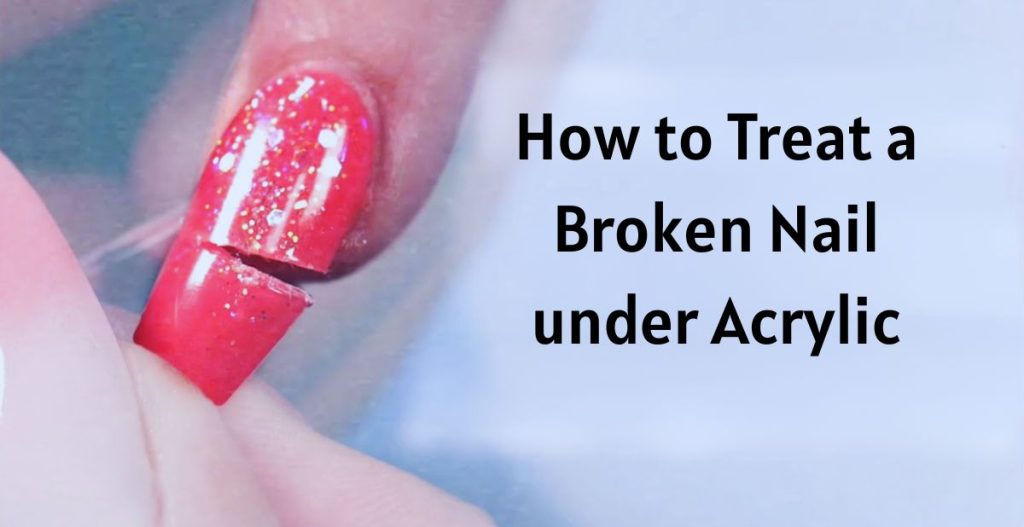
You’ve just gotten a fresh set of acrylic nails, and everything feels perfect—until you notice a broken nail lurking underneath. It’s frustrating, isn’t it?
That unexpected snag can ruin your day and your flawless manicure. But don’t worry; you’re not alone in facing this beauty dilemma. Understanding how to treat a broken nail under acrylic can save you time, money, and a whole lot of stress.
Imagine walking confidently with nails that look salon-fresh, without having to rush back to your nail technician. This guide is designed to give you practical, easy-to-follow steps to fix that broken nail safely at home. With the right techniques, you can restore your manicure and maintain that polished look you love. Let’s dive into the details that will empower you to handle this nail emergency like a pro.
Recognizing A Broken Nail
Acrylic nails can enhance your look. But a broken nail under acrylic can be distressing. Recognizing the signs early helps prevent further damage. Knowing the causes can help avoid future breakages.
Signs Of Damage
A broken nail under acrylic may show visible cracks. You might notice discoloration around the nail edge. Pain or tenderness is a significant indicator. Swelling can occur near the affected area. Loose acrylic can be another sign.
Causes Of Nail Breakage
Excessive force can damage nails under acrylic. Improper application weakens the nail structure. Frequent exposure to water may lead to breakage. Acrylic nails that are too long are more prone to cracks. Using nails as tools can cause them to break.
Immediate Steps To Take
Fixing a broken nail under acrylic needs careful attention. First, gently file down sharp edges to prevent further damage. Next, apply a small amount of nail glue to the broken area. Finally, secure with a nail wrap for added protection.
Accidents happen, and dealing with a broken nail under acrylic can be frustrating. But knowing the immediate steps to take can prevent further damage and pain. It’s all about acting quickly and carefully.
Cleaning The Area
The first thing you should do is clean the affected area. Use warm water and mild soap to gently wash your hand. This helps remove any dirt or bacteria that could cause infection. Pat your hand dry with a clean towel. Avoid rubbing as this could worsen the break. Consider using an antiseptic wipe for added protection.
Temporary Fixes
Once the area is clean, look for a quick fix to hold the nail together. You can use a small piece of a tea bag or tissue paper. Cut it to the size of the break and apply it over the damaged area with clear nail polish. Let the polish dry completely. This creates a temporary patch that holds the nail together. It may not look perfect, but it stabilizes the nail until you can seek professional help. Have you ever tried using a small piece of tape as a quick fix? It can work in a pinch when you’re out and about. Just make sure to remove it gently to avoid pulling on the broken nail. Taking these immediate steps can make a big difference. You’ll protect your nail and reduce discomfort. Plus, you’re taking control of the situation instead of letting it ruin your day.
Removing Acrylic Safely
Treating a broken nail under acrylic involves careful steps. Gently file the acrylic to reduce pressure on the damaged nail. Clean the area thoroughly to prevent infection, and apply a protective bandage. Patience and proper care are key to healing and maintaining nail health.
When you notice a broken nail under your acrylics, your first thought might be panic. But don’t worry, with the right approach, you can remove the acrylic safely and prevent further damage. Removing acrylics requires patience and care, but the end result is worth the effort. Let’s dive into how you can do this effectively.
Tools Needed
Before starting the process, gather all the necessary tools. You’ll need: – Acetone: Pure acetone is most effective for dissolving acrylic. – Aluminum Foil: Cut into small strips to wrap around your nails. – Cotton Balls: These will soak the acetone and cover your nails. – Nail File: A coarse file is best for gently roughening the acrylic surface. – Cuticle Pusher: This helps in carefully lifting the acrylic. – Bowl: Preferably glass to hold acetone. – Towel: To protect your surface from acetone spills. Having the right tools can make the process smoother and less daunting.
Step-by-step Process
Start by filing the top layer of the acrylic nail. This allows the acetone to penetrate more effectively. Be gentle to avoid damaging your natural nail. Next, soak a cotton ball in acetone and place it over your nail. Secure it with a strip of aluminum foil, wrapping it snugly around your finger. Repeat this for each affected nail. Allow the acetone to work its magic for about 15-20 minutes. During this time, you might feel a slight tingling sensation—this is normal. After soaking, gently remove the foil and cotton. Use the cuticle pusher to carefully lift the softened acrylic off your nail. If it resists, re-wrap the nail and soak again. Once the acrylic is removed, wash your hands thoroughly. Moisturize your nails and cuticles to restore hydration. This step is crucial as acetone can be drying. Have you ever thought about why patience is key here? Rushing can lead to more harm than good. Taking your time ensures that your natural nails remain healthy and intact. By carefully following these steps, you’ll safely remove the acrylic without causing further damage. This way, your nails can start the healing process, ready for your next nail adventure.

Credit: www.weridi.com
Treating The Natural Nail
Repairing a broken nail under acrylic can be challenging. It’s crucial to treat the natural nail carefully. Restoring its health ensures strong nails in the future. Focus on moisturizing and strengthening techniques to aid recovery.
Moisturizing And Nourishing
Dry nails are prone to breakage. Keep them moisturized to prevent further damage. Use natural oils like coconut or olive oil. They penetrate the nail bed and provide deep hydration. Apply these oils daily for best results. Massaging the oil in also improves circulation. This encourages healthy nail growth.
Strengthening Techniques
Weak nails need strengthening for long-term health. Choose nail hardeners with vitamins and proteins. These ingredients reinforce the nail structure. Avoid harsh chemicals that might worsen the condition. Consider dietary changes for stronger nails. Foods rich in biotin and iron can help. Eggs, nuts, and leafy greens are excellent choices. Regular care and attention to your nails pay off in the long run.
Reapplying Acrylic
Broken nails under acrylic need gentle care. First, carefully remove the acrylic using acetone. Clean the nail bed thoroughly to prevent infection. Apply a thin layer of acrylic to strengthen and protect the damaged nail.
Reapplying acrylic to a broken nail might seem daunting, but with the right approach, you can restore its beauty and strength in no time. Have you ever felt that frustration when your perfectly manicured nails are suddenly not so perfect anymore? It’s not the end of the world. With some preparation and care, you can get back to flaunting those fabulous nails. Let’s dive into how to effectively reapply acrylic to a broken nail.
Preparation Of Nail Surface
Before you start reapplying acrylic, ensure your nail surface is clean and smooth. Remove any remnants of old acrylic gently using a nail file. This step is crucial because any leftover debris can cause the new acrylic to lift or not adhere properly. Buff the nail lightly to create a rough texture. This helps the acrylic to grip better. Wipe the nail with alcohol or nail cleanser to remove oils and dust, ensuring a perfect surface for application. Consider using a primer to further enhance adhesion. It’s like laying a solid foundation before constructing a building. Have you ever skipped this step only to find your acrylic peeling off sooner than expected?
Best Practices For Application
When it comes to reapplying the acrylic, start with a small bead and build up gradually. This avoids overloading the nail with too much product, which can lead to lifting or an unnatural look. Use a brush to spread the acrylic evenly, focusing on creating a smooth transition between the natural nail and the extension. Are you taking your time to ensure every stroke counts? Ensure the acrylic layer is not too thick at the edges. Thicker edges can create a ledge that easily catches on things, risking another break. Once applied, let the acrylic dry completely before filing and shaping. Rushing this process can result in dents or uneven surfaces. Patience is key to a flawless finish.
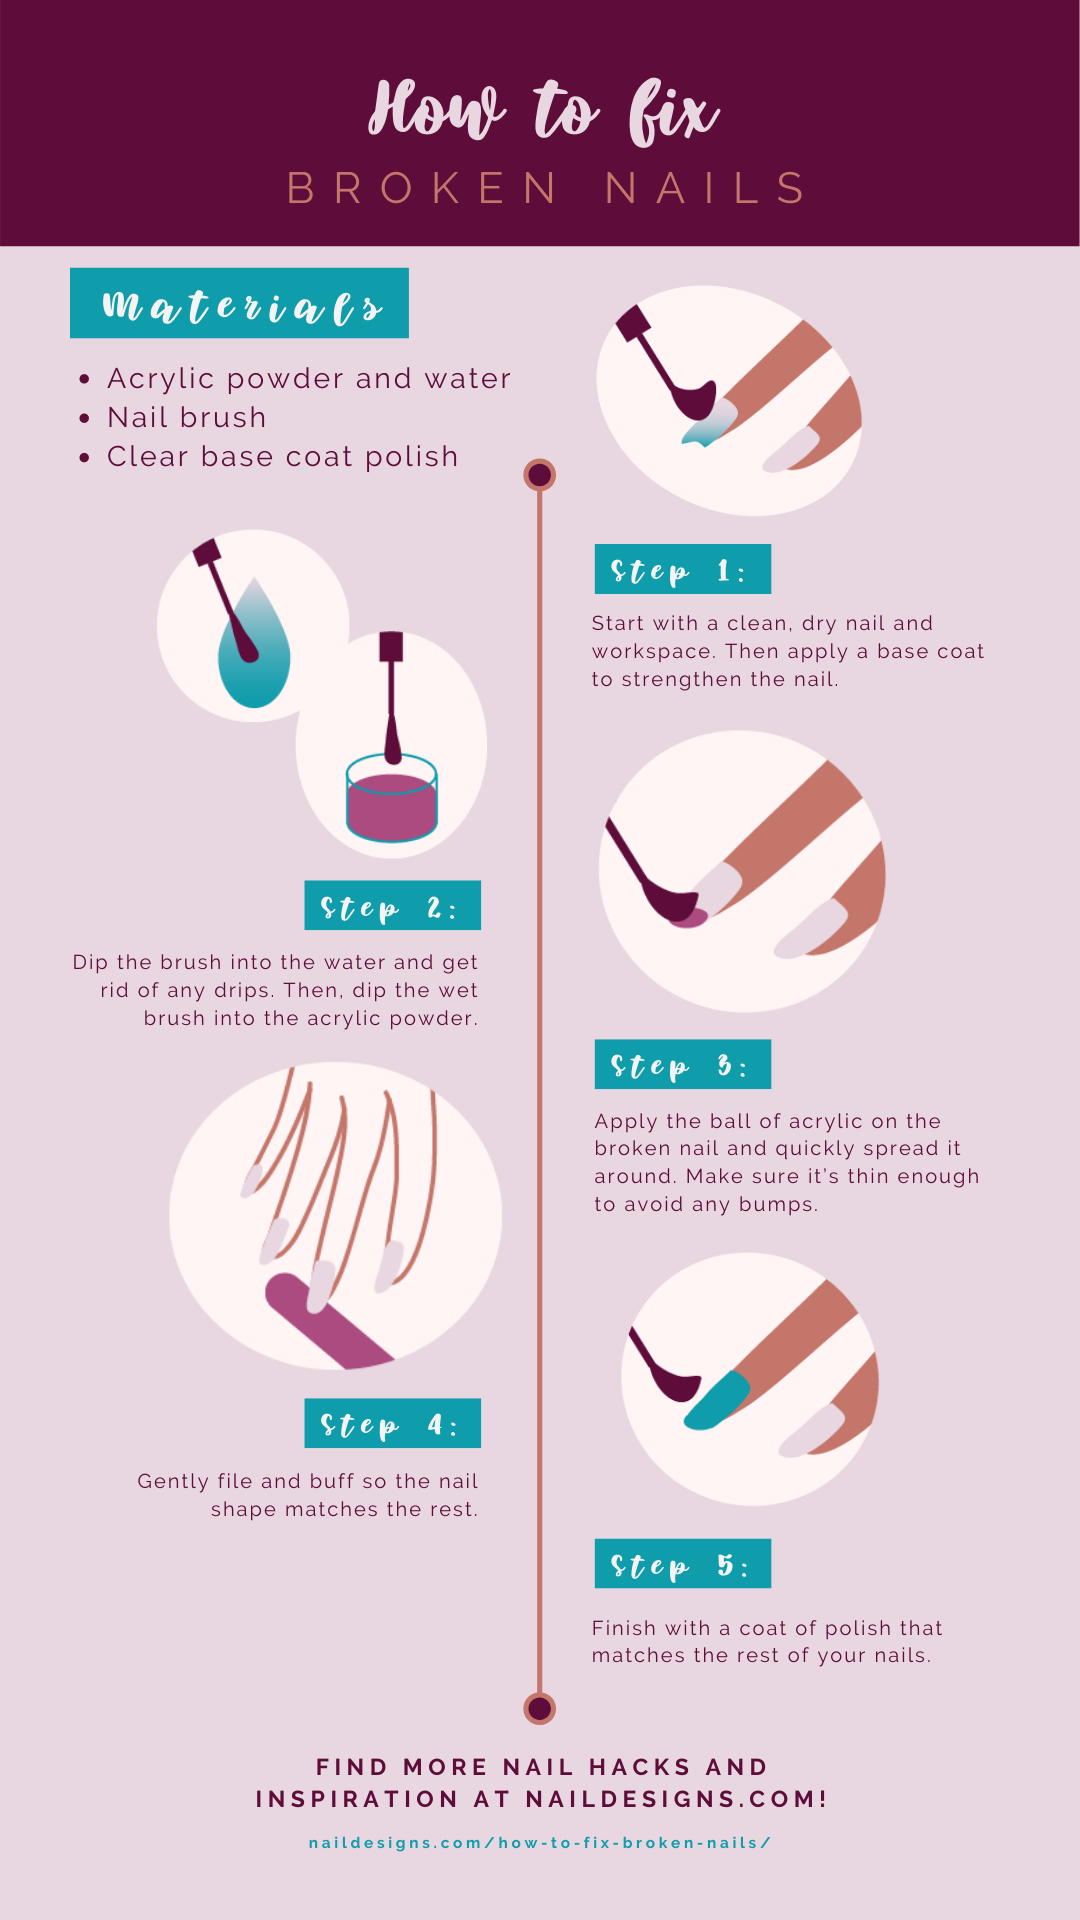
Credit: naildesigns.com
Preventing Future Breakage
Fixing a broken nail under acrylic involves gentle care to avoid further damage. Start by trimming the damaged area carefully. Apply a clear coat or nail glue to reinforce the break and protect it from future harm. Regular moisturizing and proper filing can help maintain nail health and prevent breakage.
Preventing future breakage of your acrylic nails can save you a lot of hassle and pain. We’ve all experienced the frustration of a broken nail, especially under acrylic. But what if you could minimize the chances of it happening again? Let’s dive into some practical tips that can make your nails sturdier and less prone to damage.
Regular Maintenance
Regular maintenance is key to keeping your acrylic nails strong. Schedule consistent visits to your nail technician. A professional can spot weak areas and reinforce them before they break. At home, keep your nails clean and moisturized. Use a cuticle oil daily to hydrate and strengthen the nail bed. If you notice any signs of lifting or thinning, address them immediately. Consider trimming your nails slightly shorter if they keep breaking. Longer nails are more prone to snagging and bending, leading to breakage. Wouldn’t you rather have slightly shorter nails that stay beautiful longer?
Choosing The Right Products
The products you use can make a significant difference in preventing nail breakage. Opt for high-quality acrylics and adhesives. They provide better durability and protection for your nails. When you apply nail polish, choose formulas that are gentle and nourishing. Products with added vitamins can promote nail health. Look for labels that mention strengthening properties. Avoid harsh chemicals whenever possible. These can weaken acrylic and natural nails, making them more susceptible to damage. Think about how you can care for your nails with kindness and the right products. These tips can help you enjoy beautiful, long-lasting acrylic nails. By focusing on regular care and smart choices, you’ll reduce the risk of breakage and keep your nails looking fabulous.
Expert Advice And Tips
Treating a broken nail under acrylic requires care and precision. Following expert advice can prevent further damage and promote healing. Let’s explore the insights shared by professionals, focusing on common mistakes and recommendations.
Common Mistakes To Avoid
Many rush to remove acrylics, worsening the nail break. Patience is key. Avoid peeling or picking at the acrylic. This can lead to more damage. Another mistake is applying pressure to the broken nail. Keep it protected until it heals. Using harsh chemicals can also harm the nail bed. Stick to gentle, nail-friendly products.
Professional Recommendations
Professionals suggest using a nail glue to hold the broken part. This provides temporary stability. Applying a small bandage can protect the nail. It reduces the risk of snagging. Experts recommend a warm saltwater soak. This soothes the area and reduces pain. Consider consulting a nail technician for expert care. They can provide tailored solutions. Finally, keep nails moisturized with cuticle oil. It aids in the healing process.
Credit: www.tiktok.com
Frequently Asked Questions
How Do You Fix A Broken Nail Under Acrylic?
To fix a broken nail under acrylic, gently file the damaged area. Apply nail glue to secure the broken part. Cover with a small acrylic patch for reinforcement. Once dry, buff the surface smoothly. Finish by applying a top coat for protection.
Regular maintenance prevents further damage.
Can You Remove Acrylic To Treat Broken Nail?
Yes, you can remove acrylic to treat a broken nail. Soak nails in acetone to dissolve the acrylic. Carefully file away residue without damaging the natural nail. Once removed, apply nail oil for nourishment and strength. Consult a nail technician for professional help if unsure.
Is It Safe To Treat Broken Nails At Home?
Treating broken nails at home is safe if done carefully. Use quality tools and products to avoid further damage. Follow proper hygiene practices to prevent infection. Seek professional advice if you’re uncertain or if severe damage occurs. Regular care and maintenance ensure healthy nails.
What Are Common Causes Of Broken Nails?
Common causes of broken nails include physical trauma, weak nail health, and improper acrylic application. Excessive force or pressure can easily break nails. Maintaining nail health through regular care reduces breakage risk. Ensure proper acrylic application by a skilled technician to prevent damage.
Conclusion
Treating a broken nail under acrylic can be simple. Follow the steps carefully. Start by cleaning the area gently. Use a nail buffer to smooth edges. Apply nail glue for strength. Let it dry completely. Consider seeing a professional for serious breaks.
Regular maintenance helps prevent future breaks. Keep nails moisturized and healthy. Always prioritize nail health for lasting results. Remember, patience and care are key. These steps will help restore your nail’s beauty.
Amazon and the Amazon logo are trademarks of Amazon.com, Inc, or its affiliates.