As an Amazon Associate I earn from qualifying purchases.
Imagine having nails that look like a work of art, right at your fingertips. Marble nails with acrylic offer just that—an elegant and sophisticated design that’s surprisingly within your reach.
If you’ve ever admired those swirling patterns and wondered how to achieve them, you’re in the right place. With a few simple steps, you can transform your nails into a masterpiece that catches everyone’s eye. Whether you’re prepping for a special occasion or just want to elevate your everyday look, mastering marble nails is easier than you might think.
Keep reading, and you’ll discover the secrets to achieving this stunning style, ensuring your nails are always the talk of the town.

Credit: maniology.com
Gathering Supplies
Gather supplies like acrylic powder, liquid monomer, and nail tools to create marble nails. Choose colors that complement each other for a stunning effect. Ensure you have a clean workspace and good lighting for a precise application.
Gathering the right supplies is crucial for creating stunning marble nails with acrylic. Proper preparation ensures smooth application and beautiful results. Whether you’re a beginner or a seasoned nail artist, having the right tools and colors makes the process enjoyable and efficient. Let’s dive into what you’ll need to get started.
Essential Tools
The first step is assembling your essential tools. A high-quality acrylic brush is a must. It allows precision and smooth blending. Next, ensure you have a dappen dish. This is where you’ll mix your acrylic liquid and powder. A buffer and file help shape and smooth your nails. Don’t forget a cuticle pusher. It helps in preparing your nails for application. Finally, have a lint-free wipe handy for cleaning.
Acrylic Colors Selection
Selecting the right acrylic colors is vital for marble nails. Choose at least two contrasting colors. This creates the marbled effect. White is a popular choice. It pairs well with almost any color. Consider using a metallic shade. It adds depth and shine. Pastel colors work well for a subtle look. Experiment with different combinations to find your perfect match.
Credit: www.youtube.com
Preparing The Nails
Before starting with marble nails using acrylic, preparing the nails is key. Proper preparation ensures a smooth application and long-lasting results. Let’s dive into the essential steps for getting your nails ready.
Cleaning And Shaping
Begin by washing your hands with mild soap and water. Dry them thoroughly. This removes oils and dirt from your nails. Use a nail file to shape your nails to your desired length and style. Round or square shapes work well for marble designs. Ensure all nails are uniform for a neat look. Push back the cuticles gently with a cuticle pusher. This gives you more surface area for the acrylic application. Trim any excess cuticles with cuticle scissors. Clean nails create a perfect canvas for your marble design.
Applying Base Coat
Select a high-quality base coat for your nails. A base coat prevents staining and enhances polish adherence. Apply a thin layer over each nail. Allow it to dry completely before moving to the next step. This creates a protective barrier and smooth surface for your design. A smooth base coat ensures the acrylics adhere properly. It also helps your marble design last longer without chipping.
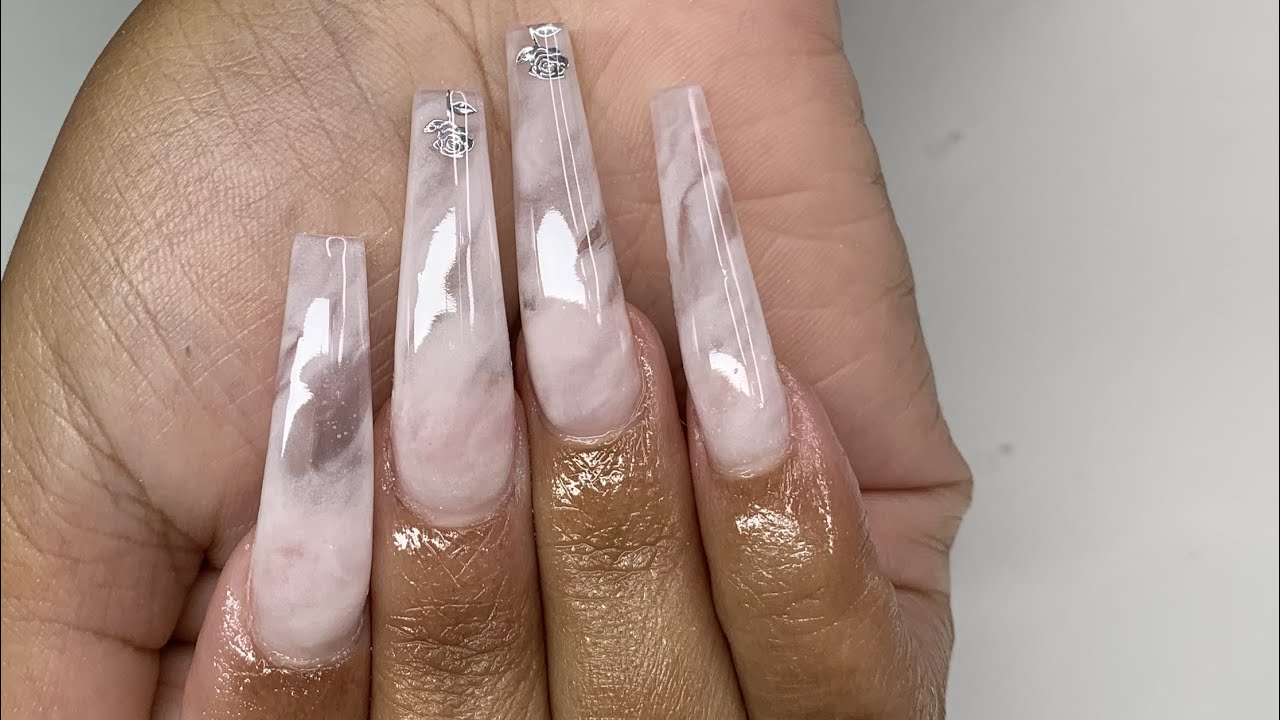
Creating The Marble Effect
Creating the marble effect on nails is an art. It blends elegance with creativity. This technique transforms ordinary nails into stunning, swirling masterpieces. The process is simple yet requires attention to detail.
Mixing Acrylic Colors
Select at least two complementary acrylic colors. A classic choice is white and gray. You can also add a splash of color for a vibrant look. Pour a small amount of each color onto a palette. Use a toothpick to gently swirl them together. Be careful not to overmix, as this will muddy the colors. The goal is to create a marbled appearance.
Applying The Marble Design
Prepare your nails with a base coat for protection. Use a brush to apply a thin layer of the mixed acrylic. Move the brush in gentle, swirling motions. This helps to mimic natural marble patterns. Add more swirls or colors to enhance the design. Once satisfied, let it dry completely. Finish with a topcoat to seal and protect your design.
Credit: www.tiktok.com
Finishing Touches
Completing the marble nail look with acrylics is like putting the last piece in a puzzle. The finishing touches are essential to ensure your nails look polished and professional. This final step can make or break your entire marble nails project, so paying close attention is crucial.
Sealing With Top Coat
Once you’ve created your marble design, it’s time to seal your masterpiece. Use a high-quality top coat to protect and give your nails that glossy finish. Apply a generous amount, ensuring you cover the entire nail surface.
Doing this not only adds shine but also extends the life of your design. Imagine the satisfaction of your friends admiring your nails weeks later. A good top coat can make that happen!
Remember to let the top coat dry completely. Patience here can save you from smudging your hard work. Have you ever rushed this step only to regret it later?
Cleaning Up Edges
After applying the top coat, it’s time to clean up any excess polish around your nails. Use a small brush dipped in acetone to carefully clean the edges. This ensures a neat and professional finish.
Don’t skip this step. Even the best designs can look unkempt with messy edges. Have you ever noticed how clean edges can make a design pop even more?
Take your time, and don’t be afraid to go over any stubborn spots. Attention to detail here sets apart the amateurs from the pros.
With these finishing touches, your marble nails with acrylic are ready to flaunt. Whether you’re heading out for a night with friends or just enjoying the look for yourself, you’ve mastered a stunning nail art technique. Now, what’s stopping you from sharing your newfound skill with others?
Tips For Perfect Marble Nails
Create stunning marble nails using acrylic by swirling colors with a thin brush. Apply a clear base coat first. Finish with a top coat for shine and durability.
Creating the perfect marble nails with acrylic can be a fun and rewarding process. However, achieving that flawless, marbleized look requires a bit of know-how. Whether you’re a beginner or have some experience under your belt, these tips will guide you in crafting beautiful marble nail art that lasts. One of the most exhilarating moments in nail art is when your marble nails turn out just as you imagined. It’s like capturing the essence of a luxurious stone on your fingertips. But what if your design ends up looking messy or the colors bleed into each other? This is where a few strategic tips can make all the difference. Crafting that perfect marble effect involves a delicate balance. Use a toothpick to swirl the colors gently instead of mixing them. This ensures each color retains its individuality, creating a stunning marbled appearance. If you rush the process, the colors may blend too much, losing the distinct marble pattern you’re aiming for.
Avoiding Common Mistakes
Common pitfalls in marble nail art include using too much product or not letting layers dry properly. Thin layers of acrylic allow for better manipulation and control over the design. Allow each layer to dry thoroughly before proceeding to the next step. Have you ever tried rushing through and ended up with a smudged mess? Patience is your best friend here.
Maintaining Nail Art Longevity
Your hard work deserves to be admired for as long as possible. Seal your design with a clear topcoat to protect it from chipping and fading. This step not only enhances the shine but also locks in your beautiful artwork. Are you ready to flaunt your marble nails for weeks instead of days? Regular touch-ups and proper nail care can make all the difference. Marble nails are a testament to your creativity and precision. With these tips, you’re on your way to mastering this elegant nail art technique. Remember, practice makes perfect, and each set of nails is an opportunity to learn and improve. What will your next marble masterpiece look like?
Frequently Asked Questions
How To Start Marble Nails With Acrylic?
Begin by prepping your nails and applying a base coat. Use a dotting tool to swirl acrylic paint colors for a marble effect. Seal with a top coat to finish.
What Tools Are Needed For Marble Nails?
You’ll need a dotting tool or toothpick, acrylic paints, a base coat, and a top coat. These are essential for achieving a professional marble nail look.
Can Beginners Do Marble Nails At Home?
Yes, beginners can create marble nails at home with practice. Start with simple designs and gradually experiment with different techniques and colors.
How Long Does It Take To Do Marble Nails?
Creating marble nails usually takes about 30 minutes to an hour. Time can vary based on your experience and design complexity.
Conclusion
Creating marble nails with acrylic can be fun and easy. Follow the steps carefully for stunning results. Practice makes perfect, so don’t worry about mistakes. Choose colors that inspire you. Experiment with different techniques and tools. Keep your nails clean and well-prepped.
Enjoy the creative process and express yourself. Share your unique nail designs with friends. Discover new patterns and ideas. Marble nails can be your new favorite style. Dive into the world of nail art and have fun. Your nails can be a beautiful canvas.
Let your creativity shine through.
Amazon and the Amazon logo are trademarks of Amazon.com, Inc, or its affiliates.