As an Amazon Associate I earn from qualifying purchases.
Have you ever admired those stunning designs on gel nails and wondered if you could do it yourself? You’re not alone.
The allure of beautifully designed gel nails is hard to resist. They offer a canvas for creativity, allowing you to express your style and personality. But is it really possible to create those intricate designs at home? The answer might surprise you.
You’ll discover whether you can achieve salon-quality designs on gel nails with your own hands. Get ready to unlock the secrets and tips that could transform your nail game. Keep reading to find out how you can turn your nails into mini masterpieces.
Gel Nails Basics
Gel nails offer a versatile option for nail enthusiasts. They are durable, shiny, and perfect for intricate designs. Understanding the basics of gel nails can open up creative possibilities for your nail art.
What Are Gel Nails
Gel nails are a type of artificial nails. They are applied using a gel-based polish. A UV or LED light cures the gel. This process makes them hard and durable. Gel nails look natural and glossy.
Benefits Of Gel Nails
Gel nails last longer than regular polish. They resist chips and cracks. This makes them ideal for busy lifestyles. The shine remains intact for weeks. Gel nails also allow detailed designs. Artists can create stunning patterns. The smooth surface aids creativity.

Creative Design Techniques
Gel nails offer a versatile canvas for creative design techniques. Artists can paint intricate patterns, apply decals, or use stamping methods. The smooth, durable surface of gel nails enhances the longevity of detailed artwork.
Creative design techniques on gel nails open up a world of artistic possibilities. Whether you’re a beginner or a seasoned nail artist, there’s always room to experiment and express your style. Let’s dive into some exciting methods to make your gel nails stand out.
Freehand Painting
Freehand painting allows you to unleash your inner artist directly onto your nails. With a steady hand and a tiny brush, you can create intricate patterns or simple designs. Imagine painting delicate flowers or geometric shapes that reflect your unique personality. Start with a base color on your gel nails. Once cured, use a fine nail art brush to paint your design. Keep some cotton swabs and acetone handy to fix any mistakes quickly. Practicing on a piece of paper first can help you get the hang of it. Remember, practice makes perfect, and each nail is a new canvas.
Stamping Art
Stamping art is a game-changer for those who want detailed designs without spending hours. This technique involves transferring pre-made designs from a stamping plate onto your nails. Choose a design plate that suits your style, whether it’s floral, abstract, or seasonal. Apply a layer of special stamping polish onto the plate, scrape off the excess, and pick up the design with a stamper. Roll the stamper across your nail for an instant artwork. It’s a quick and efficient way to achieve complex designs that would be challenging freehand.
Using Nail Stickers
Nail stickers are perfect for anyone seeking a hassle-free design solution. They’re available in a plethora of styles, from glittery stars to elegant lace patterns. Apply them to your cured gel nails for an immediate transformation. Ensure your nails are clean and dry for better adhesion. Seal your stickers with a topcoat to prevent peeling and extend their life. This method is perfect if you’re short on time but still want your nails to look professionally done. With these creative techniques, which method will you try first? Whether you opt for freehand painting, stamping art, or nail stickers, each offers a unique way to showcase your creativity. Your gel nails are a reflection of your style, so why not make them a work of art?
Tools And Materials
Designing on gel nails requires specific tools and materials. These essentials help create stunning nail art with precision. Having the right tools ensures a smooth process and beautiful results.
Essential Tools
A UV or LED lamp is crucial for curing gel nails. It hardens the gel and makes it long-lasting. A nail buffer helps in smoothing the nail surface. It prepares the base for design application. A dotting tool is essential for creating small, intricate designs. It allows for precise placement of decorations. Thin nail art brushes are key for detailed designs. They help in painting fine lines and patterns.
Popular Nail Art Supplies
Nail polishes in various colors are fundamental for colorful designs. Glitter adds sparkle and shine to any nail art. Rhinestones bring a touch of elegance to gel nails. Stickers and decals offer quick design options. They are easy to apply and remove. Striping tape creates clean lines and borders. It’s perfect for geometric designs. Nail stamping kits allow for quick and complex patterns. They save time and provide uniform designs.
Inspiration And Trends
Gel nail designs offer endless creativity. They transform simple nails into stunning works of art. Designs can be inspired by anything. From nature to fashion, the possibilities are vast. People find inspiration from social media, magazines, and even movies. Trends evolve constantly, keeping nail art fresh and exciting.
Popular Design Ideas
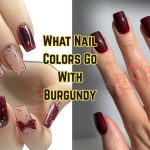
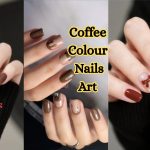
Floral designs are a favorite. They bring a touch of nature to your nails. Geometric shapes add a modern flair. Glitter and shimmer are timeless, perfect for a night out. Marble effects create a sophisticated look. Animal prints are bold and fun.
Seasonal Trends
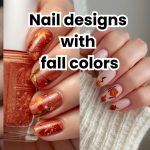
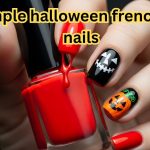
Seasonal designs keep nails in style. Spring calls for pastel colors and floral patterns. Summer designs are bright and vibrant. Fall brings earthy tones and leaf motifs. Winter is all about snowflakes and festive decorations.
Step-by-step Design Process
Designing on gel nails is a fun way to express yourself. With a step-by-step process, you can create stunning designs. Follow these steps to enhance your gel nail artistry.
Preparing The Nail Surface
Start with clean, dry nails. Remove old polish with acetone. Gently push back cuticles. Shape the nails with a file. Buff the surface to remove shine. This helps the gel adhere better.
Applying Base And Top Coats
Apply a thin layer of base coat. Cure under a UV lamp for 30 seconds. The base coat ensures the gel sticks well. After designing, seal with a top coat. Cure again for a glossy finish.
Executing The Design
Choose your design tools like brushes or dotting tools. Use gel polish for intricate patterns. Start with simple designs if you’re a beginner. Cure each layer to avoid smudging. Add embellishments like gems if desired. Seal with a top coat for durability.
Maintenance And Care
Design on gel nails requires careful maintenance and care. Regular touch-ups keep designs vibrant and prevent chipping. Avoid harsh chemicals to prolong their beauty.

Maintaining the beauty of your gel nail designs requires a bit of dedication and care. Have you ever marveled at how your friend’s gel nails seem to last forever while yours chip away so quickly? The secret lies in how you treat them post-application. By following some simple maintenance steps, you can keep your gel nails looking fresh and vibrant for weeks. Let’s dive into how you can prolong the life of your nail art and safely remove it when it’s time for a change.
Prolonging Design Longevity
The longevity of your gel nail design often depends on how you treat your nails daily. Are you guilty of using your nails as tools to open cans or scratch surfaces? This can cause your designs to chip or peel prematurely. Instead, treat your nails with care. Applying a top coat every few days can help protect your design. It’s like adding an extra layer of armor. Choose a good quality top coat that’s specifically designed for gel nails. This simple step can make a huge difference. Additionally, avoid soaking your hands in water for extended periods. Consider wearing gloves when doing dishes or cleaning. Water can weaken the gel and cause your design to lose its shine.
Safe Removal Tips
When it’s time to change your design, safe removal is crucial to prevent damage to your natural nails. Have you ever tried peeling off gel nails only to regret it later? This can lead to weakened nails and discomfort. Instead, invest in a professional gel remover. Soak a cotton ball in the remover, place it on your nail, and wrap it with foil. Let it sit for about 15 minutes. This method softens the gel, allowing it to be removed gently without scraping or force. If you’re unsure about doing it yourself, visiting a salon might be worth it. Professionals can ensure your nails are not damaged during the removal process. Plus, you get to relax and maybe pick out your next exciting design! Maintaining and caring for your gel nails doesn’t have to be a daunting task. With a little effort, you can keep them looking stunning while ensuring your natural nails stay healthy. Are you ready to give your gel nails the care they deserve?
Challenges And Solutions
Designing on gel nails poses challenges like achieving smooth finishes and preventing smudging. Selecting quality tools and practicing steady hands can help. Using thin brushes and allowing proper curing time enhances intricate designs.
Gel nails are a popular choice for many, offering durability and a glossy finish. However, designing on gel nails can come with its own set of challenges. Whether you’re a professional nail artist or someone who loves to experiment at home, understanding these challenges and finding effective solutions is key to creating stunning nail art. Let’s dive into some common design mistakes and discover troubleshooting techniques to overcome them.
Common Design Mistakes
Creating designs on gel nails can be tricky, especially when you’re aiming for precision. One common mistake is using too much gel, which can lead to a bulky look and uneven curing. Another frequent error is not allowing sufficient curing time between layers. This can result in smudged or incomplete designs. Overuse of embellishments can also detract from the overall aesthetic, making the nails appear cluttered. Have you ever felt that your design looked perfect in theory, but didn’t quite translate onto the nails? If so, you are not alone.
Troubleshooting Techniques
To address the issue of using too much gel, try applying thin layers and curing each one thoroughly. This not only ensures a smooth finish but also gives you more control over the design process. For curing problems, investing in a high-quality UV lamp can make a significant difference. Check your lamp’s settings and ensure it’s functioning properly for optimal results. If embellishments are your passion, consider using them sparingly. Create a focal point on one or two nails rather than covering every nail. This approach can enhance the design without overwhelming it. Have you ever paused to think about why some designs succeed while others falter? Often, it’s about finding the right balance between creativity and technique. By refining your approach and being mindful of common pitfalls, you can transform your gel nail designs from ordinary to extraordinary.

Frequently Asked Questions
Can Gel Nails Be Customized With Designs?
Yes, gel nails offer great flexibility for customization. You can add various designs like patterns, stickers, or even hand-painted art. Nail technicians use special techniques to embed designs. The gel formula allows for intricate details to be added without compromising durability.
How Long Do Gel Nail Designs Last?
Gel nail designs typically last around two to three weeks. The longevity depends on nail care and daily activities. Proper maintenance, like avoiding harsh chemicals, can extend lifespan. Regular touch-ups keep designs fresh. Gel nails resist chipping, making them ideal for detailed designs.
Are Gel Nail Designs Safe For Nails?
Yes, gel nail designs are generally safe for nails. They provide a protective layer that prevents damage. However, it’s important to use high-quality products and follow proper application methods. Ensure removal is gentle to avoid nail damage. Consult professionals for best results.
Can I Do Gel Nail Designs At Home?
Yes, you can create gel nail designs at home. You need a UV lamp, gel polish, and design tools. Follow instructions carefully for best results. Practice makes perfect, start with simple designs. Professional advice may be helpful initially for beginners.
Conclusion
Gel nails offer a creative canvas for stunning designs. You can explore endless patterns and colors. From simple dots to intricate art, possibilities are vast. Try stripes, floral designs, or geometric shapes. Use nail brushes for detailed work. Stickers and stamps add flair too.
Gel nails are durable, keeping your design intact longer. Experiment at home or visit a salon for expert help. Remember, practice improves your skills. Enjoy expressing your style through nail art. Let your imagination guide you. Creating art on gel nails is a fun way to showcase personality.
Dive into the world of nail design today!
Amazon and the Amazon logo are trademarks of Amazon.com, Inc, or its affiliates.