Nail art is a fun and creative way to express yourself, and the best part? You don’t need to be a professional or own expensive tools to get started. Whether you’re looking to add a pop of colour to your day or create intricate designs to impress your friends, nail art can be as simple or as detailed as you want it to be. In fact, with just a few basic supplies you probably already have at home, you can master how to do basic nail art in no time!
Purpose of the Article:
This guide is designed for beginners who want to dive into the world of nail art but aren’t sure where to begin. We’ll walk you through how to do basic nail art with easy-to-follow steps and no special tools. From basic designs to more creative styles, you’ll discover how simple it can be to add a bit of flair to your nails, all from the comfort of your home.
Why Nail Art?
Let me take you back to when I first tried my hand at nail art. I was feeling stressed after a long week of work and needed a way to unwind. On a whim, I grabbed some nail polish and started experimenting with different designs. To my surprise, not only did it give me a sense of calm, but it also sparked my creativity in ways I hadn’t expected. What started as a simple way to de-stress quickly turned into a hobby I now absolutely love.
Nail art can serve as a creative outlet, a relaxing activity, or even a fun way to match your mood or outfit. Whether you’re preparing for a special event or just want to add a little something to your everyday look, nail art lets you get creative and express yourself without needing any artistic training. And the best part? It’s incredibly satisfying to see your ideas come to life on your nails!
What You’ll Learn:
- Basic nail art designs: You don’t need to be a professional to create amazing looks. We’ll cover some simple designs that anyone can do!
- Tips and tricks for beginners: Whether you’re using polish, tape, or even a toothpick, I’ll show you how to work with what you have.
- How to do nail art at home without professional tools: You’ll learn how to create beautiful designs using everyday items like cotton swabs, hairpins, and even plastic bags.
- Step-by-step instructions for easy designs: Ready for the fun part? We’ll break down simple steps so you can get started right away.
Are you excited to start your nail art journey? Let’s dive in and unlock the secrets of creating beautiful nails at home—no salon required!
What is Basic Nail Art?
Definition:
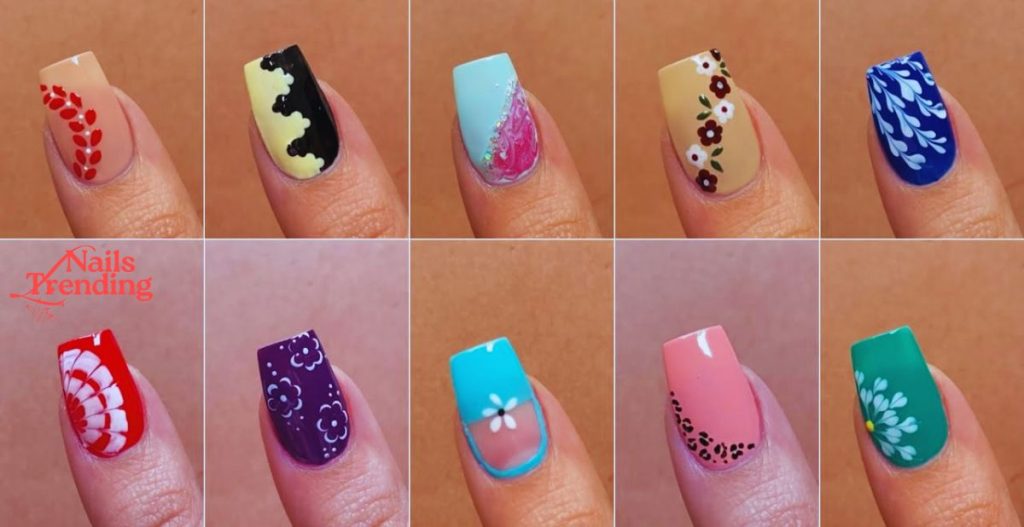
Basic nail art is the art of decorating your nails using a variety of techniques like painting, drawing, and applying embellishments. It’s a creative way to personalize your nails with unique designs that reflect your personality, mood, or style. From bold colors to intricate patterns, basic nail art can involve anything from simple solid colors to playful designs such as dots, stripes, and even little hearts or flowers. What makes it even better is that you can experiment with it as much as you like—no rules, just creativity!
Nail art isn’t limited to just using polish. You can incorporate tiny gems, stickers, or even foil to add texture and sparkle to your design. With endless possibilities, nail art offers an opportunity to play with color, shape, and texture—transforming something as small as your nails into a canvas for self-expression.
Why It’s Great for Beginners:
Basic nail art is ideal for beginners for several reasons. First, it doesn’t require professional salon skills or fancy tools to get started. You can create stunning designs using the simplest items like a basic nail polish brush, a toothpick, or even a bobby pin. This makes it super accessible, even if you’ve never tried nail art before.
Second, basic designs can be quick and easy to master. Simple techniques like creating dots, stripes, or even gradient nails can give you a polished look without requiring hours of practice. As a beginner, you can start with a simple design, and as you get more comfortable, you can gradually work your way up to more intricate patterns.
Lastly, practicing basic nail art at home is a budget-friendly way to get creative. Instead of spending money on expensive nail salon visits, you can experiment with different designs using affordable tools and supplies you likely already have in your home. It’s a fun, low-cost way to add some flair to your everyday look!
How to Do Nail Art Designs for Beginners at Home
Starting your nail art journey doesn’t have to be overwhelming. With just a few basic steps and tools, you can create fun, eye-catching designs right from your living room. Let’s break down exactly how to do nail art designs for beginners at home, using simple techniques that anyone can master.
1. Choose Your Colors
Before you dive in, it’s important to pick the right color palette. If you’re just getting started, stick with neutral tones like soft pinks, nudes, whites, or light grays—they’re forgiving and go with everything. Want something a bit more fun? Try seasonal shades like pastels in spring, bold reds and oranges in summer, or earthy tones in fall.
Here are a few tips for choosing your color combo:
- Start with two to three colors max. This keeps the design clean and easy to manage.
- Use contrasting colors for patterns like stripes or dots (e.g., black and white, blue and gold).
- Try a gradient using different shades of the same color for an ombre effect.
- Test your color mix on a piece of paper or nail swatch before applying it to your nails.
Pro Tip: Matte and glossy finishes can also be mixed for a subtle yet stylish effect—even with just one color!
2. Prep Your Nails
Like painting a wall, your nails need a clean, smooth surface before you start your design. Prepping your nails ensures your art lasts longer and looks more polished.
Here’s how to prep your nails properly:
- Clean your nails thoroughly. Use nail polish remover to eliminate any old polish or oils, even if your nails are bare. This helps new polish adhere better.
- Trim and file to shape. Short, rounded nails are easiest for beginners. Use a gentle nail file to smooth out any rough edges.
- Push back your cuticles. Use a cuticle stick or an orange stick to gently push back cuticles for a cleaner nail bed.
- Apply a base coat. This is your blank canvas! A base coat smooths out any ridges and protects your natural nails from staining, especially when using darker polish.
Why it matters: A well-prepped nail will hold polish longer and make your designs look sharper and more professional—even if you’re just starting out.
3. Basic Tools to Start With
You don’t need a professional kit to get going. In fact, many of the best beginner nail tools are things you already have at home. Here’s a list of basic items to gather before you start:
- Nail polish: Start with 2–3 basic shades. Consider adding a top coat and base coat for durability and shine.
- Cotton swabs or Q-tips: Perfect for cleaning up smudges or fixing small mistakes.
- Nail polish remover: Keep this on hand in case you want to fix or start over.
- Tape or rubber bands: These help create clean lines, geometric patterns, or French tip designs.
- Toothpick or bobby pin: Great DIY tools for creating dots, tiny hearts, or swirl patterns.
- Small paintbrush or eyeliner brush (optional): Ideal for more detailed designs once you get comfortable.
Optional Extras:
- Glitter or nail stickers for an added touch of sparkle
- Nail glue and gems (only if you’re ready to level up)
- Quick-dry spray or drops to speed up drying time
Beginner Tip: If you don’t have polish, some people even use non-toxic markers or acrylic paint (sealed with a clear top coat) for experimental designs!
How to Do Nail Art at Home Without Tools
Think you need fancy brushes or a full nail art kit to get creative? Think again. Some of the most fun, stylish designs come from using nothing but nail polish and a few everyday household items. If you’re just starting out or don’t have access to professional tools, this section will show you exactly how to do nail art at home without tools—and still make it look like you stepped out of a salon.
Nail Polish Only Designs
Even with just nail polish, there are several easy ways to create different textures and patterns. Here are some beginner-friendly techniques that require no additional tools at all:
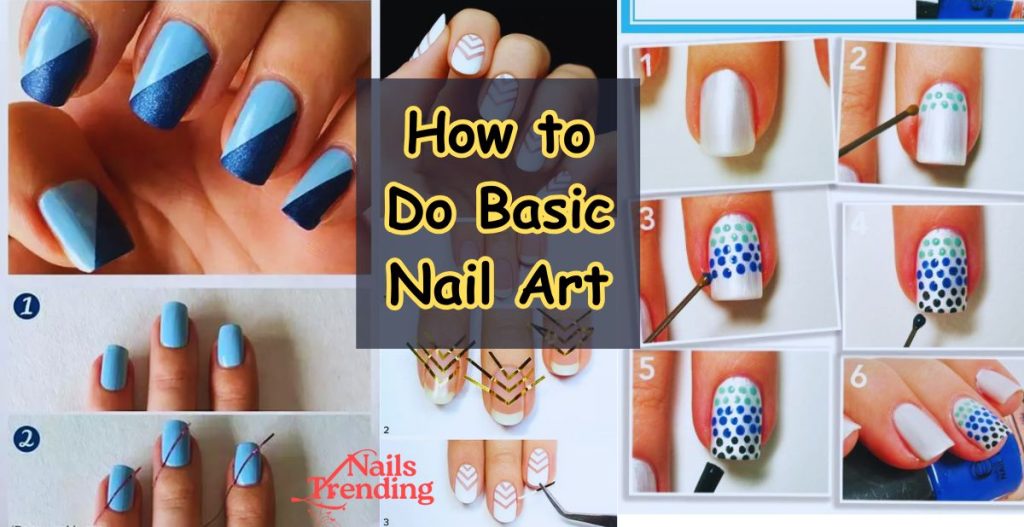
- Dot Designs: After applying your base color, use the polish brush to lightly tap the surface of your nail to make dots. You can also create a “confetti” effect by layering different colored dots.
- Stripes or Lines: Use the very tip of your polish brush to swipe thin horizontal, vertical, or diagonal lines. Keep your hand steady and work slowly—practice makes perfect!
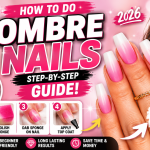
- Gradient or Ombre Effect: Pick two colors—like pink and white—and apply small overlapping sections side-by-side on your nail. Before the polish dries, use the brush to gently blend where the two colors meet. The trick here is to work quickly so the polish doesn’t dry mid-blend.
- Half-moons or French tips: Carefully tilt the brush to apply polish only to the top or bottom part of your nail, creating a simple but classic look.
Beginner Tip: If your polish brush is too thick, wipe off excess polish on the rim of the bottle before applying. A thinner layer gives you more control.
Using Household Items
If you’re feeling adventurous, look no further than your kitchen or desk drawer. Everyday items can double as nail art tools, often with better precision than you’d expect.
Here are some creative ways to use common items:
- Toothpicks: Perfect for drawing thin lines, tiny dots, or swirls. Dip the tip into polish and gently press it on the nail. Want to create a simple daisy? Place a dot of white polish as petals around a center yellow dot.
- Straws: Use a straw for cool splatter or ombre effects. For a splatter design, dip one end of the straw in polish and blow through the other end over your nail (do this on a protected surface—it’s messy but fun!). For ombre, dab two colors side by side on foil, swirl slightly with the straw end, and stamp it gently on the nail.
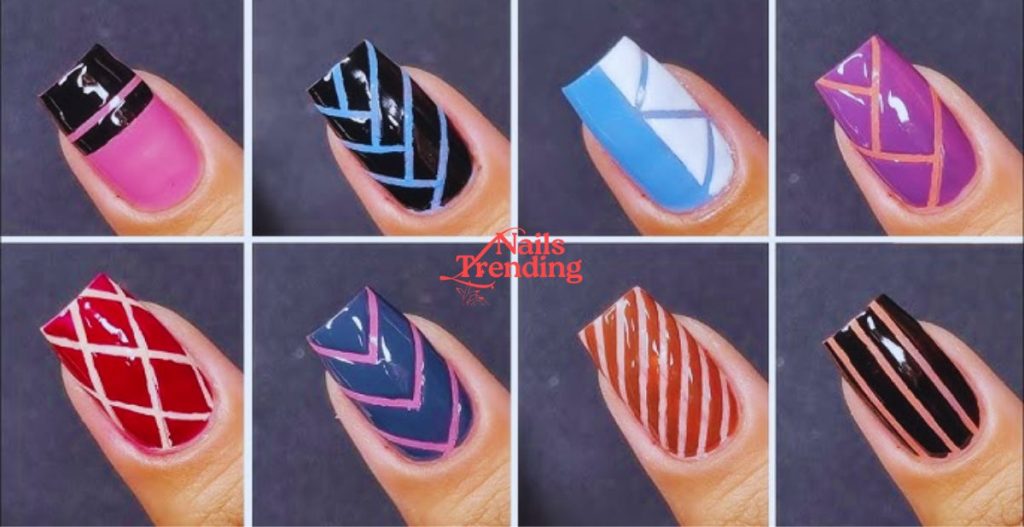
- Tape: Cut small strips of clear tape and place them over the nail to create straight lines, triangles, or checkerboard designs. Paint over the exposed area, then carefully peel the tape off before it dries.
- Paper Clips or Bobby Pins: Unfold a paper clip and dip the tip in polish to create flowers, dots, or hearts. The small rounded edge gives you control without needing a dotting tool.
Personal Experience: My First “No-Tool” Nail Art Design
One weekend, I decided to try nail art but realized I had zero tools—just a few bottles of polish and whatever I could find in my drawer. I ended up using a toothpick and tape to create a minimalistic design that honestly looked way better than I expected.
Here’s what I did:
- Painted my nails a pale pink base.
- Cut a small triangle out of tape and placed it near the tip of my nail.
- Painted a bold navy blue over the triangle area, then gently peeled off the tape.
- Used a toothpick to dot a tiny gold dot in the center.
It took less than 20 minutes and instantly made my nails look chic and intentional. Since then, I’ve played around with different household items, and I genuinely believe that creativity matters more than fancy tools.
As you can see, learning how to do nail art at home without tools is not only totally possible—it’s fun, budget-friendly, and a great way to get creative with what you already have. Don’t be afraid to experiment; sometimes the most unexpected tools produce the coolest results.
Basic Nail Art Step by Step
Learning how to do basic nail art is much easier when you follow a clear step-by-step routine. Even if you’re brand new to nail design, this beginner-friendly guide will walk you through the process from prep to polish—no stress, no special tools required!
Step 1: Prepare Your Nails
Before applying any polish, start with clean, healthy nails.
- Remove old polish using acetone-free remover.
- Trim and file your nails into a shape you like—square, round, almond, etc.
- Buff the surface lightly to remove ridges for a smooth base.
- Push back your cuticles using a soft cuticle stick for a neat, clean look.
This prep step makes a big difference in how long your nail art lasts and how professional it looks.
Step 2: Apply Base Coat
A base coat does more than just protect your natural nails. It:
- Creates a smooth surface for polish
- Prevents staining, especially with dark colors
- Helps your design stick and last longer
Let the base coat dry completely before moving on.
Step 3: Apply Your Base Color
Pick a color you love—neutral for classic looks, bold for something fun.
Tips for a smooth, even coat:
- Apply thin layers to avoid bubbles.
- Use three strokes: one down the center, then one on each side.
- Let each coat dry before applying another. Two coats are usually enough.
Step 4: Design It!
Now for the fun part—your nail art design! Here are a few beginner-friendly ideas to try:
- Dot Designs: Use a toothpick, bobby pin, or the polish brush to create simple polka dots or accent dots at the cuticle.
- Simple Stripes: Use tape for sharp lines, or freehand with the polish brush. Try horizontal, vertical, or diagonal stripes.
- French Tips with a Twist: Paint the tip of your nail a bright or glittery color instead of traditional white for a playful spin.
- Accent Nail: Keep most nails simple and add glitter, dots, or a sticker to just one or two nails for contrast.
Step 5: Apply Top Coat
This is the step that seals your design, adds shine, and makes your nail art last longer.
- Use a clear, quick-dry top coat to prevent smudging.
- Reapply every few days to keep your manicure looking fresh.
Easy Nail Art Designs for Beginners
Nail art doesn’t have to be complicated. These beginner designs are stylish, simple, and totally doable at home.
1. Dot Nail Art
Tools: A bobby pin, toothpick, or even the end of a pen.
Design Ideas:
- Polka dots all over the nail
- Gradient dots (larger at the base, smaller near the tip)
- Accent dots near the cuticle for a minimalist look
2. Stripes and Lines
Tools: Clear tape, rubber bands, or the brush itself.
Try These:
- Horizontal or vertical lines on each nail
- Chevron patterns using tape
- Accent stripe down the middle of a nude base
3. French Tip Twist
Classic, but with flair:
- Use bold colors like neon, gold, or black instead of white
- Add a thin glitter line between the tip and base
- Try asymmetrical or diagonal tips
4. Ombre Nails
How to Get the Look:
- Use a makeup sponge to blend two or three colors
- Dab gently on the nail, layering until you get a smooth gradient
- Clean around the nail with a cotton swab dipped in remover
Top Nail Art Tips for Beginners
Want to improve your nail art game? These tips will save you time and frustration:
1. Start Simple
Focus on designs like dots, stripes, or single-color accents. As your confidence grows, you can try more complex looks.
2. Take Your Time
Rushing causes smudges. Enjoy the process—paint when you’re relaxed and not in a hurry.
3. Experiment with Colors
Don’t be afraid to mix shades you wouldn’t normally wear. Unexpected combos often lead to the best results.
4. Don’t Forget the Top Coat
It adds shine, prevents chipping, and protects your design. A must for long-lasting results.
5. Clean Up Is Key
Use a small brush or cotton swab dipped in remover to clean polish around the cuticle. It instantly elevates your look.
How to Do Nail Art at Home Without Tools
Even without nail art brushes or dotting tools, you can still get creative using everyday items.
1. Use What You Have
Try these household alternatives:
- Paperclip or bobby pin for dots
- Straw for splatter or ombre effects
- Toothpick for lines and swirls
- Pencil tip for small designs
2. Get Creative with Materials
- Plastic sandwich bag: Add polish drops, swirl them, and transfer onto your nail for a marbled effect.
- Plastic wrap: Crumple it and dab over two colors to create a unique texture.
3. Get Crafty with Nail Polish
Layer different shades, add glitter, or use nail stickers for a quick design boost. No tools, just imagination!
What Are the 5 Basic Nail Arts?
If you’re new to nail art, start by mastering these five simple but classic styles:
- Polka Dots – Timeless and fun
- French Tips – Elegant with room for creativity
- Stripes – Easy to make your own
- Glitter Nails – Instant glam with minimal effort
- Ombre Nails – Trendy and surprisingly simple
How to Do Basic Nail Art Easy
Pressed for time? These quick ideas will give you beautiful nails in minutes.
Quick Designs for Busy People
- Dot designs using one color over a nude base
- Glitter tips to make any mani pop
- Single accent nail with foil, stickers, or a bold color
Time-Saving Tips
- Skip the base coat if you’re using light polish (but not recommended for dark shades)
- Use quick-dry top coats
- Paint your dominant hand first so the non-dominant hand has an easier job
FAQs: Nail Art for Beginners
These frequently asked questions will help you feel more confident as you explore how to do basic nail art at home—whether you’re just starting out or looking for easy ways to improve your skills.
Q: How long does it take to learn basic nail art?
A: It depends on the design, but most beginners can learn simple nail art (like dots or stripes) in just a few hours. The key is practice. Start small, and you’ll see real progress within your first few tries.
Q: Can I do nail art without professional tools?
A: Absolutely! Many creative designs can be done with household items like bobby pins, toothpicks, tape, and even straws. You don’t need a salon kit to create fun, beautiful nails.
Q: What’s the best way to make nail art last longer?
A: The secret to long-lasting nail art is a good base coat, a quality top coat, and being gentle with your hands. Avoid using your nails to open things, and wear gloves when cleaning to protect your design.
Q: Can I do nail art on short nails?
A: Definitely! Short nails can look just as stylish as long ones. In fact, designs like polka dots, stripes, and ombre often look cleaner and more modern on shorter nails.
Q: How do I clean up messy edges or polish on my skin?
A: Use a small brush or cotton swab dipped in nail polish remover to clean around the cuticles and sides. It instantly makes your nail art look neater and more professional.
Q: What if I mess up my design?
A: No worries—mistakes happen to everyone! You can use a toothpick or brush dipped in remover to fix small errors. And if it’s beyond saving, just remove the polish and start fresh. Nail art is all about experimenting and having fun.
Q: How many coats of polish should I use for a base color?
A: Usually, two thin coats give you full coverage without streaking. Let each coat dry before applying the next to avoid smudging or bubbling.
Q: Are there beginner-friendly designs I can do quickly?
A: Yes! Try single-dot accents, diagonal stripes using tape, or painting just one accent nail in glitter. These quick styles look great and only take a few minutes.
Conclusion:
Creating beautiful nail art at home is easier than you think. You don’t need fancy tools, expensive polish, or years of practice—just a little patience, creativity, and a willingness to experiment.
Start with simple designs, practice regularly, and you’ll get better with every manicure. Whether it’s a clean set of dots, a fun ombre fade, or a glittery accent nail, there’s something deeply satisfying about making your nails look amazing all on your own.
Call to Action:
Have you tried any of these designs? Share your favorite nail art creations in the comments—or tag me on social media so I can see your work. Let’s inspire each other to get creative, one nail at a time!
Amazon and the Amazon logo are trademarks of Amazon.com, Inc, or its affiliates.